Pac-Man Card


Erin asked me to make a birthday card for her to give to one of her friends and she requested something with an 80’s video arcade game on it, like Pac-Man.  I found a print card showing Pac-Man eating dots and heading towards a birthday cake.  So I did my version of that card using my Cricut.

I first printed a maze from the game that I found online.  I thought it would make a neat background for the card.  I designed Pac-Man in Cricut Craft Room, using the George & Basic Shapes cartridge.  I used a circle and laid a triangle over it (not using the weld feature) to make the mouth.  His eye is a black faceted stone from my stash — I think I got them at Joann’s.

Front5

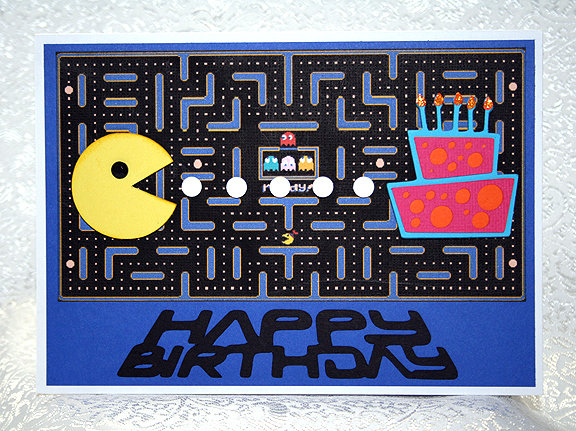
The white dots are from an EK Success punch — I think it’s called Swiss Cheese. The birthday cake is from Life’s A Party and I added orange Stickles for the flames on the candles.  Pac-Man, the white dots, and the birthday cake are all popped up with foam dots.

Front

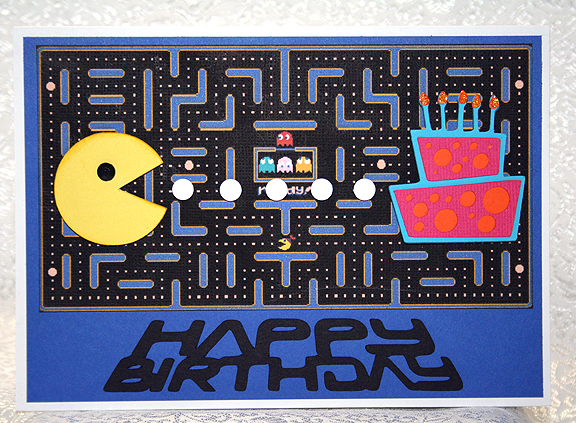
When I was laying out the card in Cricut Craft Room, I happened upon a really neat sentiment that I thought would be great with this card.  It is from a project cartridge called Space Party.  But wouldn’t you know it, it was one of the few cartridges that I didn’t have.  I looked at other fonts, but nothing grabbed me like the Space Party sentiment.

So I went on eBay, found a Space Party cartridge that wasn’t being bid too high and placed a bid.  I ended up getting it for less than $2.50 — can you believe that?  Still, I hope I use it for more than just the sentiment on this one card!

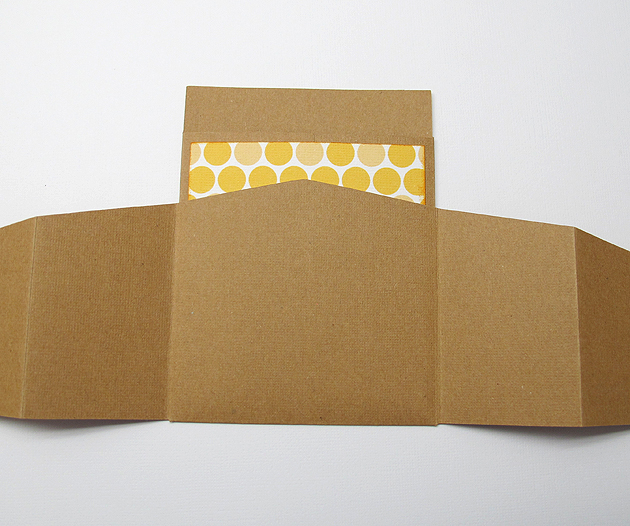
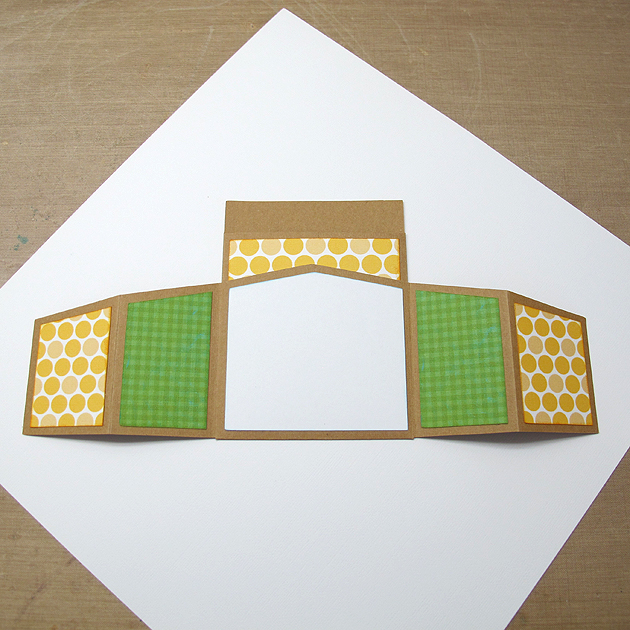
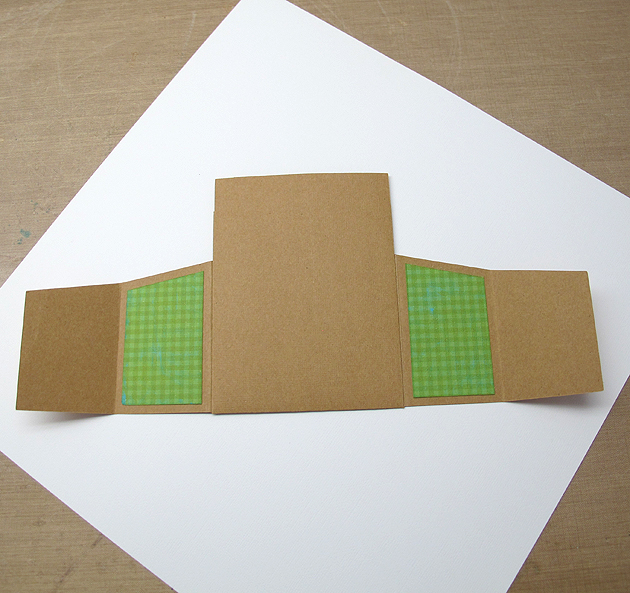
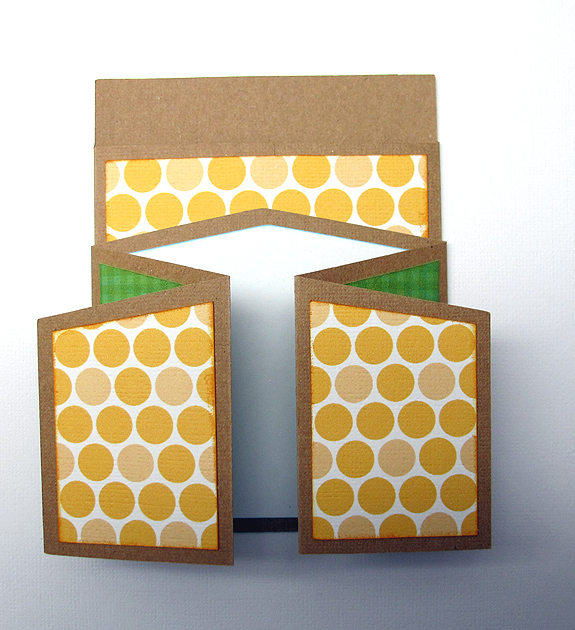
This was a pretty quick and easy card to make — and Erin was very happy with it.  I even made an envelope for it using my We R Memory Keepers Envelope Punch Board.

I am going to enter this card in the Cricut Circle Challenge, which is to use or try something new.  Since I have never used Space Party before, I figure that will satisfy the requirements.  And I used the Swiss Cheese punch, which I have owned for some time and have never used either.

  • Cricut cartridges used:  George & Basic Shapes, Life’s A Party, Space Party
  • EK Success Swiss Cheese punch
  • Stickles
  • Faceted stone from stash


Circleville NSD 2013 — On Pins Challenge


I just completed this cupcake for the On Pins Challenge that was hosted by Sis.  Be sure and check out her blog to see the beautiful mini album she made for her project.

The challenge was to make a pin-inspired project.  I had no trouble deciding which pin I was going to use.  It is the one here.   I wanted to make one of the cupcakes.  Miranda has some gorgeous projects on her blog and I was lucky because she had a video on how to make the cupcake.  You can find the link to her video on her blog here.

CC2

I followed Miranda’s directions, except that I cut the flower petals with my Cricut rather than using a punch.  I used George and Basic Shapes <Flower2>, cut at 1.125″ and I hid the center hole in CCR.  I ended up using more than one 12″ x 12″ sheet full of flowers.  I think I placed mine a little closer together than Miranda did.  I used pearl pins I got at Joann’s to place the pins on the stryofoam.  The paper is all from Graphic 45.

The cupcake opens and inside is a little banner that says “Happy Birthday.”

Open

I cut the banner from Birthday Bash at 1.5″ using the print Graphic 45 paper.  I cut the shadow layer from Bazzil cardstock.  I threaded it together using some DMC pearl cotton.  The letters are from a Cuttlebug Plus Embossing folder, Monogram Seals. I inked the letters with Distress Ink.

Banner2

I also made a box for the cupcake for a different challenge.  I will share a picture here, but will put the details for the box in my next post.

Set

The butterfly is from Martha Stewart Elegant Cake Art and was cut at 2″ from Graphic 45 paper.  I cut several layers and on the top layer I added some coarse crystal glitter.  I put brown pearls on the body.

CC3

  • Cricut cartridges used:  Birthday Bash, George and Basic Shapes, Martha Stewart Elegant Cake Art
  • Cuttlebug Plus Monogram Seals embossing folder
  • Graphic 45 paper
  • Bazzill cardstock
  • Pearl pins
  • Coarse crystal glitter
  • Distress Ink
  • 3″ stryofoam ball
  • 9 oz paper cup
  • Brown adhesive pearls
  • DMC pearl cotton

Cute Bee Card Created in Cricut Craft Room


I spent most of this weekend creating this card in Cricut Craft Room.  I found a cute paper piecing card from Treasure Box Designs and fell in love with it.  When I saw the card, I wondered if I could create it in Cricut Craft Room.  I thought the cute bee on the Create a Critter cartridge would be perfect for it.

When a challenge was posted on the Cricut Circle message board to create a project in conjunction with Circle Mania that was going on in Atlanta, I decided to get cutting.  I was so happy that my design for the base of the card worked the first time I cut it.  I’m not sure how to describe this card, maybe a gate-fold card with a pocket for a tag in the back.

Card

Open

I cut the card base from kraft cardstock.  This is what the piece looked like after cutting and scoring.  And maybe you can see why it took me so long to design this card — I was doing a lot of figuring!  I used George and Basic Shapes and Cricut Craft Room Basics to design the card base.

ScoredPiece

 After scoring, the first step was folding the edges of the pocket towards the center.

FoldPocket

 I printed all the patterned paper for this card on my Imagine.  I love that I can print the exact paper that I want when creating a project.  I used three cartridges for the paper, Bubble Gum Stripes for the gold circles, Blast Off for the green checks, and Hopscotch for the gold print on the tag.

I adhered the piece over the pocket, being careful to not glue the bottom.  I applied glue to the top and side edges only.

GluePaperPocket

Next I folded the bottom piece up towards the top.  I glued the center section of the bottom piece and attached it to the pocket.  Again, I only glued three sides — the top and two sides.  I did not glue the bottom.

FoldUpBottom

The next step was attaching the patterned paper to the panels on the card.  I cut two of the gold circles for the very front pieces and four of the green checked paper.  I attached a white piece of paper to the center panel.  It then looked like this.

GluePaperFront

I adhered two green checked pieces to the back of the panels, as they show on the front when the card is folded.  This is a view of the back of the card, showing the two panels.

GluePaperBackSide

And here is what it looks like from the front, with the panels folded up.

GluePaperNoTag

The tag was cut from Tags, Bags, Boxes & More.  The dimensions of the tag are roughly 3 3/8″ x 5 3/8″.  I adhered the white panel to the tag.  I also cut a piece of green checked paper for the top and rounded the upper corners with a punch.  I adhered that to the white panel on the tag, so the white didn’t show when the tag is in the pocket.

Tag

The fence posts are also from Tags, Bags, Boxes & More.  They are the pointed tag, just made skinny and with the hole hidden.  I cut four of the posts, with two of them being slightly taller.  Those I adhered to the center front of the card.  I ran the fence posts through the Cuttlebug using the Distressed Stripes folder before gluing them down.

GlueFence2

Next, I assembled the bee, flowers and letters.  The flowers were cut at 1″ using Flower Shoppe, using two layers for each flower.  I inked the edges and curled up the petals on the top layers.  I ran some twine through buttons and glued them to the center of the flowers.

The bee was cut at 4″ using Create a Critter.  I hid the facial features and used an oval that I made using Cricut Craft Room Basics (I squashed a circle until I got the shape I wanted) for his nose.  For his eyes, I printed out a free cut file I got at The Beary Scrap.  I don’t quite feel confident enough to try and paint my own eyes.  I did think about adding eyelashes but decided not to because I cut the bee’s face from textured cardstock.  I know my pen marks would have been all over heck and I would not have been happy.

The lettering was done using Craft Room Basics and Mickey Font.

BeeFlowers

All that was left was to adhere these pieces to the card.  I attached the bee first.   After he was adhered to the card, I glued the sentiment on and then the flowers.  My card looked like this.

GluingFlowers

To keep the front of the card closed, I tied a ribbon around it.

Card2

I’ll add a few more pictures, showing the card open and the tag part way out.  I am very happy with how it turned out — made me feel all the work was worth it.  I will cut this card base again — I can picture many uses for it.  And I will also make the bee again, but with a different sentiment.  My mom is no longer living and this is the first Mother’s Day card I have made since she passed away.  I will probably give it to a friend or relative.

GluingInside

TagPartOut

Card3

  • Cricut Craft Room
  • Cricut cartridges used:  Cricut Craft Room Basics, George and Basic Shapes, Create a Critter, Flower Shoppe, Mickey Font, Tags, Bags, Boxes & More
  • Cricut Imagine cartridges used:  Blast Off, Bubblegum Stripes, Hopscotch
  • Cuttlebug — Distressed Stripes folder
  • Ink
  • Chalk
  • Buttons
  • Ribbon

I’m going to add one last phot photo, which is a screen shot of my CCR file, to show what shapes I used to create the card base.  I hope this will help others wanting to re-create it.

ScreenShot

Graphic 45 A Ladies’ Diary Birthday Card


I wanted to make a special birthday card and only knew that I wanted to use some of my beautiful Graphic 45 paper (that I seem to be hoarding) to make it.  I went looking on the web for some inspiration and it didn’t take long for me to decide on my design.

I found a card sketch on Stuck On U Sketches that I liked and got out my paper.  All the printed paper is from A Ladies’ Diary collection.  The base of the card, the solid black cardstock, is from Bazzill.

Front6

The background is a piece of corrugated cardboard — I removed one of the layers so you can see the ribs.  Then I took some gesso and dry brushed it on.  I wrapped a piece of gold ribbon from my stash around the middle.

I cut the triangle pieces in Cricut Craft Room using George & Basic Shapes.  I dry brushed some gesso on the triangles and glued lace trim around the edges using Farbri-Tac glue.  The gold trim around the edges is stickers.  I attached pearls at the corners.

Front5

The scallop circle is from Cricut Alphabet, <Doily12>, and it is cut at 2.5″.  I used a Krylon 18kt. Gold Leafing pen to go around the edges of the shadow scallop.  I dyed some seam binding using Tattered Angels Glimmer Mist and threaded it through the holes in the doily, leaving the tails to hang down.

ScallopCircle

The birthday button in the center of the scallop is a new stamp and die set that I just got from Whimsy Stamps.  I heat embossed the sentiment using Stampendous Stardust embossing powder.

Button

The two small roses were made following this tutorial, from Scraps of Life’s blog.  I used a flower shape from Paisley, Layer1 + <Shoes1>, cut at 4.5″.  I dry brushed the layers with gesso and used the gold leafing pen on the edges of the petals before I assembled the flowers.    I love how tiny they are — they are under 1″ across.

Roses

The scallop layer and the button are attached to the card using foam pop dots.

On the inside of the card, I edged the black floral layer with the gold leafing pen.  I still have to do my sentiment layer.  I think I will write it first before attaching it.  If I make a mistake, then I can just redo it rather than having my blunder permanently attached to the card.

Inside

  • Graphic 45 A Ladies’ Diary collection
  • Bazzill cardstock
  • Cricut Craft Room
  • Cricut cartridges:  Cricut Alphabet, George & Basic Shapes, Paisley
  • piece of corrugated cardboard
  • ribbon from my stash
  • seam binding
  • Tattered Angels Glimmer Mist
  • Stampendous Stardust embossing powder
  • gold border stickers
  • self-adhesive pearls
  • Gesso
  • Krylon 18kt Gold Leafing Pen
  • Whimsy Stamps — Everyday Button Sentiments and Button Die
  • Fabri-Tac adhesive


Cricut Candy Corn Box and Totes


My goal this weekend was to make a candy corn box, but then I had an idea and soon had candy corn boxes all over my craft room.  I wanted to participate in two challenges, the 3D Halloween Treat Container challenge at Bitten by the Bug 2, and the 3D Treats challenge at Cooking with Cricut.

I have seen several versions of Cricut candy corn boxes using a cake box cut on the internet.  Using Cricut Craft Room, I chose the triangle box cut from Sweet Tooths cartridge.  I liked that it is a 2-piece box, with a separate top and bottom.  The paper is Michael’s Recollection brand.

I cut the bottom at 6″, from orange cardstock and cut the top from white cardstock.  Using George and Basic Shapes, I put a triangle on my mat and sized it to match the triangle on the top of the box.  I then cut that from white cardstock.

I laid out two more triangles in CCR, one in yellow and one in orange.  Using ovals from George and Basic Shapes to intersect the triangles, I got the shapes I wanted for the corresponding pieces.  I then glued the orange and yellow layers onto the white triangle.

Using my Cuttlebug and the spider web folder, I embossed the entire front piece after it was glued together.  I then adhered the piece onto the top of my box.

I sometimes forget about all the dies I have for my Cuttlebug, opting to cut with my Cricut instead.  But this time I remembered I had some cute Halloween dies and that is what I used for my spider and the tiny candy corns on the front of the box.  I used the 3″x3″ Cuttlebug Halloween die.

I painted the eyes on the spider and colored the candy corns using Copics.  Then then applied Glossy Accents on the candy corn to give them some shine.  I added pop-dots to the spider and candy corns and attached them on the top of the box.

The tags I used on all my candy corn boxes is a free printable I found on a website called HelloCuteness.com.  The printable is from their old website, but you can get to their new site with the link I am sharing.

I hand cut around the tags, glued them onto some orange cardstock and again hand cut around the orange cardstock. For the cake box candy corn, I tied some twine through the hole on the tag and pop-dotted it onto the top.

While I was working on the cake box version, I got an idea to create a different type of candy corn box —  one that is more like a tote.  Using CCR and George and Basic Shapes, I started laying out triangles and rectangles to get what I wanted.  It took a little time and several attempts, but I finally got it worked out.

Here is my final version, along with two of my better attempts.  They look pretty much the same — the main difference is in the tabs where they attach together and how I assembled them.  The base shape is cut from orange cardstock and then there is a yellow and white piece that attaches to the front and back.

I used a Peachy Keen face stamp, stamping just one side.  I thought about stamping both sides of the tote but decided I didn’t want any two-faced candy corns!  I used a black pen to add the stitch marks to the fronts and backs.

For the first tote, I put it all together and then realized it would be much easier to attach the white & yellow pieces, stamp the face, and punch the holes for the ribbon handle if the tote was still flat.  The next two totes were done flat and it was a lot easier.  I used Terrifically Tacky Tape to assemble the totes.

I used a Crop-A-Dile to punch the holes in the side and 12″ of ribbon for the handle.  After threading the ribbon through the hole, I tied a knot and used some hot glue to glue the ends down inside.  The tags are hung using 1/8″ ribbon and I threaded it through the same hole as the handle before using the hot glue.  Again, I did this on the first tote after it was assembled.  For the next totes I added the ribbon before assembling the them.

  • Cricut Craft Room
  • Cricut cartrideges:  George and Basic Shapes, Sweet Tooth Boxes
  • Copics
  • Glossy Accents
  • Ribbon

Barbie Suitcase Gift Card Holder for National Convention


I had a lot of fun with this project.  I was asked to make ten gift card holders that were to be handed out at the 2012 National Barbie Doll Collectors Convention this week in Garden Grove, CA.  They were originally going to hold gift cards, but then it was decided that they would contain raffle tickets.  I guess there are some fabulous prizes in the Raffle Room.  The theme of this year’s convention is The Grand Tour.

My first thought was to make the card shaped like a suitcase, as a rectangular shape would work well with a gift card.  I searched through suitcase cuts on mycutsearch.com and decided to use the one on the Summer Celebrations cartridge, since it looked sort of vintage.

I welded two shapes together at the bottom in Cricut Design Studio.  I cut the base of the card from chocolate Bazzill cardstock.  All the solid cardstock is Bazzill and the prints are from Basic Grey.  I chose a pink print for the front of the suitcase, using a neutral color for the hardware.  Since Paris and Rome are on the itinerary of the Convention, I cut those words from pink vinyl using the Word Collage cartridge.  Here is a picture of the vinyl lettering.

I chose a vintage stripe print for the lining of the suitcase.  I used a rectangle from George & Basic Shapes to create the pocket on the inside, using a punch to round the bottom corners.  Velcro at the top holds the suitcase together when closed.

The shoes, sunglasses and bra and panties are all cut from Forever Young.  I used a black glitter cardstock from Core’dinations for the shoes.  I applied Glossy Accents to the lenses on the sunglasses.

For the small flower embellishments on the shoes and bra and panties, I used the negative cuts from a Martha Stewart punch called Flower Shower.  It makes the tiniest of flowers.  I added Stickles to the centers of the flowers.

Now comes the most fun part — making the charms.  This was my first time using Ink Jet Shrinky Dinks to make charms.  I followed a great tutorial from the talented Nadia to make my charms.  Here are her step-by-step instructions.

I did not use my Imagine to make the charms as I used a jpg of the Convention logo.  I printed the design on the Shrinky Dink material using my ink jet printer.  So instead of having a Cricut to do my cutting, I hand cut around the charms.  I am not the greatest when it comes to cutting around objects — I got a little wobbly in places.  But the great thing about the Shrinky Dinks is that you don’t really see my wonky cuts.  Here is a photo showing the size of the print I started out with and what it looked like after shrinking.  I also lightened the jpg in Photoshop before printing, as the colors get intense with baking.

Following Nadia’s instructions, after the Shrinky Dinks baked and were flat, I applied some Ultra Thick Embossing Enamel (UTEE) to them.  I then popped them back in the oven and waited for the UTEE to melt.

I was so happy with the way they turned out — even my hubby thought they were neat.  The circle part of the charm is not quite an inch across — and look how well you can read the tiny lettering.

I attached jump rings in the holes and hung the charms from key chains that I shortened to fit on the suitcases.

Here are all ten suitcases.

  • Cricut Cartridges – Forever Young, George & Basic Shapes, Summer Celebrations, Word Collage
  • Bazzil cardstock
  • Basic Grey designer paper
  • Vinyl
  • Martha Stewart Flower Shower punch
  • Stickles
  • Glossy Accents by Ranger
  • Ink Jet Shrinky Dinks

Duffy the Disney Bear Celebrates Cinco de Mayo Layout

Whoo hoo — I’m back with my second layout.  I haven’t posted in quite some time, but I am so excited because my first layout won in the Provocraft contest that was held in conjunction with the launch of the new Cricut Expression E2.  I was the next-to-the-last winner announced on Provo’s Facebook page and couldn’t believe my eyes when I saw my layout pictured on their wall.

This is my first “major award”  — and what did I win?……A new Cricut Expression E2 — whoooo hoooo.  It has already arrived and I hope to start playing with it soon.  Thank you so much Provo Craft!!

I created this layout to enter in the latest Cricut Circle Blog weekly challenge, which ends in just a few hours.  This is a sketch challenge and you have to follow the sketch posted on the blog.  It always takes me time to come up with inspiration, particularly when doing layouts.  Hopefully as I gain more experience the ideas will come more quickly. Now for a little background info about this layout.  Erin (my daughter and co-conspirator on this blog) is currently living in Taiwain and is a huge Disney fan.   She has visited all five parks many times.  She got bit by the Duffy Bear bug while on a visit to Tokyo Disneyland.  Duffy is Mickey Mouse’s teddy bear, sewn by Minnie Mouse to keep Mickey company while traveling.  Notice his face is shaped like Mickey’s head.  While Duffy was exclusive to Tokyo Sea, he is now being featured at Disney World, Disney California Adventure, and Hong Kong Disneyland. Erin brought me a Duffy and Shellie May (the girl version, and still only available at Tokyo Sea) on one of her visit’s home.  She has since given me a Duffy bear from Hong Kong Disneyland, and I added two of my own from California Adventure.  While Erin’s bears have traveled all over the world (Japan, Hong Kong, France, the Netherlands, Belgium, Germany, Switzerland, Luxembourg, Tahiti, Belize, to name a few), my bears are content to reside mainly in California. Living in Taiwain, Erin is about 15 hours ahead of our time here in California.  For Cinco de Mayo, she posted pictures of one of her Duffy bears celebrating Cinco de Mayo on her Disney travel blog, Pooh’s Travels.   She dressed him in his outfit from Mexico and shows him sitting at the dinner table with a meal of chicken taquitos and mango margaritas spread out before him.  As soon as I saw her post I knew I had to do something special with one of my Duffy bears for Cinco de Mayo so I could send pictures to Erin. As my hubby and I had plans to go to Acapulco restaurant for dinner on May 5, I dressed my bear in his serape and sombrero and he tagged along.  Yep, we took a bear to dinner!  The older I get the less I seem to care if people think I’m crazy! I took a couple of pictures of him sitting in the booth with chips and salsa.  And my hubby is the one who put the chip in Duffy’s paw and moved the salsa close to him.  But the coolest part was that the restaurant had this beautiful young lady acting as a greeter for Cinco de Mayo and she was all dressed up in a gorgeous outfit from Mexico.  On the way out of the restaurant I asked her if Duffy could take a picture with her and she obliged.  I couldn’t wait to get home and send the pictures to Erin. When I first saw the pictures, I thought Duffy looked like he was sitting in a cantina and a song immediately came to mind — El Paso, by Marty Robbins.  So I included the first two verses when I sent Erin the pics and decided to include them on my layout too.

The patterned paper I used on this layout is from Basic Grey, their Life of the Party collection.  The cartridges I used are Elegant Edges for the stamped background mat and the diamond trim at the bottom of the pictures, Old West for the title, Mickey & Friends for the Mickey heads (I welded one to a rectangle for the tag that pulls out at the top), and Wild Card for the sombrero.

  • Basic Grey — Life of the Party
  • Cricut cartridges:  Elegant Edges, George & Basic Shapes, Mickey & Friends, Old West, Wild Card
  • Stickles

Surprise Birthday Layout — My First Layout


This is my first layout ever — and I really struggled with it.  Up to this point I have just made cards with my Cricut.  I have no trouble deciding and laying out what I want on my card fronts, but doing a 12″ x 12″ page proved to be a challenge. 

I wanted everything on my layout to flow and look like it was put there for a purpose.  I even went to the Cricut Circle Blog and watched their tutorial again on how to do a layout.  After watching the video I felt I had a better grasp of things, but once I started cutting I wasn’t so sure. 

The patterned paper is from SEI — their Happy Day collection.  Since I had the paper pad in my stash and knew I wanted to use it, that is the only thing I was certain about on this project.  Once I got my background paper laid out and the banner done, then the rest sort of came together.   I laid out everything in Design Studio before I started cutting anything. 

The large scallop square background is cut from the Cindy Loo cartridge.  The banner, the cat jumping out of the cake, and the gifts are all from Birthday Bash.  The streamers are from Celebrations and all the circles are from George. 

I think I cut the center circle at 7″.  Then I measured and found the center and started slicing the circle, but didn’t cut it all the way from edge to edge.  I left about 1/2″ intact at each edge of the circumference.  I glued it to the layout right-side down, so that when I pulled back the slices the pattern paper showed.  Before gluing each of the points down, I cut a ring of solid turquoise cardstock to cover the raw edges of my sliced circle.  I added some white rick rack to the ring.  Then I put adhesive on each of the points of the slices and adhered them to my layout. 

Side view so you can see the dimension of the layout

This was my first time making rosettes and I used my Martha Stewart scoreboard to make the pleats.  That was a lot of fun, except that making those score marks every 1/4″ is hard on arthritic hands. 

I used lots of Stickles — I coated all the letters in the banner.  I think the color I used was copper.  I added Stickles to the gifts, the cake, and all the streamers got coated in them.  I used DMC Memory Thread to string up my banner and for the center of the button on the rosette.  I love that stuff — it’s so easy to work with.

Close up of the title banner

Close up of the cat in the cake

Close up of the gifts

The little “birthday bash” tag was cut with my Cuttlebug using the Tiny Tags die.  I did the sentiment on the computer.  Oh, also did lots of inking and doodling and stitched the turquoise cardstock to the pink cardstock with my sewing machine. 

  • SEI Happy Day paper
  • Cricut cartridges:  Birthday Bash, Celebrations, Cindy Loo, George & Basic Shapes
  • Cuttlebug — Tiny Tags die
  • Stickles
  • DMC Memory Thread

Easter Bunny Inside His Jelly Bean Seed Packet Card


This was a fun card to make.  I wanted to make an Easter card so I could enter it in Jitterbuggin’s Spring Fling contest.  We had extra time to complete this challenge, but I waited until the last minute and am getting this in just under the wire.  It took a while for me to take my concept and come up with a finished project.   This time the challenge is open to voting, so that part is new to me. 

I was inspired by the movie Hop — I loved it and can’t wait for it to come out on DVD.  But my little bunny has to use seeds for his beans as he does not have the talent EB does when it comes to producing jelly beans.

I was a member of PC Hug Club for many years and received some very cute clip art each month.  Because I have such a large collection and never use it, I decided I was going to print my own paper to make this card.  All the background prints are images that I printed on an inkjet printer.  I really like using the clip art because I can resize it — so a 12″ x 12″ background can be reduced to 6″ x 6″ to make a card.  The size of the print becomes smaller too, so it is perfect for cardmaking. 

Fantabulous Cricut has a challenge called Do the Bunny Hop! this week that I will enter this card in.  You have to create a project using a rabbit or chick.

Also, at Cooking With Cricut, their challenge is called Cash in Your Stash and you are supposed to use things in your stash — items that you have had for at least a year.  My clip art collection certainly qualifies, and I also used scraps that I have had for ages to make the bunny and the grass.

I made the seed packet in Adobe Illustrator.  I am such a beginner using that program and was thrilled when I actually made something with it.  I made it a complete packet so I could slip the bunny inside. 

Making the jelly beans was probably the most time-consuming aspect of the card.  I first did an online search to see if I could find a Cricut cut file for a jelly bean as I was pretty sure there were no jelly beans on any of the Cricut cartridges.  I found a post where someone said they made a jelly bean using the George and Basic Shapes cartridge, using the crescent and heart shapes.    I used the same shapes and laid the beans out in Design Studio.  I cut the jelly beans from white cardstock and then colored them with Copic markers.  I applied two layers of Glossy Accents to give the beans their shine. 

The bunny is from the Paper Doll Dress Up cartridge — he’s the bunny from the magician’s costume.  I made a bow for him from seam binding that I spritzed with Glimmer Mist.  The grass is from Create a Critter.  I cut two layers of the grass for each clump so the jelly beans could be seen growing between the layers.  After I placed the bunny inside the seed packet, I pop dotted the entire piece on the front of the card.

Side view showing some of the dimension of the card.

For the inside of the card, I used a stamp from a clear set that I picked up at a scrapbooking expo several months ago.  It came with the rhinestones that I put inside the stamped flowers.  I added another clump of grass with some more jelly beans.


  • Cricut cartridges:  George & Basic Shapes, Create a Critter, Paper Doll Dress Up
  • Cricut Design Studio
  • PC Hug Club clip art
  • Copic markers
  • Glimmer Mist
  • Rayon seam binding

Challenges:

Jitterbuggin — Follow the sketch, make an Easter card and use a Cricut cut somewhere on your card.

Cooking With Cricut — Use stuff in your stash, items that you have had for a year or more.

Fantabulous Cricut — Use a bunny or chick in your project.