Two Tickets to Paradise – NSD 2014 Challenge

I was finally able to finish my first project for NSD.  I started working on this layout on Saturday.  By the evening I was not feeling well — I had caught a cold/flu.  My head was so screwed up that I couldn’t focus on anything until Wednesday, when I was at last starting to feel human again.

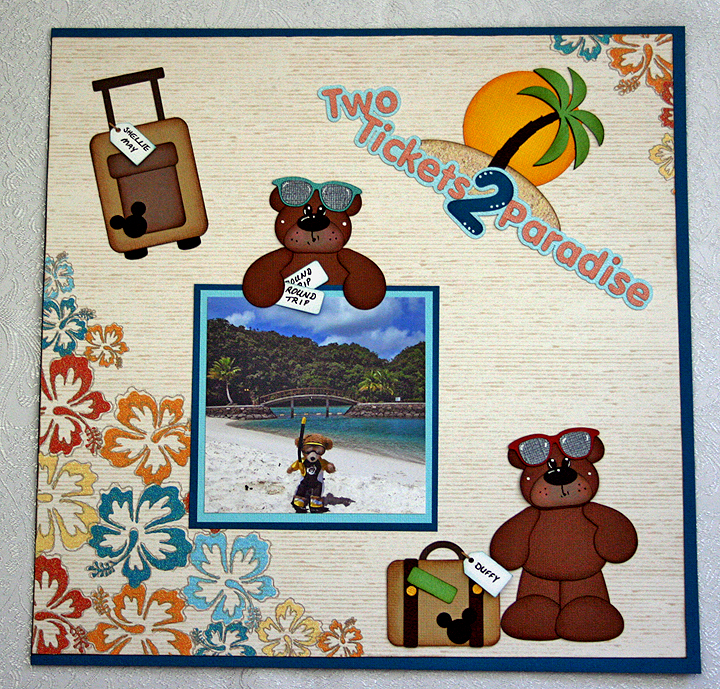
I made this for the Two Tickets to Paradise challenge, where you are to make a project that represents what paradise is to you.  I had these pictures that Erin took during her trip to Palau last year and I figured this has to be as close to paradise as anywhere.  Erin not only documents her own travels, but she always has some Disney Duffy bears with her and documents their travels as well.

I had not even heard of Palau until Erin mentioned that it was on her bucket list of places to visit.  It is in Micronesia and is famous for its diving.  As you can see from the pics, the bears obviously enjoyed their trip.

LOd

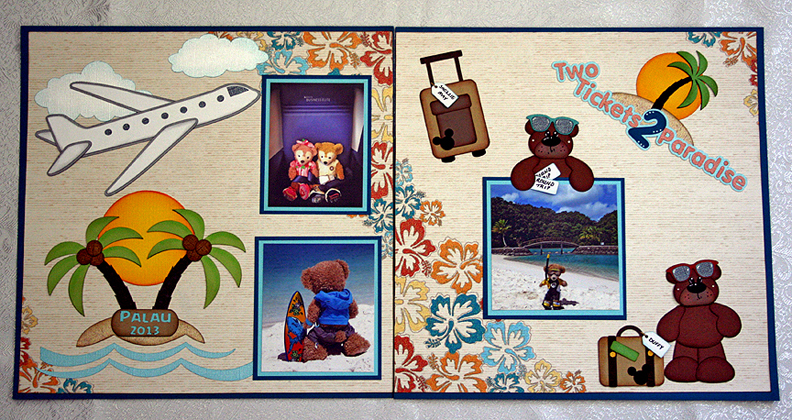
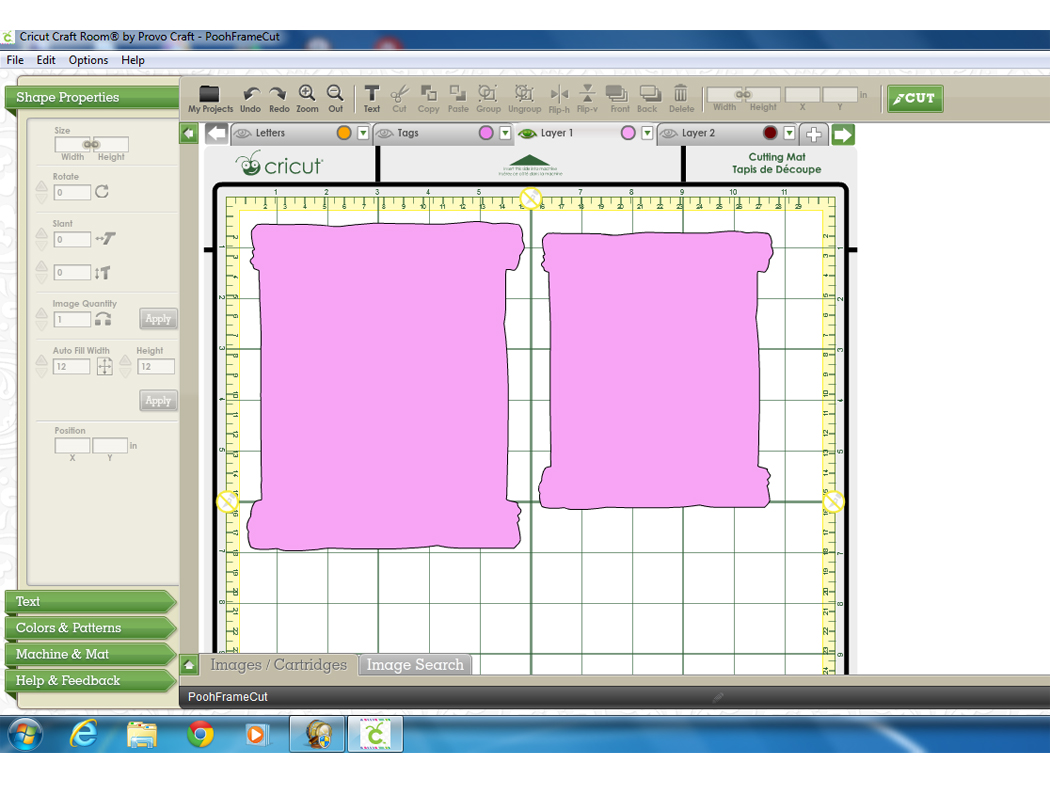
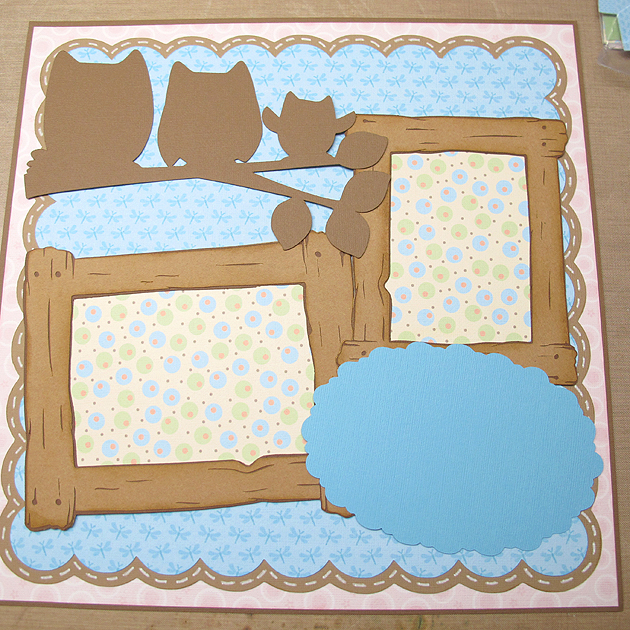
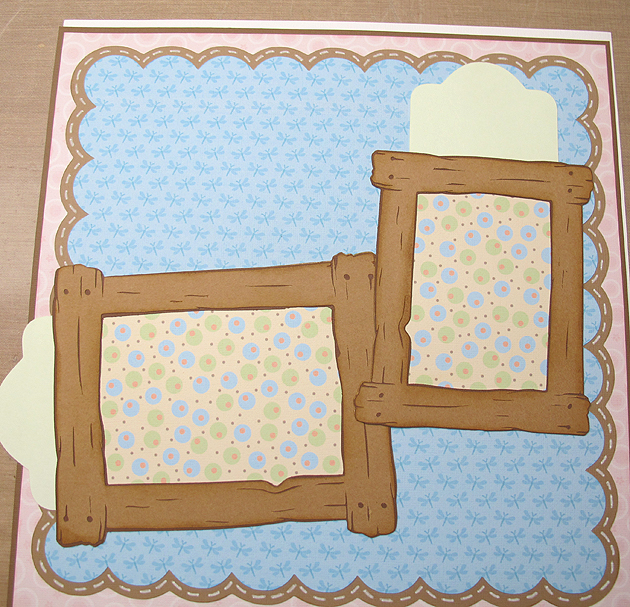
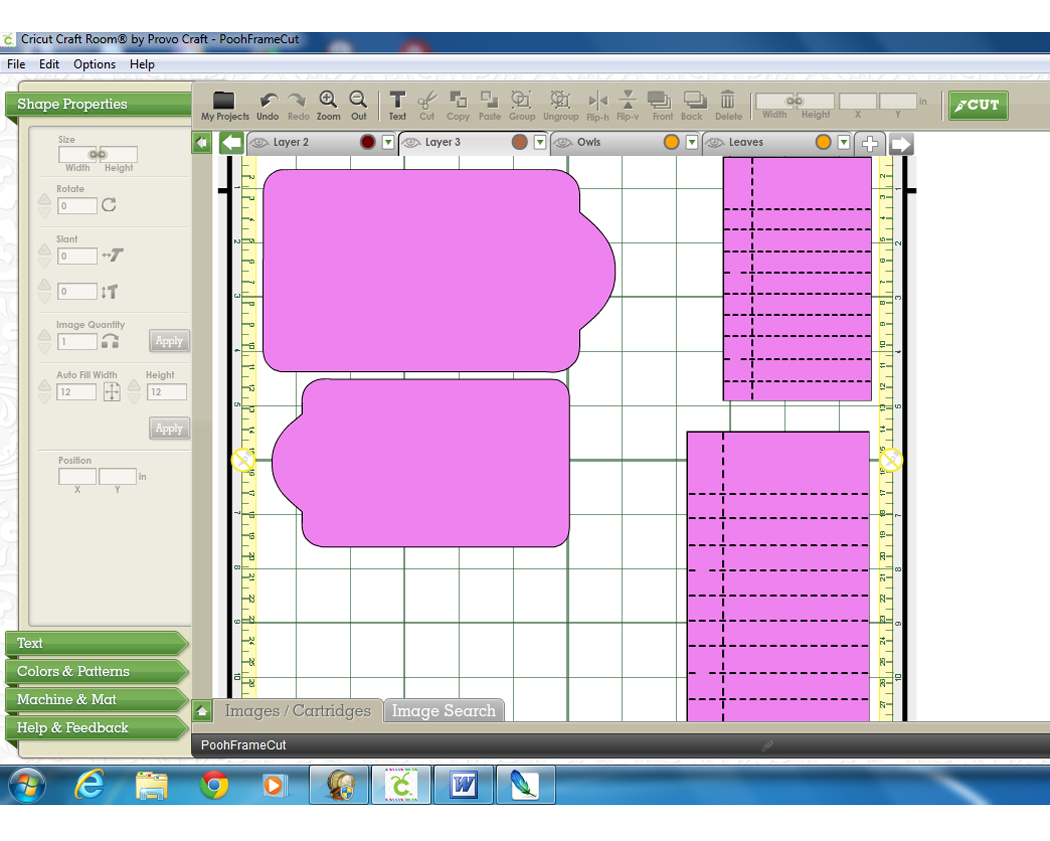
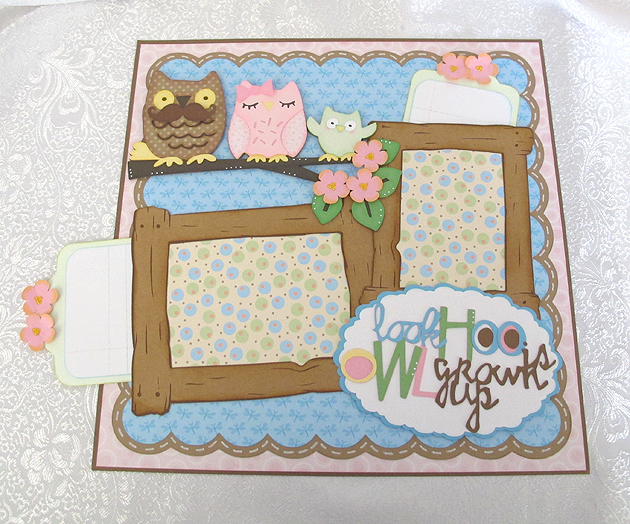
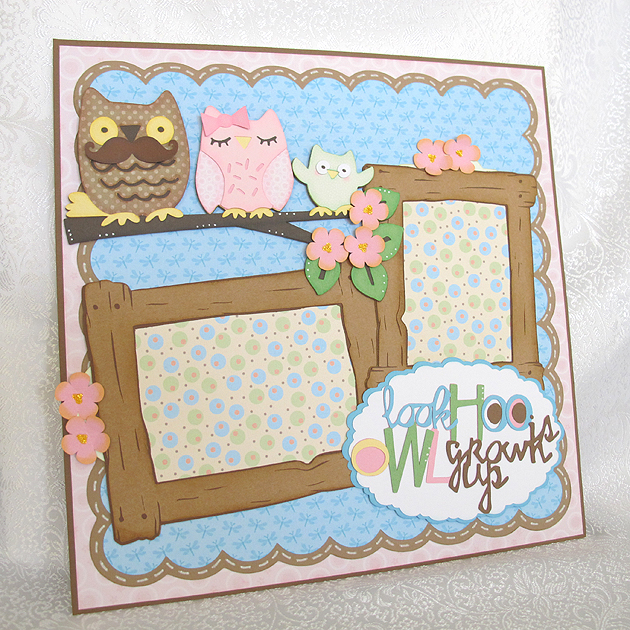
I think this is my first two-page layout — and it took me a while to figure out where I wanted everything to go.  The die cuts are all from Treasure Box Designs — the file is called Two Tickets to Paradise.

The background paper is from the Tahiti stack byDCWV.  Most of the solid cardstock is from Bazzill.

1b

I added some Mickey heads to the luggage and put Duffy’s and Shellie May’s names on the tags.  I also made sure the bears had round-trip tickets 🙂

2c


  • Treasure Box Designs svg cut file
  • DCWV Tahiti Stack
  • Bazzill cardstock

Circleville NSD 2013 — What’s It Owl About?


Thank you for stopping by my blog.  To celebrate National Scrapbook Day, some of the crafty members of the Cricut Circle are posting projects and activities on the message board all weekend long.

I created a challenge for my project and would like to share it with you.  My theme is owls — and the challenge is pretty simple, just create a project with an owl on it.  I made a layout using a cute owl family from Hoot ‘n’ Holler.

LO3

I laid out my design in Cricut Craft Room.  The patterned paper is printed on my Imagine using the Nursery Tails cartridge.  The solid cardstock is from Bazzill.  I began with Elegant Edges for the scalloped square in the background, cut at 10.5″, using <sclop2-s> and the shadow feature.  I used a white Sharpie poster paint marker to make the “stitch” lines around the square.

Scallop

Next I cut the two wood frames from Pooh & Friends at   5.5″ and 6.5″.  The frames are three layers — the basic feature and then two on the blackout feature.  For the piece cut using the printed paper, I hid the inside cut lines in CCR, so the piece was solid — it did not look like a frame.   Here is a picture of what it looks like in CCR.

FrameMat

I first assembled the basic cut and the blackout frame feature, adhering them together.  Then I prepared to glue the frame to the printed frame piece.  I wanted to leave an edge open so the picture could slide inside, so after deciding which end I wanted to leave open, I glued the frame to the mat on three sides only.  I used a liquid glue, but for the photo I laid some papers on the frame to show you were I put the glue. I did this to both frames.

FrameToMat

You can see in this photo how the pictures will slide into the frames.  I used a piece of scrap cardstock for demonstration purposes.

FramePic

Next was adhering the frames to the layout.  Since I wanted to hide tags behind the frames, I put the adhesive on the back of the frame the same way — gluing only 3 sides.  I marked the back of my frame to indicate which side was open for the photo, so I could be sure and leave the same end open for the tag.  I used the red sticky tape to adhere the frames to the layout.

FrameTape

Before attaching the frames to my background, I laid the cut pieces on it to get an idea where I wanted to place the frames.  I made light pencil marks on the background to guide me in the placement.

FramePlacement

I then checked to make sure the tags slid into the pockets behind the frames.

FramePocket


I made the tags to fit behind the frames, adjusting them in CCR to get the proper fit.  I used Tags, Bags, Boxes & More and the cut is <rndtop2>.  The large tag is 6.5″ x 3.75″ and the small one is 5.5″ x 3.125″.   The lined notebook paper is from  Simply Charmed, cut at 2.75″ x 4.5″ and 3.375″ x 5.375″, with the facial features and holes hidden.  This is a screenshot of the CCR file for the tags.

Tags


I used a punch to round the corners and a ruler and colored pencils to go over the score marks on the paper to make it look like actual notebook paper.  I just lightly held the pencils to the paper.

ColorPencils

I adhered the notebook paper to the tags.

Tags3

Next up was the owl family.  They were cut at 5″ using Hoot ‘n’ Holler.  After I cut all the pieces, I used chalk and ink to shade them.  I went over all the edges with chalk first, using a pom pom and chalk applicator.  Then I inked the edges using Distress Ink.

Chalk

 I assembled each owl first and then glued them onto the branch.  I bought a mustache punch a couple of weeks ago, so I had to try it out on Papa owl.  I think he looks pretty dapper with it.  The bow on Momma owl’s head is from Simply Charmed.  I attached the leaves next.

Owls

After adhering all the owls and leaves onto the branch, I attached the branch to my layout.  The owl cut did not include the flowers.  I used Cricut Essentials, cutting Flower 4 at 1″.  I cut three for the branch and four for the tags.  I used Distress Ink (Squeezed Lemonade) to ink the edges of the flowers and Stickles for the centers.

OwlsCU

 The title is from Hoot ‘n’ Holler, cut at 3″.  The scallop oval is from Francy Frames and the cut is <fram13lr>.  I hid the inside cut so I ended up with a solid piece.  I resized the oval to fit the title and it measures roughly 5.625″ x 3.75″.

TitleCU

Here is a picture of the completed layout with the tags pulled partially out.  Hiding journaling tags behind your photo mats is easy to do.

LoTags

LO7

To top off the fun,  I am offering a prize for comments here on my blog.  All you have to do is leave a comment, but only one per person will go into the drawing.  I will leave it open for a week, until May 12 at 8 p.m. (EDT), when I will randomly draw a name.  I am giving away some Graphic 45 goodies — an 8″ x 8″ Secret Garden paper pad and a small matchbook box.

SecretGardenCover copy

SmMatchbook copy

I am sharing a list of some of the talented members of Circleville who have joined together for the weekend festivities and invite you to visit their blogs and see their wonderful projects:

NSD1_edited-200


Cricut cartridges used:  Elegant Edges, Fancy Frames, Hoot ‘n’ Holler, Nursery Tails (Imagine), Pooh and Friends, Simply Charmed, Tags, Bags, Boxes & More

  • Bazzill cardstock
  • Distress Ink
  • Chalk
  • Stickles


Tiptoe Through the Tulips Layout — Tulip Field in the Netherlands

I was inspired to make this layout after my dear daughter, Erin, posted a picture of herself standing in a tulip field in the Netherlands.  Erin and her hubby, Brett, were in the Netherlands the first week of May looking for a place to live as they will be moving there at the end of June.  They are currently living in Taiwan — have been there about 2 1/2 years.

Erin has been to the Netherlands several times before, but she has never been in the country when the tulips are blooming.  She thought they would be too late to see any this trip, but on their way to the airport in Amsterdam to leave, they found this field still in bloom.  Brett snapped the picture and Erin posted it on Facebook.  Once I saw the picture I knew I wanted to do something special with it.

Bitten by the Bug 2 has a frame challenge that began on May 7, right around the time I first saw the picture, so I designed my layout around that challenge.  We were to use a Cricut frame on any project.  The challenge ends today, so once again I am getting my project in just under the wire.

I have to first say that on this layout I finally used my Cricut Imagine.  It has been sitting in the box for some time.  I read some of the problems people were having with their Imagines and it took me quite a while to get up the courage to fire it up.  I discovered that the cartridge that came with my Imagine (Imagine More) was defective.  Luckily I had another cartridge I could use to get the machine running.  I called Provo Craft customer service and they are sending me a new cartridge.

I did manage to get it printing and cutting.  I am having some issues with the machine not cutting each time though.  Sometimes it just spits the mat out after printing.  I will play around with it some more and hopefully it behaves.

For this layout I printed the background paper on the Imagine.  I used a pattern from the Yummy cartridge and filled an 11″ square with the design.  I love that I can now print my own paper!

The solid color cardstock is mostly from Core’dinations, with a little Stampin Up thrown in the mixture.  For my swirly frame, I used the Cricut cartridge Fancy Frames.  I made the tulip frame in Design Studio by welding four corner shapes together from the Art Nouveau cartridge.  I welded just the shadow layer (black layer) only.  I cut the other layers separately so the tendrils would overlap on the center sides.  I also cut some extra tulip petals so I could layer them on the flowers and inked all the flower petals with some Tim Holtz Distress ink.  Here is a close-up of the frame.

The title is cut from the Bloom Cricut Lite cartridge.  Erin posted on Facebook shortly after she arrived in the Netherlands that she was hoping to tiptoe through some tulips, so this was a perfect choice for the title.  I used pop-dots under the title.

And, finally, to balance out the left side of the layout I added three butterflies from the Indie Art cartridge.  I cut three different layers, and on the last layer I only glued down the inside portion of the wings so I could bend them up.  I added some Stickles to the wings.

I have been playing around some in Cricut Craft Room and have to say that I am impressed by what it can do.  As with the Imagine, I have read some problems people have encountered with CCR, so I haven’t tried cutting with it yet.  I just didn’t have time to try it with this project, but I want to share what my project looked like laid out in CCR.  It is a great design aid because you can color your layers and see exactly what your project will look like.  For my background paper, I tried several different patterns before I decided on this one.  With the click of a button I could see what a different pattern would look like with my layout.  I think the final project looks pretty much like what I laid out in CCR.  I made a few changes as I started working on the layout, but this was my blueprint for my project.

  • Cricut cartridges:  Art Nouveau, Bloom, Fancy Frames, Indie Art
  • Cardstock:  Core’dinations, Stampin Up
  • Tim Holtz Distress Ink
  • Stickles

Prom Princess Scrapbook Layout

Wow, it has been so long since I posted something on our blog.  A couple of weeks ago, Bitten by the Bug 2, posted their Princess (the Word) Challenge and I decided I wanted to participate.  Of course, I waited until the last minute to finish my project.  Time is running so short, in fact, that I am going to post pictures right now so I can link my project to their blog and then come back and post the details.   I am hoping I can come back and add comments without creating a disaster — we’ll see how that works out 🙂

OK, now I will see if I can add some details.   The picture in this layout is of our dog and it was taken in 2006, shortly after we adopted her from a rescue group.  Fifi was in foster care for about a year before we got her, so we decided to keep the name she came with — even though it was not high on my hubby’s list of dog names.

Fifi also came with a few issues, the most worrisome was that she nipped.  We talked with our veterinarian about the problem and she recommended a dog trainer–Fifi likes to refer to her as her personal trainer.  Anyway, the trainer seemed to do the trick as Fifi has not nipped since getting individual and group training.

At the end of the year, the trainer had a party for the dogs.  She does this each year and always chooses a different theme.  For 2006 the theme was Prom.  The dogs all came dressed up, but once they walked for judging they got to get undressed and get down to some serious partying — which included running in the dog park and lots of doggy treats.

This was the first  (and so far only) time that Fifi has dressed up — and I wanted to make her something special to wear.  I altered a dog pattern to make her frilly dress.  I also made a matching cover for her leash.  I was surprised that Fifi did not mind wearing the dress.  After walking for the judges, Fifi was chosen as a Prom Princess and her award was a new chew toy.

 I used a paper stack from Die Cuts With a View called The Chateau Lavender.  I laid out my design in Cricut Design Studio and I used the Once Upon a Princess cartridge for the title “Princess” cut and Don Juan for “Prom”.  The frame was cut from Elegant Edges, the throne from Formal Occasion and the dog and crown from Paper Pups.

 I did some heat embossing on the frame using some Stampendous products that I recently bought.  The embossing powder I used all over the frame is called Fran-tage Shabby White Opaque.  It is chunky and has lots of gold glitter in it.  I also added some Stampendous Shaved Ice on top of the powder before I heated it — the Shaved Ice adds chunks of bling.  My only problem was trying to keep it from blowing all over.  I heated the frame from underneath, as Stampendous recommends.

 I cut a throw rug to go underneath the throne using George and Basic Shapes.  For the white on the crown, I heat embossed it using the same Stampendous products that I used on the frame.  I did some chalking on the pup.

I used Stampendous Fran-Tage Lavender Crushed Glass Glitter on the princess hat in the title and used Stickles on the star that dots the “i”.  The last step was the small flowers, which are Recollections brand from Michaels that I recently got on clearance.  I used Stickles in the center of the flowers.

  • DCWV The Chateau Lavender
  • Cricut Cartridges:  Don Juan, Elegant Edges, Formal Occasion, Once Upon a Princess, Paper Pups
  • Stampendous Fran-tage Shabby White Opaque Embossing Powder, Lavender Crushed Glass Glitter, Shaved Ice
  • Recollections flowers
  • Stickles


Duffy the Disney Bear Celebrates Cinco de Mayo Layout

Whoo hoo — I’m back with my second layout.  I haven’t posted in quite some time, but I am so excited because my first layout won in the Provocraft contest that was held in conjunction with the launch of the new Cricut Expression E2.  I was the next-to-the-last winner announced on Provo’s Facebook page and couldn’t believe my eyes when I saw my layout pictured on their wall.

This is my first “major award”  — and what did I win?……A new Cricut Expression E2 — whoooo hoooo.  It has already arrived and I hope to start playing with it soon.  Thank you so much Provo Craft!!

I created this layout to enter in the latest Cricut Circle Blog weekly challenge, which ends in just a few hours.  This is a sketch challenge and you have to follow the sketch posted on the blog.  It always takes me time to come up with inspiration, particularly when doing layouts.  Hopefully as I gain more experience the ideas will come more quickly. Now for a little background info about this layout.  Erin (my daughter and co-conspirator on this blog) is currently living in Taiwain and is a huge Disney fan.   She has visited all five parks many times.  She got bit by the Duffy Bear bug while on a visit to Tokyo Disneyland.  Duffy is Mickey Mouse’s teddy bear, sewn by Minnie Mouse to keep Mickey company while traveling.  Notice his face is shaped like Mickey’s head.  While Duffy was exclusive to Tokyo Sea, he is now being featured at Disney World, Disney California Adventure, and Hong Kong Disneyland. Erin brought me a Duffy and Shellie May (the girl version, and still only available at Tokyo Sea) on one of her visit’s home.  She has since given me a Duffy bear from Hong Kong Disneyland, and I added two of my own from California Adventure.  While Erin’s bears have traveled all over the world (Japan, Hong Kong, France, the Netherlands, Belgium, Germany, Switzerland, Luxembourg, Tahiti, Belize, to name a few), my bears are content to reside mainly in California. Living in Taiwain, Erin is about 15 hours ahead of our time here in California.  For Cinco de Mayo, she posted pictures of one of her Duffy bears celebrating Cinco de Mayo on her Disney travel blog, Pooh’s Travels.   She dressed him in his outfit from Mexico and shows him sitting at the dinner table with a meal of chicken taquitos and mango margaritas spread out before him.  As soon as I saw her post I knew I had to do something special with one of my Duffy bears for Cinco de Mayo so I could send pictures to Erin. As my hubby and I had plans to go to Acapulco restaurant for dinner on May 5, I dressed my bear in his serape and sombrero and he tagged along.  Yep, we took a bear to dinner!  The older I get the less I seem to care if people think I’m crazy! I took a couple of pictures of him sitting in the booth with chips and salsa.  And my hubby is the one who put the chip in Duffy’s paw and moved the salsa close to him.  But the coolest part was that the restaurant had this beautiful young lady acting as a greeter for Cinco de Mayo and she was all dressed up in a gorgeous outfit from Mexico.  On the way out of the restaurant I asked her if Duffy could take a picture with her and she obliged.  I couldn’t wait to get home and send the pictures to Erin. When I first saw the pictures, I thought Duffy looked like he was sitting in a cantina and a song immediately came to mind — El Paso, by Marty Robbins.  So I included the first two verses when I sent Erin the pics and decided to include them on my layout too.

The patterned paper I used on this layout is from Basic Grey, their Life of the Party collection.  The cartridges I used are Elegant Edges for the stamped background mat and the diamond trim at the bottom of the pictures, Old West for the title, Mickey & Friends for the Mickey heads (I welded one to a rectangle for the tag that pulls out at the top), and Wild Card for the sombrero.

  • Basic Grey — Life of the Party
  • Cricut cartridges:  Elegant Edges, George & Basic Shapes, Mickey & Friends, Old West, Wild Card
  • Stickles

Surprise Birthday Layout — My First Layout


This is my first layout ever — and I really struggled with it.  Up to this point I have just made cards with my Cricut.  I have no trouble deciding and laying out what I want on my card fronts, but doing a 12″ x 12″ page proved to be a challenge. 

I wanted everything on my layout to flow and look like it was put there for a purpose.  I even went to the Cricut Circle Blog and watched their tutorial again on how to do a layout.  After watching the video I felt I had a better grasp of things, but once I started cutting I wasn’t so sure. 

The patterned paper is from SEI — their Happy Day collection.  Since I had the paper pad in my stash and knew I wanted to use it, that is the only thing I was certain about on this project.  Once I got my background paper laid out and the banner done, then the rest sort of came together.   I laid out everything in Design Studio before I started cutting anything. 

The large scallop square background is cut from the Cindy Loo cartridge.  The banner, the cat jumping out of the cake, and the gifts are all from Birthday Bash.  The streamers are from Celebrations and all the circles are from George. 

I think I cut the center circle at 7″.  Then I measured and found the center and started slicing the circle, but didn’t cut it all the way from edge to edge.  I left about 1/2″ intact at each edge of the circumference.  I glued it to the layout right-side down, so that when I pulled back the slices the pattern paper showed.  Before gluing each of the points down, I cut a ring of solid turquoise cardstock to cover the raw edges of my sliced circle.  I added some white rick rack to the ring.  Then I put adhesive on each of the points of the slices and adhered them to my layout. 

Side view so you can see the dimension of the layout

This was my first time making rosettes and I used my Martha Stewart scoreboard to make the pleats.  That was a lot of fun, except that making those score marks every 1/4″ is hard on arthritic hands. 

I used lots of Stickles — I coated all the letters in the banner.  I think the color I used was copper.  I added Stickles to the gifts, the cake, and all the streamers got coated in them.  I used DMC Memory Thread to string up my banner and for the center of the button on the rosette.  I love that stuff — it’s so easy to work with.

Close up of the title banner

Close up of the cat in the cake

Close up of the gifts

The little “birthday bash” tag was cut with my Cuttlebug using the Tiny Tags die.  I did the sentiment on the computer.  Oh, also did lots of inking and doodling and stitched the turquoise cardstock to the pink cardstock with my sewing machine. 

  • SEI Happy Day paper
  • Cricut cartridges:  Birthday Bash, Celebrations, Cindy Loo, George & Basic Shapes
  • Cuttlebug — Tiny Tags die
  • Stickles
  • DMC Memory Thread