Paper Mache Quilt Shop

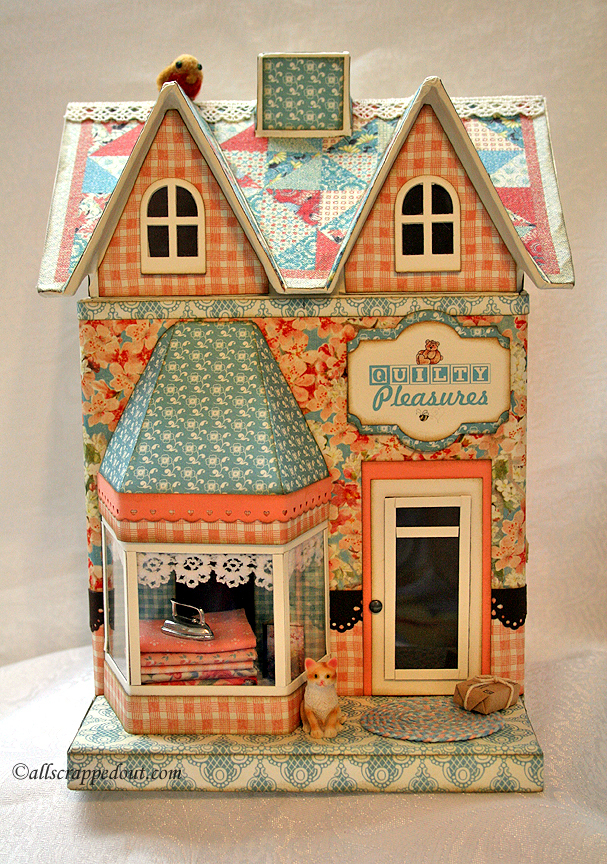
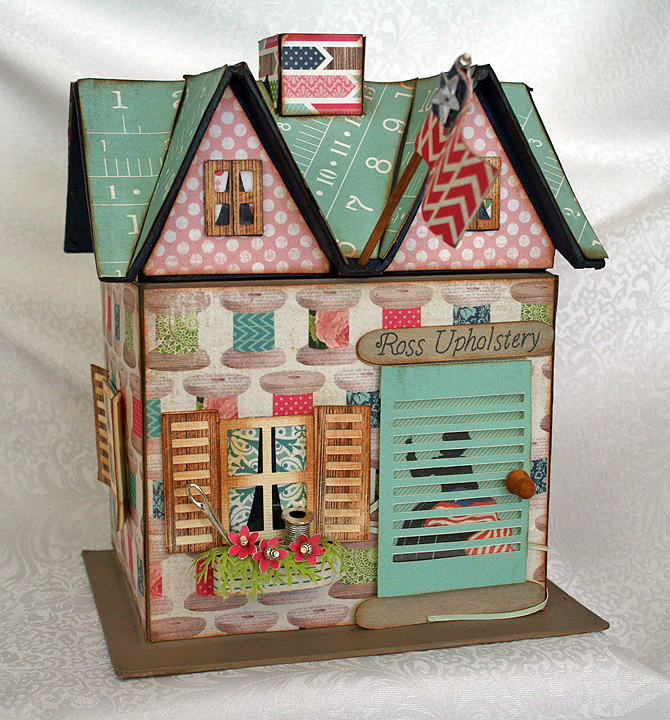
This is the quilt shop I made for a swap I participated in way back in August of 2014.  I altered a paper mache house from Hobby Lobby.  The porch and window I added in the front was made using a tutorial from Laura Denison Designs — I altered one of her Maple Street Shoppes (the Tea Shoppe) to fit my little house.

All the paper I used to cover it is from Graphic 45’s Secret Garden collection.  I used several doll house miniatures to add realism and I even added a little needle-felted robin on the roof.  I found the robin on etsy and he came all the way from Russia.

Front3

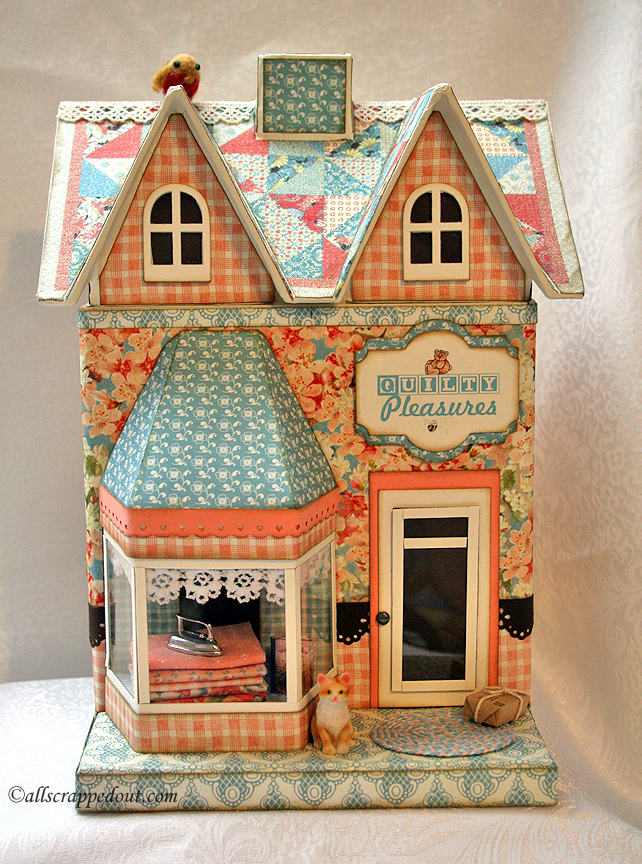
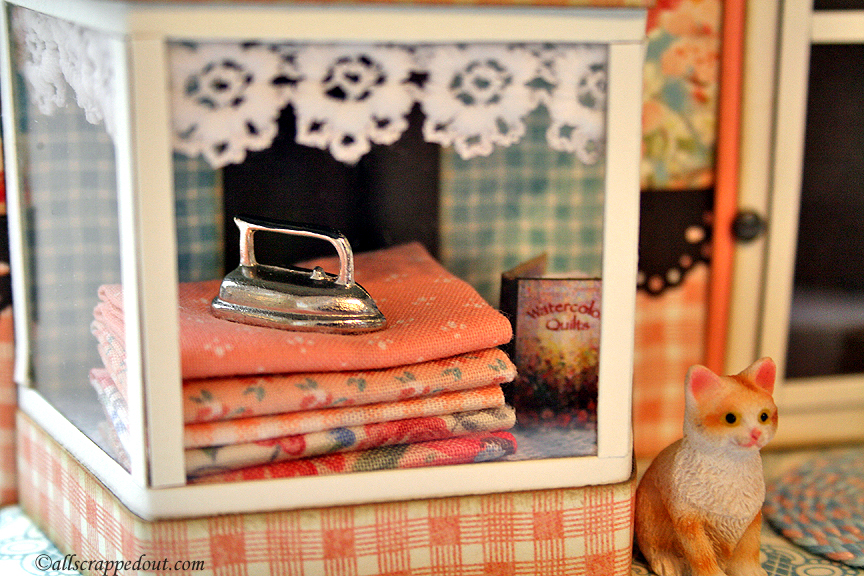
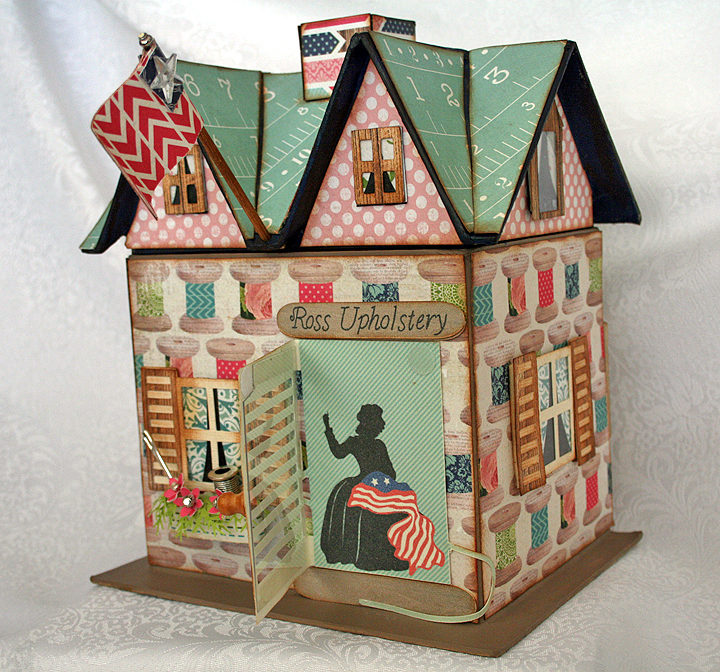
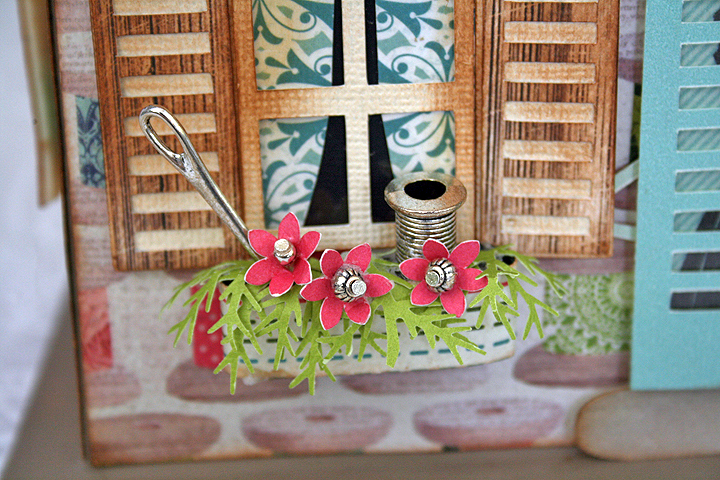
The sign is computer generated and mounted on a Spellbinders Label shape, but I don’t recall which one I used.  I named my shop Quilty Pleasures.  You can see some of the miniatures I used — the cat and package by the front door and the iron in the window. There is also a miniature quilt book in the window that I found on etsy — it even opens. In the next photo you can see the book a little better.  I made the bolts of fabric using fabric from my stash.

I used two different Martha Stewart border punches for trim on the shop.

WindowCU
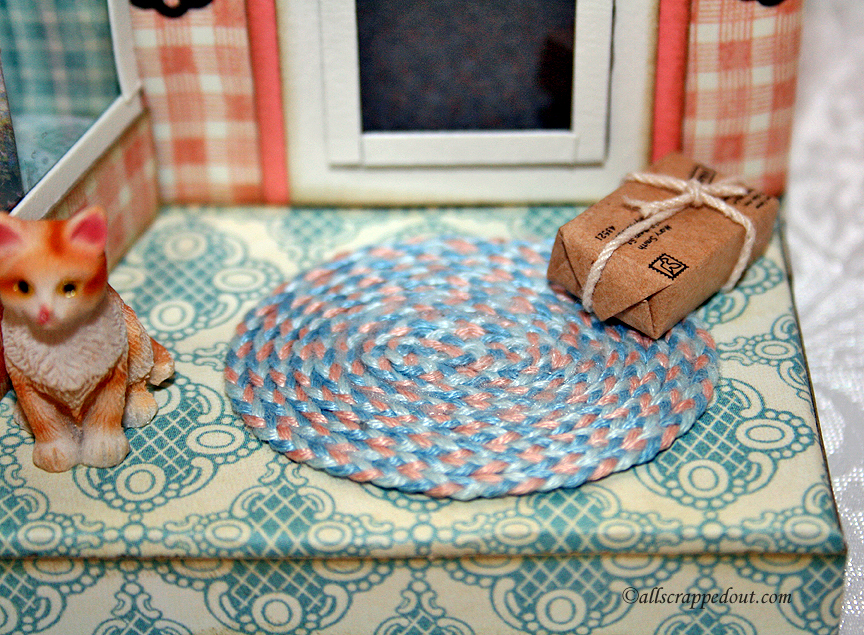
I handmade the rug that is on the front porch – a tedious and time consuming undertaking.  I used strands of embroidery floss that I braided together.  Once I had a long strand I started forming it into the shape of the rug.  I cut an oval from cardstock and glued on the back of the rug.

Rug

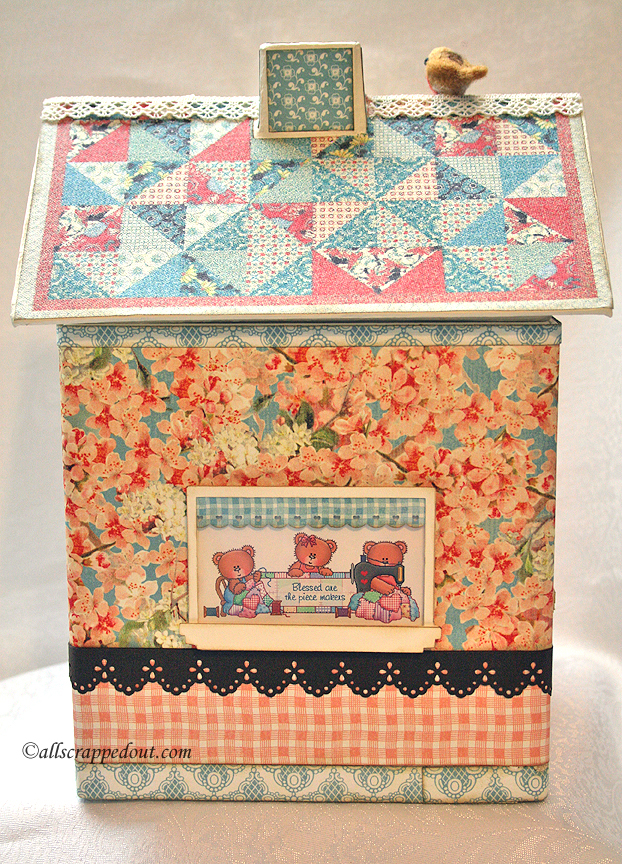
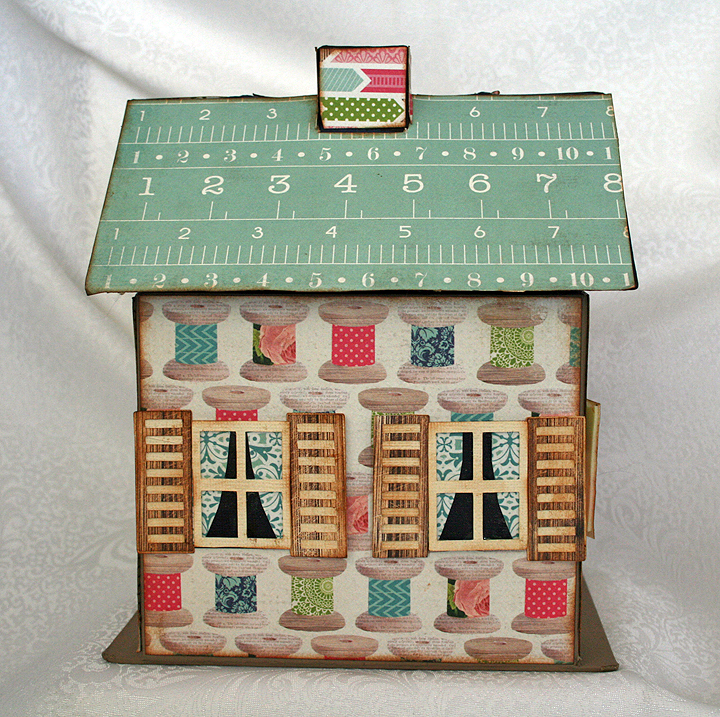
The next three pictures will be of the windows on the sides and the back of the shop.  I printed some cute bear quilting clipart I found on the internet and put them behind windows that I cut out with my Zing using a svg file.

RSide2

LSide

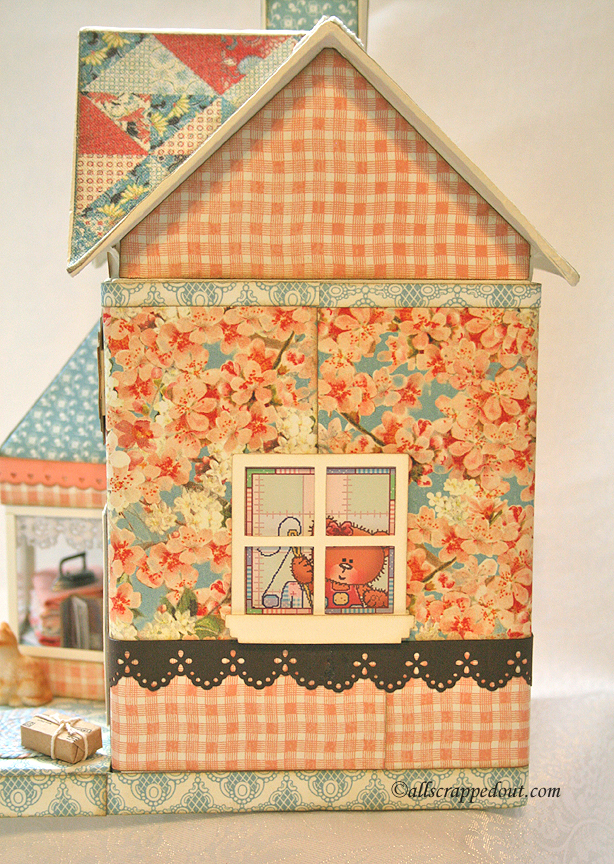
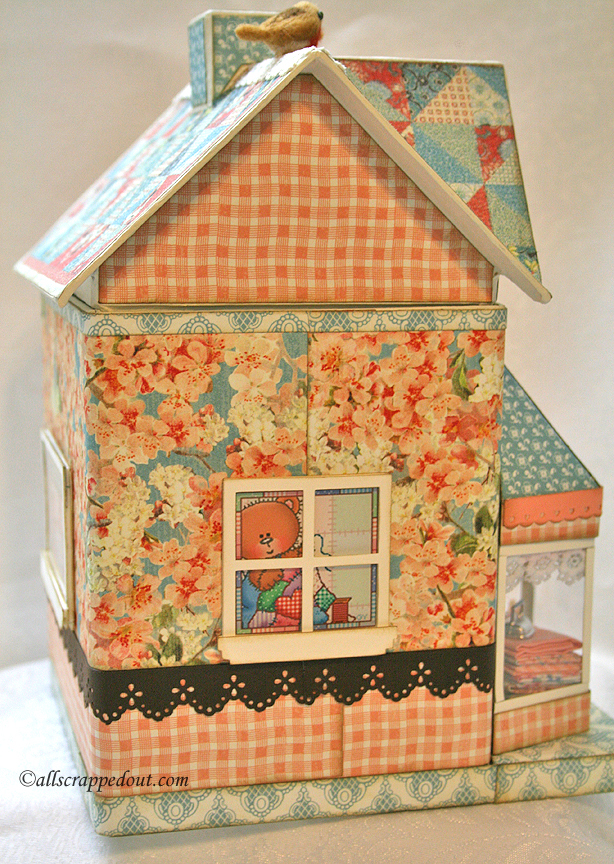
The roof is made from a piece of fabric that I printed a quilt design on using my Brother garment printer.

Back

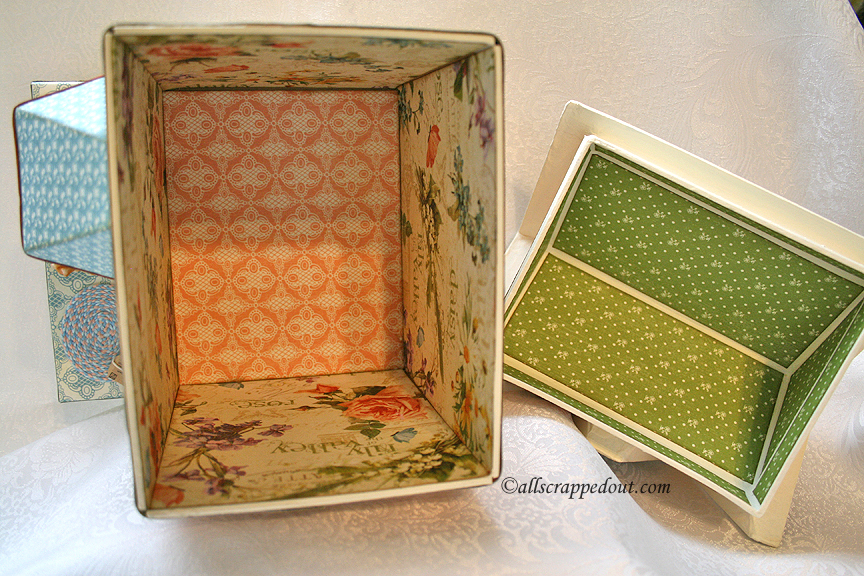
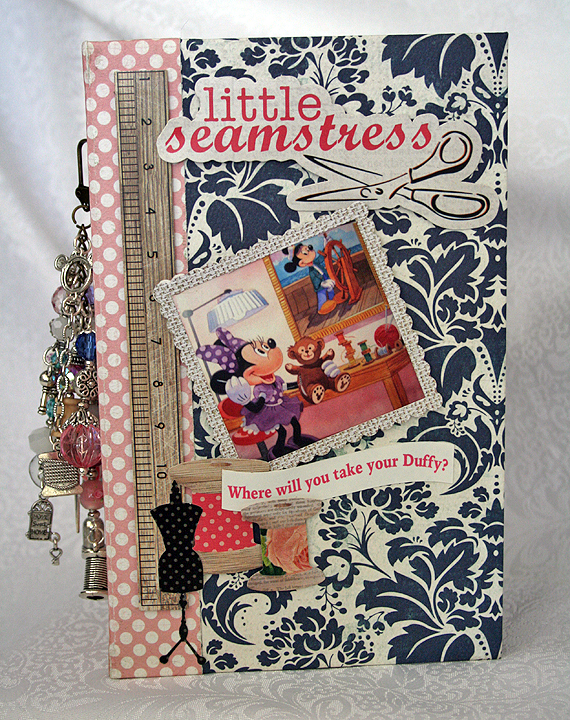
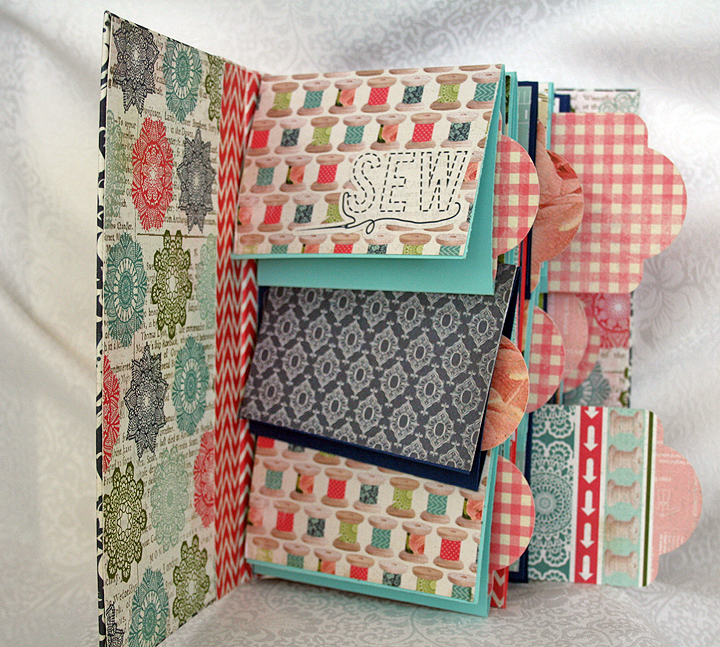
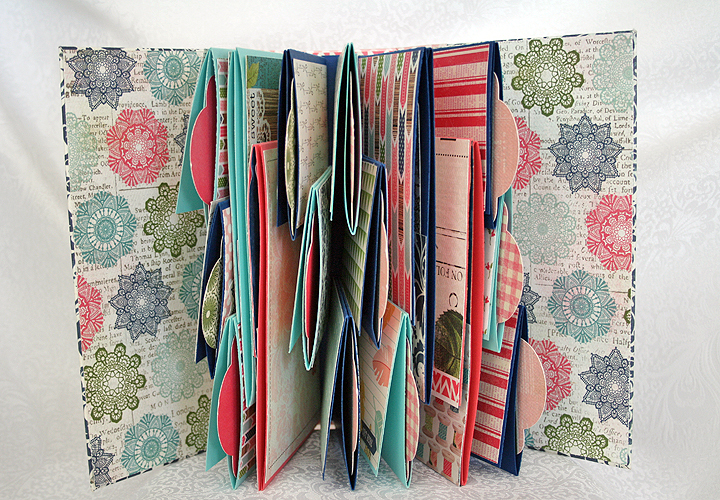
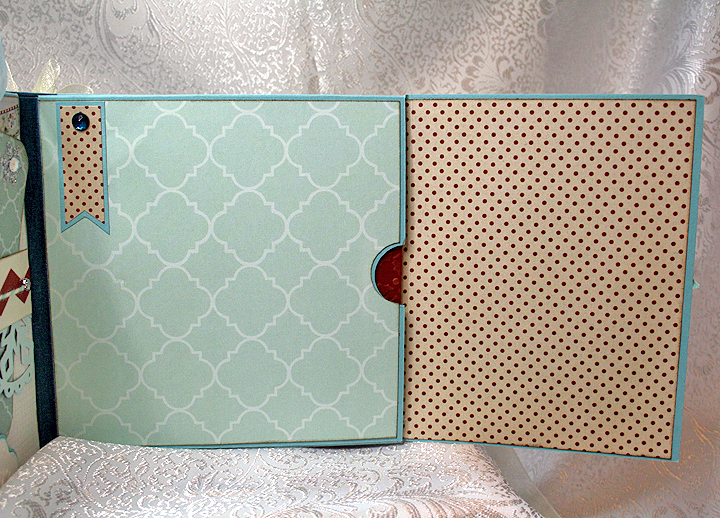
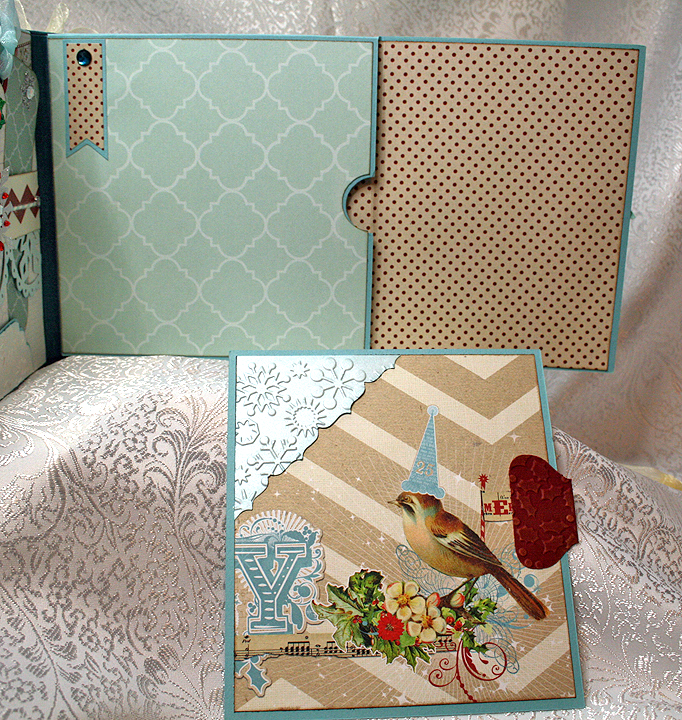
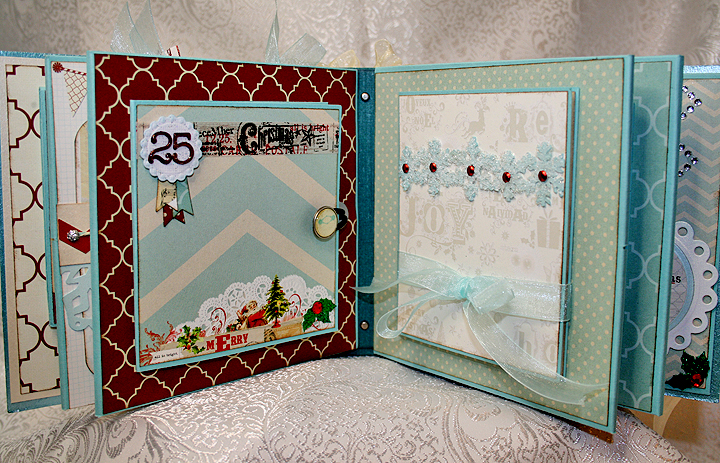
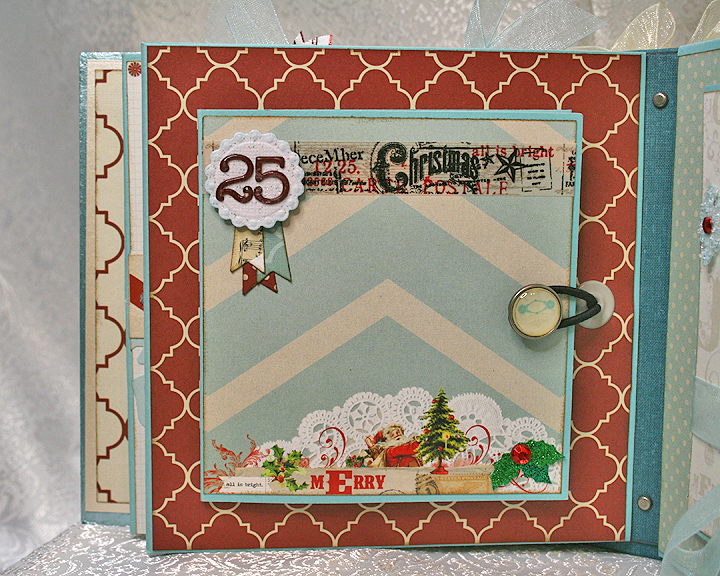
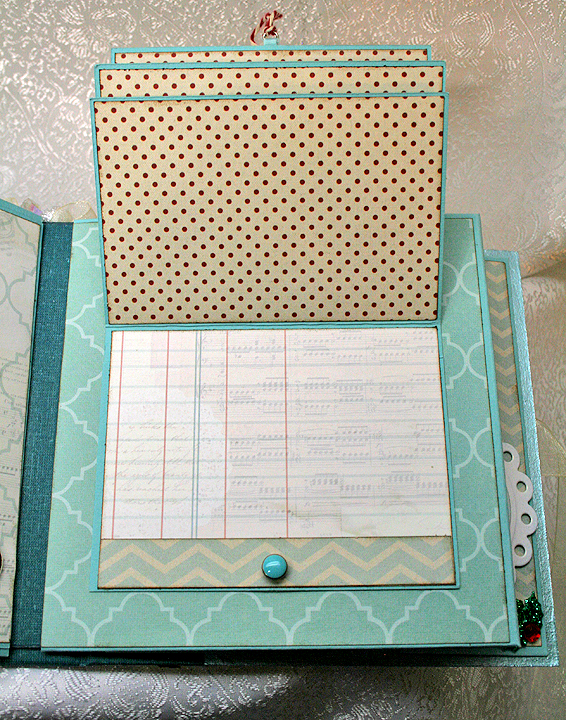
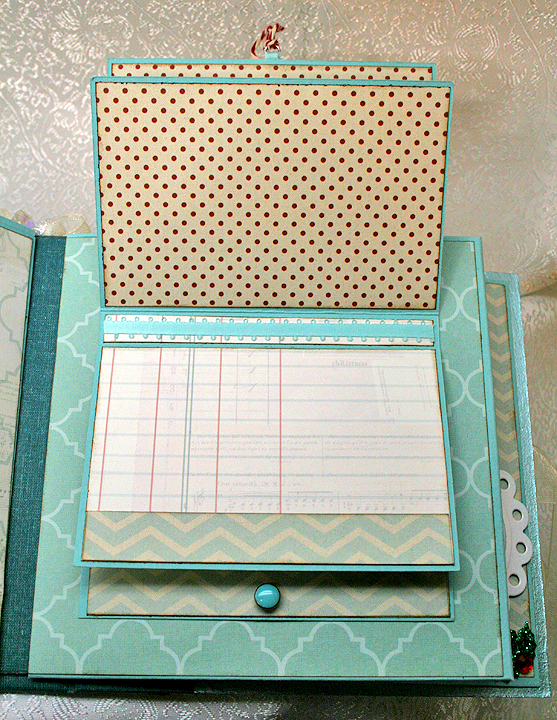
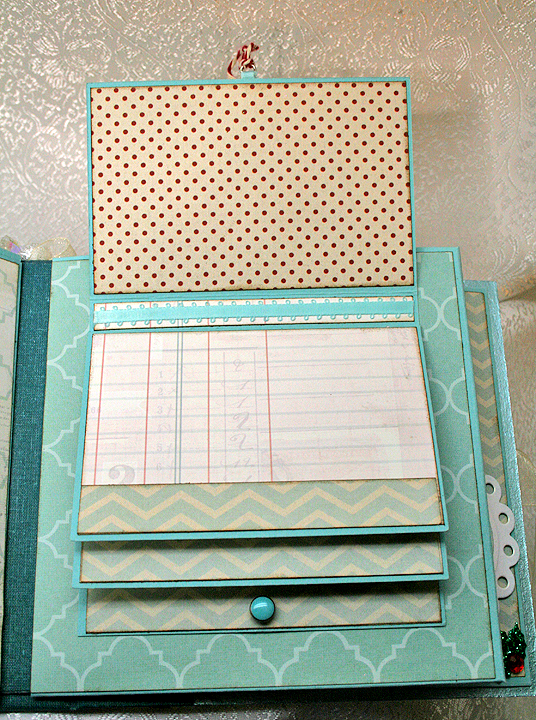
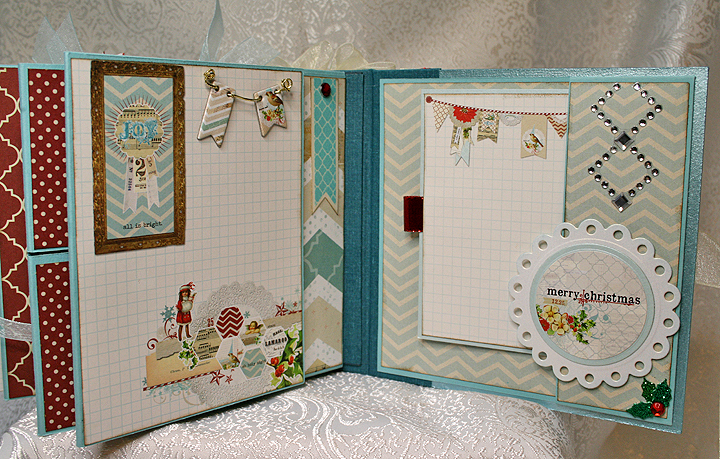
The roof lifts off and I covered the inside of the house with paper – a mini album fits inside.

Inside

This was such a fun project and I love how the Secret Garden collection looks on the quilt shop.  I ended up making two mini albums, which I will post separately.

Front6

  • Paper mache house from Hobby Lobby
  • Graphic 45 Secret Garden collection
  • Laura Denison Designs Tea Shoppe pattern
  • Martha Stewart border punches
  • Spellbinders label die
  • Assorted purchased miniatures
  • Handmade braided rug
  • Scrap lace and fabric from my stash

Quilt Card With Graphic 45 Secret Garden

I am so late in adding this project to our blog.  Way back in August of 2014, I participated in a paper mache house swap on the Cricut Circle Message Board. I altered a paper mache house from Hobby Lobby, making it into a quilt shop. This is the card I made to go with my project.  The printed paper is all from Graphic 45’s Secret Garden collection and I used the hexagon cover plate die from Papertrey Ink to cut the quilt pattern. Card The sentiment was computer generated and the scalloped rectangle is a Spellbinders die.  I tied some baker’s twine towards the bottom.

  • Graphic 45 Secret Garden paper
  • Papertrey Ink hexagon cover plate die
  • Spellbinders scallop rectangle die

Paper Mache House, Mini Album & Chunky Charm Swap

I haven’t posted in such a long time.  I joined a swap on the Cricut Circle Message Board and we were to alter a paper mache house and make a mini album and a chunky charm to go with the house.  This is what my fabulous partner, Sis, sent me. She is so creative and I love it all!!

First the house — Sis couldn’t have chosen a more perfect theme.  If you look through the louvers on the front door you can see Betsy Ross inside stitching away on the flag.  When I first unwrapped the house, I was so engrossed in looking through the louvers that I didn’t even notice the door is a spool of thread.  A couple hours later I discovered the door opens!  Notice the shutters on the windows — and the curtains.  I also love the flag waving in the breeze.

House3

House2

The back of the house and a close-up of the flower box.

HouseBack


FlowerBox

Here is the mini album.  I love the Disney touches — I’m sure I will have to hide the album from Erin on her next visit or I will find it gone 🙂 There is a picture of Minnie Mouse on the front, sewing Duffy Bear for Mickey to take with him on his travels.  There is plenty of space inside this fun album — all sorts of cascading pockets holding lots of tags.

Album

AlbumOpen

AlbumSide

And the beautiful chunky charm hanging from the spine of the album.  Did you spot some Disney charms?  There is also a beautiful book locket.

AlbumCharm

Sis went above and beyond and sent me two extra special gifts.  The first one is a chunky necklace, with the charms hanging from a Betsy Ross thimble.  It’s beautiful with all the sewing themed charms (and yes, a Disney charm too).

Necklace

And here I get to introduce the little thread bear that Sis made.  Isn’t she precious? She is made from pink wool and has her threaded needle in her paw.  I named her Betsy (my hubby said I should call her Bear-tsy).

Betsy2

Thank you so much, Sis!!  You went way above and beyond and I love everything!!  You put so much detail in your work and I’m still sitting here looking at everything.  It makes me smile 🙂

Stick Pins and Stick Pin Book

I made 10 stick pins for the swap on the Cricut Circle Message Board.  It was my first time altering a paper mache box and also my first time making stick pins.  I wanted my pins to fit inside the book, so I went searching on the web for some type of pin holder.  I found some tutorials on vintage needle books, small books that hold sewing needles.  I figured one of these books would hold my stick pins just fine.

1

These are very easy to make, requiring very little sewing.  Most everything is glued together.  This is the tutorial that I followed to make my book.

The fabric, wool felt, and lace are all from my stash.  The pearl trim and small roses are from Wild Orchid Crafts.   I used Fabri-Tac by Beacon Adhesives to hold everything together.

I machine embroidered my partner’s initials on a piece of wool felt and cut the design out with a Tim Holtz bottle cap die.  I added some Stickles around the edges. The book closes with seam binding ribbon.

3

This is inside, showing the first of the stick pins.

P1-2

Page 3 of the book:  You can see there is a piece of felt that separates page 3 and 4.

P3

Page 4 shows a close-up of the pins.  Those are eggs hanging from the chicken and rooster pins 🙂

P4

And the last two pages:

P5-6

Because my pins are so chunky, I couldn’t add any more to the book and have it fit inside the altered paper mache box.  So I just added some sewing pins to the final page.  Those are lace pockets at the very front of the book and the very back of it.

Here are some close-up pictures of the rest of the stick pins.

StickPins

StickPins2

The beads are from Michaels, Joann, and some vendors I found on etsy and eBay. The peeps bunny is from a shop on etsy called TreasuresInClay.  She did a special order for me where she drilled the holes in the bunnies vertically instead of horizontally.

  • Fabri-Tac adhesive
  • Wild Orchid Crafts – roses and pearl trim
  • Wool felt
  • Scraps of lace, ribbon, and trim


Altered Book Box and Stick Pin Swap

I just participated in an altered book box and stick pin swap on the Cricut Circle Message Board.  I had never altered a paper mache box before, so this was a new adventure for me.  My partner (Maria) let me know some of her likes — I knew she liked bright colors and owls.  Since I like owls too, I decided to use that for my theme.

Front9

The first thing I did was primer the book in gesso.  Then I applied two coats of Martha Stewart  Mother of Pearl paint.  I let the last coat of paint dry overnight and then I brushed on a layer of Tim Holtz Rock Candy Crackle paint on the spine and the inside edges of the book.  When that was thoroughly dry, I sponged on some blue and brown distress ink over the crackled paint.

Spine

The title was printed on the computer and adhered on the spine using Liquitex Gloss Medium & Varnish.  I added a couple coats of the gloss medium over the crackle paint on the spine and on the inside.

Spine2

I used Ranger Sticky Back Canvas for the cover of the book.  Since this was my first time using it, I wasn’t sure if it need to be primed with gesso.  I decided to go ahead and gesso it, but first I stuck the canvas to a piece of cardstock and sewed around the edges. After the gesso dried, I stamped a scene of the moon and some trees using Versamark and heat embossed it using white embossing powder.  The stamp set is by Sheena Douglass and called Lakeside Shore.

Then I sprayed the canvas with several different colors of Starburst spray by Lindy’s Stamp Gang.  As you can see, the colors are nice and bright. Since I had used gesso on the canvas, it acted as a resist to the sprays and I found they would easily wipe off.  So I let them dry and then sprayed a coat of gloss varnish (Krylon) over the canvas to seal it.  I was happy to see that I didn’t lose all the pretty shimmer when I sprayed the canvas with the sealer.

10

I purchased the crocheted owl from Tatiana, who I first found on the Cricut Message Board.  She now sells her beautiful crocheted pieces on her Facebook page, Created  By Tatiana.   I picked the colors for this owl to match the book and also ordered several other owls in different colors.

I added a branch and some leaves that I cut from white cotton crinoline using a Martha Stewart punch. The leaves were sprayed with Starburst spray. The flowers and foliage at the bottom were also cut from crinoline using Martha Stewart punches and colored with Starburst spray.

The book has a ribbon closure.

Front2

The back of the book is my attempt at humor, a pun on the Looney Tunes “That’s All Folks”.  The paper is from Doodlebug Designs and the owl is some clipart I got from the now defunct PC Crafter website. The image at the bottom is stamped and heat embossed using Lindy’s Stamp Gang’s embossing powder.

Back

The inside of the cover is also Doodlebug Design paper and I added a clipart bookplate to it.

Bookplate

This is looking inside the book, showing the fabric book that I made to hold the stick pins.  Since this post is so long, I am going to do a separate post for the stick pin holder.

Inside

I included two extra crocheted owls for my swap partner.  The cards they are on were stamped with the Button Boutique stamp set from Papertrey Ink and cut using the coordinating die.

CrochetOwls


  • Paper mache book box from Hobby Lobby
  • Doodlebug Design paper
  • Ranger Sticky Back Canvas
  • Lindy’s Stamp Gang Starburst sprays and embossing powder
  • Tim Holtz Rock Candy Distress Crackle Paint
  • Tim Holtz Distress Ink
  • Crocheted owls from Created By Tatiana on Facebook
  • Sheena Douglass Lakeside Shore stamp set
  • Button Boutique stamp and die set from Papertrey Ink
  • Martha Stewart craft paint — Mother of Pearl
  • Martha Stewart punches
  • Liquitex Gloss Medium & Varnish
  • Cotton crinoline purchased at Joann.com

Spring Card with Bunnies

I wanted to make a nice spring card to send to my book box swap partner (Maria), so I went looking at some of the cards I have pinned on Pinterest to get some inspiration.  Right away I found one I liked.  It is pinned from KittieKraft’s blog — she makes the most beautiful cards.

I have always wanted to make a wreath card and figured this was the perfect time.  While I didn’t have the dies she used to make the wreath, I did have the die to make the cute bunnies.  So I used two Martha Stewart punches to make the wreath — the branch punch and the medium frond punch and I followed Kittie’s tutorial on making the wreath.  For the flowers, I used another Martha Stewart punch — the 3-in-1 Hydrangea punch.  I used the two smaller blossoms for the flowers.

6

I have been wanting to try my new Anna Griffin Cuttlebug Lace Trimmings embossing folders and dies and thought they would make a nice background for the wreath.  I had no problem cutting the borders, but I did have a bit of a problem trying to emboss them.  The white cardstock embossed fine, but the yellow kept slipping in the folders and the embossing was all over the place.  The yellow cardstock is heavier than the white, so I thought that might be the issue.

I ended up lining the border up inside the folder and taping it (using blue painter’s tape) to the Cuttlebug plate.  I was still having a problem right at the end of the folder, where it opens.  So I turned the folder around and ran it through the Cuttlebug with the open end first and then it embossed nicely.

I cut the bunnies in white cardstock and inked them brown using Walnut Stain Distress Ink.  The flowers have Stickles in the centers and the bow was made using my Zutter Bind-it-All.  I sure love how easy it is to make bows using the Bow-it-All.

4


  • Martha Stewart punches:  Branch, Medium Frond & 3-in-1 Hydrangea
  • Anna Griffin Cuttlebug Lace Trimmings Embossing Folders & Dies
  • Zutter Bow-it-All
  • Stickles

Valentine Mini Album and Card

I’m finally getting around to posting pictures of the Valentine mini album and card I made for a swap I participated in on the Cricut Circle Message Board.  The card features an embroidery design I purchased from Embroidery Library that is made for cardstock.  The scalloped frame was cut with my Cricut using the Elegant Edges cartridge.

Card

I found a mini album on Graphic 45’s blog that I really liked.  It is made by Gloria Stengel and she calls it a flip album.  And lucky for me, there is a tutorial on how to make it.  I loved the papers she used, and since I had many of them on hand, my album is almost exactly like hers.  I had to change a few of the dimensions on the album because mine was turning out to be a bit too chunky.

Front

All the patterned papers are from Graphic 45, most from the Place in Time collection.  The pretty red print on the cover is from the Bird Song collection.  I love how you can combine their collections and they coordinate so well.

The roses were light pink and I sprayed them with Starburst spray from Lindy’s Stamp Gang to get the colors I wanted.  The shimmer shows up pretty well in the pictures.

1

The album has an organza ribbon closure.

2

The dark red lace doily was cut from a Spellbinders heart die.  

3

Here are two pictures that show an overview of the album.  It is an interesting album, with all its interactive pages.

Open

Open2

This is what it looks like when it is first opened.  The frame on the right is made with a Martha Stewart punch-around-the-page combo set.  I think it is called Cherish.  

5

The front pocket holds a photo mat.

6

This is with the first page flipped out.  The wings are from a Cuttlebug Embossing Plus die called Vintage Collage.  The heart borders are from Martha Stewart punches.  The scalloped frame under the wings is from a Spellbinders die.  

7

This is after you flip open the page with the wings.  Another scalloped frame from Spellbinders, the heart is from a Martha Stewart die and the key is from Graphic 45.  I think the “love” is also a Martha Stewart punch.  

8

And another flip:

9

Here is a gate fold that opens to the back of the album.

10

 And this what it looks like with the left gate open.

11

And here we are at the back of the album, with a photo mat held in place with a corner embellishment.

12

This was a fun album to assemble.


  • Graphic 45 paper and Ornate Metal Key
  • Cricut cartridge:  Elegant Edges
  • Spellbinders dies
  • Martha Stewart punches
  • Cuttlebug embossing folders and Vintage Collage die


Altered Book Box and Stick Pin Swap

I recently participated in an altered book box and stick pin swap on the Cricut Circle Message Board.  I want to share the beautiful box and pins that Maria sent me.  I love the chunky charm she made to hang on the edge of the spine of the book.  It is filled with so many cute charms and beads.

C1a

The inside of the box is as beautiful as the outside.

C2

Maria made a stick pin for each month, which I thought was very creative.   She also made a very pretty spring card.  Thank you so much, Maria — I love it all !!

C3


Christmas Mini Album for Cricut Circle Stocking Stuffer Swap

I participated in the Cricut Circle Stocking Stuffer Swap for the first time in 2013.  I figure it’s about time I posted the mini album I made to send to my partner, Sherry (Octoberbeauty).  I’ll warn you — there are lots of pictures.

This is the second mini album I’ve made and I again used a tutorial from Cathy, whose etsy shop is called So Much Scrap.   For this album I used her All Hallow’s Eve tutorial.  I really like her tutorials because they are very detailed and easy to follow.

I did something a little different on this album than what the directions call for.  I made the spine and binding system using only chipboard and book binding cloth — I didn’t use any cardstock in the construction.  I am happy with the way it turned out — the binding system is very flexible.

The patterned paper I used throughout the album is from My Mind’s Eye Merry & Bright collection.  The solid cardstock is all Basis 80#.  The edges of the chipboard are painted with Martha Stewart pearl paint.  I covered the outside of the spine in wool felt and added some ribbon, lace and metallic rick rack trim to the edges.

Front10B

Front12B

Back2

I made the charm on the spine using stardust jingle bells, crystal snowflake beads and a deer pendant I got from eBay. I made the bow using my Zutter Bow-It-All.  I’m really liking the bows I can make using this handy tool.

Charm

Here are some close-up details of the album front.  The poinsettia is made from the Layered Poinsettia die by Spellbinders, sprayed with Lindy’s Stamp Gang’s Starburst spray, and I added glass seed beads to the center.  The snowflake is from the Tim Holtz Snowflake Rosette die and is coated in coarse glitter.  The album closure is a ribbon that wraps around a brad on the front cover — another of Cathy’s wonderful ideas.

FrontPoinsettia

CoverDetail

Pages 1 and 2:

P1-2

P1B

The pocket opens up to reveal a photo mat inside.  I made all the tabs for the photo mats using my We R Memory Keepers Envelope Punch Board and embossed the tabs with my Cuttlebug.

P1TagB

The ornament is cut from a Memory Box die.  The edges on the pocket flaps were done with a punch — I think it was an EK Success Bracket border punch.  The flaps close with a magnet — there are lots of magnetic closures used in this album.

P2

I made the small tags using Tim Holtz’s Tag & Tie die.

P2Tags

Pages 3-4:

P3-4

P3Tags

P4

Page 4 opens and has a photo mat inside the pocket.

P4Open

P4Tag

Pages 5 and 6:

P5-6B

The pocket closes using an elastic hair band and a brad.

P5B

P5Open

Page 6 has an accordion fold feature that folds up and is held closed with a ribbon.  The snowflake trim is from a Martha Stewart punch.

P6

P6Open

P6OpenB

Pages 7 and 8:

P7-8B

The ornament is embossed with Lindy’s Stamp Gang embossing powder.  I can’t remember what stamp I used for the ornament — that’s what I get for waiting so long to post this on our blog.  The ribbon hanger is a Memory Box die.

P7B

P7TagsB

Page 8 has a waterfall feature.

P8B

P8OpenC

P8OpenB

P8Open

Pages 9 and 10:

P9-10B

P9

P9OpenB

P9TagC

P10

P10WTag

Thanks for checking out my Christmas album.  I have a Valentine mini to post next — I hope it doesn’t take me two months to get it written up, like it did with this album.

Front6B

  • My Mind’s Eye Merry & Bright paper collection
  • Basis 80# cardstock
  • So Much Scrap (etsy shop), All Hallow’s Eve tutorial
  • Tim Holtz dies: Snowflake Rosette and Tag & Tie
  • Memory Box ornament and bow dies
  • Spellbinders Layered Poinsettia die
  • Lindy’s Stamp Gang embossing powder
  • EK Success Bracket edger punch
  • We R Memory Keeps Envelope Punch Board
  • Zutter Bow-It-All
  • Martha Stewart pearl paint
  • Cuttlebug

Valentine Swap on the Cricut Circle Message Board


I participated in the Valentine Swap on the Cricut Message Board that was hosted by Sherry (Octoberbeauty).  My partner for this swap was Maria (MariaJ) and I want to share all the goodies she sent me.  Besides spoiling me with so many gifts, she made a really cute pin cushion and included some stick pins in it.  It will be on display in my craft room.

This is what I saw inside the box when I opened it.  Everything was so nicely wrapped — check out the gift basket.  I love the cupcakes Maria clipped on the cellophane.

InsideBox

This is the beautiful Valentine card Maria made.

Card

I got some Spellbinder dies and a pad of really cute Valentine paper 🙂

Pkgs

This shows the inside of the basket, after I removed the cellophane.  Maria really stuffed that basket full of goodies.

Basket2

Two pictures of the pin cushion and stick pins.  I pulled the flower petals up in one picture so you can see how the pin cushion is made in a tea cup — so clever!

PinCushion

PinCushionCup

The last pictures shows all the items that were inside the basket with the pin cushion.  To the left you can see the bookmark with the pretty blue beaded charm hanging from it — I love it!!  Thank you so much, Maria!

IB2