My First Mini Album

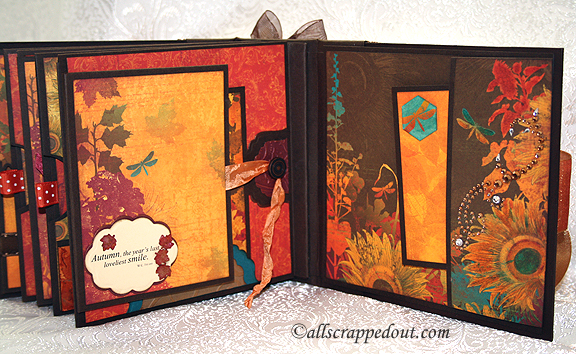
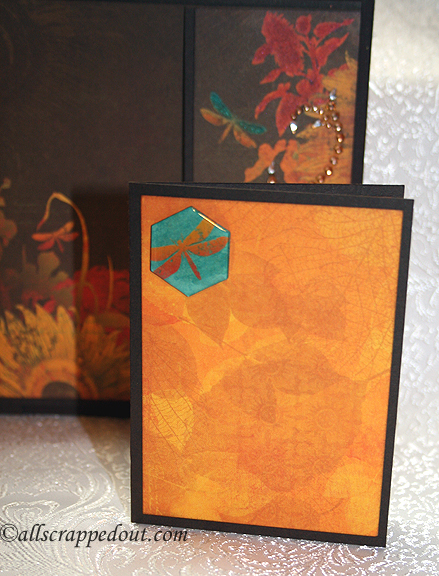
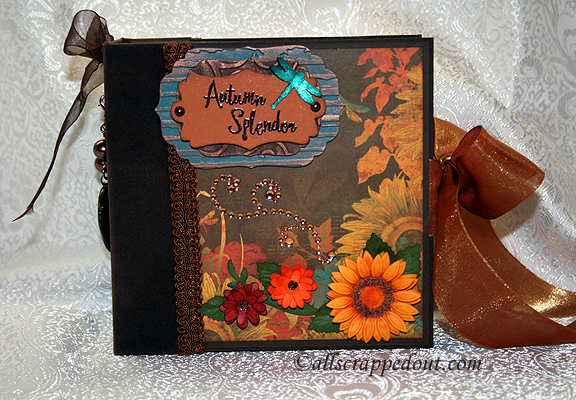
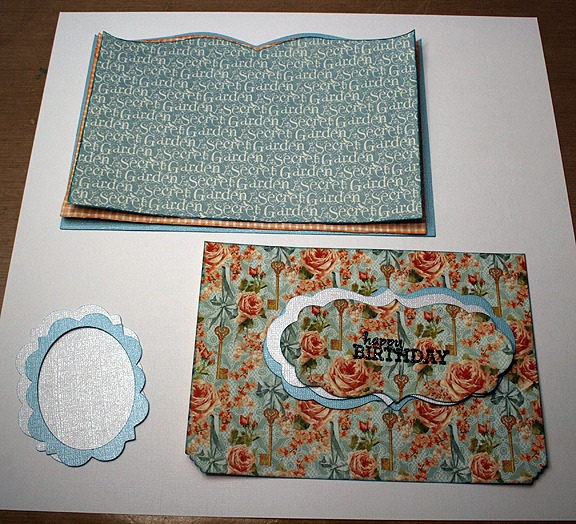
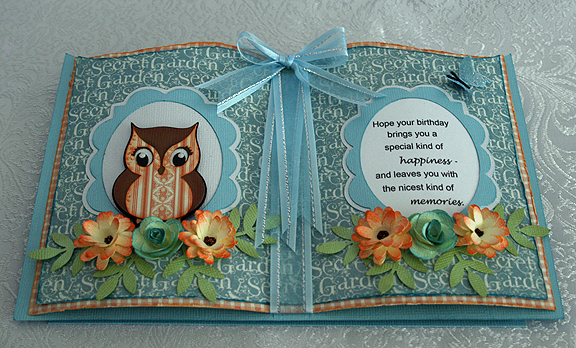
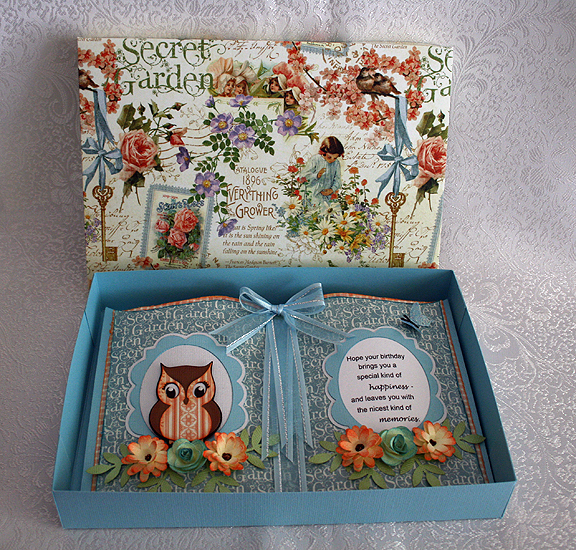
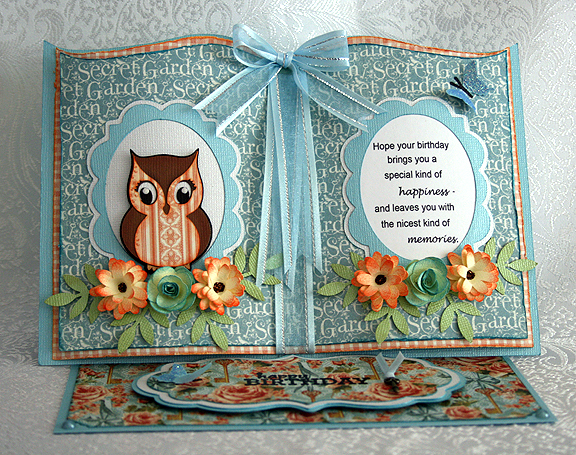
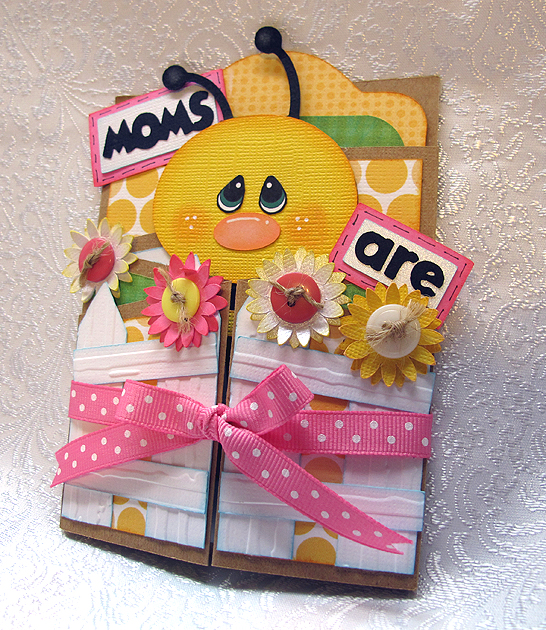
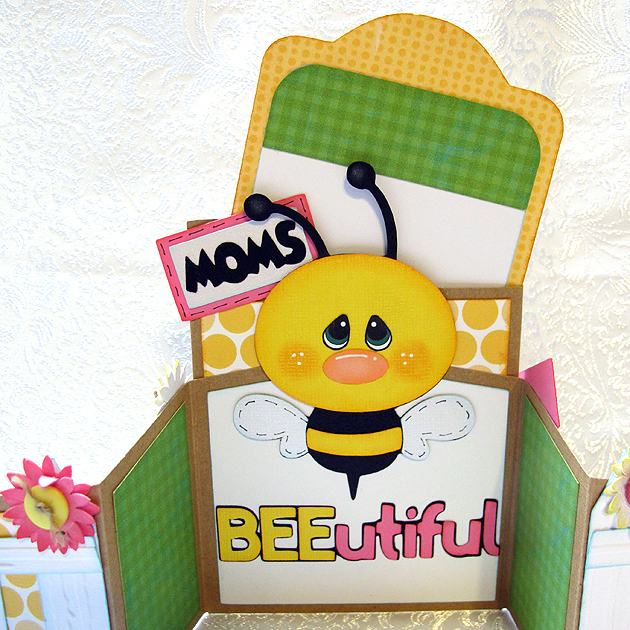
Yesterday I posted the mini album I received in a swap.  Today I want to share the mini album I made for my swap partner.  I took a ton of pictures — I think because after spending so much time making the album, it was hard for me to part with it.  I felt like it was part of the family 🙂

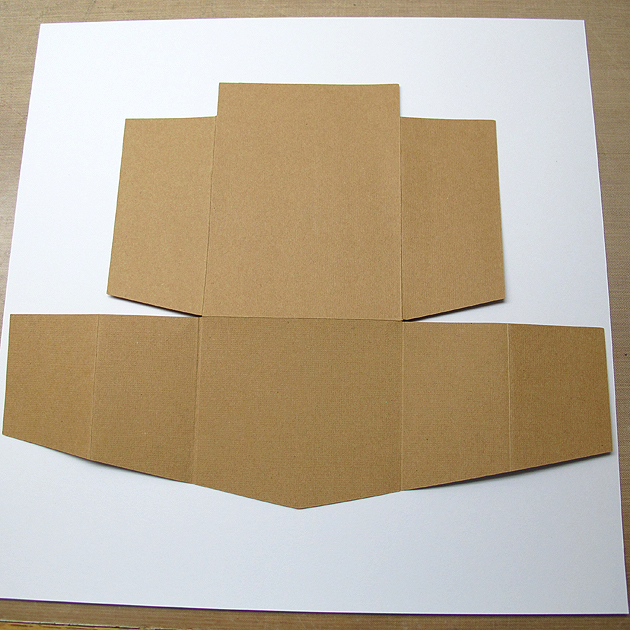
I made several wonderful discoveries along the way while making the album.  First and foremost, I discovered some wonderful mini album tutorials on Etsy.  You can find them in Cathy’s shop, which is called SoMuchScrap.

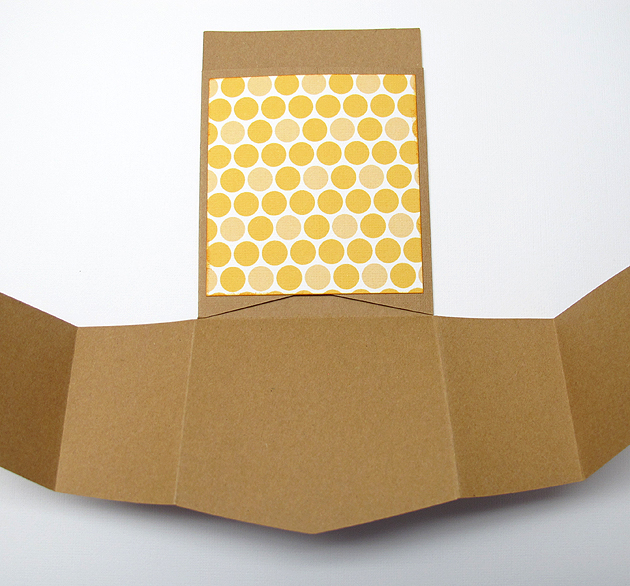
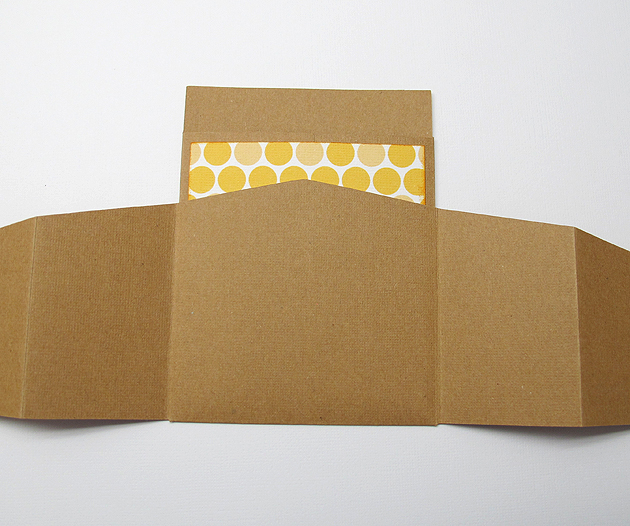
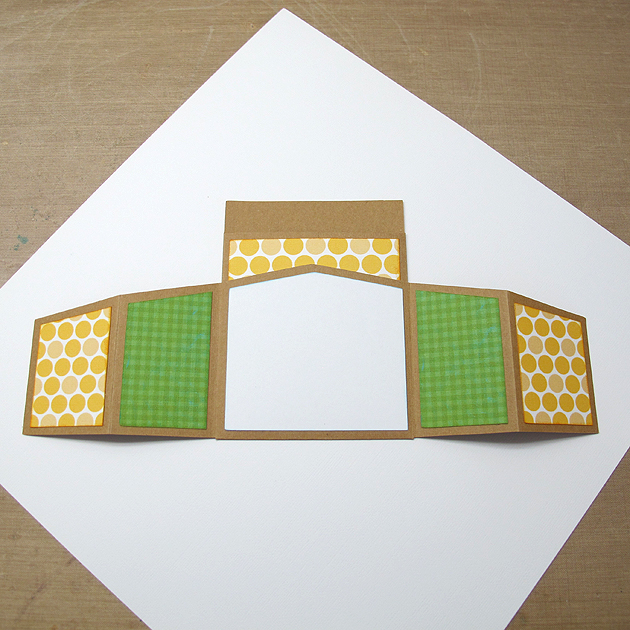
I have been researching minis on the internet for a long time and knew I wanted to make something with interactive pages.  After finding Cathy’s tutorials, I knew this was the way to go for me.    I purchased her binding tutorial and her Je’ T’ Adore tutorial for a 6″ x 6″ mini.  All I did was change the papers to a fall theme.  The tutorials are excellently written and have step-by-step instructions as well as pictures to guide you through each page.  Another plus about purchasing from Cathy is that she readily answers any questions you might have.  So, with big thanks to Cathy, here is my mini.

Thumb

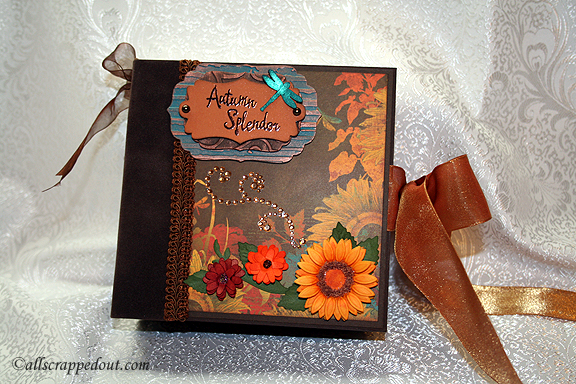
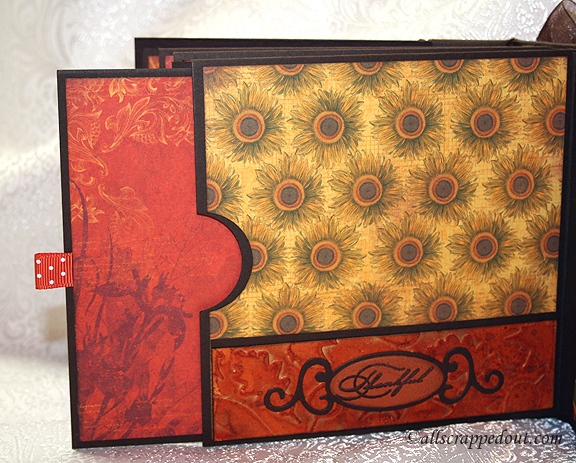
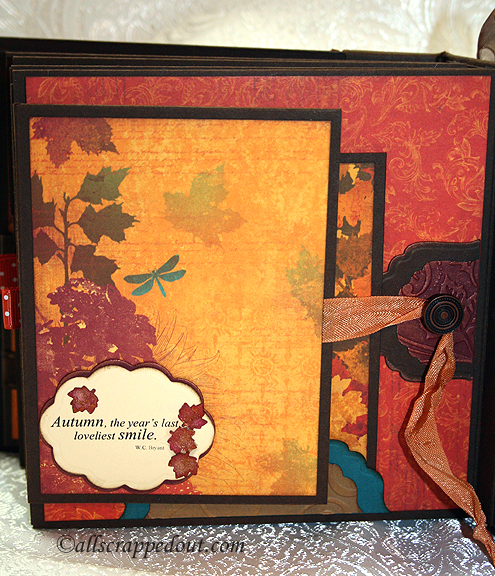
I used paper from BoBunny’s Forever Fall collection.  The solid cardstock is all from papertemptress.com.  The brown trim and ribbon are from Joann’s.  Another discovery I made was book cloth — I used imitation suede book cloth to cover the spine of the album and a glue specifically designed for bookbinding.  I was amazed at how easy it was to apply the cloth.  I picked up these supplies at Hollander’s.

Front2

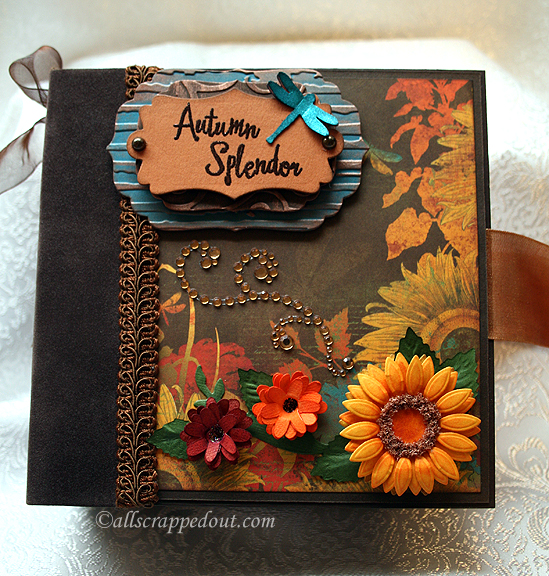
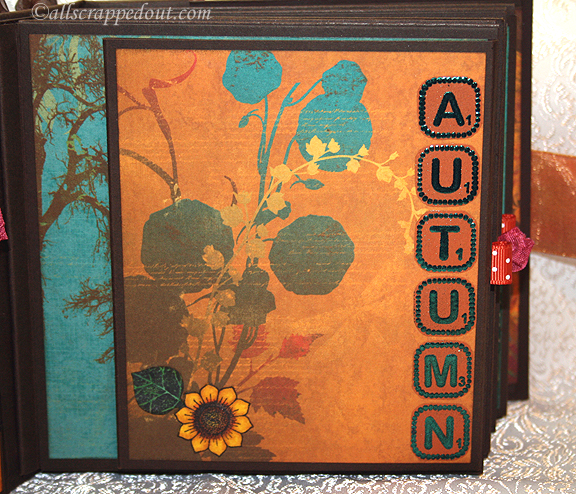
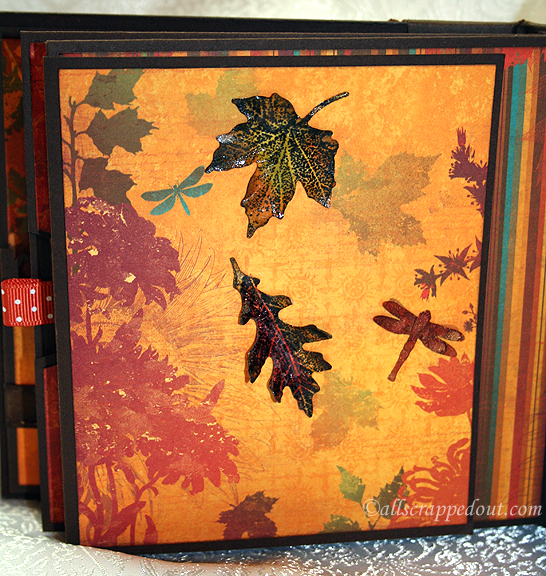
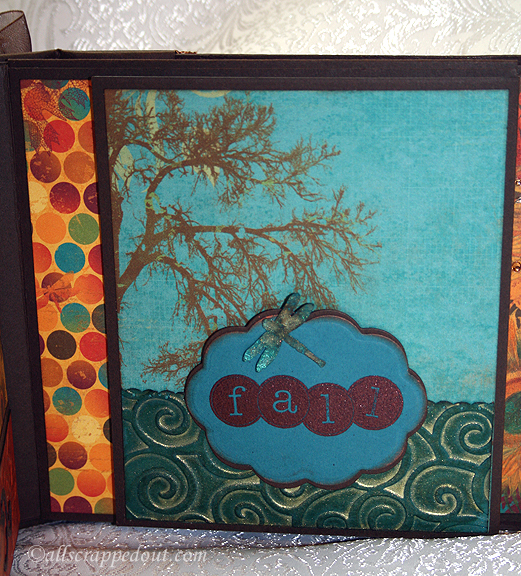
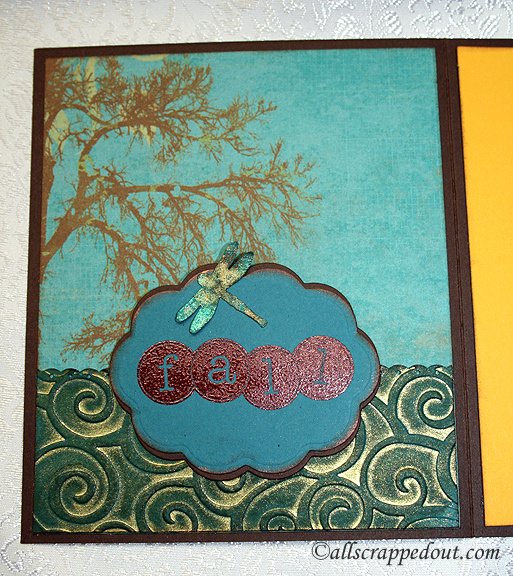
The title is from two Spellbinders dies, Labels 4 and Grommet Tags.  I embossed the bottom layer with the Distressed Striped Cuttlebug embossing folder.  I added highlights with a copper ink pad and sponge.  The “Autumn Splendor” is from a Close to My Heart stamp set with the same name, heat embossed with Lindy’s Stamp Gang’s embossing powder.

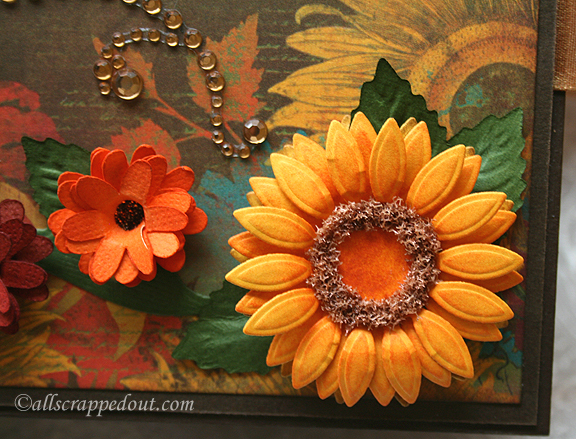
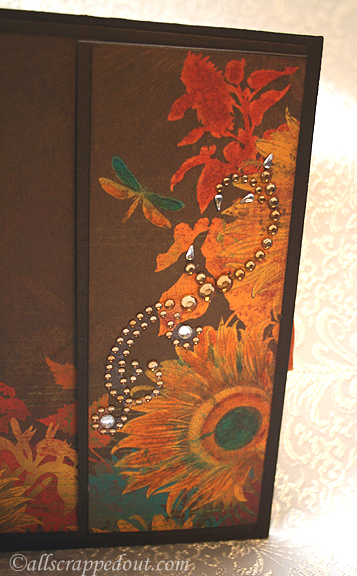
That is another of my discoveries — Lindy’s Stamp Gang‘s products.  I bought their Autumn Leaves Mega Set and I can’t say enough good things about it.  I love their sprays and embossing powders — they are gorgeous.  Look at the heat embossing close up — their powder not only embosses but also adds a shimmer, which you will see in the second picture.

Title

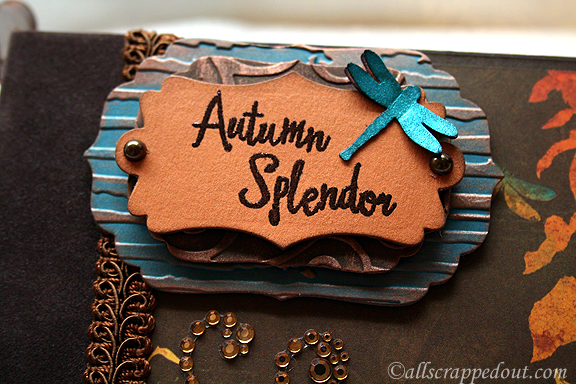
The dragonfly is from a Martha Stewart punch and I sprayed him with Lindy’s Starburst Spray and dried him with a heat gun.  I added a chocolate pearl to each side of the tag.

TitleEmboss

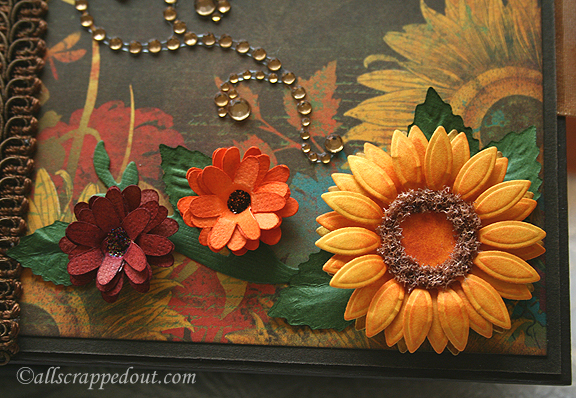
The rhinestone embellishment is from Michaels, from their Recollections brand.  I made the three flowers on the front, using Spellbinders Jewel Flowers and Flourishes for the sunflower.  The two smaller flowers are cut with my Cricut using the Flower Shoppe cartridge.  I added Stickles to the centers of the small flowers and Flower Soft to the center of the sunflower.

Flowers 

Flowers2

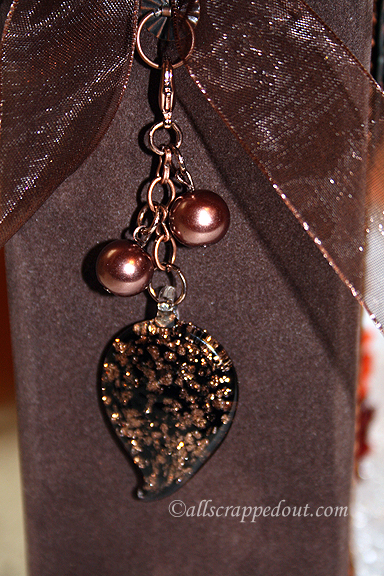
On the spine I hung a charm on a Tim Holtz ring fastener that I made with supplies I picked up at Joann’s. This was my first time making a charm — and I love the way it turned out.

Spine

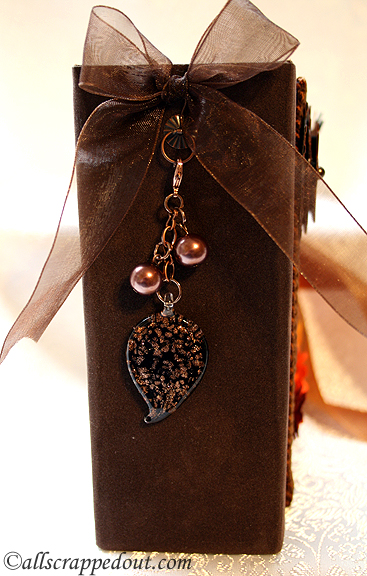
The pendant is glass and it reminded me of a leaf shape — so I figured it would go well with the album.

Charm

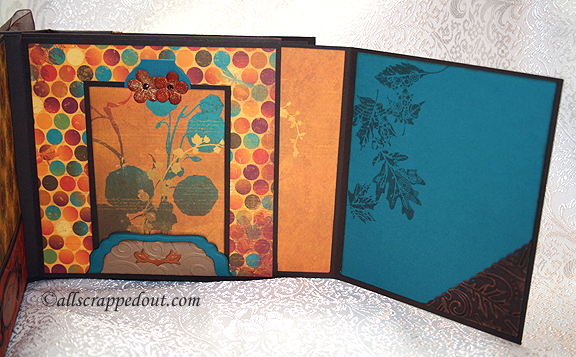
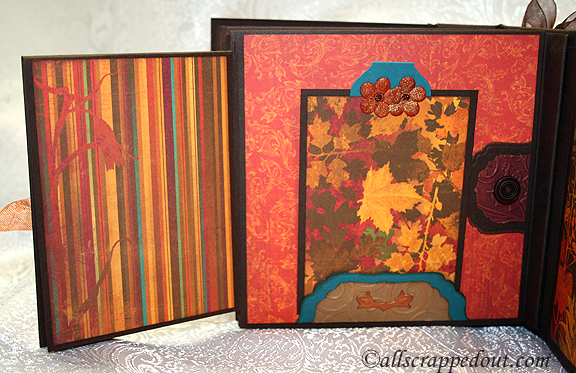
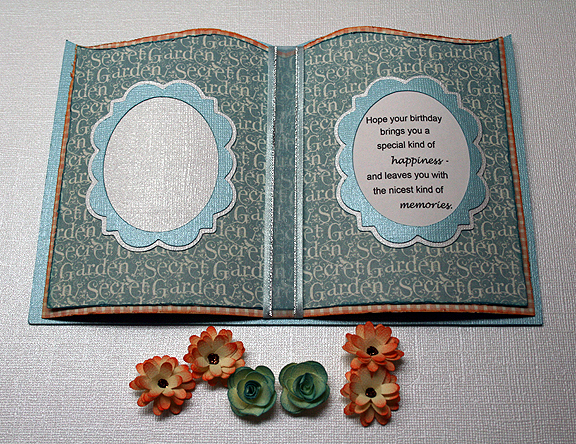
OK, let’s look inside the album.  Here are pages 1 and 2.

1-2

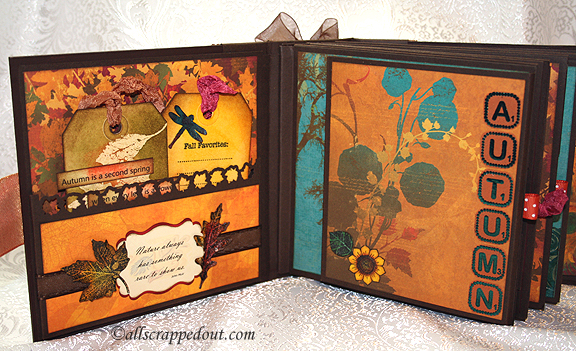
The first page has a pocket and I used a Martha Stewart border punch on it.   There is also ribbon running under the sentiment.

1

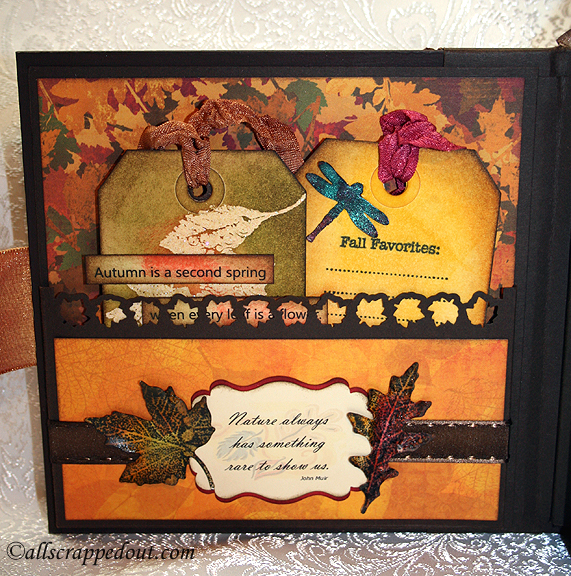
The sentiment is a graphic I got from the Internet and cut out with a EK Success punch.  I made the leaves using a Cuttlebug die.  I found this video on making leaves and they were really easy to do.  She uses the Tim Holtz Tattered Leaves die for her leaves, but I found them to be too large for what I wanted.  The Cuttlebug die leaves were just the right size.  The leaf on the right has Crackle Accents on top of it and the leaf on the left has matte medium coating it.

1Verse

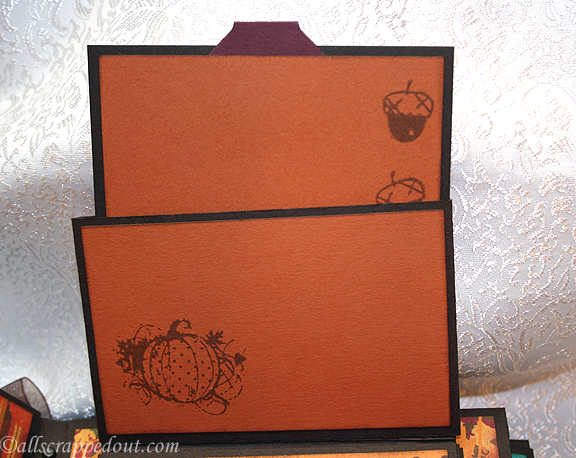
I made two tags to sit inside the pocket, using Distress Ink, stamping, heat embossing , and seam binding ribbon to create them.  The ribbon is colored with Lindy’s sprays.  

1Tags

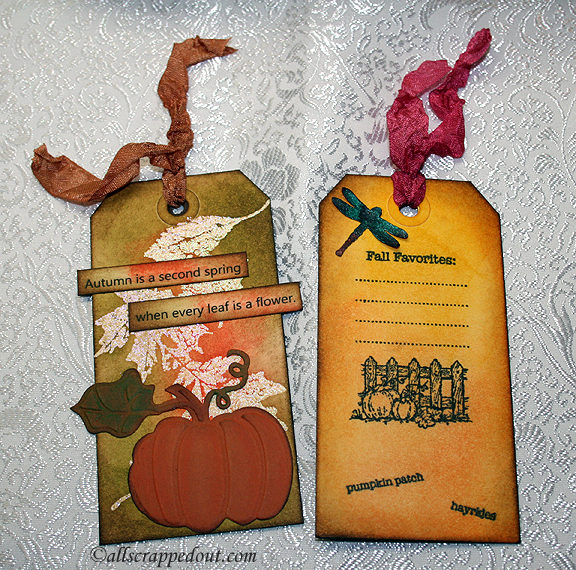
The pumpkin is from a Cuttlebug Cut and Emboss die, the sentiment is computer generated,  and there is another dragonfly from the Martha Stewart punch.  I kept the backs simple.

1TagsBack

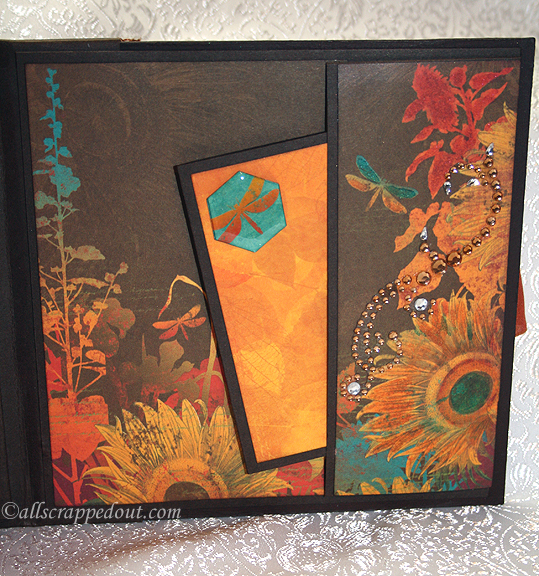
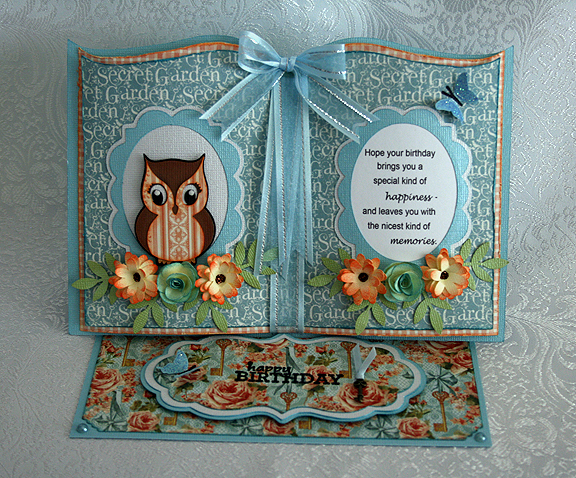
Page 2 is an interactive page, folding up and closing with a small magnet.  I used Basic Grey magnetic snaps throughout the mini.   The Scrabble letters are from a Whimsy stamp (Spell It Out), heat embossed with Lindy’s embossing powder.  The sunflower is from a Heartfelt Creations stamp, colored with Copics and cut out.

2

This is page 2, partially open, revealing a tag inside.  The flowers are Recollection from Michaels, sprayed with Lindy’s Starburst Spray and topped with Stickles in the centers.  The pocket that holds the tag is a label shape from Spellbinders, cut in half.  The rectangle on the mat at the right is attached only at the bottom and right hand side to create a pocket to slip a photo in.

2Open1

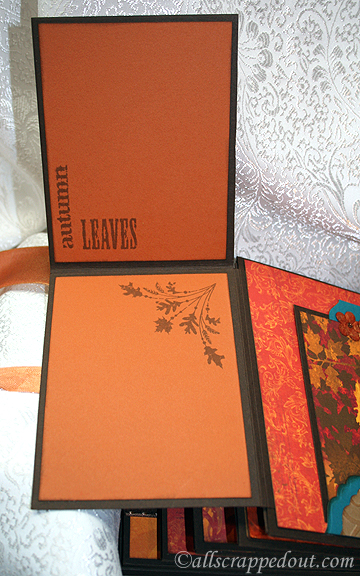
I learned so much making this mini — like how to make tabs for tags using the We R Memory Keepers Envelope Punch Board.  I watched this video.

2Tag

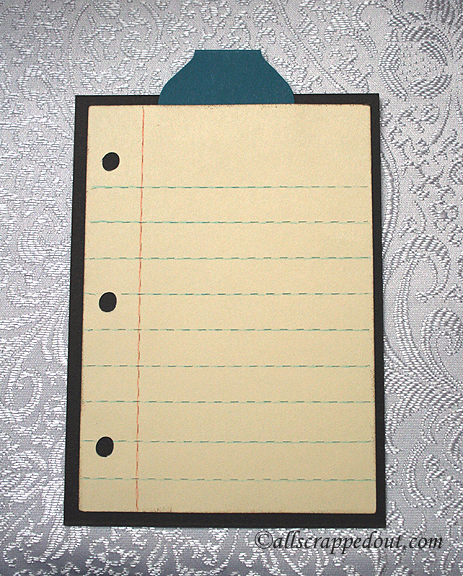
I made the backs of all the tags the same — I created a little spot for journaling.  I used the Cricut cartridge Simply Charmed for the notebook paper, using colored pencils and a ruler to go over the score lines.

TagsBack

This is page 2, fully opened.  I created corners by cutting a square in half and embossing them with Darice’s Fall Leaf folder. The stamps I used throughout the album are either Close To My Heart, Inkadinkado, or from Michaels $1 bin.

2Open

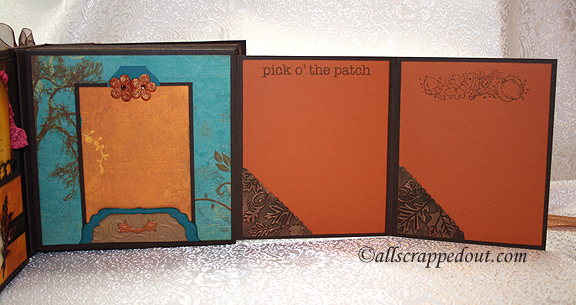
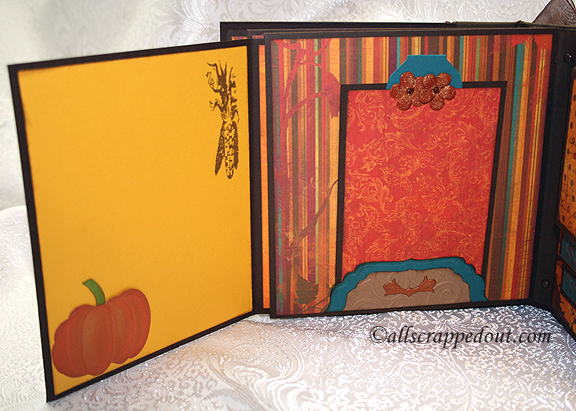
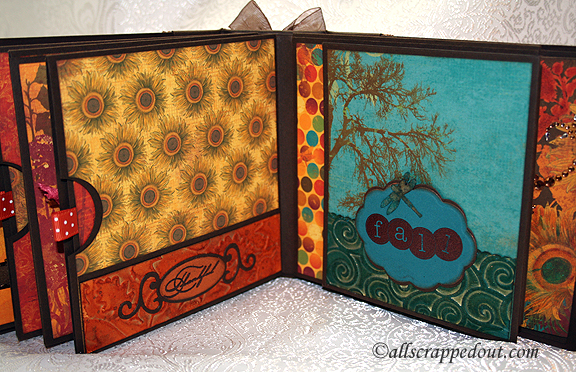
Next up are pages 3 and 4.

3-4

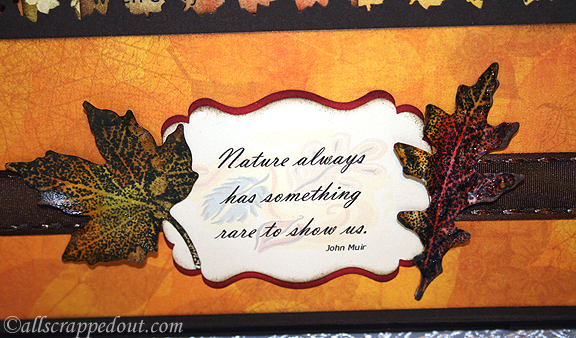
The leaf is from a Spellbinders die and the sentiment is heat embossed.  The square the leaf is on is only glued at the bottom and left hand edge to the page — to create another pocket.  There is a mat that pulls out with a ribbon tab.

3

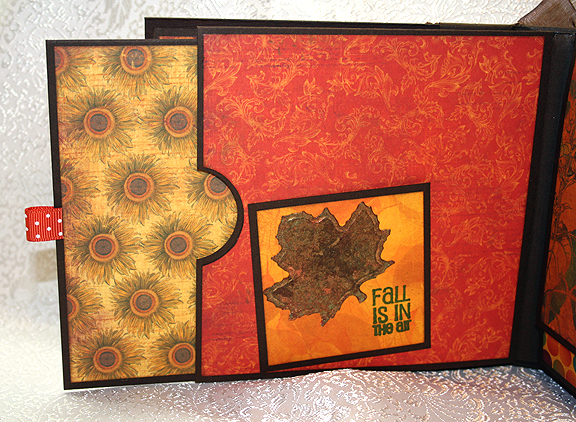
The mat is good sized.  This is the back, which I stamped with a Close To My Heart Stamp.  I used Memento Rich Cocoa Ink for the stamps that aren’t heat embossed.

3Mat2

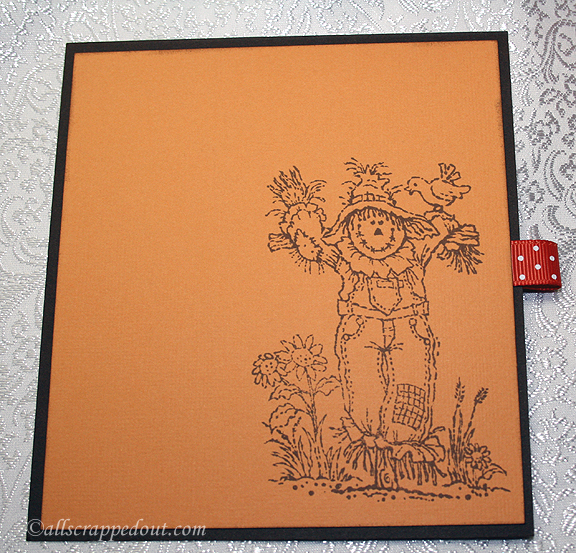
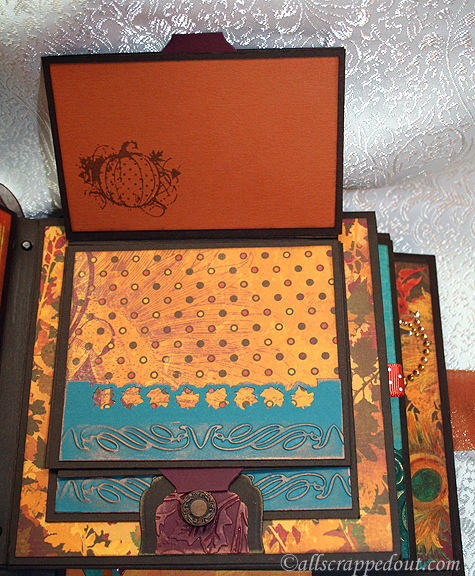
Page 4 is another interactive page.   The title is from the Simply Scarecrows Cricut cartridge and sprayed with Lindy’s Starburst sprays.  The small leaves are from a Martha Stewart punch.  The ribbon opener features a brad from the BoBunny Forever Fall collection and closes with a magnet.

4

And here’s what it looks like open.

4Open

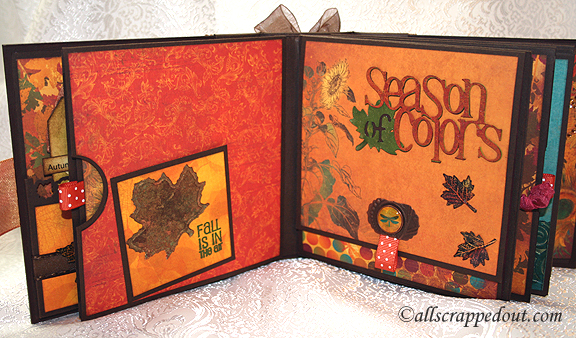
Now were moving on to pages 5 and 6.

5-6

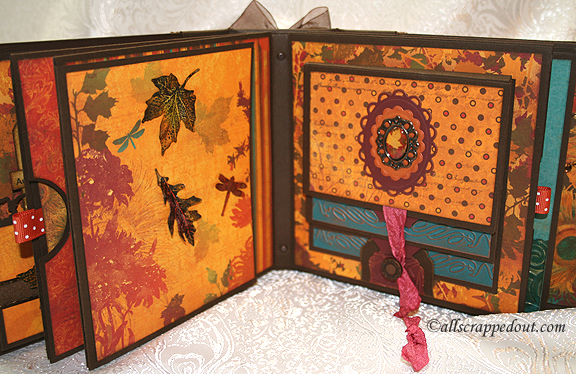
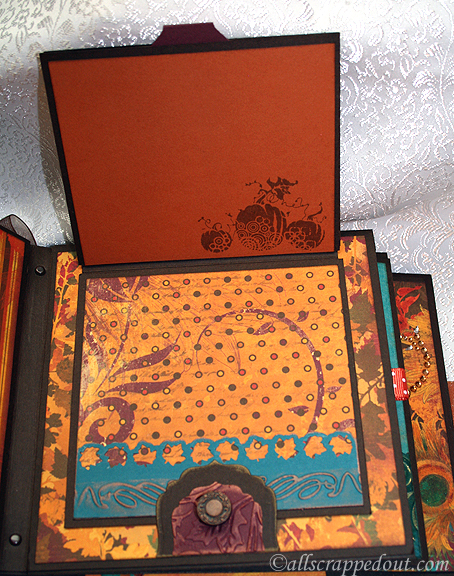
Page 5 has a mat that pulls out of a pocket and folds over, forming the front.  It is held in place with a magnet.  I kept the front simple, adding a couple of leaves and another dragonfly.

5

This is page 5 open.  There is a tag inside.  The pumpkin on the mat is from the same Cuttlebug Cut and Emboss die that is on the tag in the pocket on page 1, with the leaf cut off.  It is attached only at the bottom and left side, so a photo can slip inside.

5Open

Two pictures of the mat, front and back.

5Mat


5Mat2

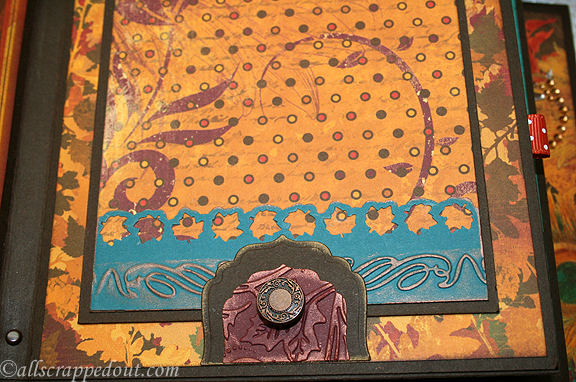
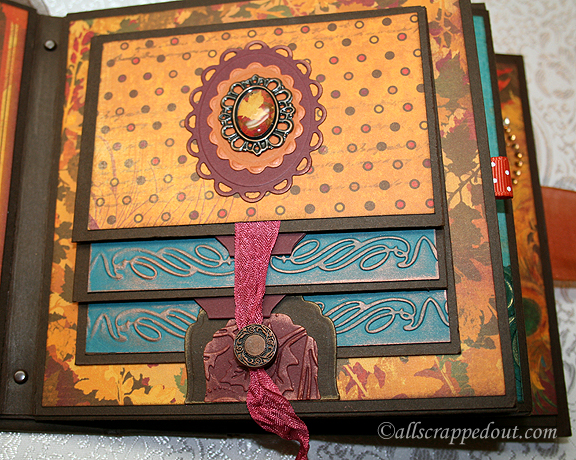
Page 6 has a waterfall feature.   The BoBunny charm sits on two Spellbinders ovals.  The brad is also from the Forever Fall collection, using dyed seam binding to wrap around it as a closure.

6

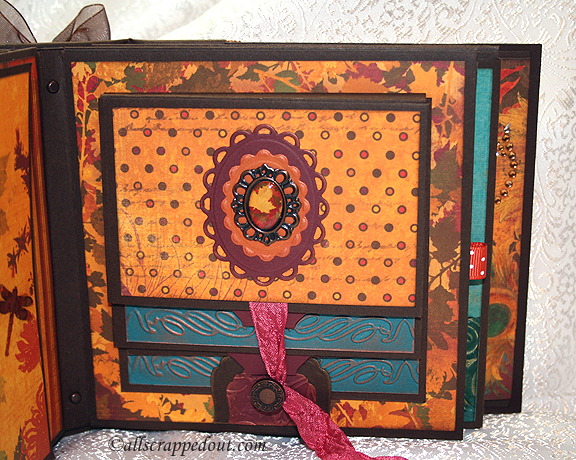
Each layer of the waterfall has an embossed trim strip at the bottom and a pocket with a tag at the top.  This is the uppermost layer.

6WF

Here is the tag, partially pulled out.

6WF2

The second layer of the waterfall.

6WF3

This is a close-up of the brad.  I again used the Martha Stewart border punch for the leaf border.

6Brad

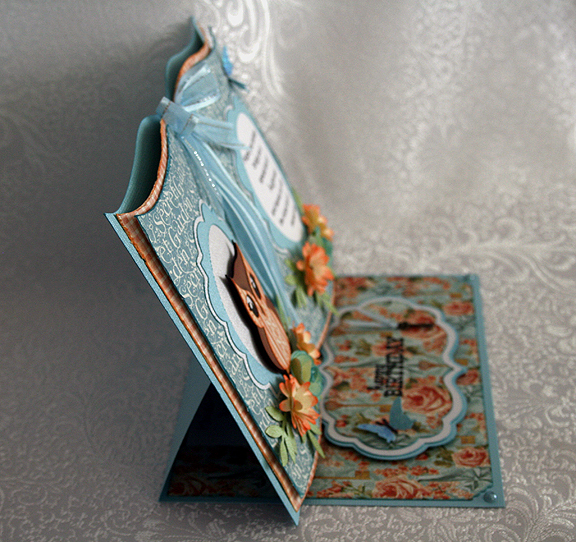
This shows how the waterfall closes.  You will also notice two brads in the spine of my album.  Cathy’s binding tutorial shows how to add strength to your binding system by not only taping it to your spine, but by adding brads.

6Closed

We’re getting near the end.  Here are pages 7 and 8.

7-8

Page 7 has a pocket at the bottom.  The label is a Spellbinders die and the sentiment is heat embossed.  There is another pull out mat in the pocket on this page.

7Open

Page 8 features a mat that folds around to the front and is held in place with a magnet.  There is a pocket at the bottom and the curved oval shape (a Spellbinders die) is attached at the bottom to the pocket only.  The embossing is from the Cuttlebug Divine Swirls folder and is highlighted with gold metallic ink.  And there is one more of those little dragonflies on this page.

8

This picture again shows how wonderful Lindy’s Stamp Gang products are — look at all that sparkle.  I used more than one color on the dragonfly.

8Emboss

This is page 8 with the mat partially out.

8Open2

And we’re to the last of the pages, pages 9 and 10.

9-10

Page 9 is a fun interactive page.  It has a brad and seam binding closure.

9

The sentiment is attached at the lower and left edges only, forming a pocket.  The small leaves are the negative cuts from the Martha Stewart border punch, sprayed with Starburst Spray.

9Verse

Page 9 opens to reveal another tag.

9Open

The left side of the page then opens up to reveal two more spots for photos.

9Flap

Page 10 is the inside of the back cover.  It has a pocket at the right hand side with a folded photo mat tucked inside.

10

I again used some Recollection brand rhinestones on the pocket.

10Rhinestones

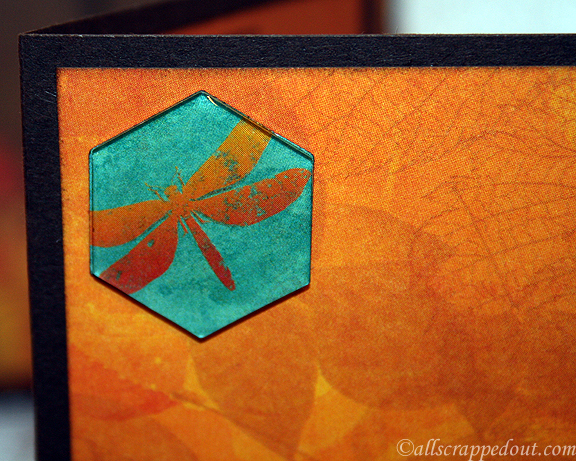
The photo mat features a hexagon made with the BoBunny paper using an Epiphany Crafts tool and  bubble cap.

10Mat3

How cool is that hexagon?

10Epiphany

This is the inside of the mat.

10MatInside

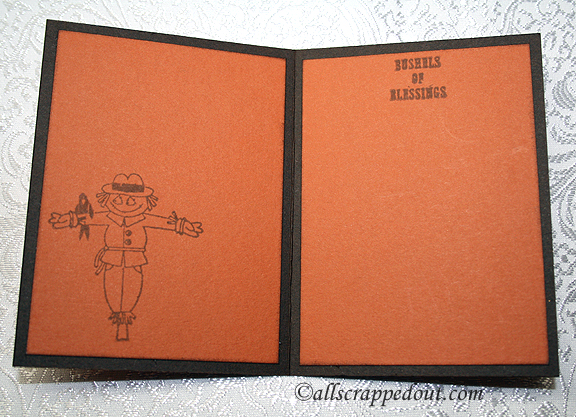
And, finally, we are to the back cover of the album.

Back

Thank you for taking a “tour” of my mini album.  And I want to share my last discovery — I discovered that I love to make mini albums.  I am already planning my next one.

Front


  • BoBunny Forever Fall Collection
  • Cricut cartridges:  Flower Shoppe, Simply Charmed, Simply Scarecrows
  • Cuttlebug:  Divine Swirls folder, Distressed Stripes folder,  Fall Leaves die, Cut and Emboss Pumpkin Spice
  • Spellbinders:  Labels Four, Grommet Tags, Jewel Flowers and Flourishes
  • Lindy’s Stamp Gang embossing powder and Starburst Sprays
  • We R Memory Keepers Envelope Punch Board
  • Martha Stewart punches
  • Recollections rhinestones
  • Stickles
  • Flower Soft

Open Book Easel Card


I made this card a while ago to send to a lovely lady on the Cricut Circle Message Board who was celebrating her 65th birthday.  I wanted to create a special card for her and first set out to make one using a Bookatrix Board.  I picked one up on eBay a long time ago and have yet to use it.  It’s basically an embossing board and you emboss the edges of the pages for the book and then cut them out by hand.

As I sat reviewing videos on YouTube on how to use the Bookatrix Board, I couldn’t help but wonder why I couldn’t do something similar with my Cricut and not have to cut everything by hand.   So this is my attempt at “Cricut-izing” a Bookatrix card. And I have to say I am very happy with how it turned out.

Thumb

The solid cardstock is Bazzill and the printed papers are all from Graphic 45’s Secret Garden collection.  And because I want to remember how I made this card, I am posting a little tutorial.

Front4 

The book is from the Summer Celebrations Cricut cartridge and is the card feature.  I put it on my mat in Cricut Craft Room (CCR) and made the measurements 8″ wide by 5.5″ high.  I took two lower case “v”s from Cricut Craft Room Basics, turned them upside down and welded one into each upper corner to hide the notches that are in this particular cut.  I also hid the score marks that are in the center of the book.  This is layer one (the back layer on the card) — I guess you would call it the cover.

Next is the middle layer.  I copied and pasted the first (cover) layer onto another mat and made it 7.75″ wide by 5.25″ high.  I did the top (third) layer the same and it measures 7.5″ wide by 5″ high.  I cut out all three of the layers.

I laid the top and middle layers (the pages) on my scoreboard along the width and found the center.  Then I scored a line 1/4″ on both the left and right side of center.  This enables you to fold the pages up slightly and have them sit away from the cover. It is also the area that you will be gluing to attach the layers together.  I distressed the edges of the pages only (the middle and top layer) and then inked them.  I took a dowel about 1” in diameter (from Lowe’s) and curled the pages under, curling one layer at a time.

Dowel

The base for the easel card is a piece of solid cardstock that measures 7″ wide by 10″ high.  Lay the 10″ side on a scoreboard and score at 2 1/2″ and at 5″.  It should look like this unfolded.

BaseUnfolded

And here is how it looks folded.

BaseFolded2

Cut the remaining pieces.  The frames on the pages (for the owl and verse) are from Elegant Edges and cut at 3″.  The label where I heat embossed “Happy Birthday” is from Cricut Craft Room Basics and I fiddled with the dimensions to get something that would fit in the area I had to work with on the base of the card.  The bottom layer measures 5″ wide by 2.75″ high.  The middle layer is 4.75″ wide by 2.5″ high.  And the top layer is 4.5″ wide by 2.25″ high.

The mat for the easel card base is 6 3/4″ wide by 4 3/4″ wide.  I used a corner punch on the front two edges.  This is what your pieces should look like.

Pieces

To assemble the card, I first attached the book cover (layer one) to the easel base.  I centered it across the width and had the bottom edge of the book even with the edge of the base.

Adhere the middle and top layer together, putting the adhesive in the 1/2″ center area created by the two score marks. Before attaching the pages to the cover, lay ribbon down the middle and attach it on the back of the pages at the top and bottom. Adhere the pages to the book cover in the center only.

Assemble the frames, using whatever cuts/designs you wish in the middle.   I used the dowel to curve the frames just a little so they would conform to the pages.  The computer-printed verse is a layer of the frame.  I adhered the frames to the pages before adding the owl.  I used the owl from Disney’s Happily Ever After, cut at  2″, and attached it with foam dots.

The daisies are from the Flower Shoppe, cut at 1″.  The roses are from the Paisley cartridge.  I posted a card here where I give the measurements and a link to a tutorial on how to make the roses.  Both are cut from cream-colored cardstock and I inked the edges with distress ink to add color.  The center of the daisies are Stickles.

This is what it looks like up to this point, lying flat and minus the owl.

Unassembled

The “Happy Birthday” label is popped up on foam dots and is what holds the easel card up.  I added a bow at the top of the ribbon in the center.

The greenery around the flowers is from a Martha Stewart punch, as are the butterflies.  I attached a little gold key charm on the “Happy Birthday” label, which you can barely see in this picture.  Oh, I also added a pearl to each corner in the front.

Front2

This is a side view of the card, so you can see how it stands.

Side

And this is what the completed card looked like folded flat.

FoldedFlat

Because my card would not fit into a standard envelope, I made a little box for it to sit in.

InBox


Boxed

At some point I will probably post this in Cricut’s Project Center and will attach the file.  In the meantime, I hope you enjoy this little tutorial.

Front5

  • Cricut cartridges used:  Cricut Craft Room Basics, Disney’s Happily Ever After, Elegant Edges, Flower Shoppe, Summer Celebrations
  • Bazzill cardstock
  • Graphic 45 Secret Garden collection
  • Martha Stewart punches
  • Ribbon
  • Key charm
  • Stickles

Cute Bee Card Created in Cricut Craft Room


I spent most of this weekend creating this card in Cricut Craft Room.  I found a cute paper piecing card from Treasure Box Designs and fell in love with it.  When I saw the card, I wondered if I could create it in Cricut Craft Room.  I thought the cute bee on the Create a Critter cartridge would be perfect for it.

When a challenge was posted on the Cricut Circle message board to create a project in conjunction with Circle Mania that was going on in Atlanta, I decided to get cutting.  I was so happy that my design for the base of the card worked the first time I cut it.  I’m not sure how to describe this card, maybe a gate-fold card with a pocket for a tag in the back.

Card

Open

I cut the card base from kraft cardstock.  This is what the piece looked like after cutting and scoring.  And maybe you can see why it took me so long to design this card — I was doing a lot of figuring!  I used George and Basic Shapes and Cricut Craft Room Basics to design the card base.

ScoredPiece

 After scoring, the first step was folding the edges of the pocket towards the center.

FoldPocket

 I printed all the patterned paper for this card on my Imagine.  I love that I can print the exact paper that I want when creating a project.  I used three cartridges for the paper, Bubble Gum Stripes for the gold circles, Blast Off for the green checks, and Hopscotch for the gold print on the tag.

I adhered the piece over the pocket, being careful to not glue the bottom.  I applied glue to the top and side edges only.

GluePaperPocket

Next I folded the bottom piece up towards the top.  I glued the center section of the bottom piece and attached it to the pocket.  Again, I only glued three sides — the top and two sides.  I did not glue the bottom.

FoldUpBottom

The next step was attaching the patterned paper to the panels on the card.  I cut two of the gold circles for the very front pieces and four of the green checked paper.  I attached a white piece of paper to the center panel.  It then looked like this.

GluePaperFront

I adhered two green checked pieces to the back of the panels, as they show on the front when the card is folded.  This is a view of the back of the card, showing the two panels.

GluePaperBackSide

And here is what it looks like from the front, with the panels folded up.

GluePaperNoTag

The tag was cut from Tags, Bags, Boxes & More.  The dimensions of the tag are roughly 3 3/8″ x 5 3/8″.  I adhered the white panel to the tag.  I also cut a piece of green checked paper for the top and rounded the upper corners with a punch.  I adhered that to the white panel on the tag, so the white didn’t show when the tag is in the pocket.

Tag

The fence posts are also from Tags, Bags, Boxes & More.  They are the pointed tag, just made skinny and with the hole hidden.  I cut four of the posts, with two of them being slightly taller.  Those I adhered to the center front of the card.  I ran the fence posts through the Cuttlebug using the Distressed Stripes folder before gluing them down.

GlueFence2

Next, I assembled the bee, flowers and letters.  The flowers were cut at 1″ using Flower Shoppe, using two layers for each flower.  I inked the edges and curled up the petals on the top layers.  I ran some twine through buttons and glued them to the center of the flowers.

The bee was cut at 4″ using Create a Critter.  I hid the facial features and used an oval that I made using Cricut Craft Room Basics (I squashed a circle until I got the shape I wanted) for his nose.  For his eyes, I printed out a free cut file I got at The Beary Scrap.  I don’t quite feel confident enough to try and paint my own eyes.  I did think about adding eyelashes but decided not to because I cut the bee’s face from textured cardstock.  I know my pen marks would have been all over heck and I would not have been happy.

The lettering was done using Craft Room Basics and Mickey Font.

BeeFlowers

All that was left was to adhere these pieces to the card.  I attached the bee first.   After he was adhered to the card, I glued the sentiment on and then the flowers.  My card looked like this.

GluingFlowers

To keep the front of the card closed, I tied a ribbon around it.

Card2

I’ll add a few more pictures, showing the card open and the tag part way out.  I am very happy with how it turned out — made me feel all the work was worth it.  I will cut this card base again — I can picture many uses for it.  And I will also make the bee again, but with a different sentiment.  My mom is no longer living and this is the first Mother’s Day card I have made since she passed away.  I will probably give it to a friend or relative.

GluingInside

TagPartOut

Card3

  • Cricut Craft Room
  • Cricut cartridges used:  Cricut Craft Room Basics, George and Basic Shapes, Create a Critter, Flower Shoppe, Mickey Font, Tags, Bags, Boxes & More
  • Cricut Imagine cartridges used:  Blast Off, Bubblegum Stripes, Hopscotch
  • Cuttlebug — Distressed Stripes folder
  • Ink
  • Chalk
  • Buttons
  • Ribbon

I’m going to add one last phot photo, which is a screen shot of my CCR file, to show what shapes I used to create the card base.  I hope this will help others wanting to re-create it.

ScreenShot