Paper Mache Quilt Shop

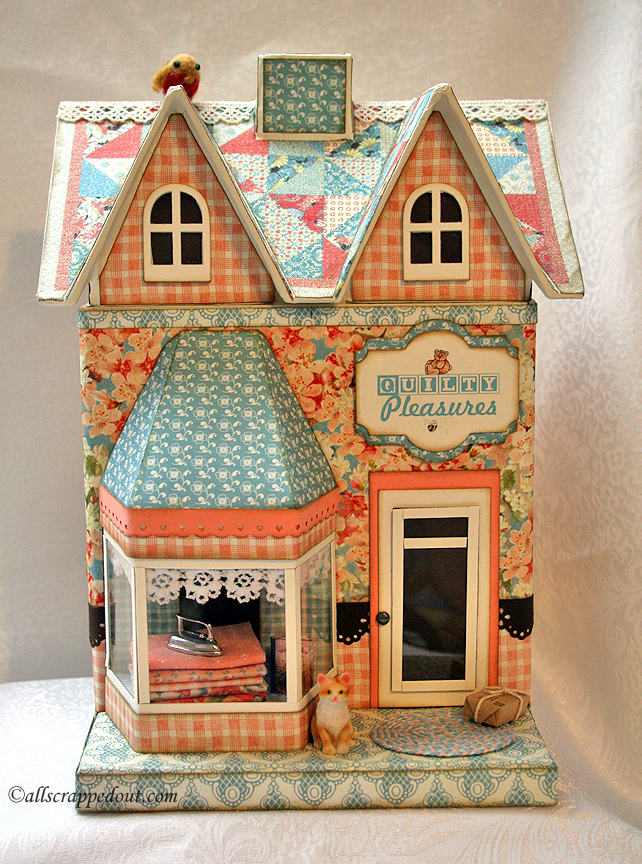
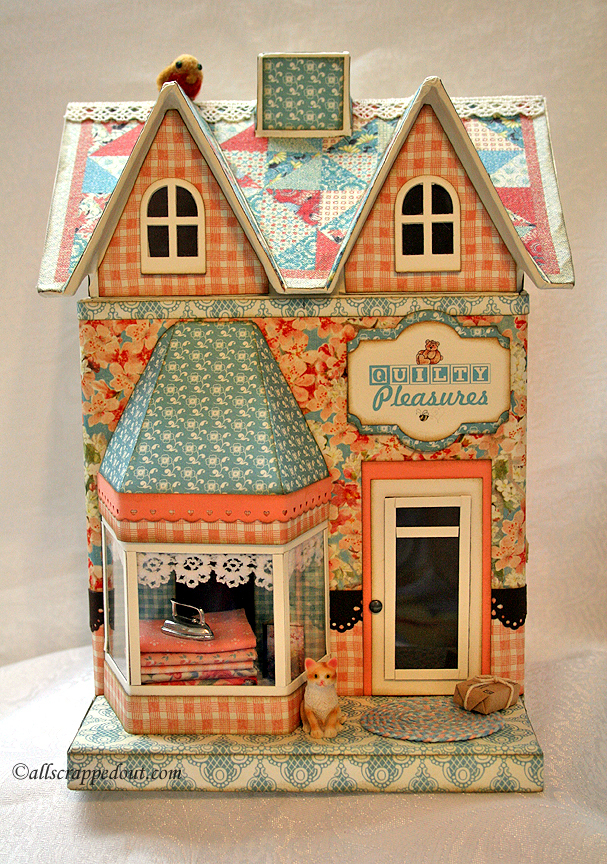
This is the quilt shop I made for a swap I participated in way back in August of 2014.  I altered a paper mache house from Hobby Lobby.  The porch and window I added in the front was made using a tutorial from Laura Denison Designs — I altered one of her Maple Street Shoppes (the Tea Shoppe) to fit my little house.

All the paper I used to cover it is from Graphic 45’s Secret Garden collection.  I used several doll house miniatures to add realism and I even added a little needle-felted robin on the roof.  I found the robin on etsy and he came all the way from Russia.

Front3

The sign is computer generated and mounted on a Spellbinders Label shape, but I don’t recall which one I used.  I named my shop Quilty Pleasures.  You can see some of the miniatures I used — the cat and package by the front door and the iron in the window. There is also a miniature quilt book in the window that I found on etsy — it even opens. In the next photo you can see the book a little better.  I made the bolts of fabric using fabric from my stash.

I used two different Martha Stewart border punches for trim on the shop.
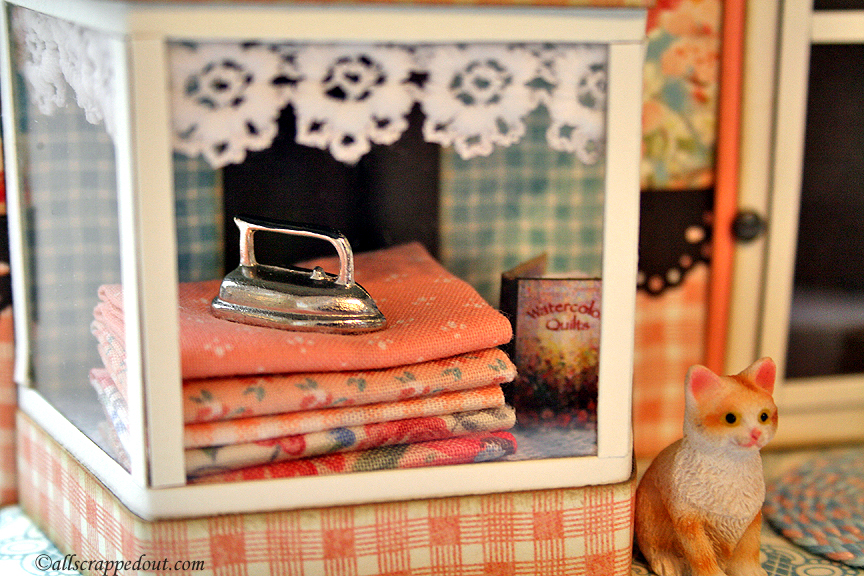
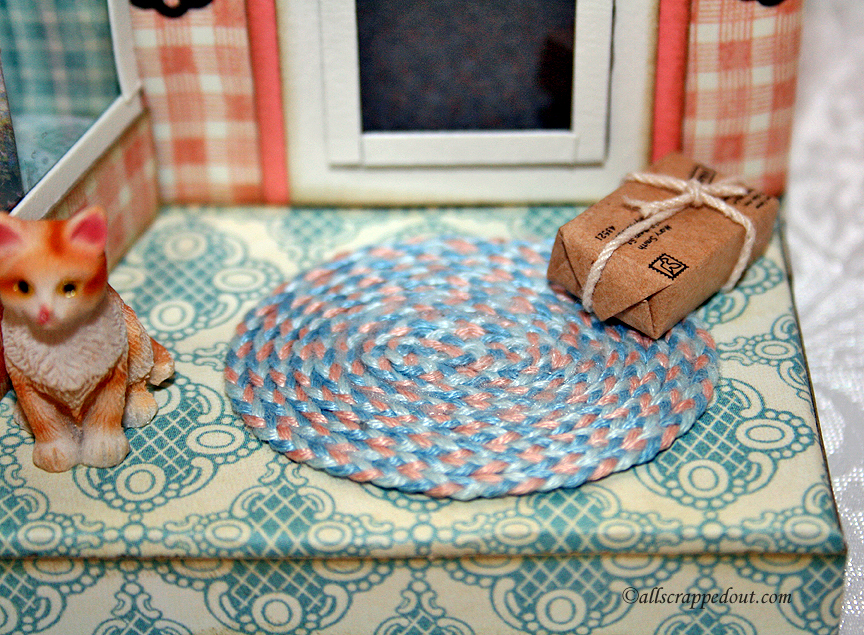
WindowCUI handmade the rug that is on the front porch – a tedious and time consuming undertaking.  I used strands of embroidery floss that I braided together.  Once I had a long strand I started forming it into the shape of the rug.  I cut an oval from cardstock and glued on the back of the rug.

Rug

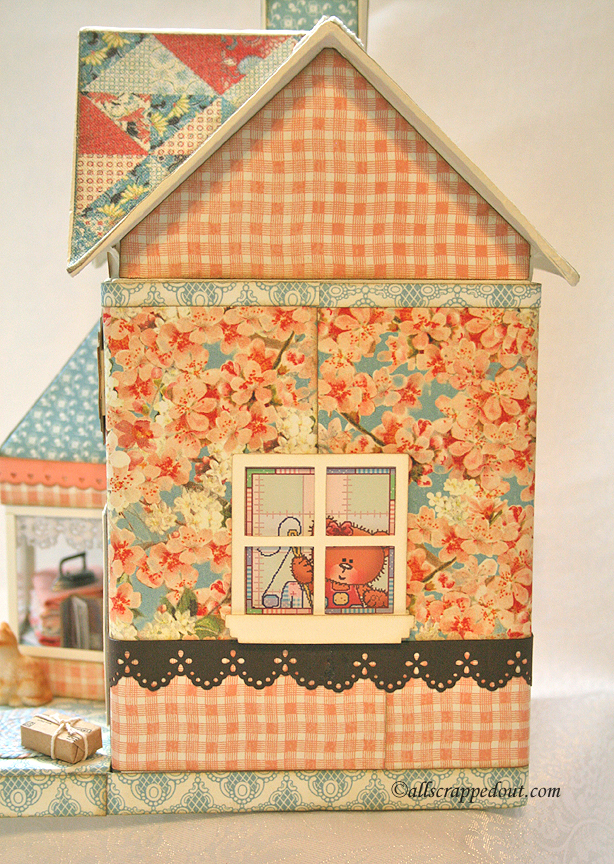
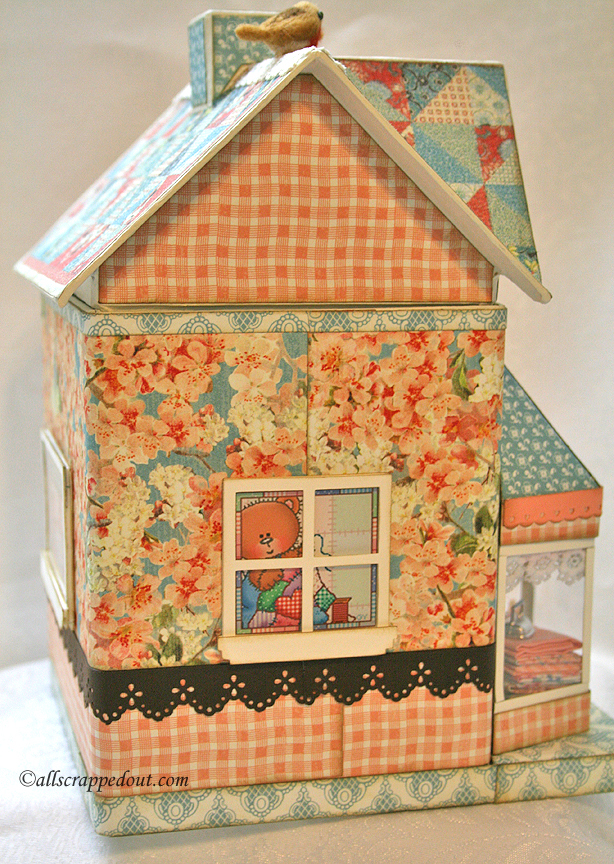
The next three pictures will be of the windows on the sides and the back of the shop.  I printed some cute bear quilting clipart I found on the internet and put them behind windows that I cut out with my Zing using a svg file.

RSide2

LSide

The roof is made from a piece of fabric that I printed a quilt design on using my Brother garment printer.

Back

The roof lifts off and I covered the inside of the house with paper – a mini album fits inside.

Inside

This was such a fun project and I love how the Secret Garden collection looks on the quilt shop.  I ended up making two mini albums, which I will post separately.

Front6

  • Paper mache house from Hobby Lobby
  • Graphic 45 Secret Garden collection
  • Laura Denison Designs Tea Shoppe pattern
  • Martha Stewart border punches
  • Spellbinders label die
  • Assorted purchased miniatures
  • Handmade braided rug
  • Scrap lace and fabric from my stash
Quilt Card With Graphic 45 Secret Garden

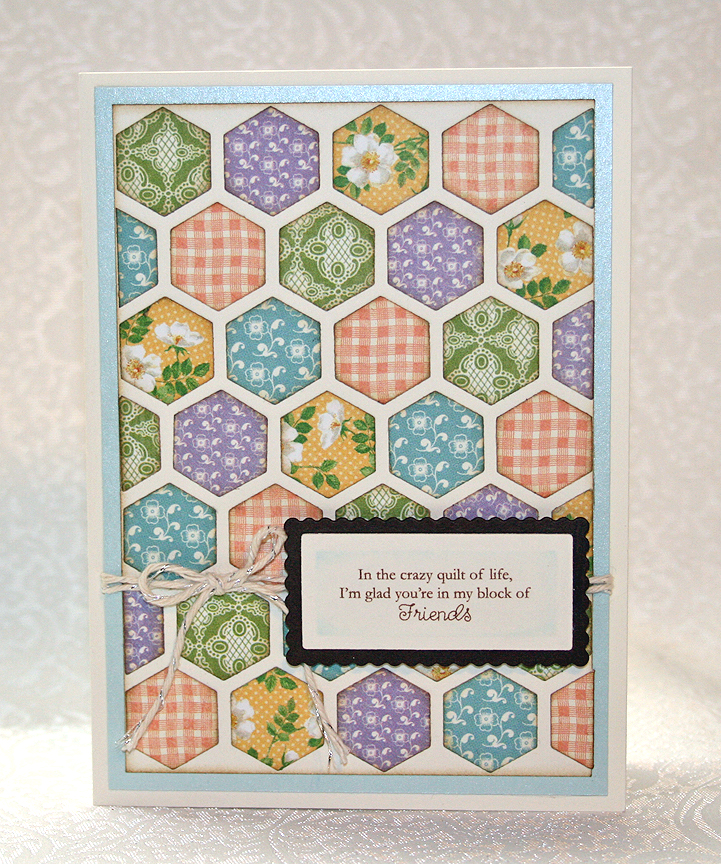
I am so late in adding this project to our blog.  Way back in August of 2014, I participated in a paper mache house swap on the Cricut Circle Message Board. I altered a paper mache house from Hobby Lobby, making it into a quilt shop. This is the card I made to go with my project.  The printed paper is all from Graphic 45’s Secret Garden collection and I used the hexagon cover plate die from Papertrey Ink to cut the quilt pattern. Card The sentiment was computer generated and the scalloped rectangle is a Spellbinders die.  I tied some baker’s twine towards the bottom.

  • Graphic 45 Secret Garden paper
  • Papertrey Ink hexagon cover plate die
  • Spellbinders scallop rectangle die

Birthday Shaker Card & Nugget Box

It took me about a year to break my Zing cutter out of its box and give it a try — and now I am kicking myself for waiting so long!  I love it — it is cutting paper that I had trouble cutting with my Expression.  The paper that gave me problems was usually textured.  I had some Bazzill that the Expression would refuse to cut — it looked like it tried to gum its way through.  So far the Zing has cut everything I’ve thrown at it.

What I am really loving is cutting svg files.  svgcuttingfiles.com has some of the cutest designs and I love that jadedblossom.com has coordinating stamps for many of the cut files.  For this project I used two cutting files and two different sets of stamps.

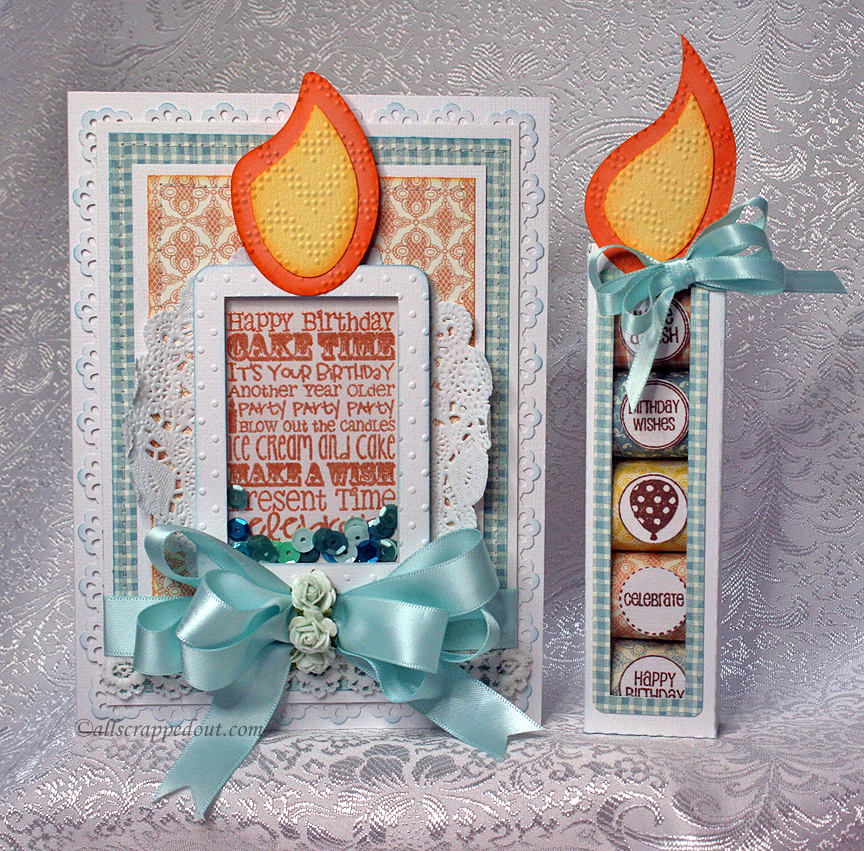
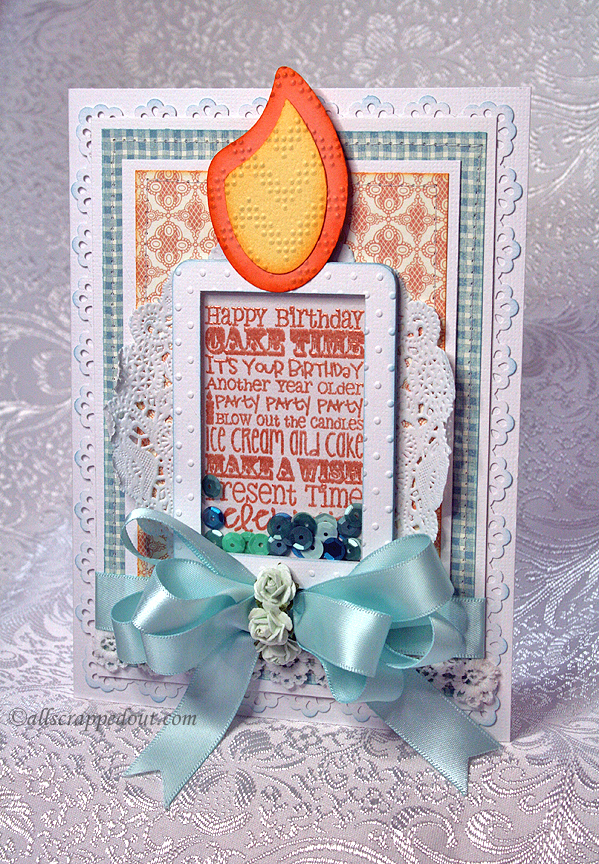
I made this birthday card and matching box that holds little Nugget candy bars for my niece.   I love shaker cards and when I saw the Party Shaker Tag file, I had to buy it.   I made the candle card — there are three other shakers in this set.  I used the Birthday Treat Tags stamps to heat emboss the design in the shaker.  Of course I used my favorite embossing powder, from Lindy’s Stamp Gang.   I think the color I used was Cleopatra’s Copper.

CardCandy6

The patterned paper is from the Secret Garden collection by Graphic 45.  I used a Martha Stewart punch around the page set called Vintage Floral.  I stitched around a couple of the mats, added some lace trim at the bottom, along with a satin bow made using one of my favorite tools, the Zutter Bow-it-All.  The roses are from Wild Orchid Crafts and the sequins in the shaker from Doodlebug Designs.

I used two Cuttlebug folders, Dotted Swiss and Charles (for the flames).

Card1

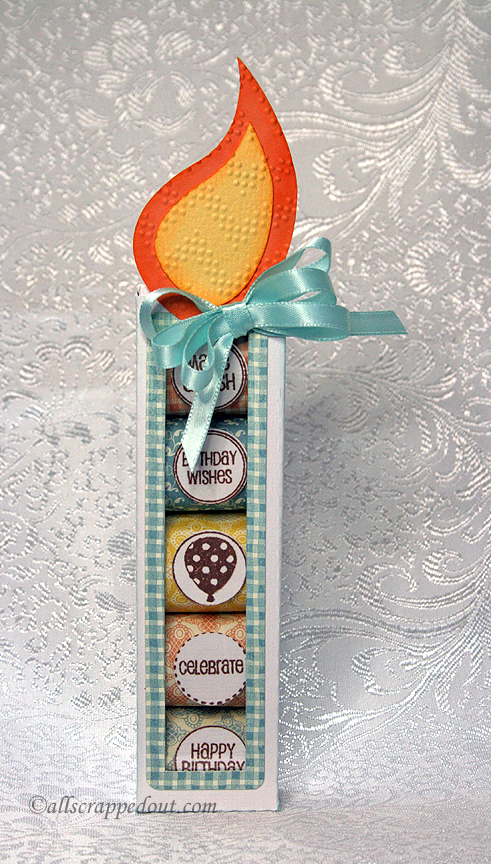
For the box, I used the Candle Nugget Box svg.  I wrapped each nugget and then topped it with a circle sentiment from the Birthday Candies stamp set.

Candy1This set was so much fun to make.

Valentine Mini Album and Card

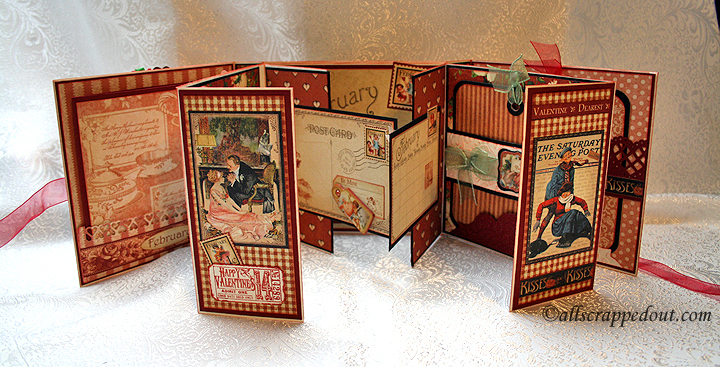
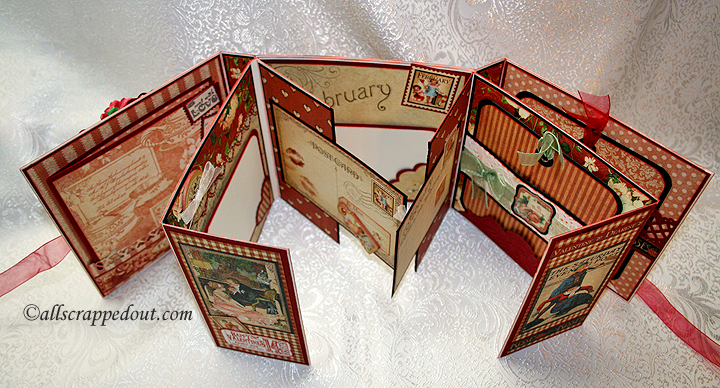
I’m finally getting around to posting pictures of the Valentine mini album and card I made for a swap I participated in on the Cricut Circle Message Board.  The card features an embroidery design I purchased from Embroidery Library that is made for cardstock.  The scalloped frame was cut with my Cricut using the Elegant Edges cartridge.

Card

I found a mini album on Graphic 45’s blog that I really liked.  It is made by Gloria Stengel and she calls it a flip album.  And lucky for me, there is a tutorial on how to make it.  I loved the papers she used, and since I had many of them on hand, my album is almost exactly like hers.  I had to change a few of the dimensions on the album because mine was turning out to be a bit too chunky.

Front

All the patterned papers are from Graphic 45, most from the Place in Time collection.  The pretty red print on the cover is from the Bird Song collection.  I love how you can combine their collections and they coordinate so well.

The roses were light pink and I sprayed them with Starburst spray from Lindy’s Stamp Gang to get the colors I wanted.  The shimmer shows up pretty well in the pictures.

1

The album has an organza ribbon closure.

2

The dark red lace doily was cut from a Spellbinders heart die.  

3

Here are two pictures that show an overview of the album.  It is an interesting album, with all its interactive pages.

Open

Open2

This is what it looks like when it is first opened.  The frame on the right is made with a Martha Stewart punch-around-the-page combo set.  I think it is called Cherish.  

5

The front pocket holds a photo mat.

6

This is with the first page flipped out.  The wings are from a Cuttlebug Embossing Plus die called Vintage Collage.  The heart borders are from Martha Stewart punches.  The scalloped frame under the wings is from a Spellbinders die.  

7

This is after you flip open the page with the wings.  Another scalloped frame from Spellbinders, the heart is from a Martha Stewart die and the key is from Graphic 45.  I think the “love” is also a Martha Stewart punch.  

8

And another flip:

9

Here is a gate fold that opens to the back of the album.

10

 And this what it looks like with the left gate open.

11

And here we are at the back of the album, with a photo mat held in place with a corner embellishment.

12

This was a fun album to assemble.


  • Graphic 45 paper and Ornate Metal Key
  • Cricut cartridge:  Elegant Edges
  • Spellbinders dies
  • Martha Stewart punches
  • Cuttlebug embossing folders and Vintage Collage die


CHA Winter 2014 Conference & Trade Show, Day One


Erin and I attended the opening day of the CHA Conference & Trade Show held in Anaheim, CA.  We arrived about an hour after it opened — we were a little late because Erin had to drive up from San Diego.  We stayed until about an hour before it closed and managed to walk a little over 1/3 of the show.  We will be back tomorrow when it opens.

Erin took a lot of pictures and I am sharing quite a few.  I would post more but I am just too tired and I need to get to bed so we can get up and do it all over again tomorrow.  We plan on going all four days.  So, here are some of the highlights from today.

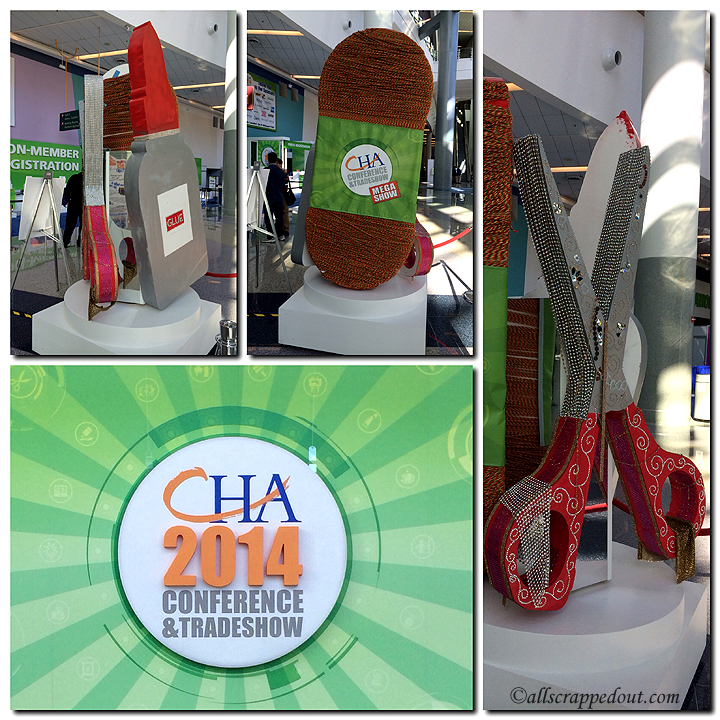
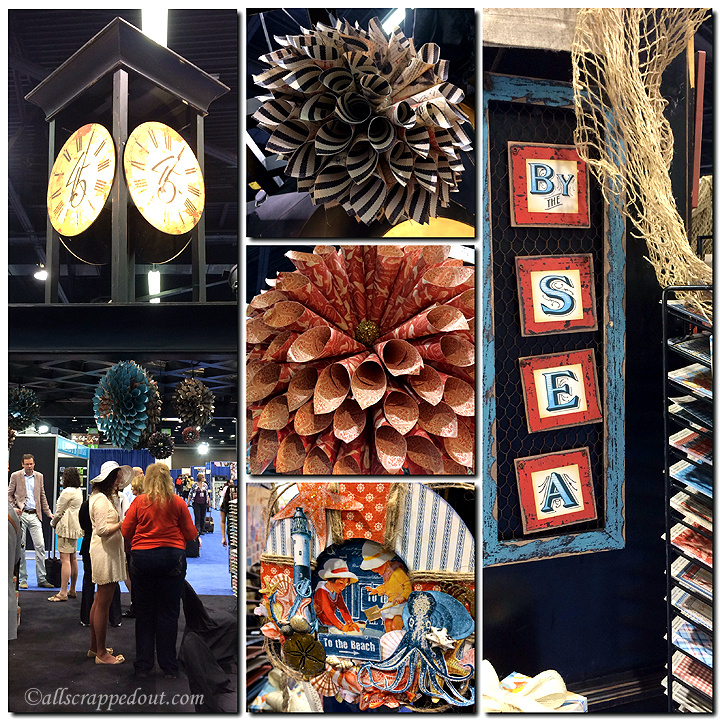
Some of the displays in the lobby.

Some of the displays in the lobby.


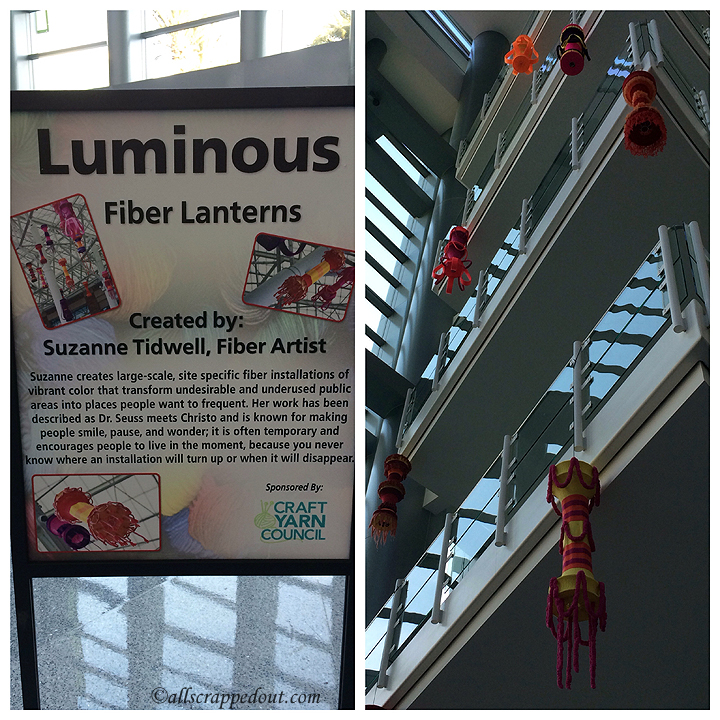
Lanterns hanging in the lobby.

Lanterns hanging in the lobby.


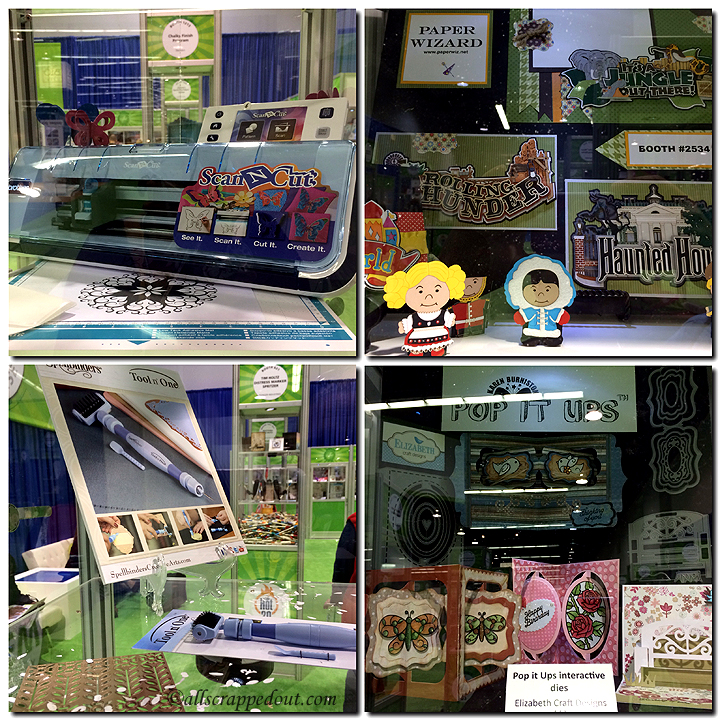
Brother's new Scan & Cut machine, laser die cuts, Pop-It-Up dies, and Spellbinders Tool In One (used to clean up those hard-to-get-out pieces from intricate dies).

In the New Showcase area: Brother’s new Scan & Cut machine, laser die cuts, Pop It Up dies, and Spellbinders Tool in One (to clean up those hard-to-get-out pieces from intricate dies).


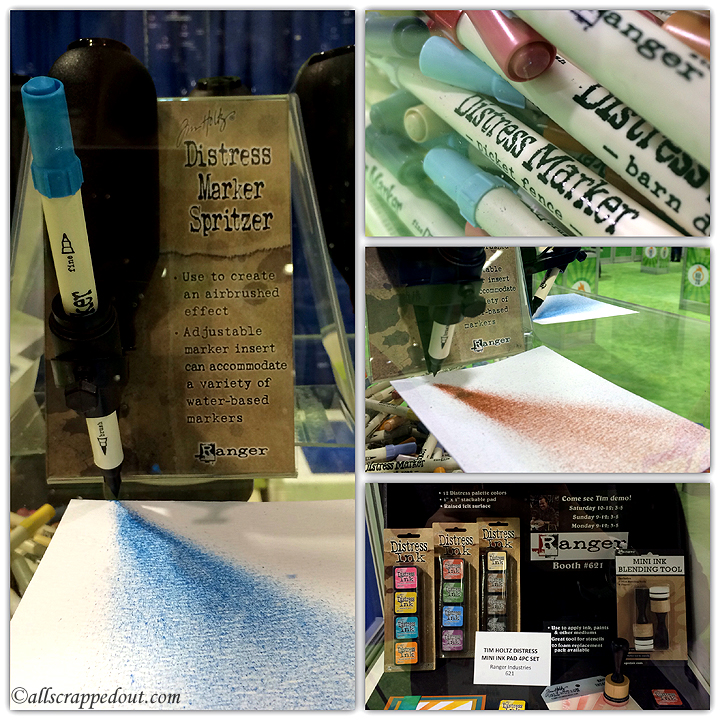
New Tim Holtz products - a Spritzer to use with Distress Markers and some mini Distress Inks and Ink Blending Tool.

New Tim Holtz products – a Spritzer to use with Distress Markers and some Mini Distress Inks and Ink Blending Tool.


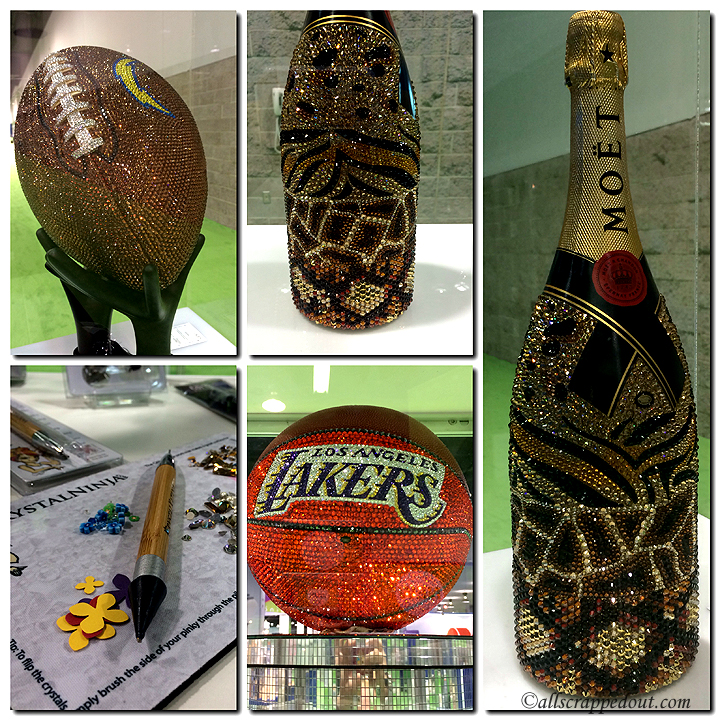
Crystals

Lots of bling at the show. Even Swarovski is there — we haven’t made it to the Swarovski Elements booth yet.


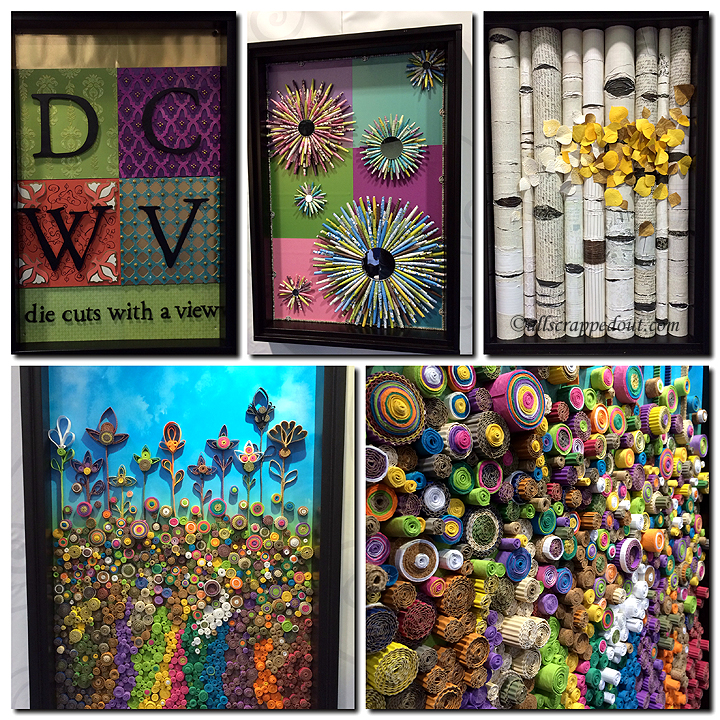
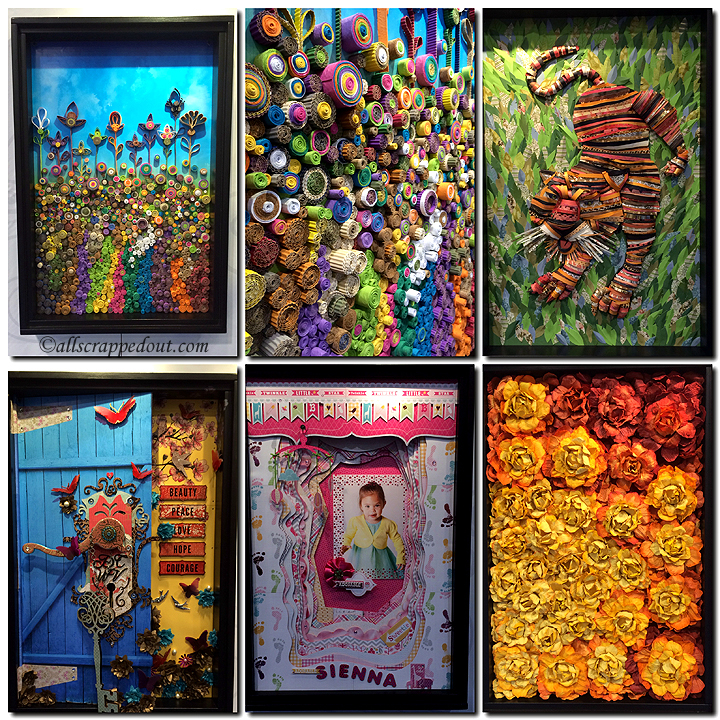
Die Cuts With a View always has fantastic displays.  This year their booth has walls and they have gorgeous framed paper art hanging on the sides.

Die Cuts With a View always has fantastic displays. This year their booth has walls and they have gorgeous framed paper art hanging on the outside.


More DCWV

More DCWV


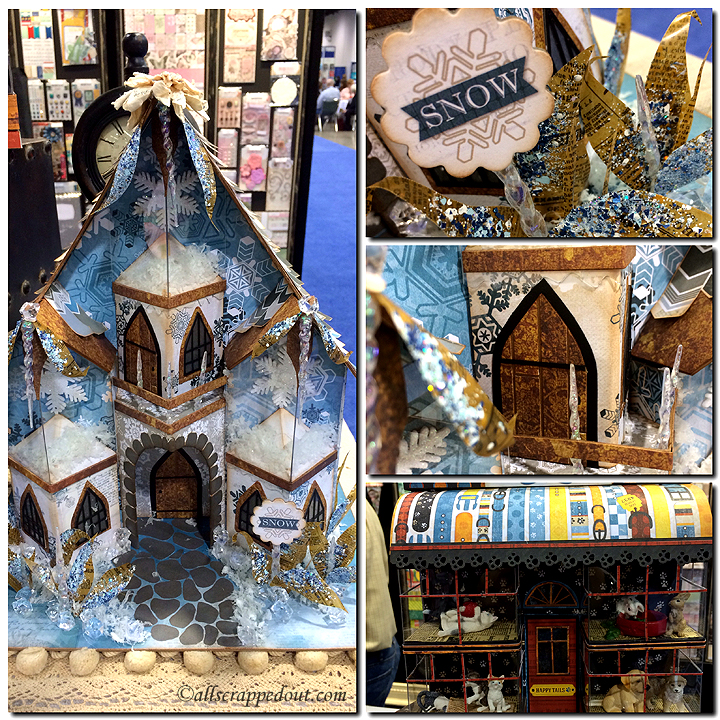
Bo Bunny's booth features two beautiful projects -- a Winter Fairy House and a the Happy Tails Pet Shoppe, both created by Laura Denison of Following the Paper Trail.

Bo Bunny’s booth features two beautiful projects — a Winter Fairy House and the Happy Tails Pet Shoppe, both created by Laura Denison of Following the Paper Trail.


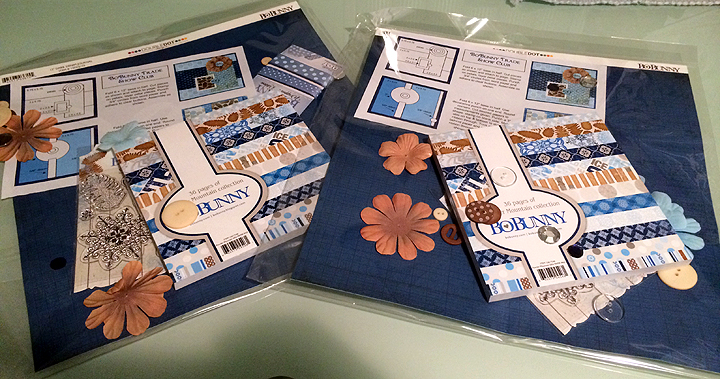
The kits Erin & I received at the Bo Bunny booth for giving them a business card.

The kits Erin & I received at the Bo Bunny booth for giving them a business card.


The Graphic 45 booth -- always a popular location.

The Graphic 45 booth — always a popular location.


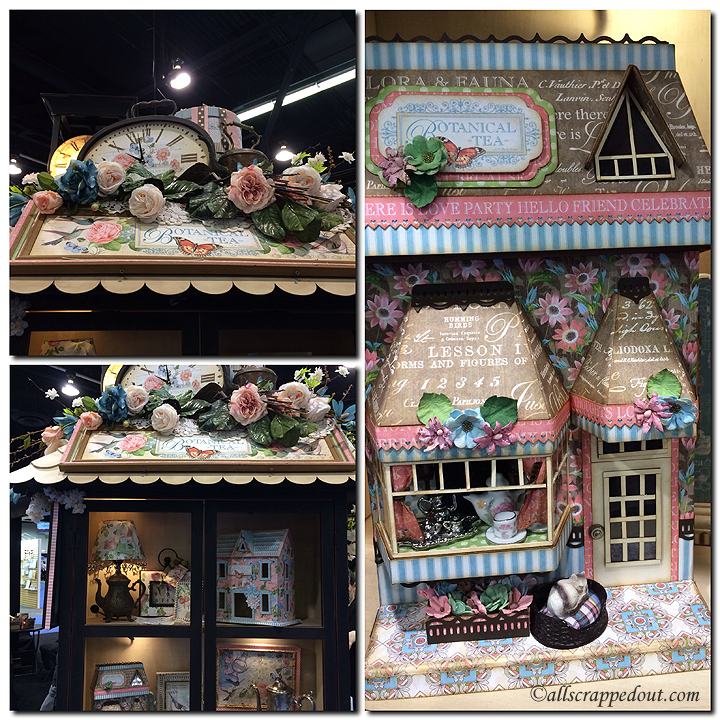
More Graphic 45.  The Tea Shoppe is gorgeous.  It was also created by Laura Denison of Following the Paper Trail.

More Graphic 45. The Tea Shoppe is gorgeous. It was also created by Laura Denison of Following the Paper Trail.

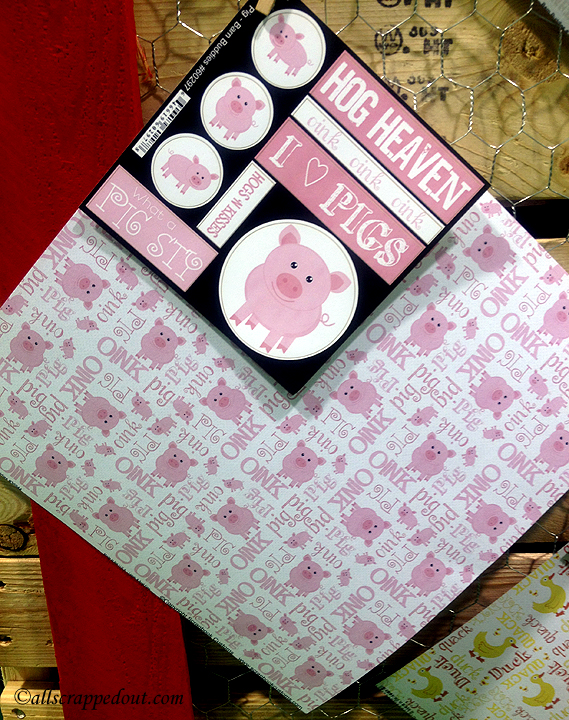
Cute paper and stickers from Scrapbook Customs.

Cute paper and stickers from Scrapbook Customs.


Open Book Easel Card


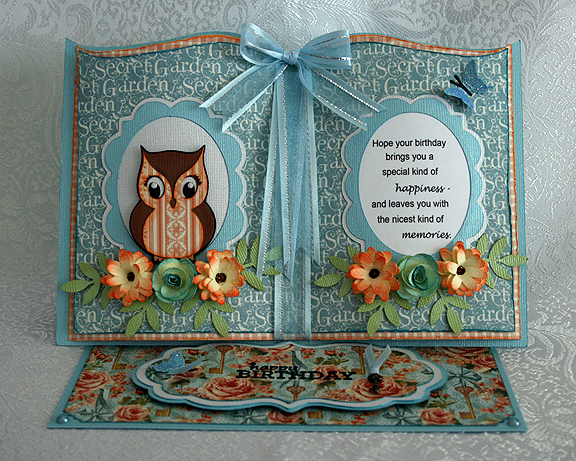
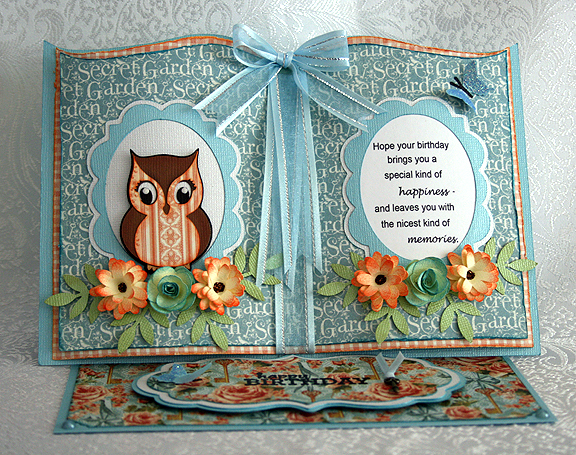
I made this card a while ago to send to a lovely lady on the Cricut Circle Message Board who was celebrating her 65th birthday.  I wanted to create a special card for her and first set out to make one using a Bookatrix Board.  I picked one up on eBay a long time ago and have yet to use it.  It’s basically an embossing board and you emboss the edges of the pages for the book and then cut them out by hand.

As I sat reviewing videos on YouTube on how to use the Bookatrix Board, I couldn’t help but wonder why I couldn’t do something similar with my Cricut and not have to cut everything by hand.   So this is my attempt at “Cricut-izing” a Bookatrix card. And I have to say I am very happy with how it turned out.

Thumb

The solid cardstock is Bazzill and the printed papers are all from Graphic 45’s Secret Garden collection.  And because I want to remember how I made this card, I am posting a little tutorial.

Front4 

The book is from the Summer Celebrations Cricut cartridge and is the card feature.  I put it on my mat in Cricut Craft Room (CCR) and made the measurements 8″ wide by 5.5″ high.  I took two lower case “v”s from Cricut Craft Room Basics, turned them upside down and welded one into each upper corner to hide the notches that are in this particular cut.  I also hid the score marks that are in the center of the book.  This is layer one (the back layer on the card) — I guess you would call it the cover.

Next is the middle layer.  I copied and pasted the first (cover) layer onto another mat and made it 7.75″ wide by 5.25″ high.  I did the top (third) layer the same and it measures 7.5″ wide by 5″ high.  I cut out all three of the layers.

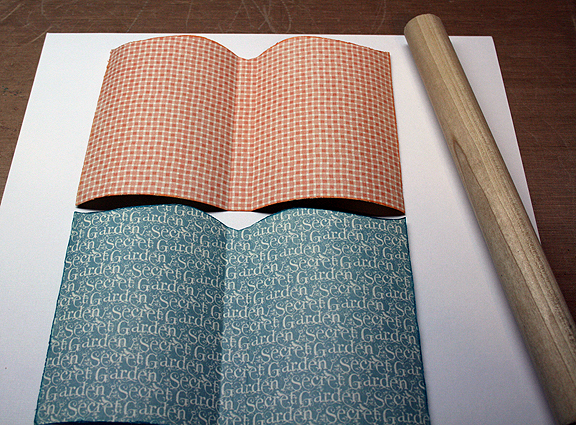
I laid the top and middle layers (the pages) on my scoreboard along the width and found the center.  Then I scored a line 1/4″ on both the left and right side of center.  This enables you to fold the pages up slightly and have them sit away from the cover. It is also the area that you will be gluing to attach the layers together.  I distressed the edges of the pages only (the middle and top layer) and then inked them.  I took a dowel about 1” in diameter (from Lowe’s) and curled the pages under, curling one layer at a time.

Dowel

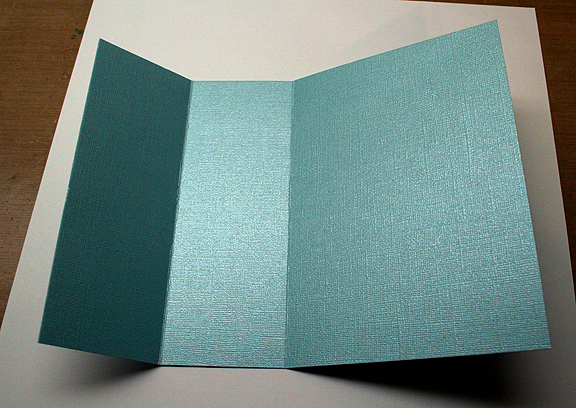
The base for the easel card is a piece of solid cardstock that measures 7″ wide by 10″ high.  Lay the 10″ side on a scoreboard and score at 2 1/2″ and at 5″.  It should look like this unfolded.

BaseUnfolded

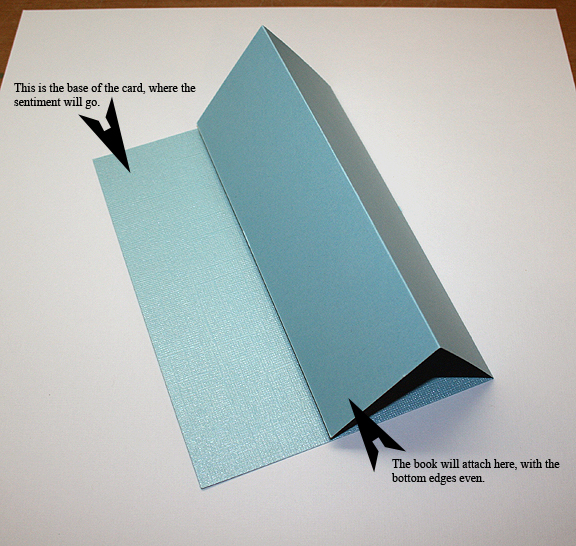
And here is how it looks folded.

BaseFolded2

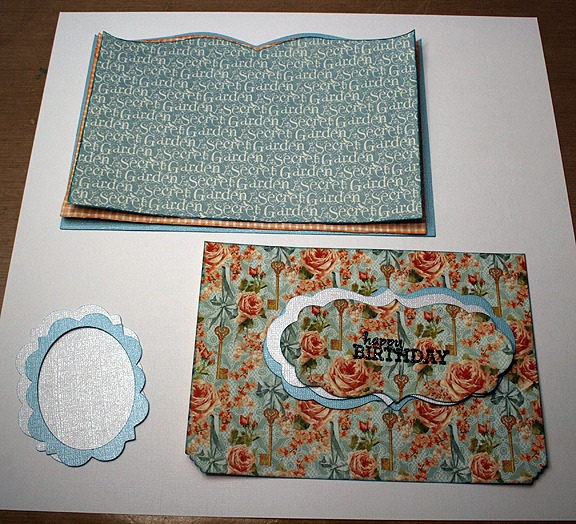
Cut the remaining pieces.  The frames on the pages (for the owl and verse) are from Elegant Edges and cut at 3″.  The label where I heat embossed “Happy Birthday” is from Cricut Craft Room Basics and I fiddled with the dimensions to get something that would fit in the area I had to work with on the base of the card.  The bottom layer measures 5″ wide by 2.75″ high.  The middle layer is 4.75″ wide by 2.5″ high.  And the top layer is 4.5″ wide by 2.25″ high.

The mat for the easel card base is 6 3/4″ wide by 4 3/4″ wide.  I used a corner punch on the front two edges.  This is what your pieces should look like.

Pieces

To assemble the card, I first attached the book cover (layer one) to the easel base.  I centered it across the width and had the bottom edge of the book even with the edge of the base.

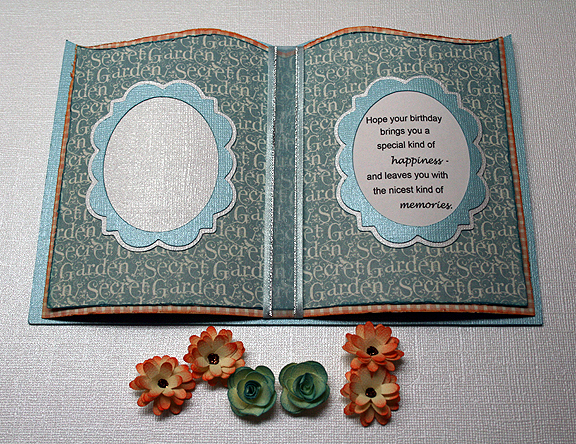
Adhere the middle and top layer together, putting the adhesive in the 1/2″ center area created by the two score marks. Before attaching the pages to the cover, lay ribbon down the middle and attach it on the back of the pages at the top and bottom. Adhere the pages to the book cover in the center only.

Assemble the frames, using whatever cuts/designs you wish in the middle.   I used the dowel to curve the frames just a little so they would conform to the pages.  The computer-printed verse is a layer of the frame.  I adhered the frames to the pages before adding the owl.  I used the owl from Disney’s Happily Ever After, cut at  2″, and attached it with foam dots.

The daisies are from the Flower Shoppe, cut at 1″.  The roses are from the Paisley cartridge.  I posted a card here where I give the measurements and a link to a tutorial on how to make the roses.  Both are cut from cream-colored cardstock and I inked the edges with distress ink to add color.  The center of the daisies are Stickles.

This is what it looks like up to this point, lying flat and minus the owl.

Unassembled

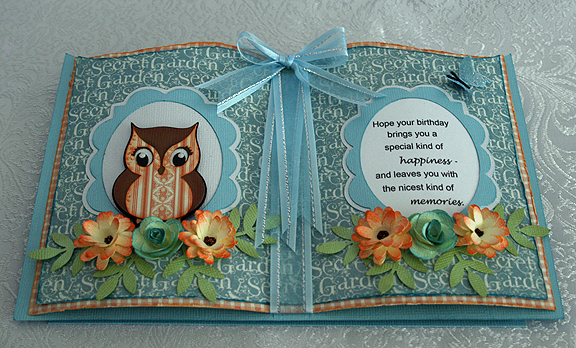
The “Happy Birthday” label is popped up on foam dots and is what holds the easel card up.  I added a bow at the top of the ribbon in the center.

The greenery around the flowers is from a Martha Stewart punch, as are the butterflies.  I attached a little gold key charm on the “Happy Birthday” label, which you can barely see in this picture.  Oh, I also added a pearl to each corner in the front.

Front2

This is a side view of the card, so you can see how it stands.

Side

And this is what the completed card looked like folded flat.

FoldedFlat

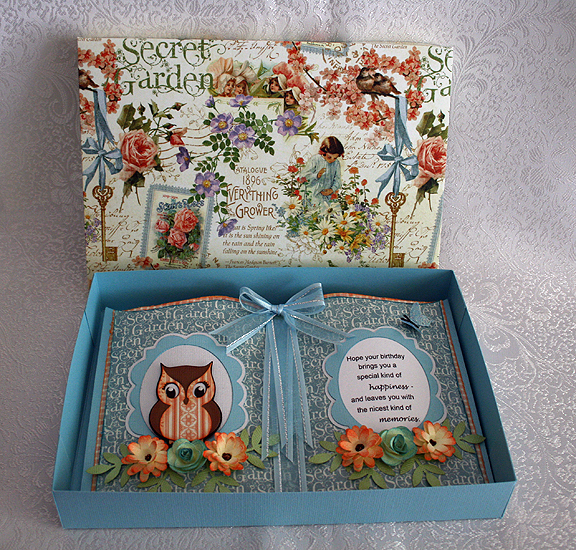
Because my card would not fit into a standard envelope, I made a little box for it to sit in.

InBox


Boxed

At some point I will probably post this in Cricut’s Project Center and will attach the file.  In the meantime, I hope you enjoy this little tutorial.

Front5

  • Cricut cartridges used:  Cricut Craft Room Basics, Disney’s Happily Ever After, Elegant Edges, Flower Shoppe, Summer Celebrations
  • Bazzill cardstock
  • Graphic 45 Secret Garden collection
  • Martha Stewart punches
  • Ribbon
  • Key charm
  • Stickles

Chalkboard Birthday Card


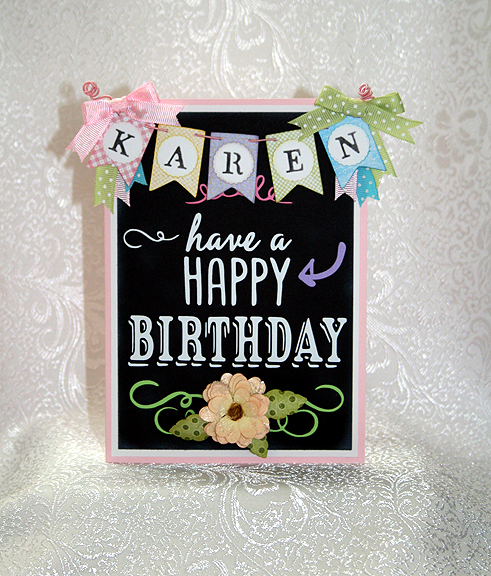
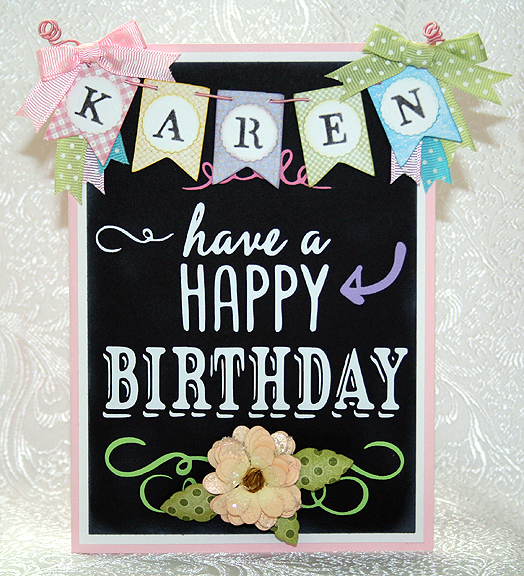
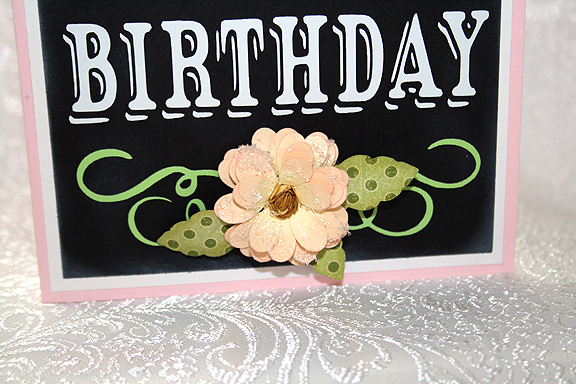
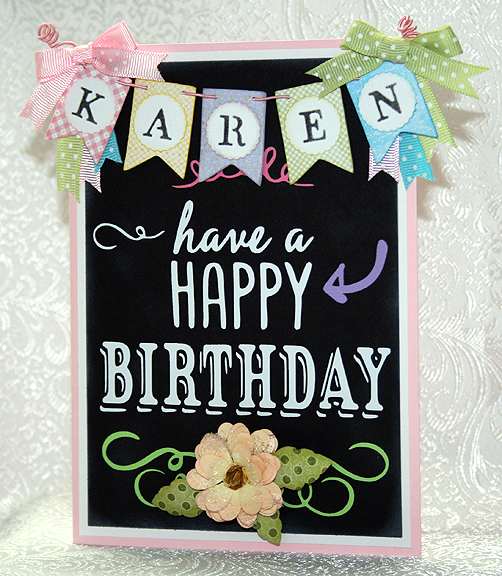
I was inspired by chalkboard art on Pinterest to create this birthday card for my sister-in-law, using Cricut’s new Chalkboard Fonts cartridge. When I first saw this cartridge, I didn’t know that much about chalkboard art or how popular it is right now.  Now it is one of my favorite cartridges.

The solid  cardstock on this card is the Recollection brand from Michaels. The patterned paper on the banner was printed on my Imagine using the Blossom and Imagine More Cards cartridges.  The leaves are from a scrap of Graphic 45 paper.

FrontSm

The card is 5″ x 7″, matted with a white layer.  The black (chalkboard) layer is inked with white on the edges.  I also lightly smudged white ink on the front so it looks like an actual blackboard.  The lettering and swirls are all from the Chalkboard Fonts cartridge, cut from vinyl.

Front10

The banner is from the Birthday Bash cartridge, cut at 1.25″.  For the letters on the banner, I used a Cuttlebug Embossing Plus folder called Monogram Seals.  I inked the letters with black ink.  The banner is hung from the card with DMC Memory Thread.  I added some ribbons and bows and curled the ends of the Memory Thread by wrapping them around a chopstick.
Banner

 The flower is also made with the Cuttlebug, using the Daisy quilling kit.  The petals are light yellow, inked with pink on the edges.  I brushed Glossy Accents on the completed flower and sprinkled it with coarse, clear glitter to add some sparkle.

Flower

 I will make a box for this card, since it is a little bulky to place in an envelope, and send it to my sister-in-law.  I hope she likes it.

Front7

  • Cricut cartridges:  Birthday Bash, Chalkboard Fonts, Imagine Blossom and Imagine More Cards
  • Cuttlebug:  Monogram Seals Embossing Plus folder, Daisy quilling kit
  • Vinyl
  • DMC Memory Thread
  • Ink
  • Ribbon

Circleville NSD 2013 – Did-I-Mension? Challenge


Here is my project for the Circleville Did-I-Mension challenge hosted by Renee.  Be sure and check out her blog and see the beautiful boxes she made for this challenge.

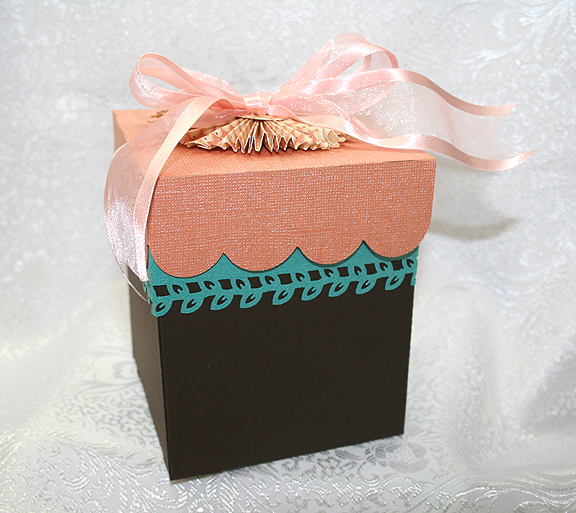
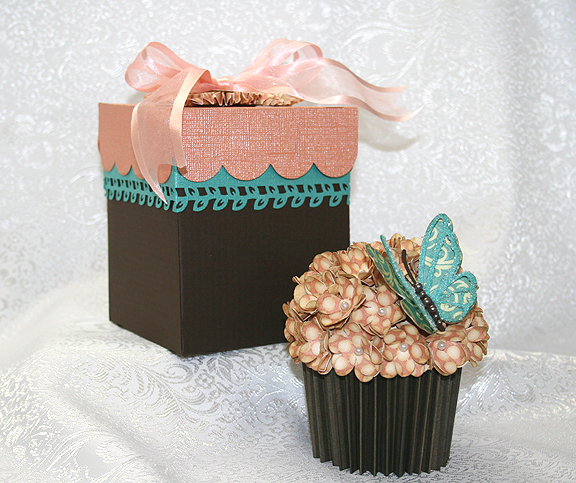
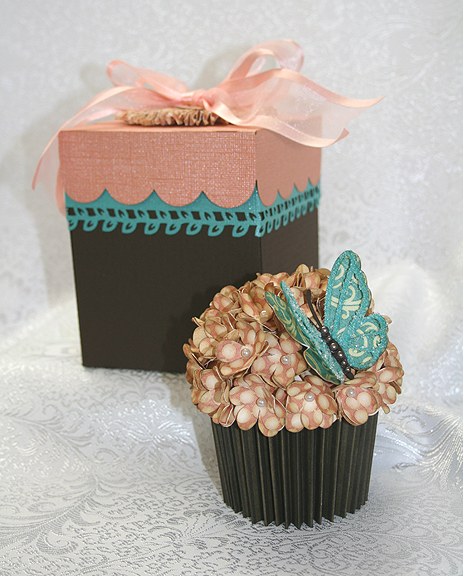
Renee challenged us to created a 3D box, bag or some other project.  Since I had just finished making my cupcake for the previous challenge, I thought a box to put the cupcake in would be the ideal project to make.  I used Sweet Tooth Boxes to cut my box, using the Cube Box cut at 11.5″.  All the cardstock used to construct the box is from Bazzill.

Set8

It didn’t take too long until I realized I was faced with a challenge.  I could only make a box that would fit on a 12″ x 12″ piece of paper.  I needed a square box and I could get the size I need (barely) for the cupcake to go inside, but I couldn’t get  it tall enough.  I spent a good two hours going back and forth on what to do.  I was looking at making something completely different for my project, but I kept coming back to the cupcake because I really needed a box.

Box3

I finally decided to see if I could add a separate piece of cardstock to the top of the box without it looking too funky.  I cut 2″ strips and had to piece them together to get four 4″ sides.  I used a Martha Stewart punch on the bottom edge.  I think it is called Laurel Leaf.   This is what the box looks like without the lid.

Box

The added piece gave me the height I needed, but I’m not too sure on the overall appearance.  I think it looks OK.  I made a rosette to put on the lid, using the Graphic 45 paper from the cupcake.  I then added a bow to the rosette.

Set8

  • Cricut Cartridge – Sweet Tooth Boxes
  • Bazzill cardstock
  • Martha Stewart Laurel Leaf punch
  • Ribbon

Circleville NSD 2013 — On Pins Challenge


I just completed this cupcake for the On Pins Challenge that was hosted by Sis.  Be sure and check out her blog to see the beautiful mini album she made for her project.

The challenge was to make a pin-inspired project.  I had no trouble deciding which pin I was going to use.  It is the one here.   I wanted to make one of the cupcakes.  Miranda has some gorgeous projects on her blog and I was lucky because she had a video on how to make the cupcake.  You can find the link to her video on her blog here.

CC2

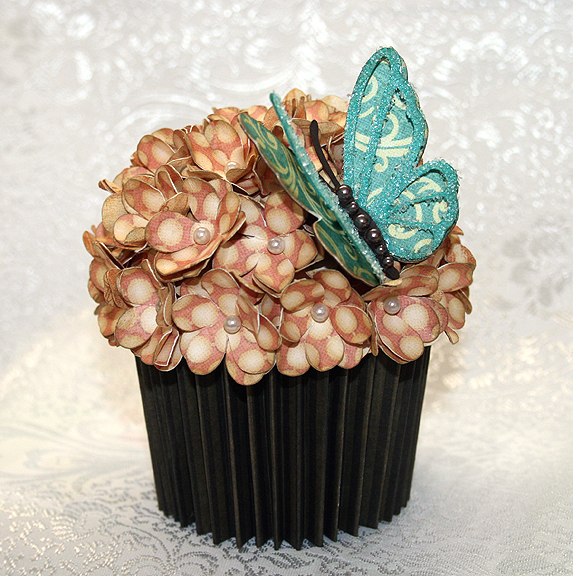
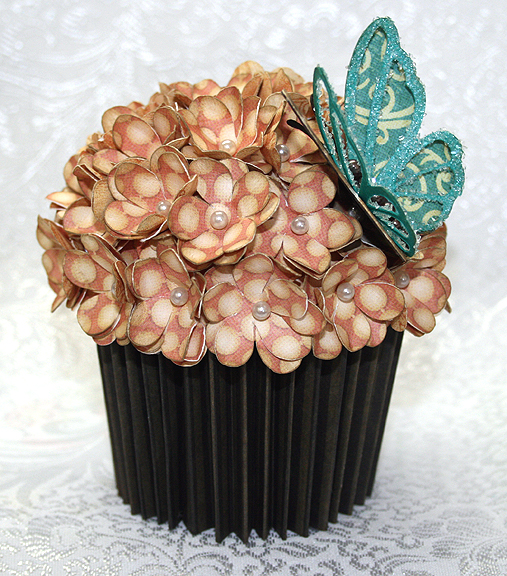
I followed Miranda’s directions, except that I cut the flower petals with my Cricut rather than using a punch.  I used George and Basic Shapes <Flower2>, cut at 1.125″ and I hid the center hole in CCR.  I ended up using more than one 12″ x 12″ sheet full of flowers.  I think I placed mine a little closer together than Miranda did.  I used pearl pins I got at Joann’s to place the pins on the stryofoam.  The paper is all from Graphic 45.

The cupcake opens and inside is a little banner that says “Happy Birthday.”

Open

I cut the banner from Birthday Bash at 1.5″ using the print Graphic 45 paper.  I cut the shadow layer from Bazzil cardstock.  I threaded it together using some DMC pearl cotton.  The letters are from a Cuttlebug Plus Embossing folder, Monogram Seals. I inked the letters with Distress Ink.
Banner2

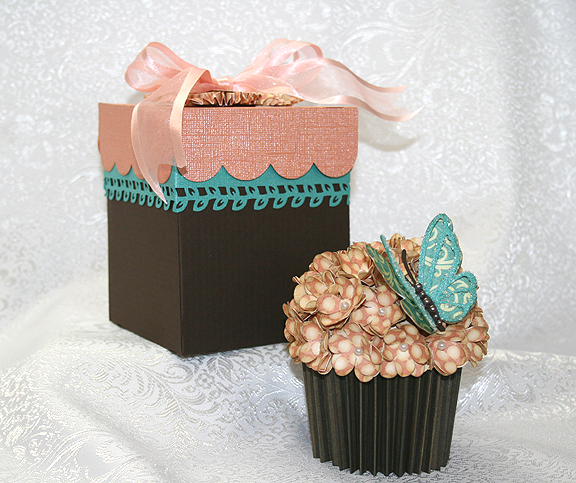
I also made a box for the cupcake for a different challenge.  I will share a picture here, but will put the details for the box in my next post.

Set

The butterfly is from Martha Stewart Elegant Cake Art and was cut at 2″ from Graphic 45 paper.  I cut several layers and on the top layer I added some coarse crystal glitter.  I put brown pearls on the body.

CC3

  • Cricut cartridges used:  Birthday Bash, George and Basic Shapes, Martha Stewart Elegant Cake Art
  • Cuttlebug Plus Monogram Seals embossing folder
  • Graphic 45 paper
  • Bazzill cardstock
  • Pearl pins
  • Coarse crystal glitter
  • Distress Ink
  • 3″ stryofoam ball
  • 9 oz paper cup
  • Brown adhesive pearls
  • DMC pearl cotton

Circleville NSD 2013 — What’s It Owl About?


Thank you for stopping by my blog.  To celebrate National Scrapbook Day, some of the crafty members of the Cricut Circle are posting projects and activities on the message board all weekend long.

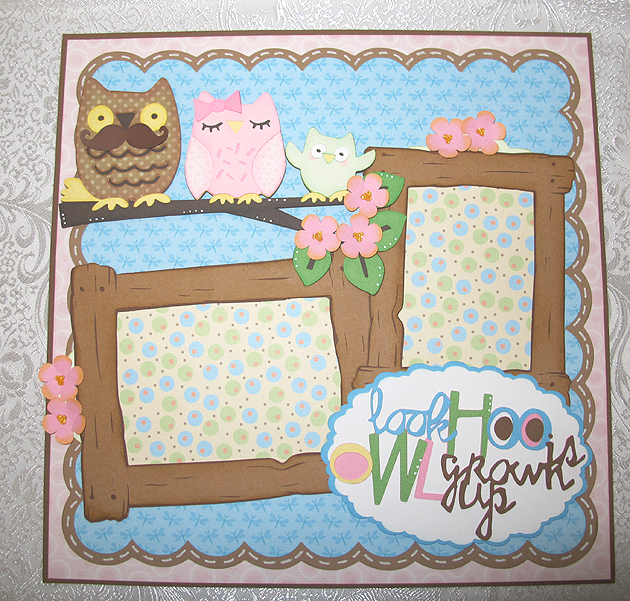
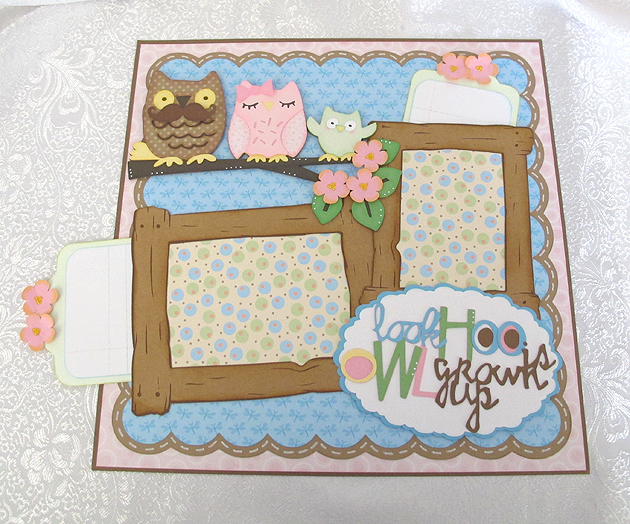
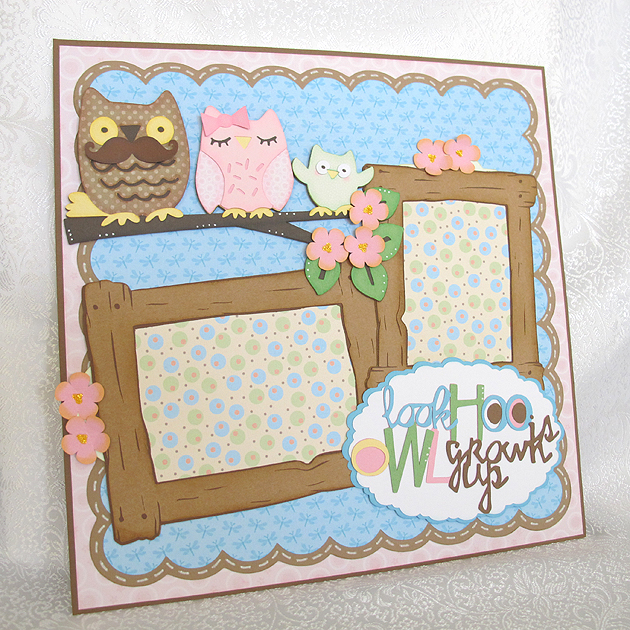
I created a challenge for my project and would like to share it with you.  My theme is owls — and the challenge is pretty simple, just create a project with an owl on it.  I made a layout using a cute owl family from Hoot ‘n’ Holler.

LO3

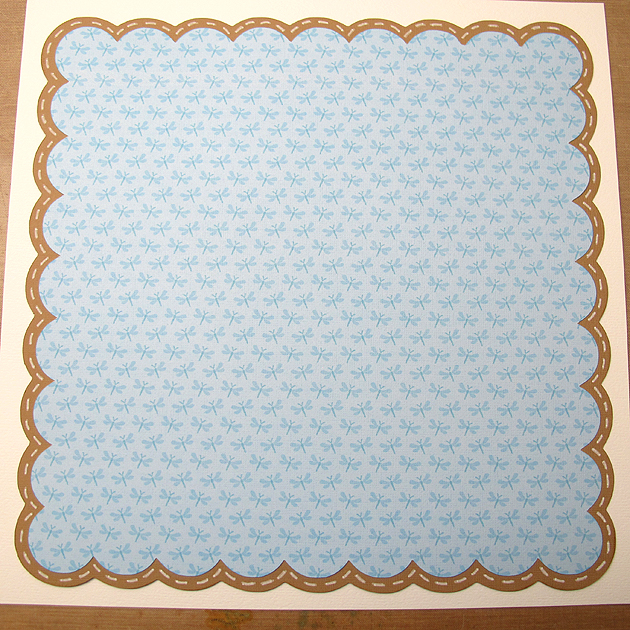
I laid out my design in Cricut Craft Room.  The patterned paper is printed on my Imagine using the Nursery Tails cartridge.  The solid cardstock is from Bazzill.  I began with Elegant Edges for the scalloped square in the background, cut at 10.5″, using <sclop2-s> and the shadow feature.  I used a white Sharpie poster paint marker to make the “stitch” lines around the square.

Scallop

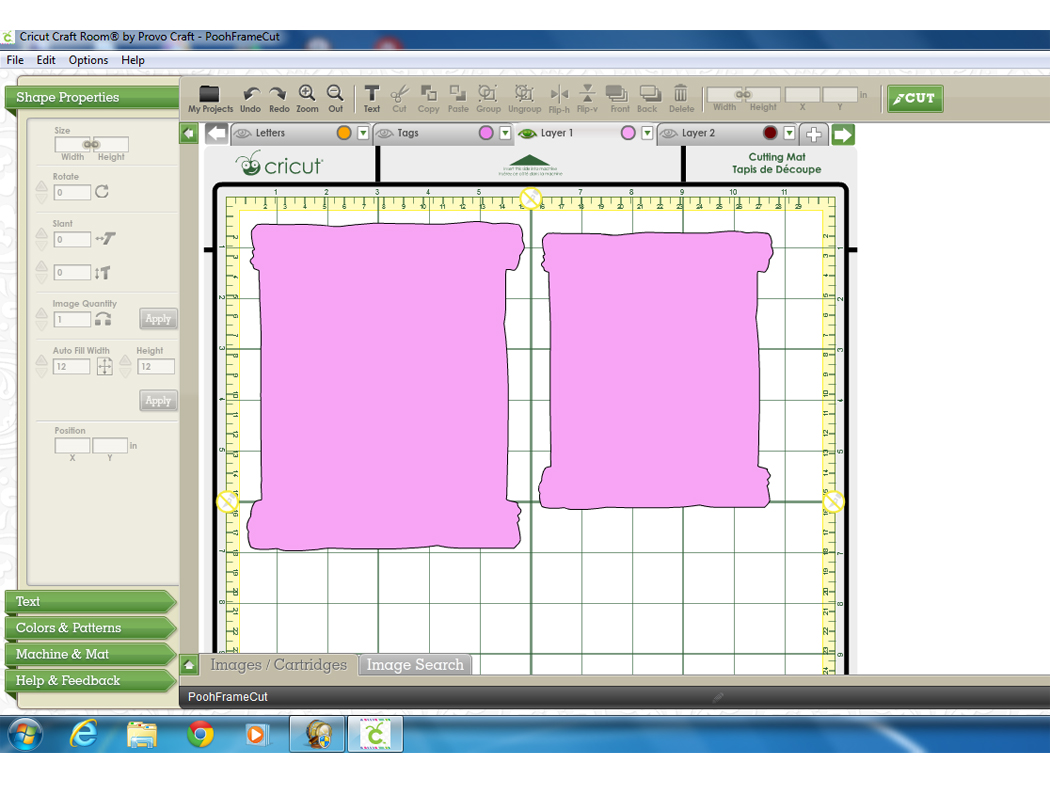
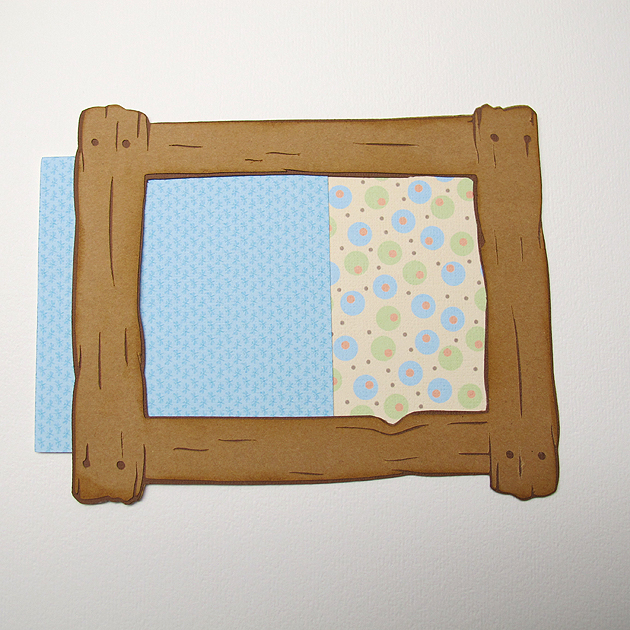
Next I cut the two wood frames from Pooh & Friends at   5.5″ and 6.5″.  The frames are three layers — the basic feature and then two on the blackout feature.  For the piece cut using the printed paper, I hid the inside cut lines in CCR, so the piece was solid — it did not look like a frame.   Here is a picture of what it looks like in CCR.

FrameMat

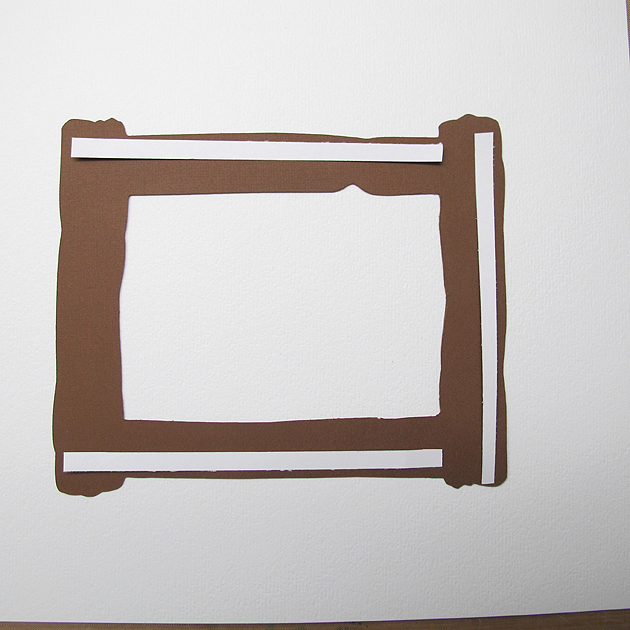
I first assembled the basic cut and the blackout frame feature, adhering them together.  Then I prepared to glue the frame to the printed frame piece.  I wanted to leave an edge open so the picture could slide inside, so after deciding which end I wanted to leave open, I glued the frame to the mat on three sides only.  I used a liquid glue, but for the photo I laid some papers on the frame to show you were I put the glue. I did this to both frames.

FrameToMat

You can see in this photo how the pictures will slide into the frames.  I used a piece of scrap cardstock for demonstration purposes.

FramePic

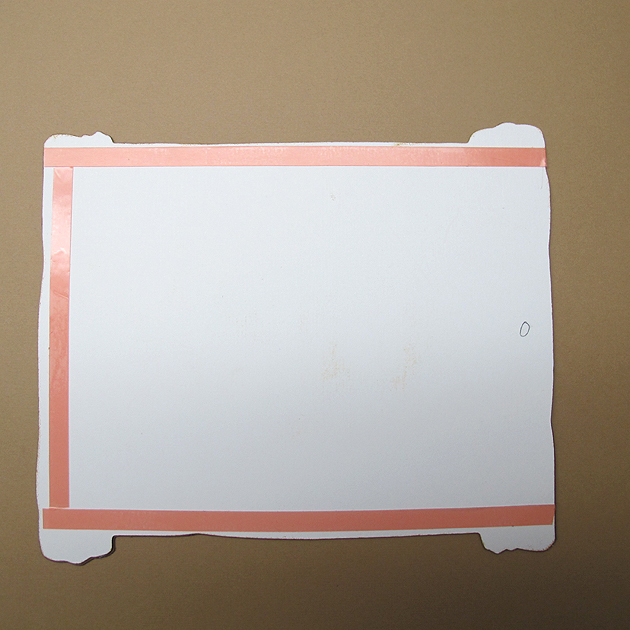
Next was adhering the frames to the layout.  Since I wanted to hide tags behind the frames, I put the adhesive on the back of the frame the same way — gluing only 3 sides.  I marked the back of my frame to indicate which side was open for the photo, so I could be sure and leave the same end open for the tag.  I used the red sticky tape to adhere the frames to the layout.

FrameTape

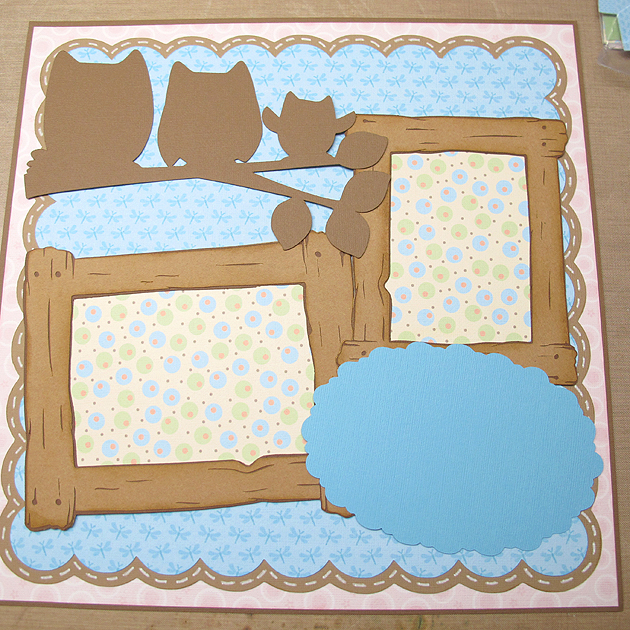
Before attaching the frames to my background, I laid the cut pieces on it to get an idea where I wanted to place the frames.  I made light pencil marks on the background to guide me in the placement.

FramePlacement

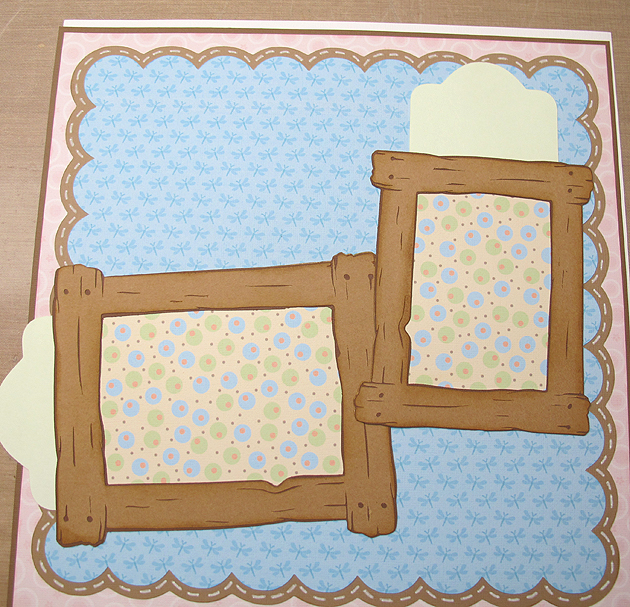
I then checked to make sure the tags slid into the pockets behind the frames.

FramePocket


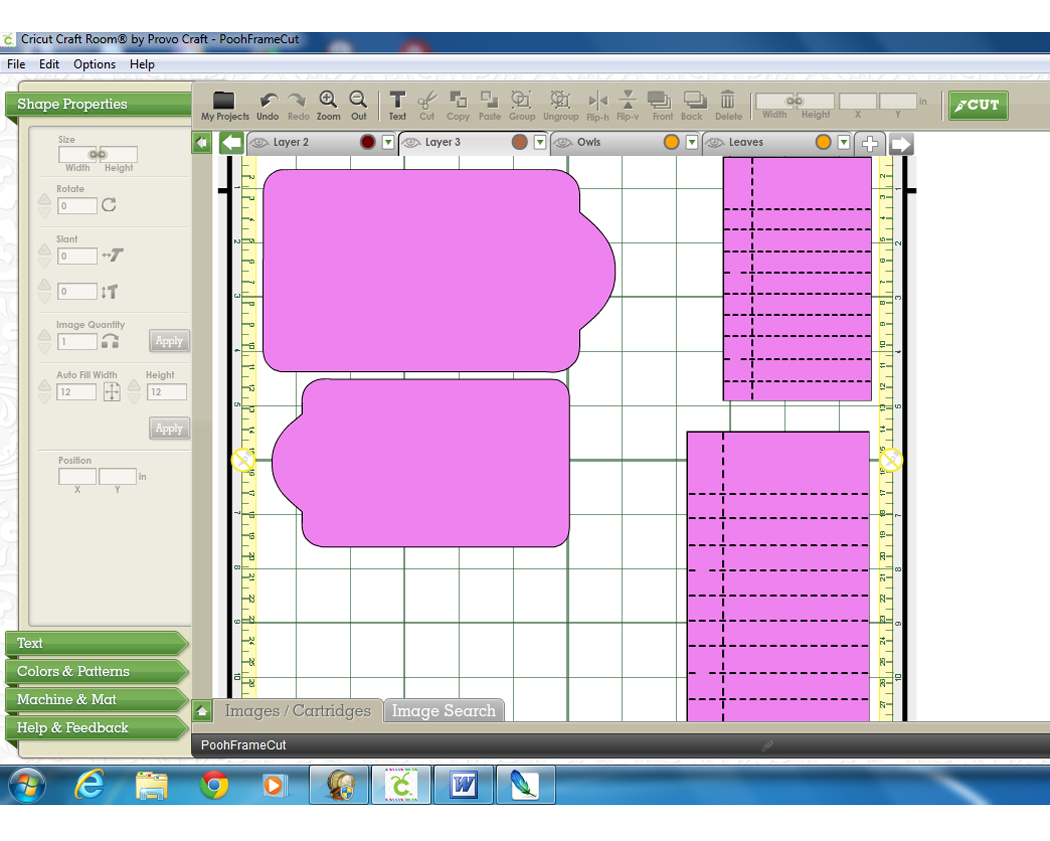
I made the tags to fit behind the frames, adjusting them in CCR to get the proper fit.  I used Tags, Bags, Boxes & More and the cut is <rndtop2>.  The large tag is 6.5″ x 3.75″ and the small one is 5.5″ x 3.125″.   The lined notebook paper is from  Simply Charmed, cut at 2.75″ x 4.5″ and 3.375″ x 5.375″, with the facial features and holes hidden.  This is a screenshot of the CCR file for the tags.

Tags


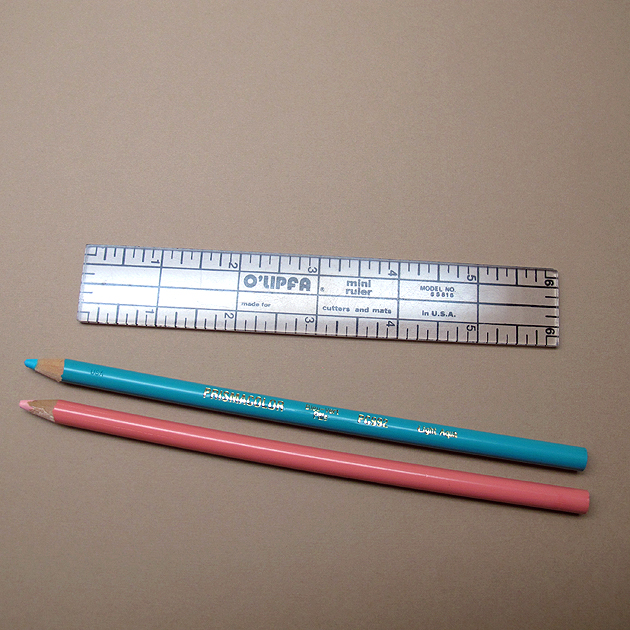
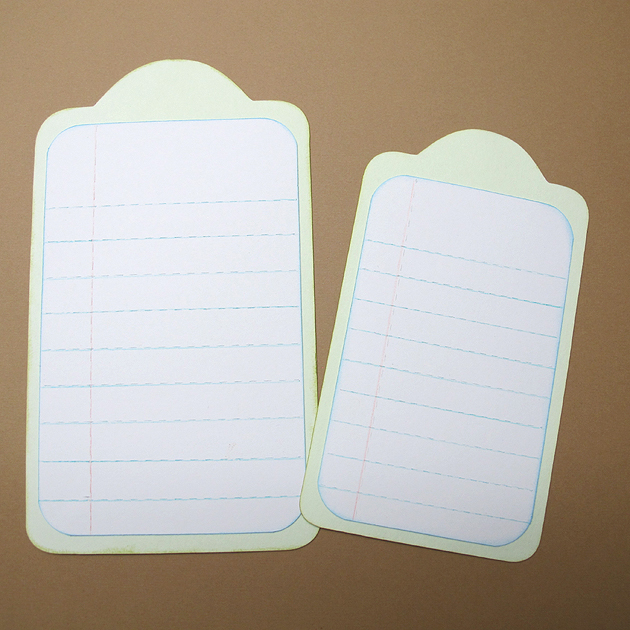
I used a punch to round the corners and a ruler and colored pencils to go over the score marks on the paper to make it look like actual notebook paper.  I just lightly held the pencils to the paper.

ColorPencils

I adhered the notebook paper to the tags.

Tags3

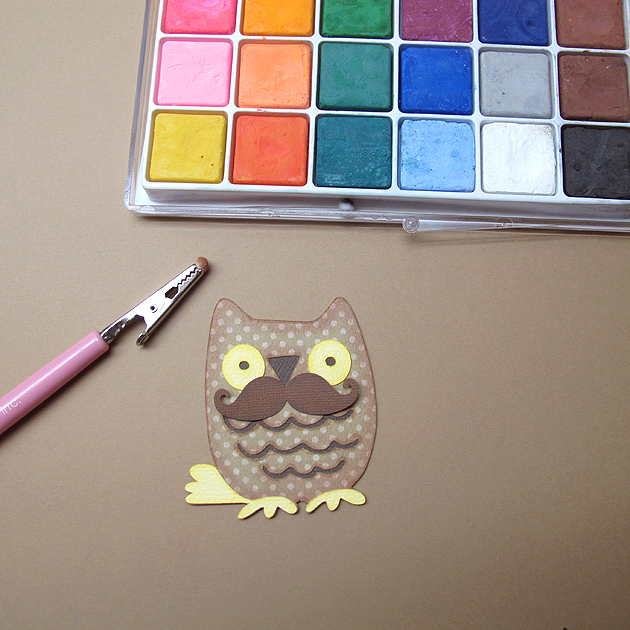
Next up was the owl family.  They were cut at 5″ using Hoot ‘n’ Holler.  After I cut all the pieces, I used chalk and ink to shade them.  I went over all the edges with chalk first, using a pom pom and chalk applicator.  Then I inked the edges using Distress Ink.

Chalk

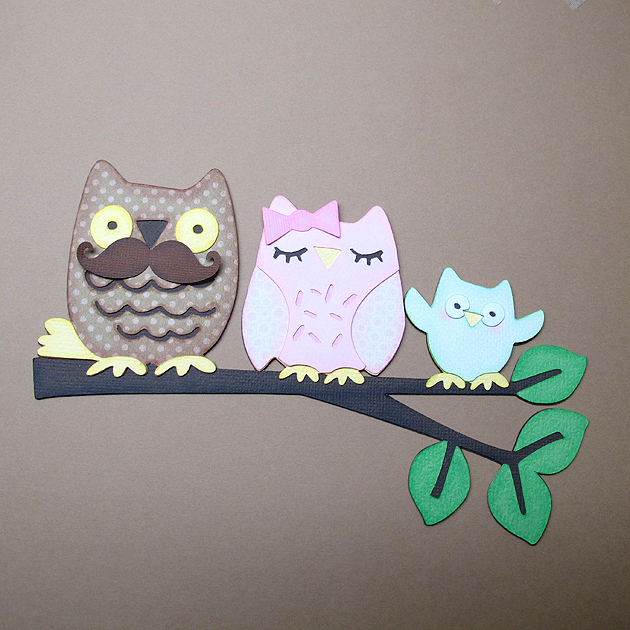
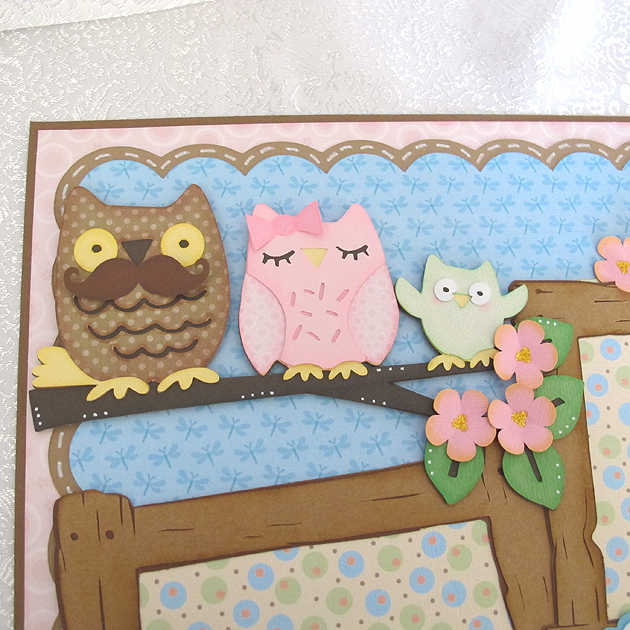
 I assembled each owl first and then glued them onto the branch.  I bought a mustache punch a couple of weeks ago, so I had to try it out on Papa owl.  I think he looks pretty dapper with it.  The bow on Momma owl’s head is from Simply Charmed.  I attached the leaves next.

Owls

After adhering all the owls and leaves onto the branch, I attached the branch to my layout.  The owl cut did not include the flowers.  I used Cricut Essentials, cutting Flower 4 at 1″.  I cut three for the branch and four for the tags.  I used Distress Ink (Squeezed Lemonade) to ink the edges of the flowers and Stickles for the centers.

OwlsCU

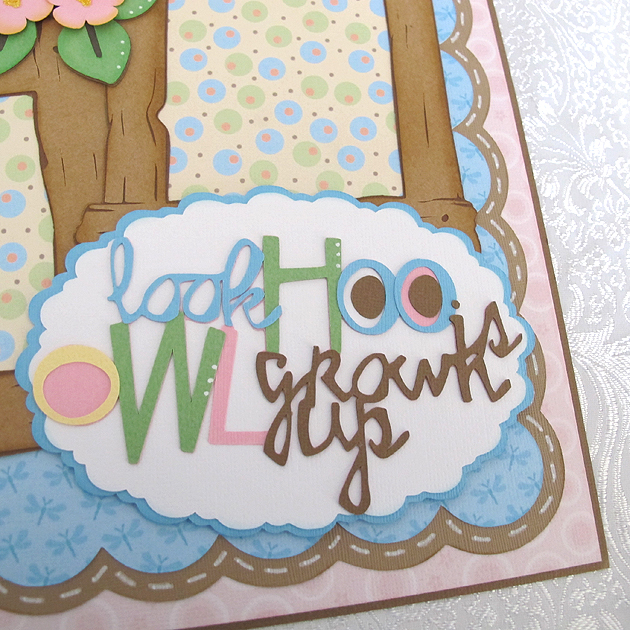
 The title is from Hoot ‘n’ Holler, cut at 3″.  The scallop oval is from Francy Frames and the cut is <fram13lr>.  I hid the inside cut so I ended up with a solid piece.  I resized the oval to fit the title and it measures roughly 5.625″ x 3.75″.

TitleCU

Here is a picture of the completed layout with the tags pulled partially out.  Hiding journaling tags behind your photo mats is easy to do.

LoTags

LO7

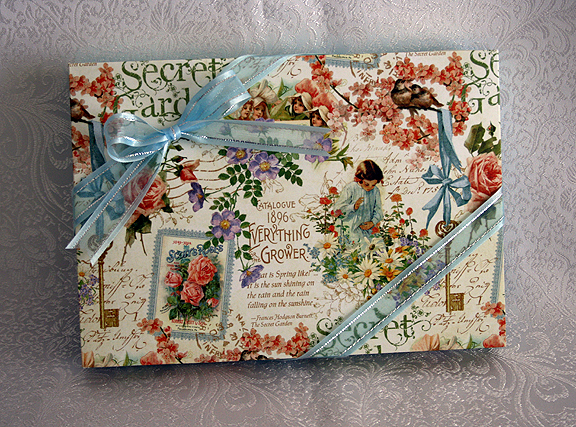
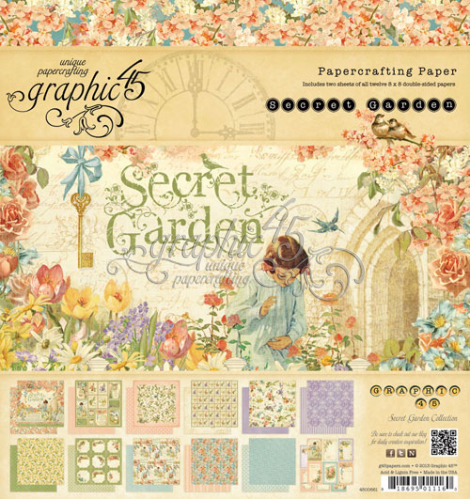
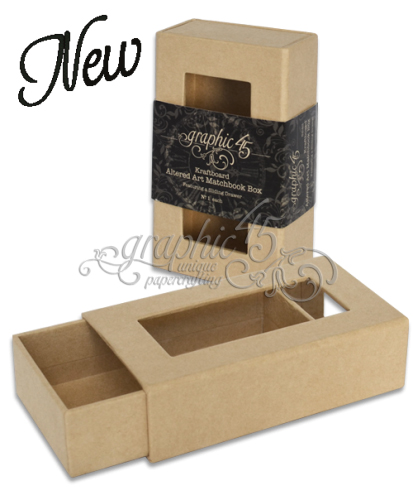
To top off the fun,  I am offering a prize for comments here on my blog.  All you have to do is leave a comment, but only one per person will go into the drawing.  I will leave it open for a week, until May 12 at 8 p.m. (EDT), when I will randomly draw a name.  I am giving away some Graphic 45 goodies — an 8″ x 8″ Secret Garden paper pad and a small matchbook box.

SecretGardenCover copy

SmMatchbook copy

I am sharing a list of some of the talented members of Circleville who have joined together for the weekend festivities and invite you to visit their blogs and see their wonderful projects:

NSD1_edited-200


Cricut cartridges used:  Elegant Edges, Fancy Frames, Hoot ‘n’ Holler, Nursery Tails (Imagine), Pooh and Friends, Simply Charmed, Tags, Bags, Boxes & More

  • Bazzill cardstock
  • Distress Ink
  • Chalk
  • Stickles