Chalkboard Birthday Card


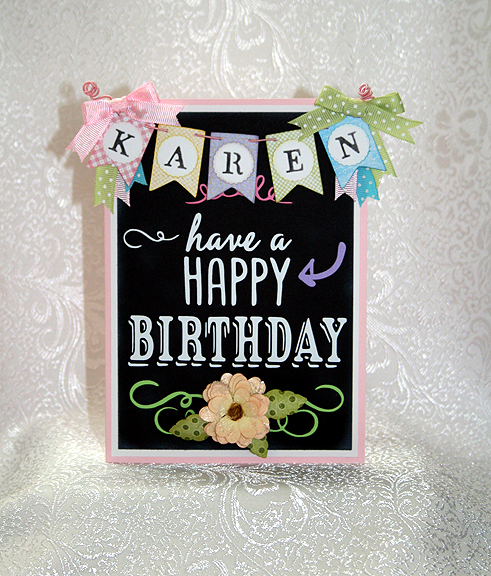
I was inspired by chalkboard art on Pinterest to create this birthday card for my sister-in-law, using Cricut’s new Chalkboard Fonts cartridge. When I first saw this cartridge, I didn’t know that much about chalkboard art or how popular it is right now.  Now it is one of my favorite cartridges.

The solid  cardstock on this card is the Recollection brand from Michaels. The patterned paper on the banner was printed on my Imagine using the Blossom and Imagine More Cards cartridges.  The leaves are from a scrap of Graphic 45 paper.

FrontSm

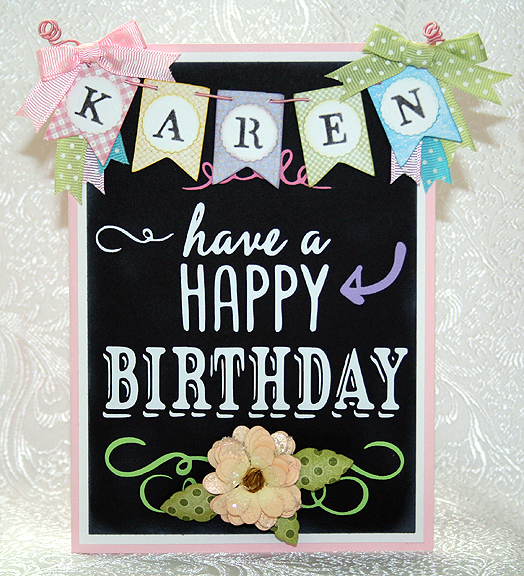
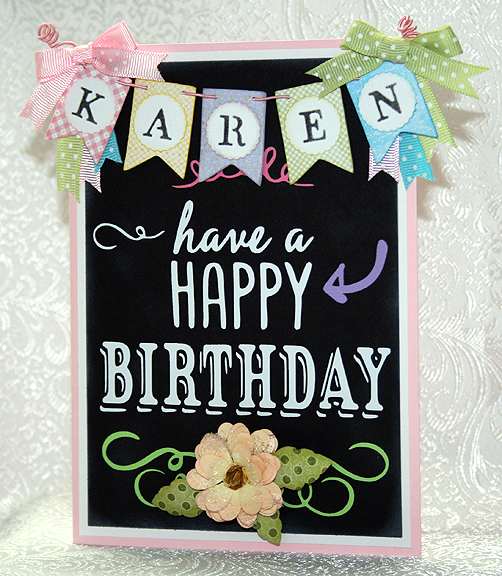
The card is 5″ x 7″, matted with a white layer.  The black (chalkboard) layer is inked with white on the edges.  I also lightly smudged white ink on the front so it looks like an actual blackboard.  The lettering and swirls are all from the Chalkboard Fonts cartridge, cut from vinyl.

Front10

The banner is from the Birthday Bash cartridge, cut at 1.25″.  For the letters on the banner, I used a Cuttlebug Embossing Plus folder called Monogram Seals.  I inked the letters with black ink.  The banner is hung from the card with DMC Memory Thread.  I added some ribbons and bows and curled the ends of the Memory Thread by wrapping them around a chopstick.

Banner

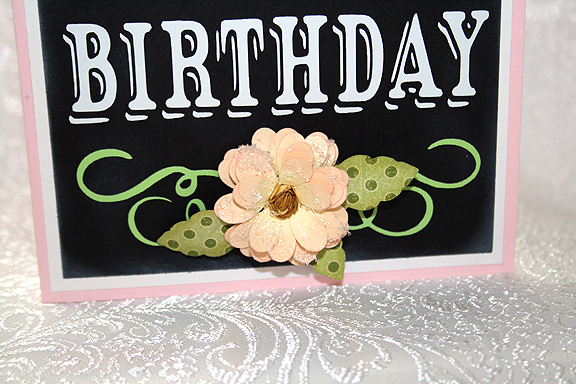
 The flower is also made with the Cuttlebug, using the Daisy quilling kit.  The petals are light yellow, inked with pink on the edges.  I brushed Glossy Accents on the completed flower and sprinkled it with coarse, clear glitter to add some sparkle.

Flower

 I will make a box for this card, since it is a little bulky to place in an envelope, and send it to my sister-in-law.  I hope she likes it.

Front7

  • Cricut cartridges:  Birthday Bash, Chalkboard Fonts, Imagine Blossom and Imagine More Cards
  • Cuttlebug:  Monogram Seals Embossing Plus folder, Daisy quilling kit
  • Vinyl
  • DMC Memory Thread
  • Ink
  • Ribbon
Welcome Spring — Cricut Campin’ Critters

This little card is for the Spring is in the Air weekly challenge at Bitten by the Bug 2.   The seasons may be more subtle here in California than in other states, but I always look forward to spring.  I love seeing all the birds and listening as they fill the air with chirping.  Right now we have mockingbirds building nests in the trees outside our kitchen door.   And yesterday I watched a hummingbird in our orange tree as I sat at the dining table.

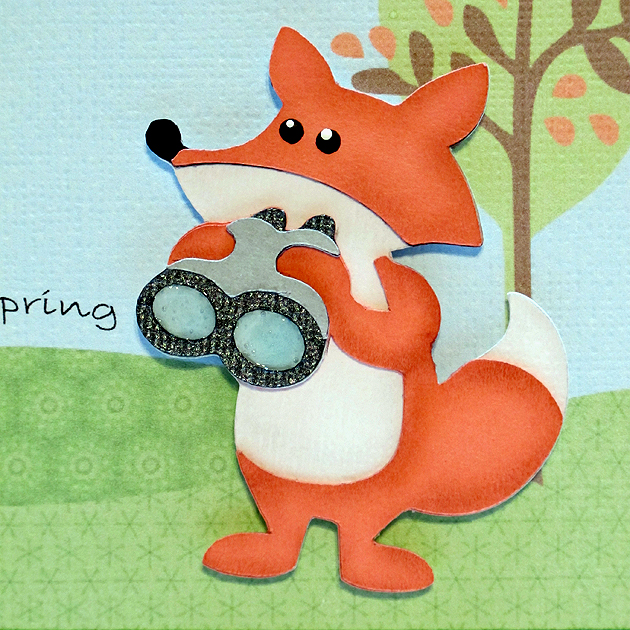
My card is whimsical — a little fox doing some bird watching on a beautiful spring day.  I printed the papers using my Imagine and the Nursery Tails cartridge.  I love that you can print to fit whatever you are making, as in the background.  I printed this at 5″.

Front2

I made the  “welcome spring” sentiment for the card using Photoshop.  I took the text and put it on an arc.  I printed it out on a piece of plain paper and put the background piece over top.  I held both up to a light so I could see where the sentiment was going to be and when I got it where I wanted it, I held it in place with a few pieces of the blue painter’s tape.  I just lightly pressed the tape down — I didn’t want it sticking too much and removing any of the color.  Then I ran both pieces through the printer.

The fox is from Campin’ Critters and cut at 2.5″.  I used chalk to give his body some definition and used pop-dots to attach him to the front.  I added Glossy Accents to the lenses in his binoculars.

Fox2

I cut an extra bird and layered it on the front.  For the inside I added another bird and a frog, also from Nursery Tails.

Inside

I hope you enjoy my spring card.

  • Cricut cartridges – Campin’ Critters, Imagine Nursery Tails
  • White cardstock – American Crafts
  • Chalk
  • Ranger Glossy Accents

Cricut Candy Corn Box and Totes


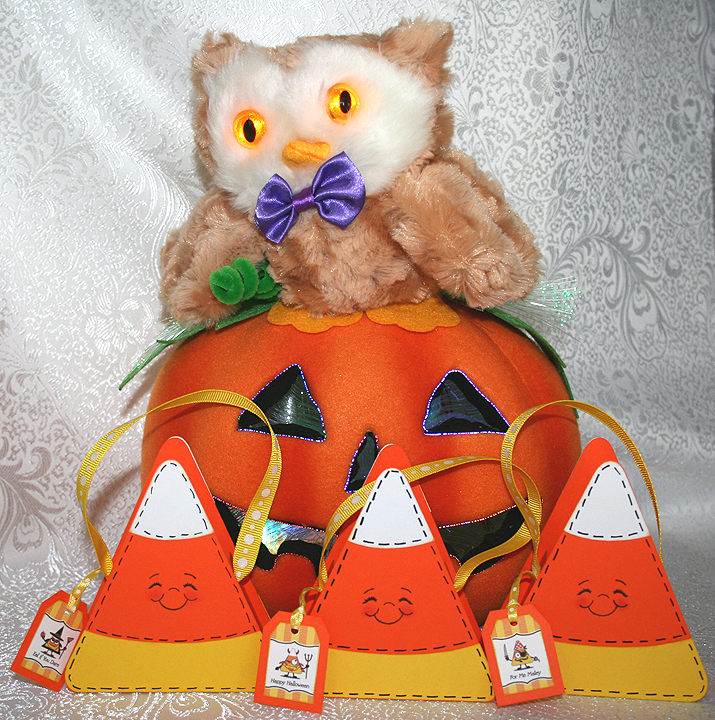
My goal this weekend was to make a candy corn box, but then I had an idea and soon had candy corn boxes all over my craft room.  I wanted to participate in two challenges, the 3D Halloween Treat Container challenge at Bitten by the Bug 2, and the 3D Treats challenge at Cooking with Cricut.

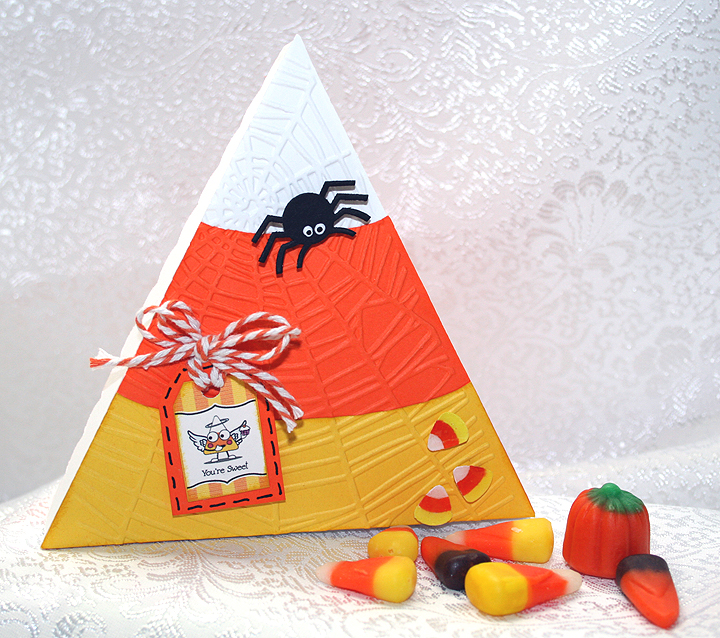
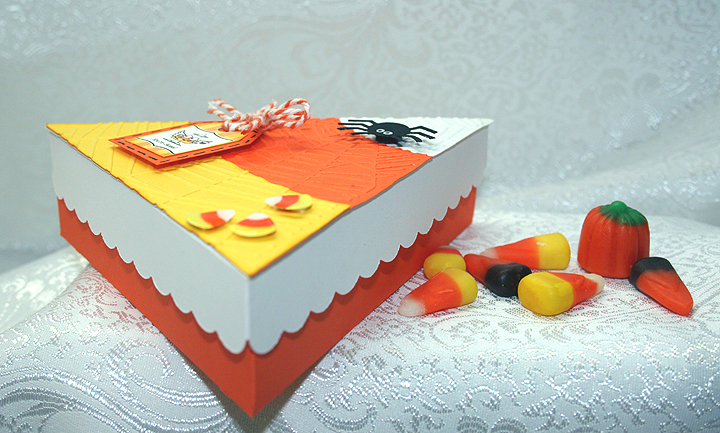
I have seen several versions of Cricut candy corn boxes using a cake box cut on the internet.  Using Cricut Craft Room, I chose the triangle box cut from Sweet Tooths cartridge.  I liked that it is a 2-piece box, with a separate top and bottom.  The paper is Michael’s Recollection brand.

I cut the bottom at 6″, from orange cardstock and cut the top from white cardstock.  Using George and Basic Shapes, I put a triangle on my mat and sized it to match the triangle on the top of the box.  I then cut that from white cardstock.

I laid out two more triangles in CCR, one in yellow and one in orange.  Using ovals from George and Basic Shapes to intersect the triangles, I got the shapes I wanted for the corresponding pieces.  I then glued the orange and yellow layers onto the white triangle.

Using my Cuttlebug and the spider web folder, I embossed the entire front piece after it was glued together.  I then adhered the piece onto the top of my box.

I sometimes forget about all the dies I have for my Cuttlebug, opting to cut with my Cricut instead.  But this time I remembered I had some cute Halloween dies and that is what I used for my spider and the tiny candy corns on the front of the box.  I used the 3″x3″ Cuttlebug Halloween die.

I painted the eyes on the spider and colored the candy corns using Copics.  Then then applied Glossy Accents on the candy corn to give them some shine.  I added pop-dots to the spider and candy corns and attached them on the top of the box.

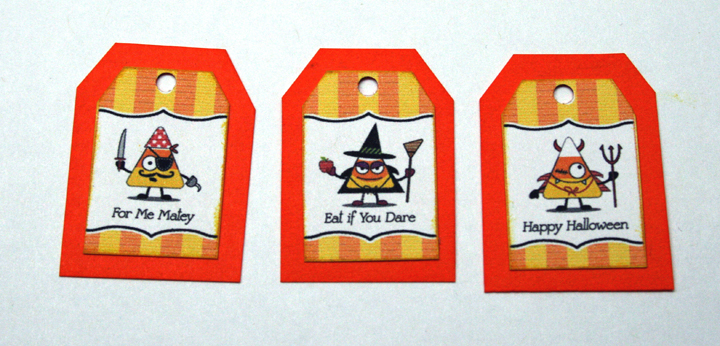
The tags I used on all my candy corn boxes is a free printable I found on a website called HelloCuteness.com.  The printable is from their old website, but you can get to their new site with the link I am sharing.

I hand cut around the tags, glued them onto some orange cardstock and again hand cut around the orange cardstock. For the cake box candy corn, I tied some twine through the hole on the tag and pop-dotted it onto the top.

While I was working on the cake box version, I got an idea to create a different type of candy corn box —  one that is more like a tote.  Using CCR and George and Basic Shapes, I started laying out triangles and rectangles to get what I wanted.  It took a little time and several attempts, but I finally got it worked out.

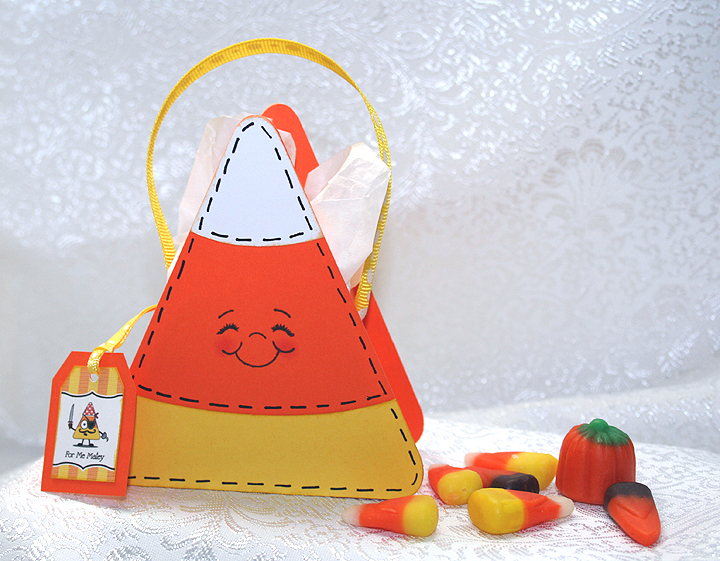
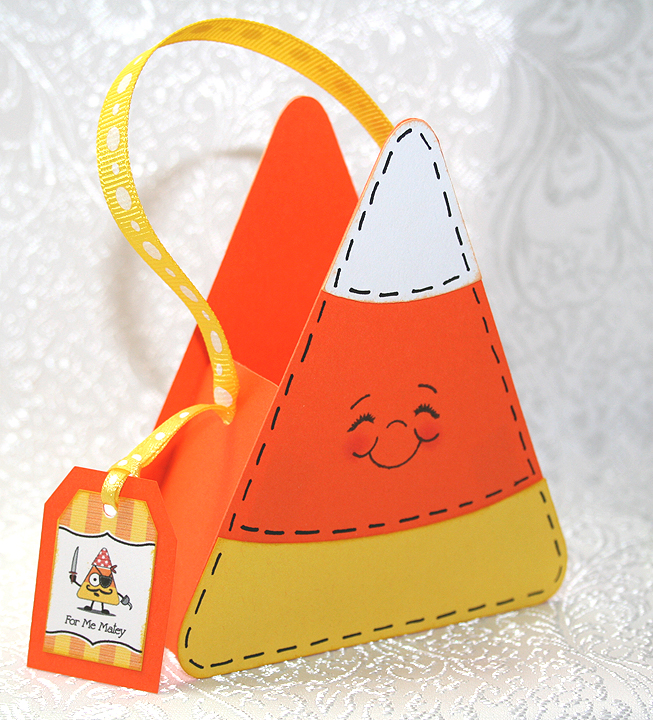
Here is my final version, along with two of my better attempts.  They look pretty much the same — the main difference is in the tabs where they attach together and how I assembled them.  The base shape is cut from orange cardstock and then there is a yellow and white piece that attaches to the front and back.

I used a Peachy Keen face stamp, stamping just one side.  I thought about stamping both sides of the tote but decided I didn’t want any two-faced candy corns!  I used a black pen to add the stitch marks to the fronts and backs.

For the first tote, I put it all together and then realized it would be much easier to attach the white & yellow pieces, stamp the face, and punch the holes for the ribbon handle if the tote was still flat.  The next two totes were done flat and it was a lot easier.  I used Terrifically Tacky Tape to assemble the totes.

I used a Crop-A-Dile to punch the holes in the side and 12″ of ribbon for the handle.  After threading the ribbon through the hole, I tied a knot and used some hot glue to glue the ends down inside.  The tags are hung using 1/8″ ribbon and I threaded it through the same hole as the handle before using the hot glue.  Again, I did this on the first tote after it was assembled.  For the next totes I added the ribbon before assembling the them.

  • Cricut Craft Room
  • Cricut cartrideges:  George and Basic Shapes, Sweet Tooth Boxes
  • Copics
  • Glossy Accents
  • Ribbon

Barbie Suitcase Gift Card Holder for National Convention


I had a lot of fun with this project.  I was asked to make ten gift card holders that were to be handed out at the 2012 National Barbie Doll Collectors Convention this week in Garden Grove, CA.  They were originally going to hold gift cards, but then it was decided that they would contain raffle tickets.  I guess there are some fabulous prizes in the Raffle Room.  The theme of this year’s convention is The Grand Tour.
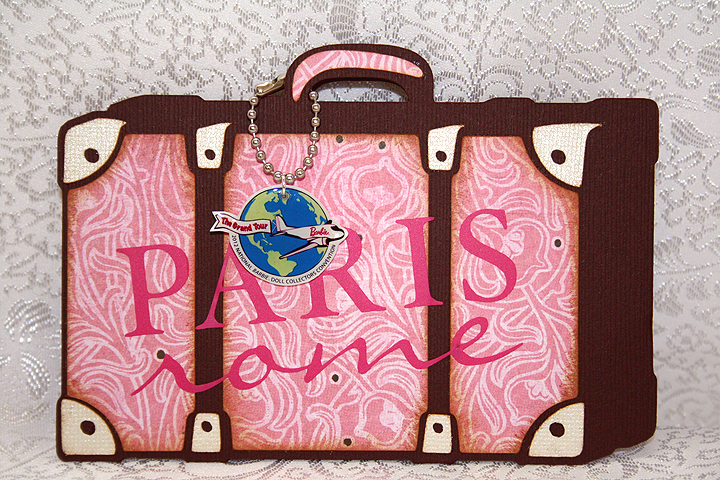
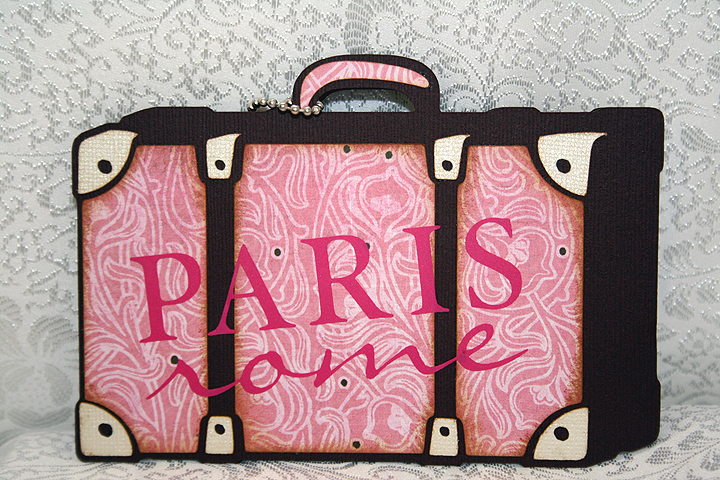
My first thought was to make the card shaped like a suitcase, as a rectangular shape would work well with a gift card.  I searched through suitcase cuts on mycutsearch.com and decided to use the one on the Summer Celebrations cartridge, since it looked sort of vintage.

I welded two shapes together at the bottom in Cricut Design Studio.  I cut the base of the card from chocolate Bazzill cardstock.  All the solid cardstock is Bazzill and the prints are from Basic Grey.  I chose a pink print for the front of the suitcase, using a neutral color for the hardware.  Since Paris and Rome are on the itinerary of the Convention, I cut those words from pink vinyl using the Word Collage cartridge.  Here is a picture of the vinyl lettering.

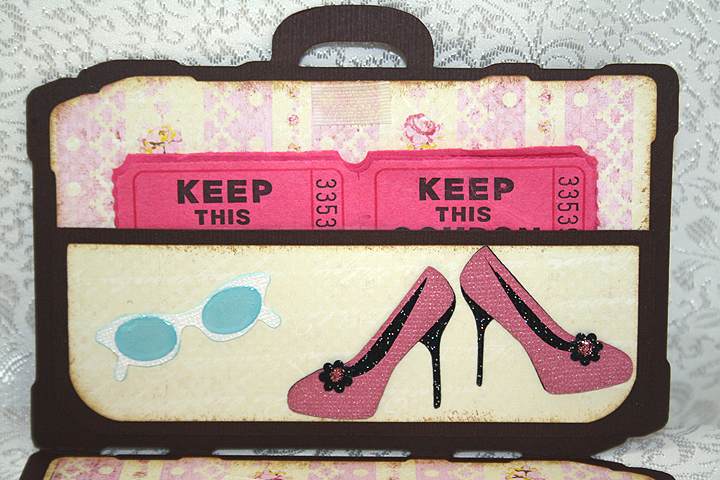
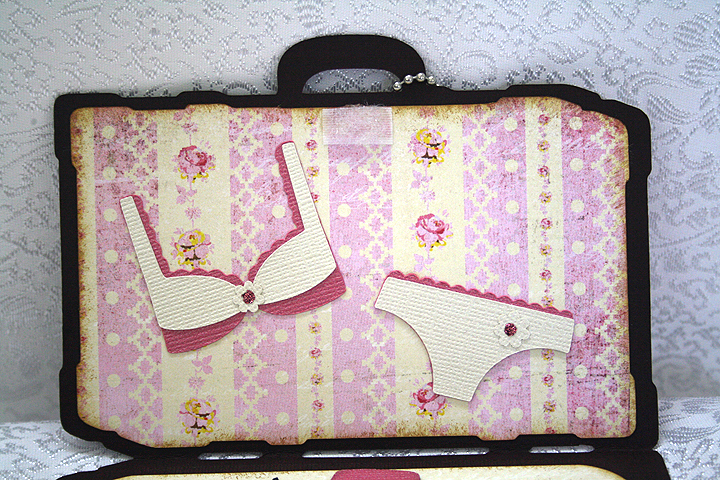
I chose a vintage stripe print for the lining of the suitcase.  I used a rectangle from George & Basic Shapes to create the pocket on the inside, using a punch to round the bottom corners.  Velcro at the top holds the suitcase together when closed.

The shoes, sunglasses and bra and panties are all cut from Forever Young.  I used a black glitter cardstock from Core’dinations for the shoes.  I applied Glossy Accents to the lenses on the sunglasses.

For the small flower embellishments on the shoes and bra and panties, I used the negative cuts from a Martha Stewart punch called Flower Shower.  It makes the tiniest of flowers.  I added Stickles to the centers of the flowers.

Now comes the most fun part — making the charms.  This was my first time using Ink Jet Shrinky Dinks to make charms.  I followed a great tutorial from the talented Nadia to make my charms.  Here are her step-by-step instructions.

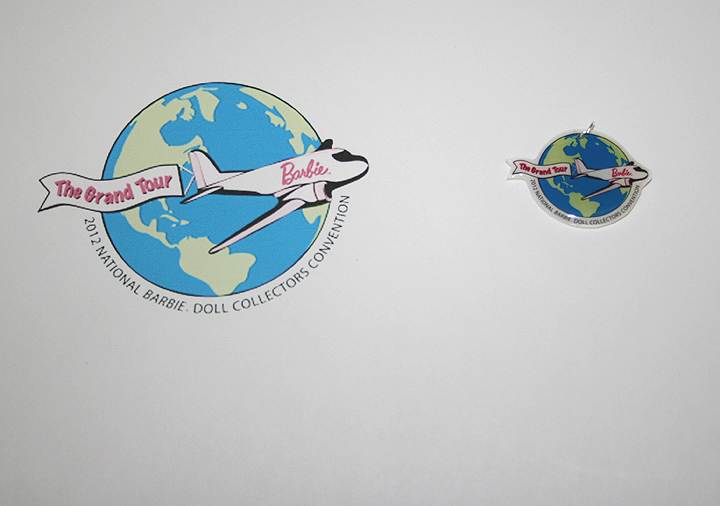
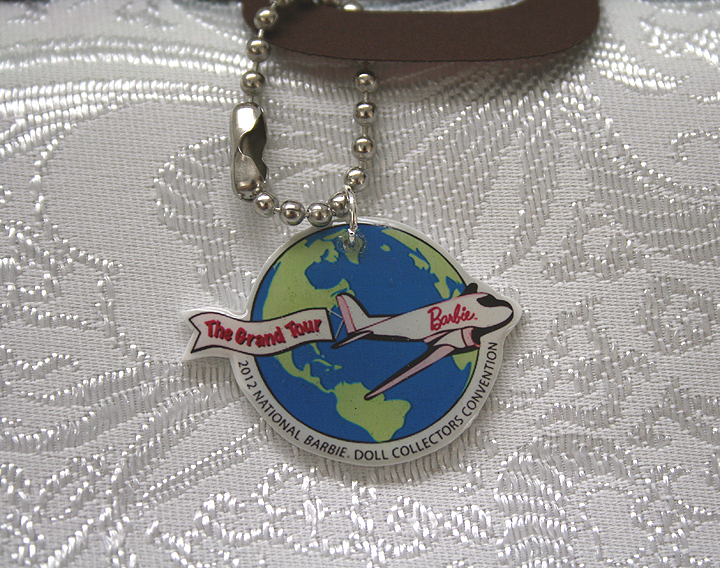
I did not use my Imagine to make the charms as I used a jpg of the Convention logo.  I printed the design on the Shrinky Dink material using my ink jet printer.  So instead of having a Cricut to do my cutting, I hand cut around the charms.  I am not the greatest when it comes to cutting around objects — I got a little wobbly in places.  But the great thing about the Shrinky Dinks is that you don’t really see my wonky cuts.  Here is a photo showing the size of the print I started out with and what it looked like after shrinking.  I also lightened the jpg in Photoshop before printing, as the colors get intense with baking.

Following Nadia’s instructions, after the Shrinky Dinks baked and were flat, I applied some Ultra Thick Embossing Enamel (UTEE) to them.  I then popped them back in the oven and waited for the UTEE to melt.

I was so happy with the way they turned out — even my hubby thought they were neat.  The circle part of the charm is not quite an inch across — and look how well you can read the tiny lettering.

I attached jump rings in the holes and hung the charms from key chains that I shortened to fit on the suitcases.

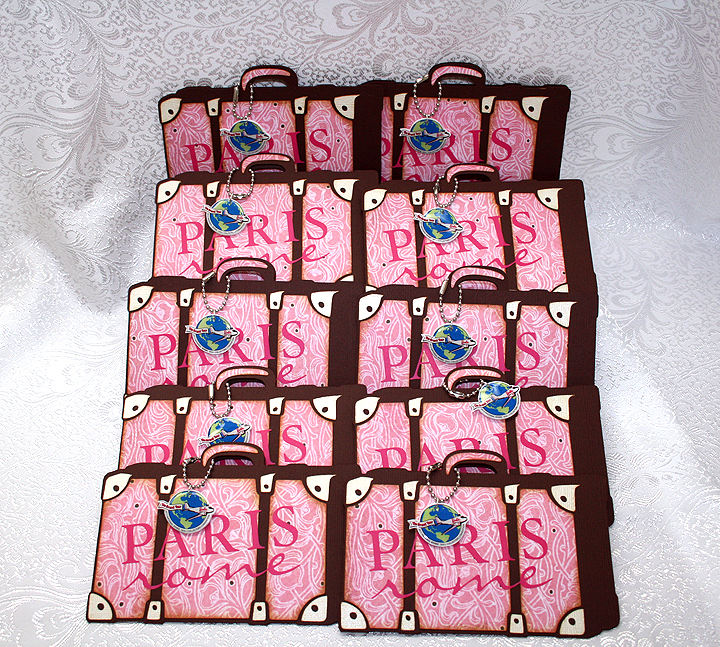
Here are all ten suitcases.

  • Cricut Cartridges – Forever Young, George & Basic Shapes, Summer Celebrations, Word Collage
  • Bazzil cardstock
  • Basic Grey designer paper
  • Vinyl
  • Martha Stewart Flower Shower punch
  • Stickles
  • Glossy Accents by Ranger
  • Ink Jet Shrinky Dinks

So Happy For You! Card

OutForPublication

I think this is my first time making a card using the card feature on a Cricut cartridge.  I searched through the suns I had and found this cute shaped card on Something to Celebrate.  This is also one of the few times that I have used only one cartridge to make a card.

I cut the card base out of white cardstock and then started adding layers.  My colored cardstock is all from Stampin’ Up.  I added a layer of turquoise, three layers of the yellow/gold and two layers for the white cloud.  Inking was all done with Tim Holtz Distress Inks.

I used my Cuttlebug to emboss the sun, using a new folder called Charles.  It has a neat chevron pattern of small dots. I used Divine Swirls on the cloud and Swiss Dots on the pink “Happy”.  I traced the lines of the swirls on the clouds with Glossy Accents and sprinkled with Martha Stewart crystal glitter.  Then I used Glossy Accents around the edges of the cloud and sprinkled with MS coarse glitter.

  • Cricut cartridge – Something to Celebrate
  • Cuttlebug folders – Charles, Divine Swirl, Swiss Dots
  • Stampin’ Up cardstock
  • Martha Stewart glitter

Strawberry Teapot Card — My First Easel Card


I made this card for the Kitchen Challenge over at Bitten by the Bug 2. Your project must be based on something you would find in a kitchen and have a Cricut cut on it.  I started out with all sorts of ideas but narrowed it down to a teapot.  I was laying out my design in Cricut Design Studio and thought it was looking pretty good.  I decided to try making an easel card, going for a floral, frilly teapot.

Then, a couple of nights ago I was checking out one of my favorite embroidery websites, EmbLibrary.com, and happened upon a strawberry teapot.  I kept looking at it and wondered if I could make something similar using my Cricut.  So I started playing around in Design Studio and ended up with this card.

I used Core’dinations solid cardstock for the base of the card.  All the dotted printed paper I did on my Imagine, using The Good Old Days cartridge.  I am really having fun using my Imagine.

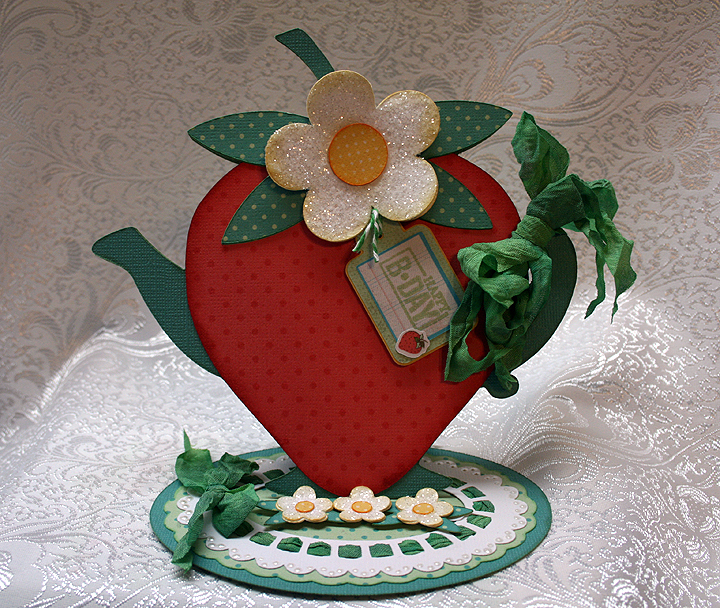
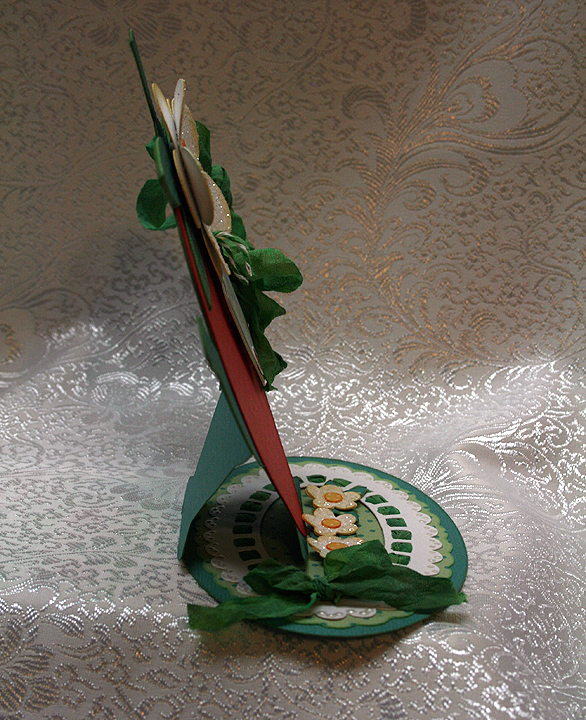
The teapot I used is from Kate’s ABCs cartridge and I welded a strawberry from Preserves over top of the teapot, so just the spout and handle were sticking out beyond the strawberry.  I then welded an oval from George & Basic Shapes onto the bottom of the teapot, to form the base of my easel card.  Here is a side view of the card, so you can see how it stands up.

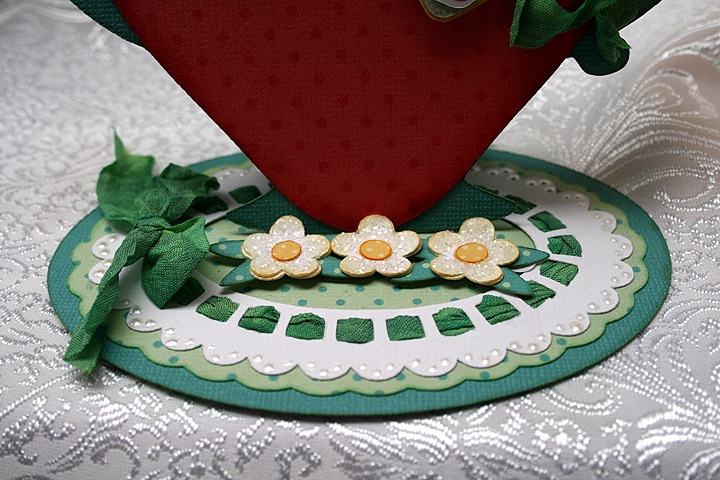
I cut a scalloped oval and doily shape from Lacy Labels to go on my base.  Through the holes of the doily shape, I threaded seam binding that I dyed using Tattered Angels Glimmer Mist.  Where my seam binding met, I tied a bow.  Here is a close-up of the base so you can see how I threaded the binding, and also how the three small flowers allow the card to stand up.  I used Liquid Pearls to add some dots on the doily.

I also used seam binding to tie a bow around the handle of the teapot.  I used Glossy Accents and Martha Stewart coarse glitter to add some sparkle to the flowers.

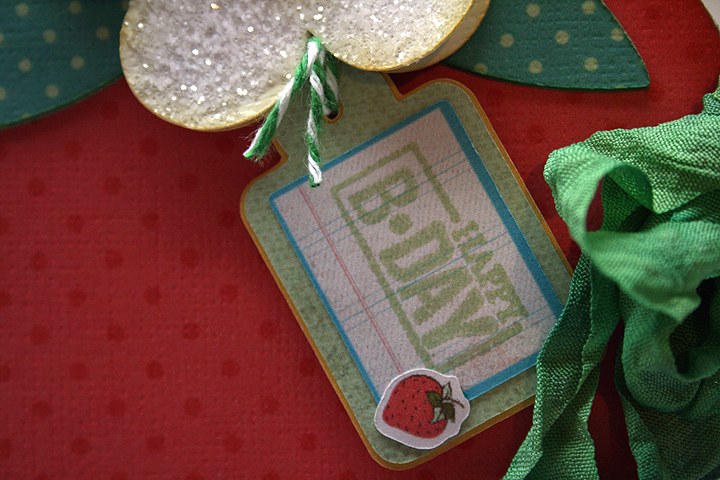
I made the tag using my Imagine and the Imagine More cartridge.  I am very happy with how it came out — it is my first cut and print piece that I have used on a project.  I changed the color on one of the layers and left off the sentiment that was on this particular tag.  I then took a Studio G stamp and stamped Happy B-Day on the front and tied it up with some twine.

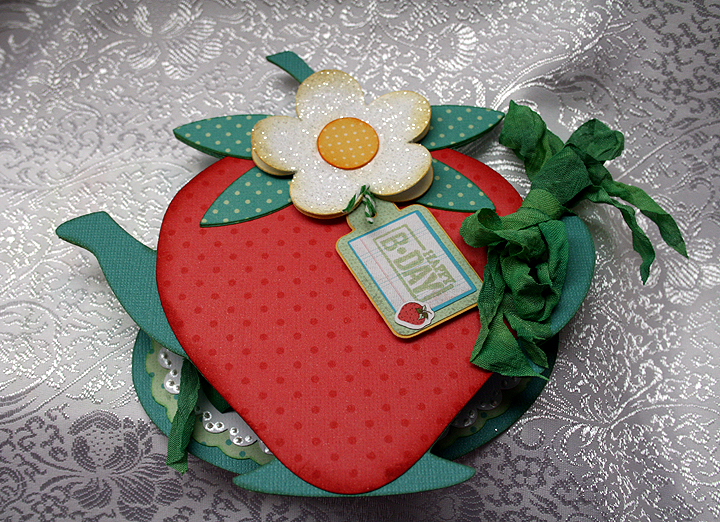
And here is a picture to show you what the card looks like when it is flat.

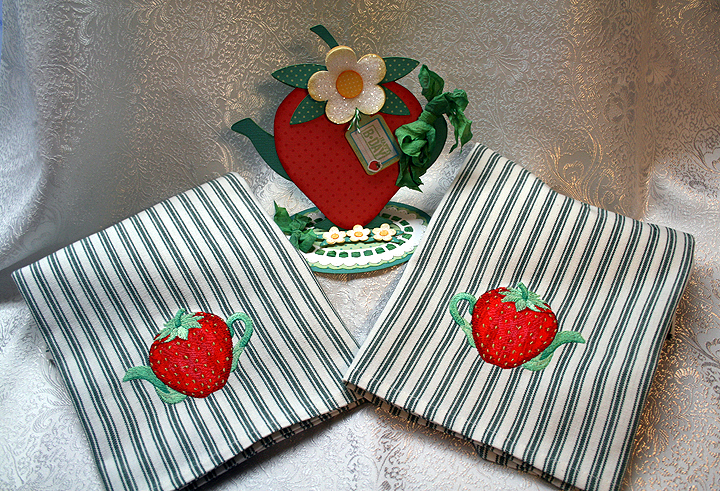
When I finished my card, I thought it would be nice if I embroidered some tea towels using the strawberry embroidery design that inspired my creation.  I found a couple of blank striped towels that I thought the design would look OK on and proceeded to stitch them out.  So now I have a nice gift set to give to someone.

And, finally, I want to thank the wonderfully talented Design Team at Bitten by the Bug 2 for the prize that I won in the frame challenge.  My number was picked to receive the Smash Book prize — and I am so excited!  Thank you everyone at Bitten by the Bug 2.

  • Cricut cartridges:  George & Basic Shapes, Kate’s ABCs, Lacy Labels (Lite), Preserves
  • Imagine cartridges:  Imagine More, The Good Old Days
  • Core’dinations cardstock
  • Martha Stewart coarse glitter
  • Glossy Accents
  • Rayon seam binding
  • Liquid Pearls

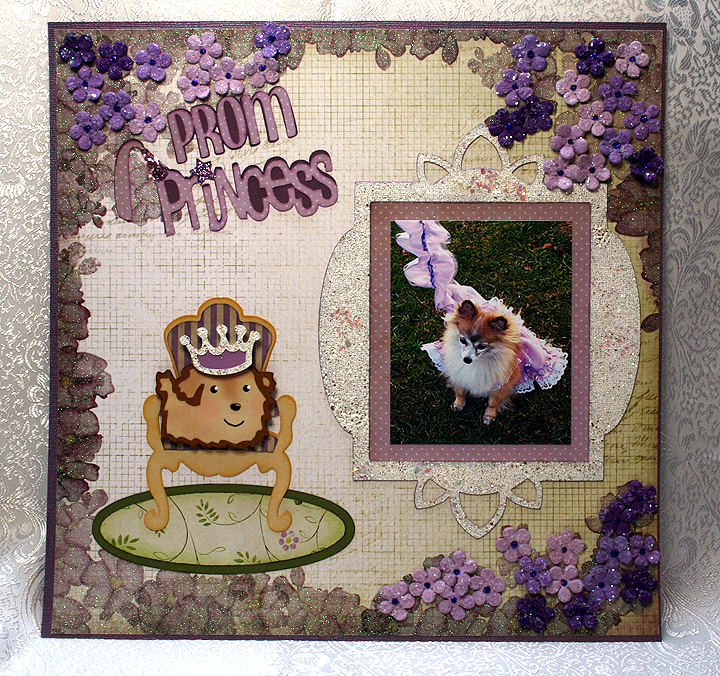
Prom Princess Scrapbook Layout

Wow, it has been so long since I posted something on our blog.  A couple of weeks ago, Bitten by the Bug 2, posted their Princess (the Word) Challenge and I decided I wanted to participate.  Of course, I waited until the last minute to finish my project.  Time is running so short, in fact, that I am going to post pictures right now so I can link my project to their blog and then come back and post the details.   I am hoping I can come back and add comments without creating a disaster — we’ll see how that works out 🙂

OK, now I will see if I can add some details.   The picture in this layout is of our dog and it was taken in 2006, shortly after we adopted her from a rescue group.  Fifi was in foster care for about a year before we got her, so we decided to keep the name she came with — even though it was not high on my hubby’s list of dog names.

Fifi also came with a few issues, the most worrisome was that she nipped.  We talked with our veterinarian about the problem and she recommended a dog trainer–Fifi likes to refer to her as her personal trainer.  Anyway, the trainer seemed to do the trick as Fifi has not nipped since getting individual and group training.

At the end of the year, the trainer had a party for the dogs.  She does this each year and always chooses a different theme.  For 2006 the theme was Prom.  The dogs all came dressed up, but once they walked for judging they got to get undressed and get down to some serious partying — which included running in the dog park and lots of doggy treats.

This was the first  (and so far only) time that Fifi has dressed up — and I wanted to make her something special to wear.  I altered a dog pattern to make her frilly dress.  I also made a matching cover for her leash.  I was surprised that Fifi did not mind wearing the dress.  After walking for the judges, Fifi was chosen as a Prom Princess and her award was a new chew toy.

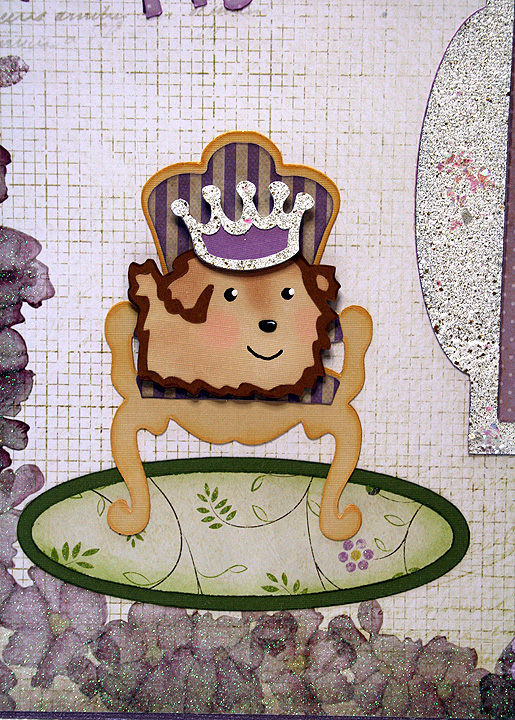
 I used a paper stack from Die Cuts With a View called The Chateau Lavender.  I laid out my design in Cricut Design Studio and I used the Once Upon a Princess cartridge for the title “Princess” cut and Don Juan for “Prom”.  The frame was cut from Elegant Edges, the throne from Formal Occasion and the dog and crown from Paper Pups.

 I did some heat embossing on the frame using some Stampendous products that I recently bought.  The embossing powder I used all over the frame is called Fran-tage Shabby White Opaque.  It is chunky and has lots of gold glitter in it.  I also added some Stampendous Shaved Ice on top of the powder before I heated it — the Shaved Ice adds chunks of bling.  My only problem was trying to keep it from blowing all over.  I heated the frame from underneath, as Stampendous recommends.

 I cut a throw rug to go underneath the throne using George and Basic Shapes.  For the white on the crown, I heat embossed it using the same Stampendous products that I used on the frame.  I did some chalking on the pup.

I used Stampendous Fran-Tage Lavender Crushed Glass Glitter on the princess hat in the title and used Stickles on the star that dots the “i”.  The last step was the small flowers, which are Recollections brand from Michaels that I recently got on clearance.  I used Stickles in the center of the flowers.

  • DCWV The Chateau Lavender
  • Cricut Cartridges:  Don Juan, Elegant Edges, Formal Occasion, Once Upon a Princess, Paper Pups
  • Stampendous Fran-tage Shabby White Opaque Embossing Powder, Lavender Crushed Glass Glitter, Shaved Ice
  • Recollections flowers
  • Stickles


Vintage Birthday Card for Cricut Circle Blog’s Monthly Challenge


Here I am, getting another project submitted with just a few hours to spare.  I guess I work better with deadlines closing in on me, although I do not care for the stress.  But who can I blame for procrastinating?  Yep, no one but me!

I decided to make a birthday card for my niece and this is my first time trying to make something that looks vintage.  I love the look of vintage but didn’t know how well I would do trying to create it.  I am happy with how it turned out, especially for a first try.

The paper I chose is the reason I went for the vintage look.  I picked up a pad of paper by Bo Bunny when I was shopping last week.  It is the Gabrielle Collection and there are some beautiful designs in it. 

The monthly challenge for May at the Cricut Circle is the Tic Tac Toe Challenge.  The object is to pick three prompts in a row from a tic tac toe grid and to include at least two Cricut cuts.

I chose a diagnoal row, going from the bottom left to the right top — which consisted of:  use a cut of a flower shape, use a ruffle, and use some buttons.

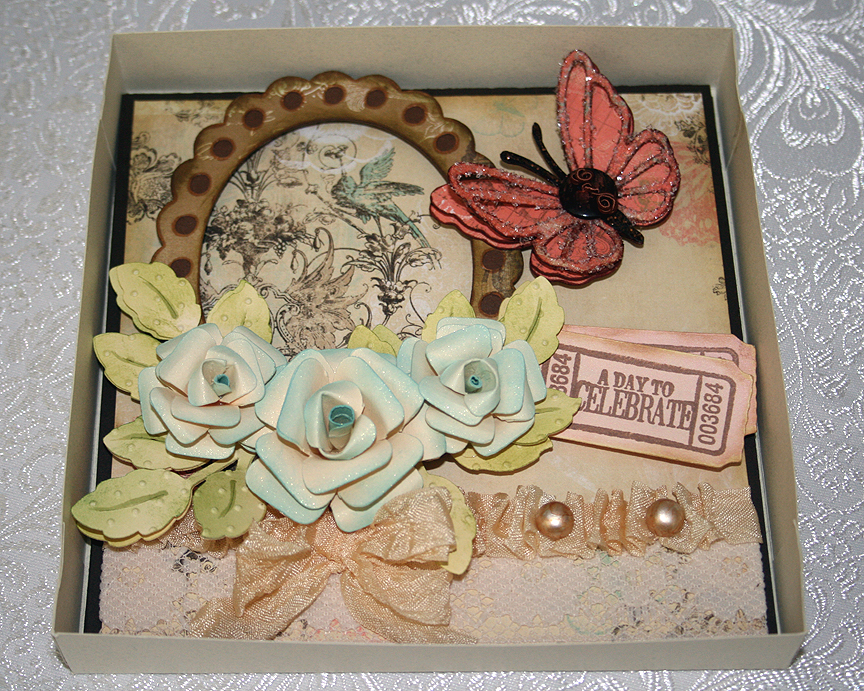
Because the paper is so pretty, I decided to use a frame around one of the designs.  I cut the frame from the Elegant Edges Cricut cartridge.  I made my ruffle from a piece of seam binding and laid down a piece of lace on the paper before adding the ruffle.  The pearls on the ruffle are actually white buttons that I colored with my Copics.  I cut the shanks off the button before gluing them on the ruffle.

The flowers were the most time-consuming part of my card.  I cut them out of plain off-white cardstock using my Accent Essentials cartridge.  I inked all the edges and then formed the cuts into roses.  I sprayed them with Glimmer Mist — sure wish the sparkle showed up in the pictures. 

I cut the leaves from the same off-white cardstock using the Picturesque cartridge, inked them green and then ran them through my Cuttlebug using the Swiss Dots folder.  The butterfly is from the Martha Stewart Elegant Cake Art cartridge.  I found a button in my stash that matched the butterfly beautifully.  I added some Memory Thread to the button and glued it on the body of the butterfly.  On the lacy layer of the butterfly, I added some sparkle using Glossy Accents and Diamond Dust.  I also used Distress Stickles on its body.

I cut some tickets using Wall Decor & More and inked them a light coral color.  I cut the tickets at 2″ and they fit the stamp set perfectly.  I then stamped them with a stamp set from Autumn Leaves called Ticketed. 

The inside of the card features a different piece of the Bo Bunny paper and another ticket.

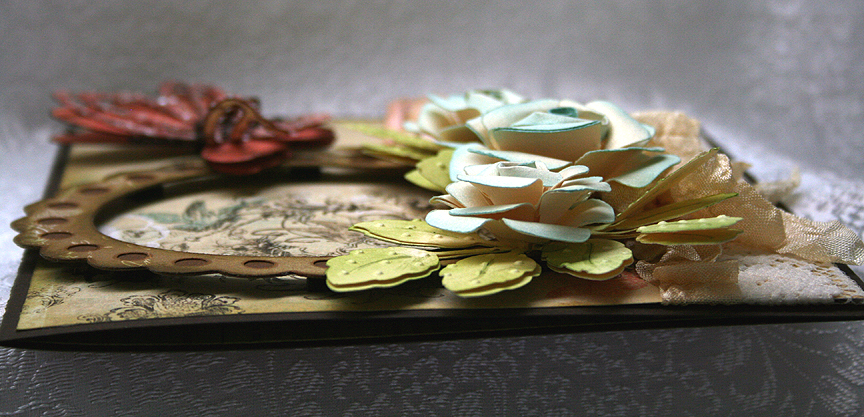
I used lots of foam dots on this card.  Here is a photo showing a side view so you can get an idea of the dimension that this card has.

Since I can’t put this card into a normal envelope, I made a box to hold it.  But I need to take a picture of the box.  I will post the picture once I take it. 

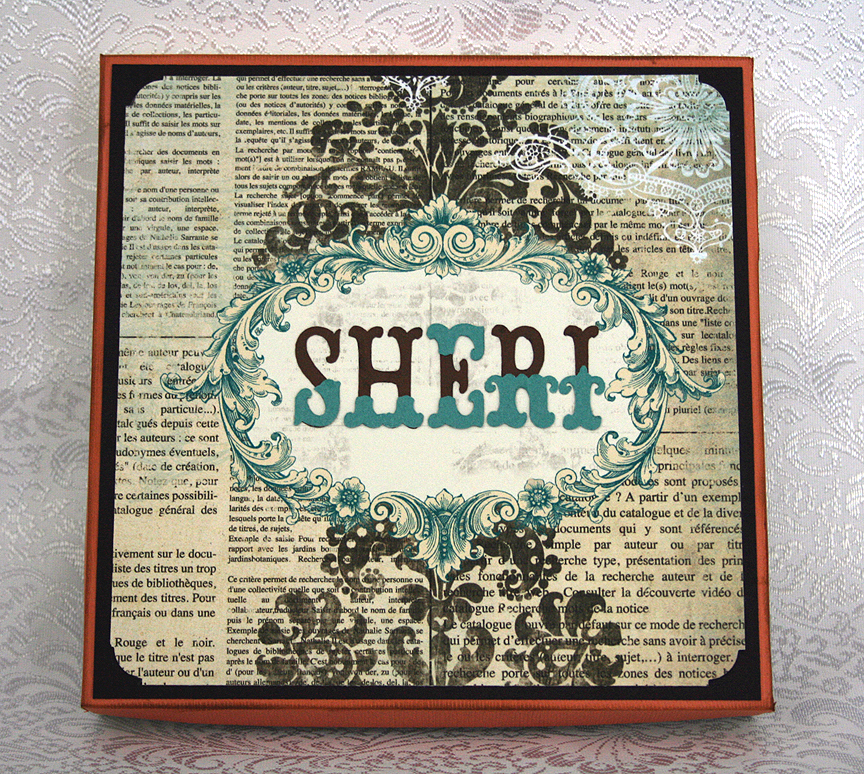
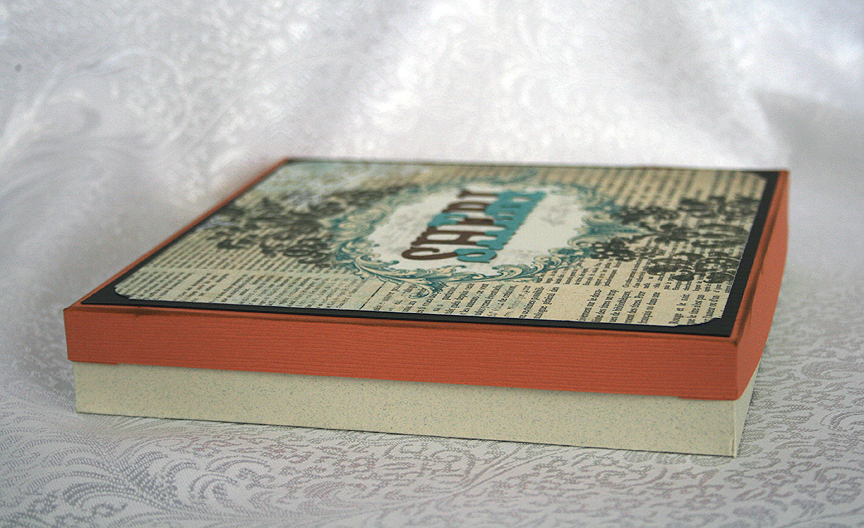
I’m back with some pics of the box.  I ended up adding my niece’s name to the top of the box, which I cut from Storybook.


  • Bo Bunny – Gabrielle Collection
  • Cricut cartridges used:  Accent Essentials, Elegant Edges, Martha Stewart Elegant Cake Art, Picturesque, Wall Decor & More
  • Cuttlebug folder – Swiss Dots
  • Glimmer Mist
  • Seam binding
  • Stickles
  • Autumn Leaves stamps – Ticketed
  • DMC Memory Thread
  • Glossy Accents
  • Diamond Dust
  • Buttons from stash

Easter Bunny Inside His Jelly Bean Seed Packet Card


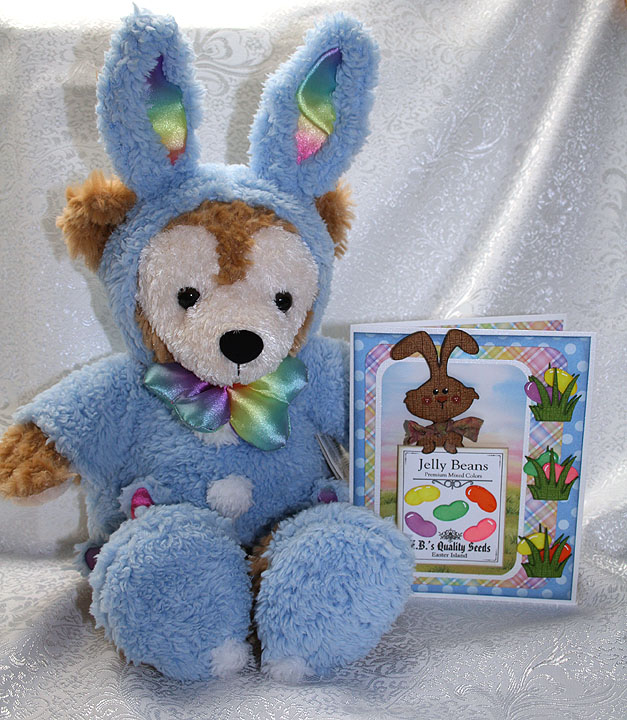
This was a fun card to make.  I wanted to make an Easter card so I could enter it in Jitterbuggin’s Spring Fling contest.  We had extra time to complete this challenge, but I waited until the last minute and am getting this in just under the wire.  It took a while for me to take my concept and come up with a finished project.   This time the challenge is open to voting, so that part is new to me. 

I was inspired by the movie Hop — I loved it and can’t wait for it to come out on DVD.  But my little bunny has to use seeds for his beans as he does not have the talent EB does when it comes to producing jelly beans.

I was a member of PC Hug Club for many years and received some very cute clip art each month.  Because I have such a large collection and never use it, I decided I was going to print my own paper to make this card.  All the background prints are images that I printed on an inkjet printer.  I really like using the clip art because I can resize it — so a 12″ x 12″ background can be reduced to 6″ x 6″ to make a card.  The size of the print becomes smaller too, so it is perfect for cardmaking. 

Fantabulous Cricut has a challenge called Do the Bunny Hop! this week that I will enter this card in.  You have to create a project using a rabbit or chick.

Also, at Cooking With Cricut, their challenge is called Cash in Your Stash and you are supposed to use things in your stash — items that you have had for at least a year.  My clip art collection certainly qualifies, and I also used scraps that I have had for ages to make the bunny and the grass.

I made the seed packet in Adobe Illustrator.  I am such a beginner using that program and was thrilled when I actually made something with it.  I made it a complete packet so I could slip the bunny inside. 

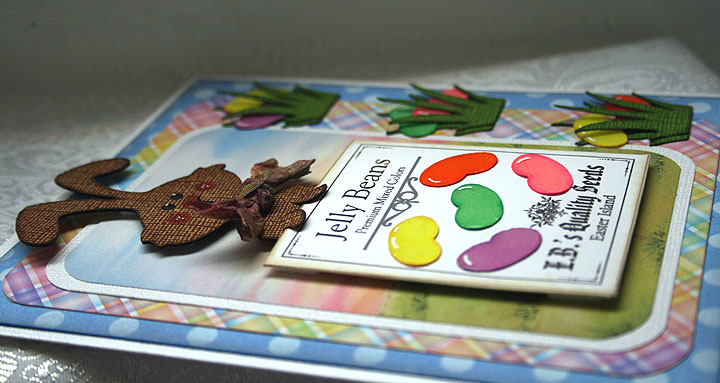
Making the jelly beans was probably the most time-consuming aspect of the card.  I first did an online search to see if I could find a Cricut cut file for a jelly bean as I was pretty sure there were no jelly beans on any of the Cricut cartridges.  I found a post where someone said they made a jelly bean using the George and Basic Shapes cartridge, using the crescent and heart shapes.    I used the same shapes and laid the beans out in Design Studio.  I cut the jelly beans from white cardstock and then colored them with Copic markers.  I applied two layers of Glossy Accents to give the beans their shine. 

The bunny is from the Paper Doll Dress Up cartridge — he’s the bunny from the magician’s costume.  I made a bow for him from seam binding that I spritzed with Glimmer Mist.  The grass is from Create a Critter.  I cut two layers of the grass for each clump so the jelly beans could be seen growing between the layers.  After I placed the bunny inside the seed packet, I pop dotted the entire piece on the front of the card.

Side view showing some of the dimension of the card.

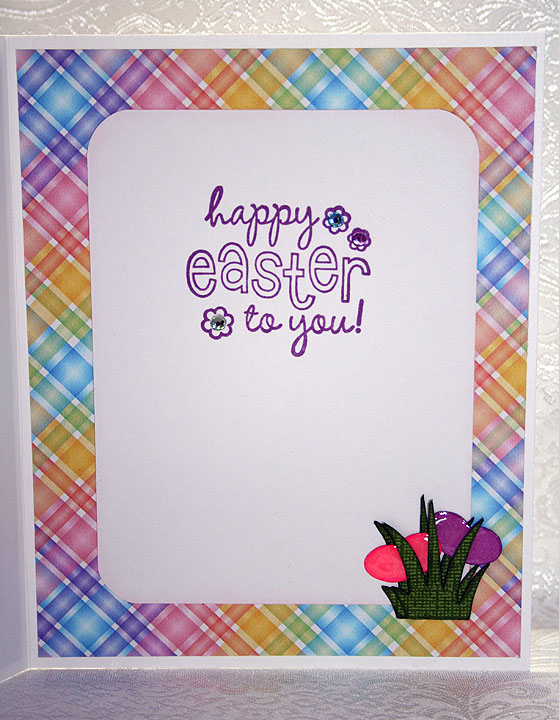
For the inside of the card, I used a stamp from a clear set that I picked up at a scrapbooking expo several months ago.  It came with the rhinestones that I put inside the stamped flowers.  I added another clump of grass with some more jelly beans.


  • Cricut cartridges:  George & Basic Shapes, Create a Critter, Paper Doll Dress Up
  • Cricut Design Studio
  • PC Hug Club clip art
  • Copic markers
  • Glimmer Mist
  • Rayon seam binding

Challenges:

Jitterbuggin — Follow the sketch, make an Easter card and use a Cricut cut somewhere on your card.

Cooking With Cricut — Use stuff in your stash, items that you have had for a year or more.

Fantabulous Cricut — Use a bunny or chick in your project.