Birthday Tag — NSD 2014 Challenges

Since time is running out to enter the challenges on the Cricut Circle Message Board, I made this tag to enter into two different categories.  Actually, I think it qualifies for three.  The first is the XO Three in a Row, the second one is Everything’s Coming Up Rosettes, and the third is All Mixed Up.

For Maria’s XO Three in a Row challenge, you have to pick three items from a Tic Tac Toe board and incorporate them into your project. I chose the bottom row, which is Flower, Ribbon (or Twine), and Stamp.

For Colleen’s Everything’s Coming Up Rosettes, you have to make a project and use a rosette on it.

For Di’s All Mixed Up challenge, you need to use a piece of fabric on your project.

3

I covered the tag with sticky back canvas and then inked it using Peacock Feathers Distress Ink.  I stamped the images on the canvas using the same ink.

I used this tutorial from Tammy Tutterow for my tag, because I wanted to make the flower out of crinoline and she has step-by-step instructions.  I used a Tim Holtz rosette die to cut the crinoline and then sprayed them with Lindy’s Stamp Gang’s Starburst Sprays to get the beautiful colors.   The leaves are from a Spellbinders die, also cut from crinoline.  I stamped a butterfly on vellum and added it to the flower.

2

All that was left was the sentiment and bow, which I made using my Bow-it-All.

  • Ranger Sticky Back Canvas
  • Tim Holtz rosette die
  • Crinoline (from Jo-Ann’s)
  • Distress Ink
  • Lindy’s Stamp Gang Starburst Spray

Circleville NSD 2013 – Did-I-Mension? Challenge


Here is my project for the Circleville Did-I-Mension challenge hosted by Renee.  Be sure and check out her blog and see the beautiful boxes she made for this challenge.

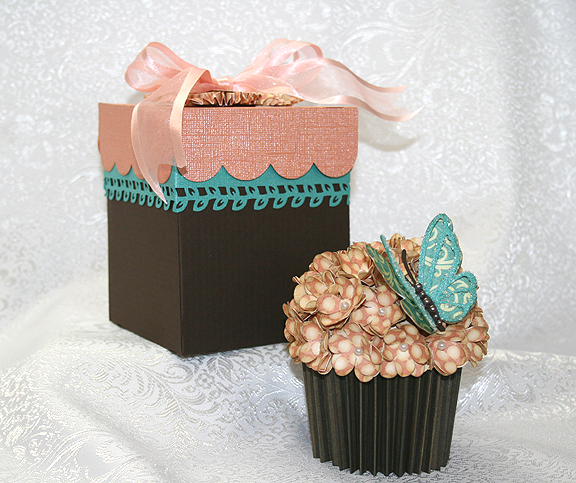
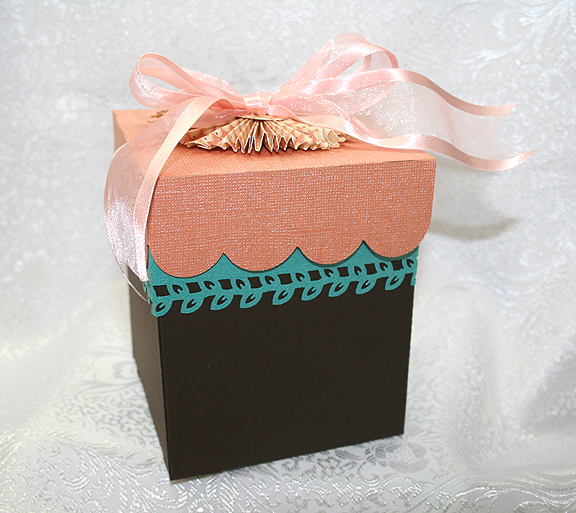
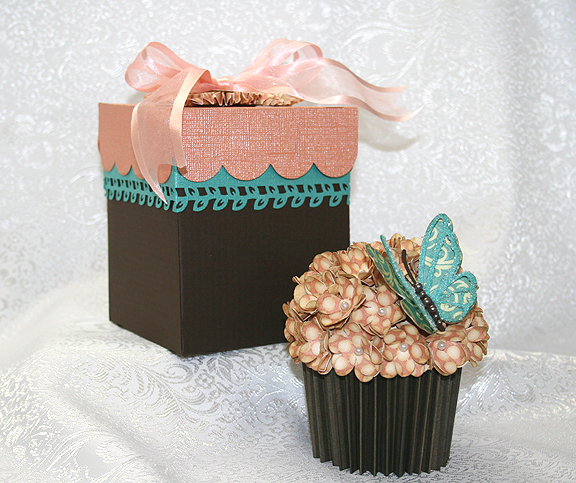
Renee challenged us to created a 3D box, bag or some other project.  Since I had just finished making my cupcake for the previous challenge, I thought a box to put the cupcake in would be the ideal project to make.  I used Sweet Tooth Boxes to cut my box, using the Cube Box cut at 11.5″.  All the cardstock used to construct the box is from Bazzill.

Set8

It didn’t take too long until I realized I was faced with a challenge.  I could only make a box that would fit on a 12″ x 12″ piece of paper.  I needed a square box and I could get the size I need (barely) for the cupcake to go inside, but I couldn’t get  it tall enough.  I spent a good two hours going back and forth on what to do.  I was looking at making something completely different for my project, but I kept coming back to the cupcake because I really needed a box.

Box3

I finally decided to see if I could add a separate piece of cardstock to the top of the box without it looking too funky.  I cut 2″ strips and had to piece them together to get four 4″ sides.  I used a Martha Stewart punch on the bottom edge.  I think it is called Laurel Leaf.   This is what the box looks like without the lid.

Box

The added piece gave me the height I needed, but I’m not too sure on the overall appearance.  I think it looks OK.  I made a rosette to put on the lid, using the Graphic 45 paper from the cupcake.  I then added a bow to the rosette.

Set8

  • Cricut Cartridge – Sweet Tooth Boxes
  • Bazzill cardstock
  • Martha Stewart Laurel Leaf punch
  • Ribbon

My First Mixed Media Canvas — Cricut Southwest Contest

I have been wanting to try my hand at creating a mixed media canvas for a while now.  Cricut’s latest contest for their new Southwest cartridge gave me the push to get started.  The inspiration for my project was a picture I pinned on Pinterest of a gorgeous white dream catcher.

I watched a lot of videos online trying to gather facts on what supplies I needed and how I wanted to proceed.  I made a run to Michaels for supplies before I started.  I needed a canvas and gesso, and I also picked up a few fun items to try.  I think my favorite was the modeling paste.

3


4

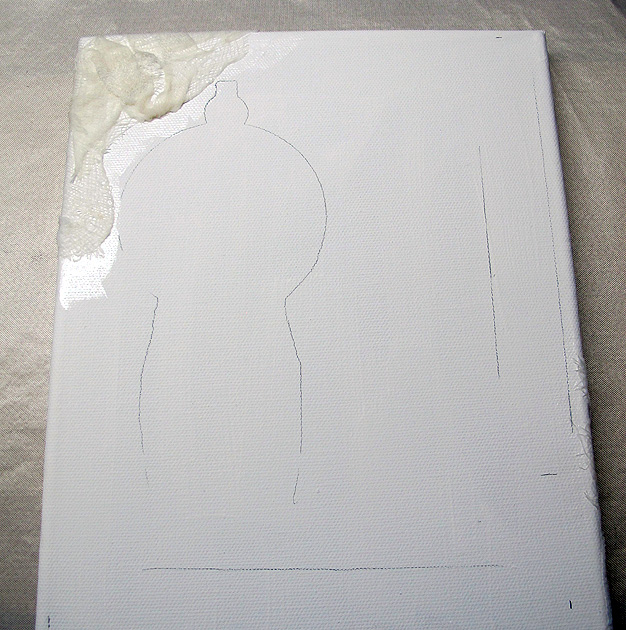
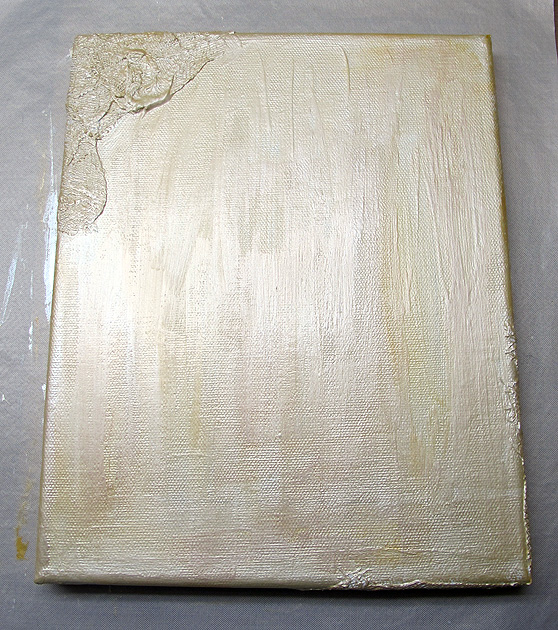
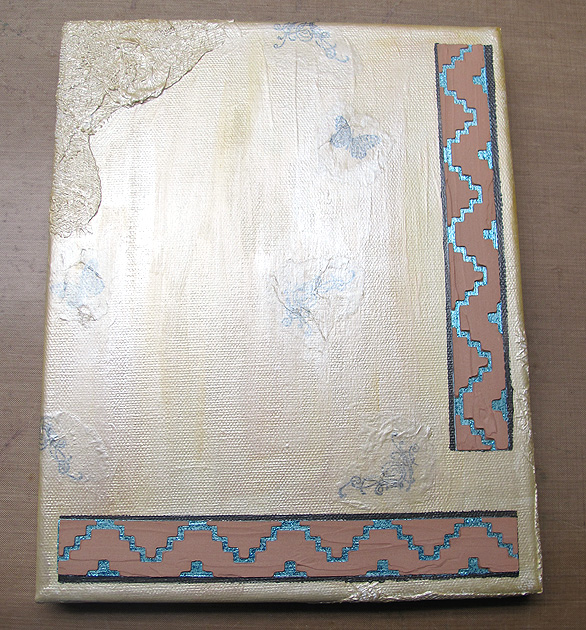
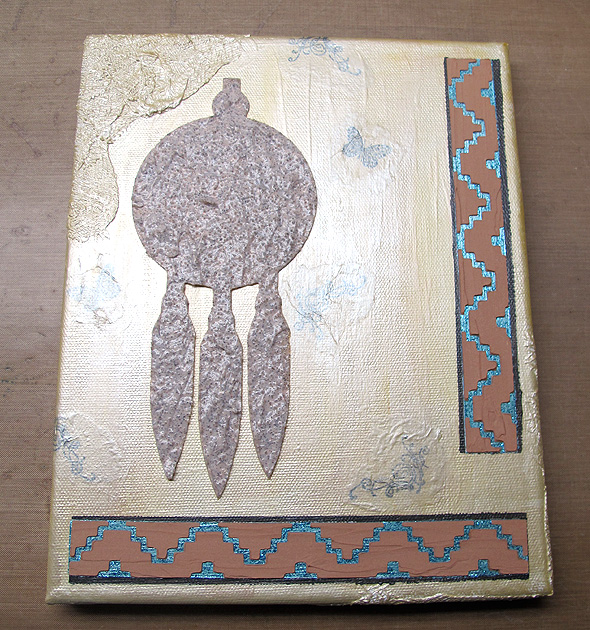
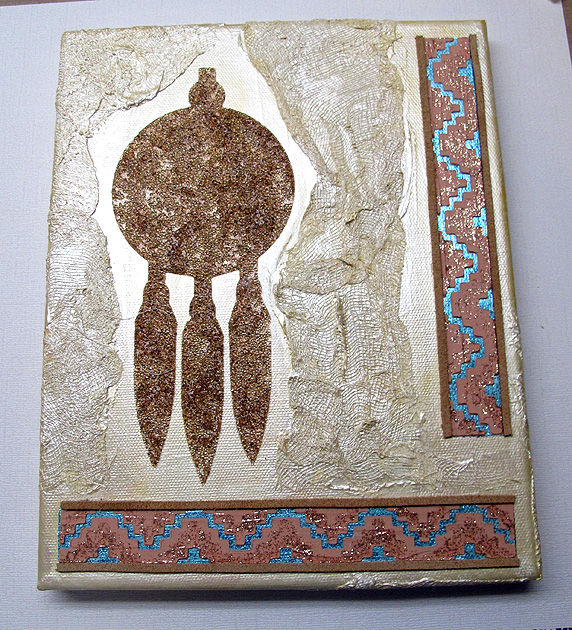
I laid my design out in Cricut Craft Room.  The first step was to paint the 8″ x 10″ canvas with gesso.  After it was dry, I cut out the dream catcher  at 7″ and border strips at .85″ from scrap cardstock so I could gauge where I wanted them on the canvas.  I lightly traced around the cuts with a pencil.

StepCanvasLayout

Then I added some cheesecloth to the canvas using a gloss medium.  When that was dry, I gave everything another coat of gesso.  Then I used two shades of Martha Stewart metallic craft paint to cover it.

StepCanvasPaint

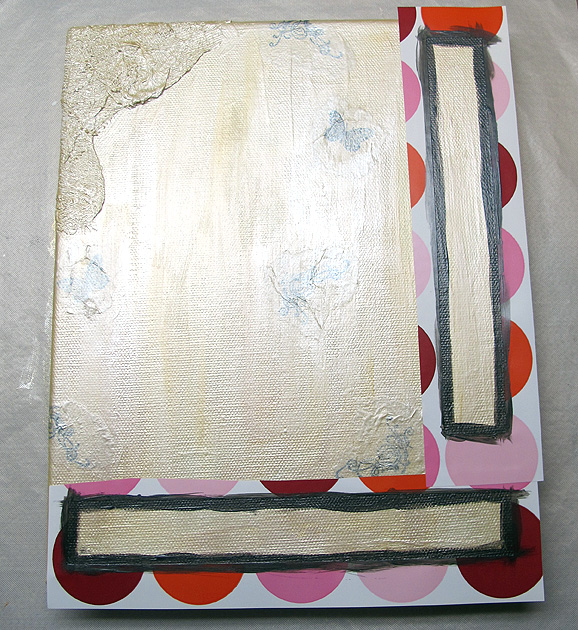
For my borders, I cut the design using repositionable vinyl and made stencils.  I used the negative images for my stencils.  The stencils are the polka dot material in the pictures.  It is some vinyl I picked up on clearance.  Using the first stencil, I laid down some gunmetal metallic paint.  I would skip this step next time because I ended up covering that part of the design with some leather lacing.  I didn’t like the dark paint — it was too much of a contrast.

StepBorderDk1

In this picture you will notice the canvas looks different than the finished project. I had stamped some images on it that I decided to delete by covering with gesso and adding some more cheesecloth. I then painted the area to blend in with the background.

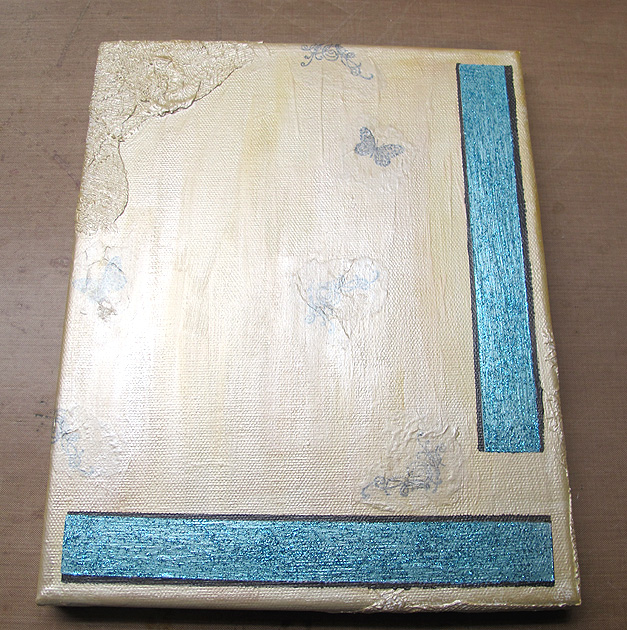
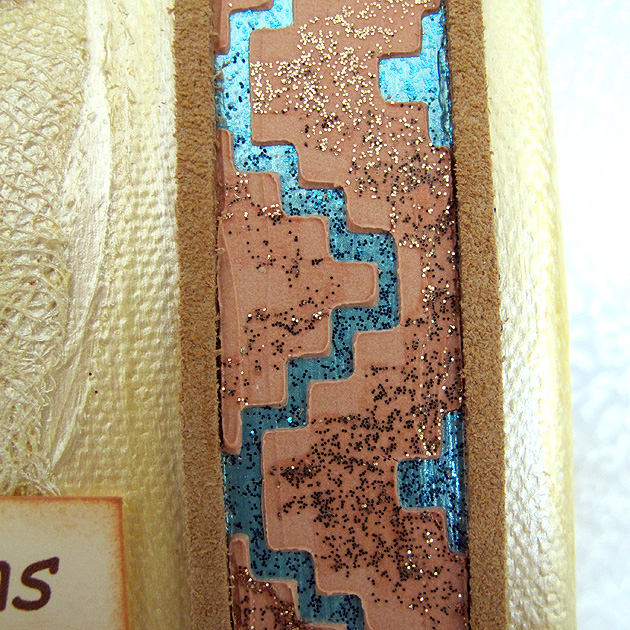
I laid down the turquoise color with the second stencil.  I put a layer of gesso first and then added two layers of color.  The final layer was a coat of Martha Stewart glitter paint.

StepBorderBlue

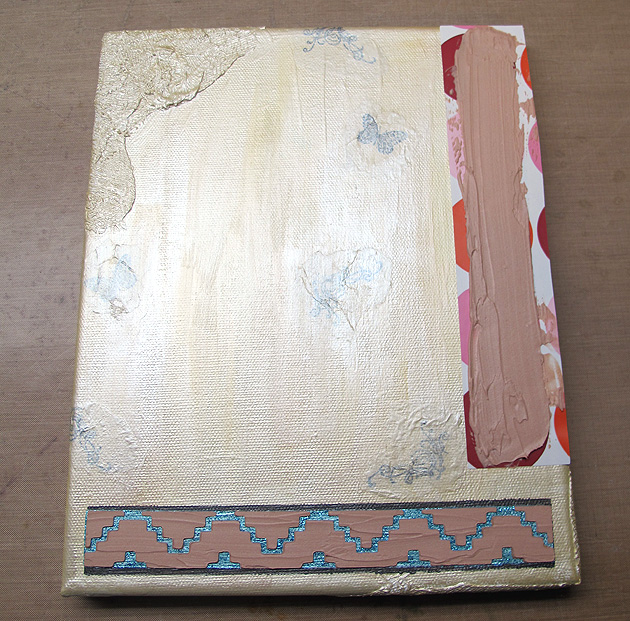
The third stencil is where I got to try the modeling paste.  I mixed some copper color into the paste and used a craft stick to smooth it over the stencil.

StepModelPaste1

I was so happy with how it turned out — the design is raised and after it dried it reminded me of pottery.

StepModelPaste


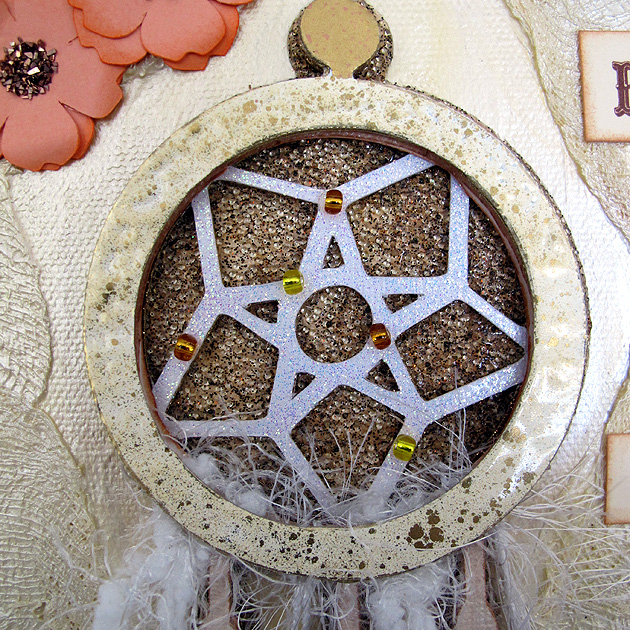
Before doing the last layer of the borders, I cut a stencil of the shadow of the dream catcher and stuck it on the canvas.  I mixed some glass bead gel with some glitter paint and spread it over the canvas.  This layer was pretty wet and it had to dry overnight.

StepGlassBeads


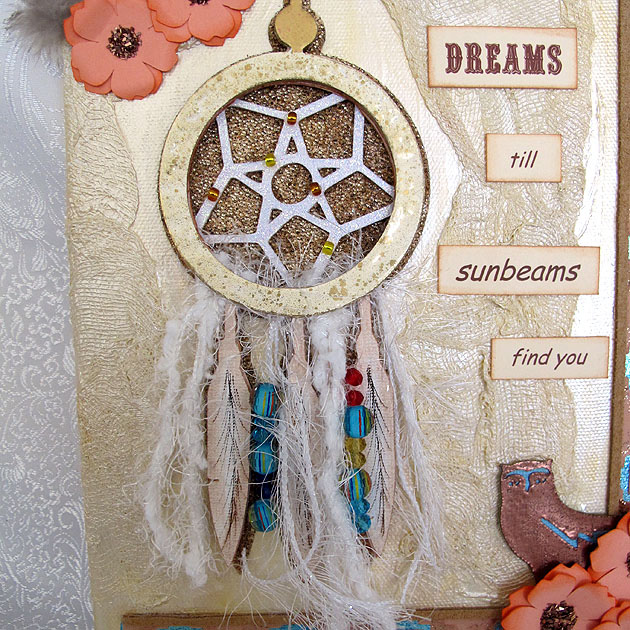
You can see the glass beads behind the web part of the dream catcher.  They give a really neat effect.

DCCloseup2


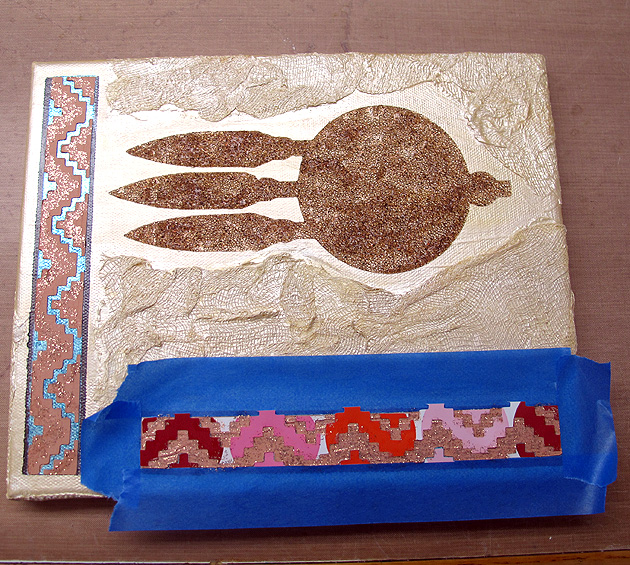
The final border stencil was a little tricky.  My first issue was weeding the correct vinyl — I kept pulling off the wrong areas.  The I had trouble getting it to stick on top of the modeling pasted.  It wanted to lift up, so I opted to add just a coat of copper glitter paint for the final coat, rather than changing colors completely.  I was afraid the paint would bleed and be noticeable if I went for a contrast.

StepBorderTopLayer


I was very pleased with the finished border.  The last layer added a subtle glitter design on the modeling paste.

BorderCloseup2

At this point I decided I did not like the stamped images I placed on the canvas earlier.  I painted over them with gesso and then added some more cheesecloth.  I went over the entire area with the metallic paint and blended the areas into the background.   I also glued some leather lacing along the edges of the border, covering the dark painted layer I had first stenciled on.  I was much happier with this look.

StepCheesecloth2

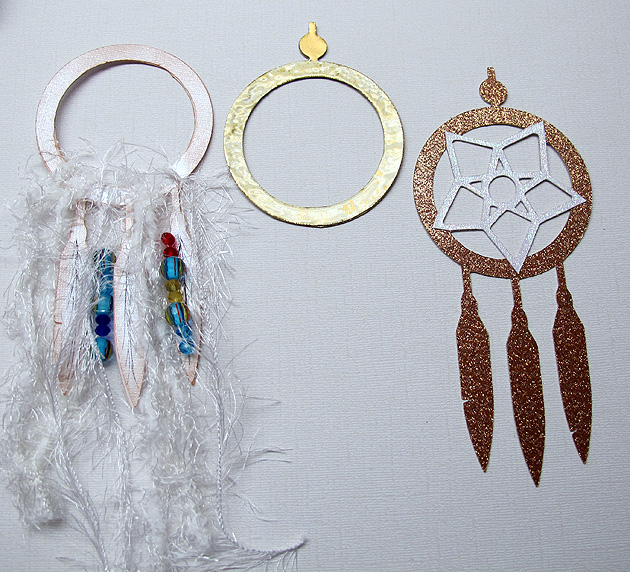
I used several layers to make the dream catcher.  I trimmed one layer so all I had was a circle and used that to tie on the trim and beads.  The top layer is also just the circle and I heat embossed it using a Fran-tage powder from Stampendous.  The web part is also heat embossed using a holographic powder.  I glued some small seed beads to it.  I added several layers of feathers and sketched in some lines using a marker.

StepDCLayers


This is what it looks like all put together.


DCCloseup

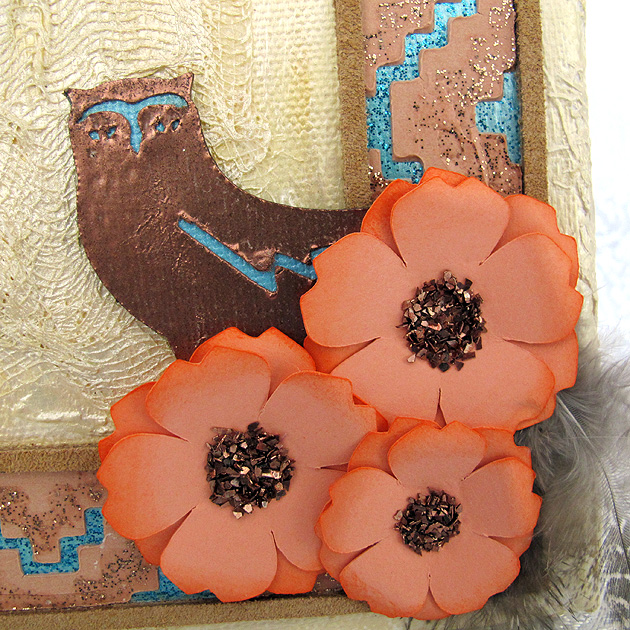
The flowers were cut at two sizes, 1.5″ and 1.25″.  I inked the edges and curled the petals under.  The flower centers are glass glitter from Stampendous.  I glued some feathers behind the flowers.  The owl was cut at 2″ and heat embossed with copper embossing powder.

Owl

The saying was printed using various fonts and cut apart into rectangles.  I inked the edges and glued them on the canvas.  It is actually a song lyric from Dream a Little Dream of Me, sung by Cass Elliott of the Mamas & Papas.

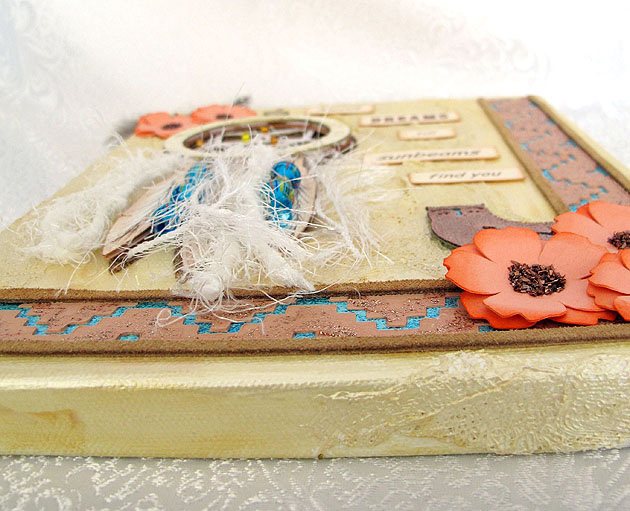
Here is a side view of the canvas, to give you an idea of all the texture and dimension it has.

SideView

While this project was very time consuming, I do want to try doing a canvas again.  With all the supplies I now own, I don’t have an excuse not to.

1

  •  Cricut Southwest cartridge
  • 8″ x 10″ canvas
  • Liquitex Gesso
  • Liquitex Modeling Paste
  • Liquitex Glass Beads
  • Golden Acrylic Glazing Liquid (used to blend background paints)
  • Martha Stewart acrylic craft paints:  Light Gold Metallic, Pale Bronze Metallic, Aquarium Pearl, Turquoise Glitter, Brownstone Glitter, Sunstone Glitter
  • Cheesecloth
  • Stampendous Fran-tage embossing powder
  • Stampendous Glass Glitter
  • Yarn
  • Beads
  • Feathers
  • Leather lacing (from Michaels)

Window Card Using Cricut Creative Cards

There is going to be a new Cricut cartridge available on February 21, 2013 and it is called Creative Cards.   For one week only, from February 14-20, there are seven cards and envelopes from this cartridge available to use for free in Cricut Craft Room.  I was  happy I found time to try one of these cuts — I chose to make the window card.

I really like this card, so much so that I will surely purchase Creative Cards.  I think the window card is called a tri-fold card.  I like this because the inside of the card, where I will write my greeting, is not visible through the window.

A

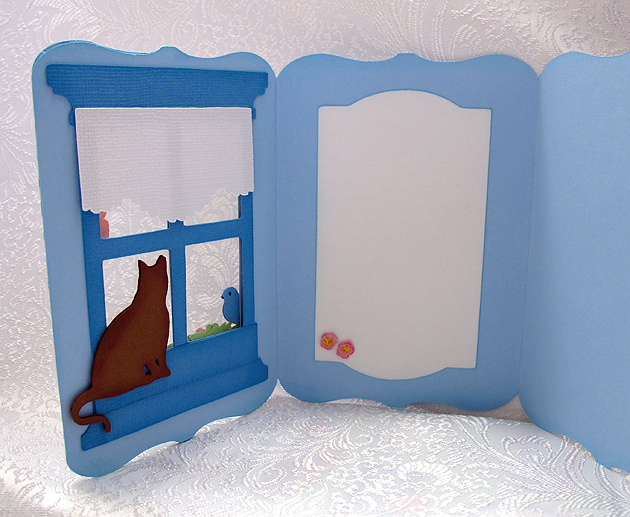
I made my card using spring colors and the first thing I did was decide what paper was going to show through the window.  I wanted something that looked like wallpaper, so it would look like the inside of a house.  I looked through my Imagine cartridges and found a striped print I liked on the Blossom cartridge.  After picking out my wallpaper, I decided my card would be blue.  All the small pieces were cut from scraps.

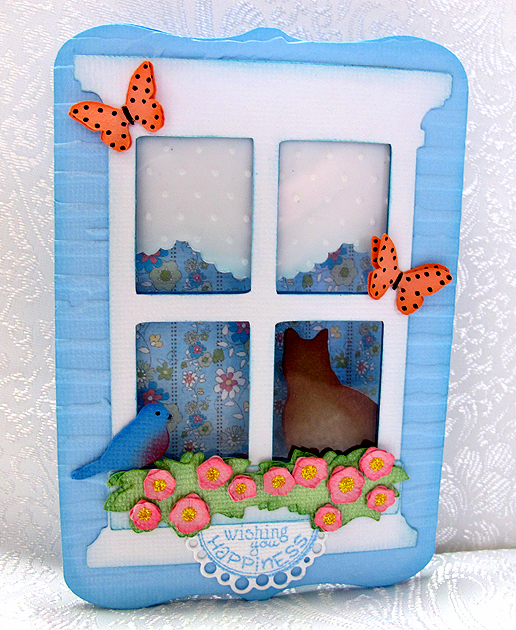
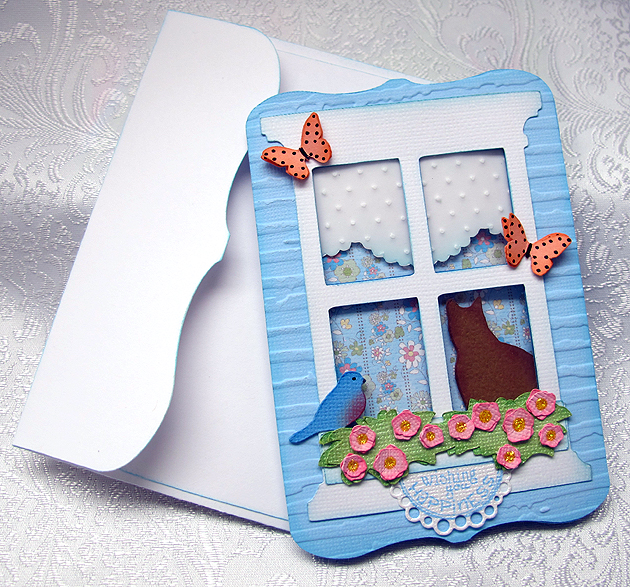
The card is cut at 5″ and the finished size is about 3.5″ x 5″.  I cut an extra front panel and ran it through the Cuttlebug using the Distressed Stripes embossing folder so that it would look like siding on a house.  I cut a piece of clear acetate and adhered it between the two front pieces to give the appearance of glass.

The curtain is a piece of vellum run through the Cuttlebug using the Swiss Dots folder, backed by a piece of white cardstock.  The outside window and flower box are white.  I cut an extra window in a darker blue and used it on the inside because I wanted a finished look in there too.

Inside2

The bird and butterflies are from Creative Cards and both were cut at 2.5″.  The only other cartridge I used was A Child’s Year to cut the silhouette of the cat, which was cut at 2″.  I inked and chalked all the pieces before assembling the card.  I used Stickles for the centers of the flowers.

Card6

The sentiment below the flower box is from Whimsy Stamps and it is from their Celebration Circle Pennants set.  I cut it out using the matching die.  This was my first time using both the stamps and die, and I am very happy with how it turned out.

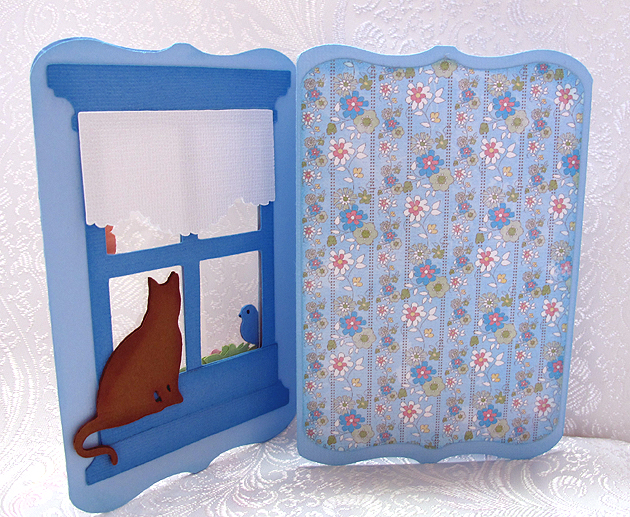
On the inside of the card, I added a white mat to write on.   It is the inside of the window from the card cut — I just hid the outline for the card and cut only the window.  I embellished it with a couple of the same flowers from the window box on the front.

Inside

The last step was making the envelope, and that turned out to be an easy task.  I simply cut the envelope at the same size I cut the card, which was 5″.  I scored along the two side flaps and then at both the top and bottom.  I folded at the score marks and then inked all the edges.  I glued the bottom to the side flaps and the envelope was done.  I’ll seal the top flap when I send the card.

Envelope


  • Cricut cartridges:  Creative Cards, Imagine Blossom, A Child’s Year
  • Ink & Chalk
  • Whimsy Stamps
  • Stickles


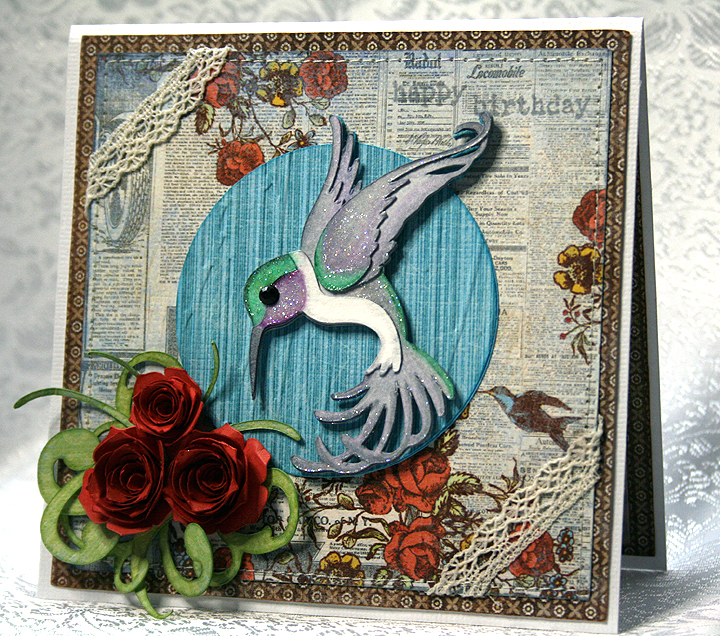
Cricut Art Nouveau Hummingbird Birthday Card


I wanted to make a card to enter in a couple of challenges and this is what I came up with.  The first challenge is Things that Fly in Nature over at Bitten by the Bug 2. The second challenge is Texture at Cooking with Cricut.

I made a 5″ x 5″ card and the patterned paper was all printed on the Imagine using the Country Carnival cartridge.  I love the paper selection on this cartridge and have been wanting to use the design that is on the background of my card for some time.  The reason I bought this cartridge is because of the paper — and the very cool font that it has.

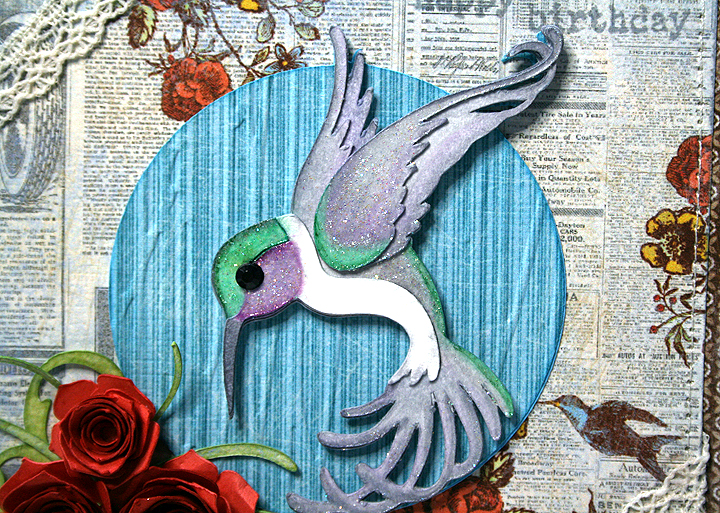
 I cut the hummingbird (at 3″) from watercolor paper using the Art Nouveau cartridge and colored him with Copics.  This is only my second time trying to color with Copics, and I have lots to learn.  I discovered I don’t have enough green markers — I didn’t have enough in the same color group to do any blending.

After I colored the hummingbird, I used a crystal glaze (something I got years ago) to go over sections of his body to try and simulate the iridescence you see in their feathers.

Oh, dear — after looking at the close-up I’m not too sure I should be posting it.  My coloring definitely leaves a lot to be desired!  The circle behind the hummingbird was embossed using the Forest Branches folder.

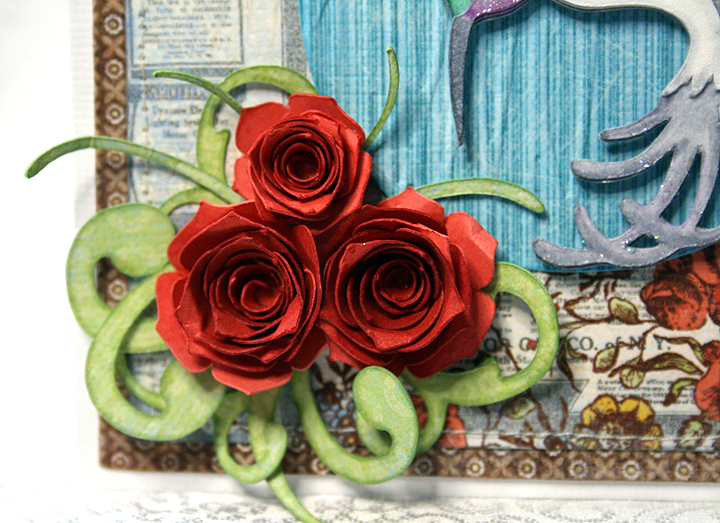
I recently got the Art Philosophy cartridge, mainly because of the flowers I have seen so many crafters make with it. The roses on this card represent my first time using this cartridge.  I cut them at 2″ and 2.5″ using some Recollections paper from Michaels.  I inked the edges with Tim Holtz Fired Brick Distress Ink.  I used a quilling tool from one of my Cuttlebug quilling kits to roll up the flowers.  I was surprised at how quickly they went together.  The greenery behind the roses is also from Art Philosophy.

I wanted the sentiment to be subtle, so I stamped it in the upper right hand corner (using distress ink) trying to make it look like it is part of the print on the paper.  I added a couple of pieces of lace across two corners and used my sewing machine to stitch around the card.

For the inside of the card, the white area is a shape cut using Art Philosophy.  The corners are a 2″ square of vellum, cut diagonally, embossed with the Swiss Dots folder, and trimmed with lace sewn across the top edges.  I then secured them to the card by stitching around the entire piece.

I originally planned on using the vellum corners on the front of the card, but when I laid everything out, I thought they hid too much of the paper on the front.  So they got moved inside, which worked out fine because I had no plans yet for the inside of the card.

  • Cricut cartridges:  Art Nouveau, Art Philosophy, Imagine Country Carnival
  • Cuttlebug embossing folders:  Forest Branches, Swiss Dots
  • Copics
  • Vellum, scraps of lace

Wild About You Onesie Gift Set Using Cricut Create a Critter 2


One of the more popular Cricut cartridges surely must be Create a Critter.  Provo Craft is giving users of Cricut Craft Room a sneak peak of one of their newest cartridges by making five cuts from Create a Critter 2 available for free. There is also a contest, which ends on September 5,  where you can enter your projects using these latest designs through the Cricut Project Center.

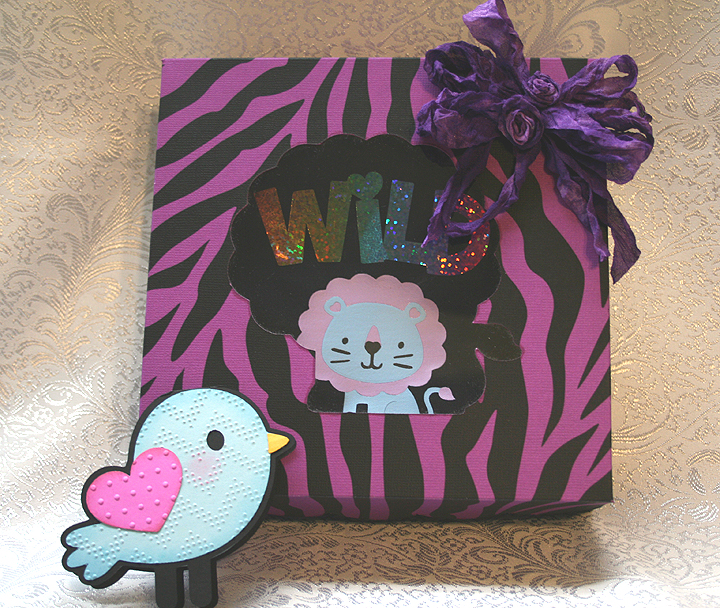
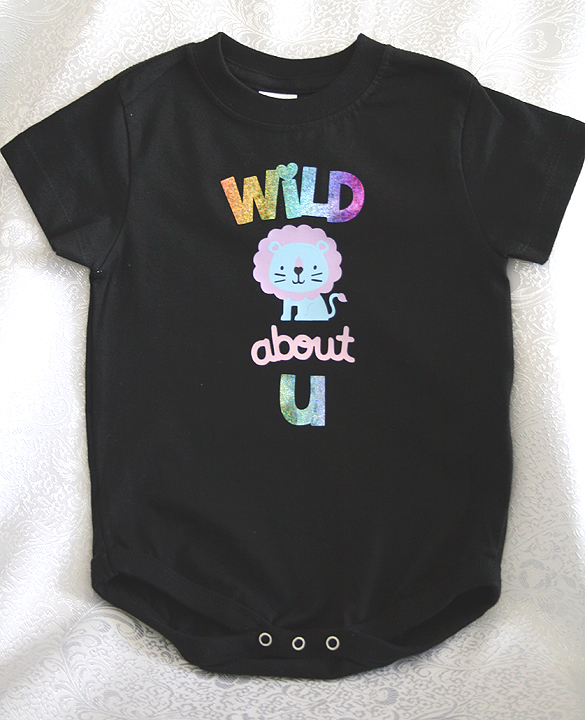
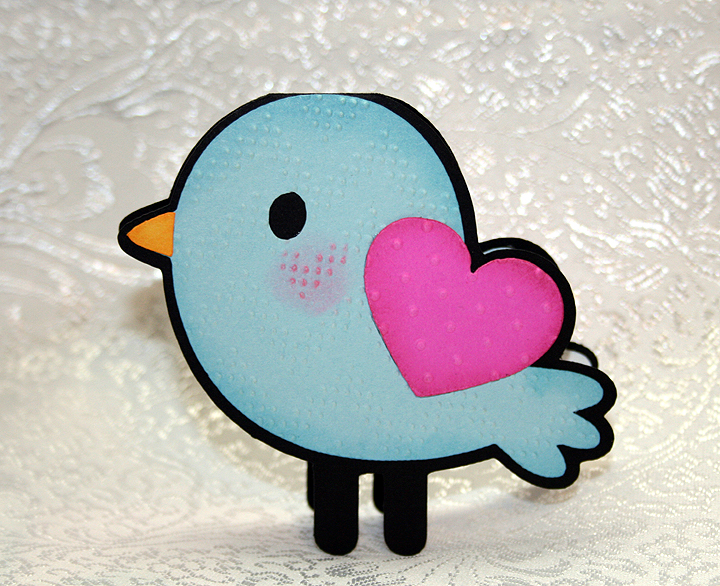
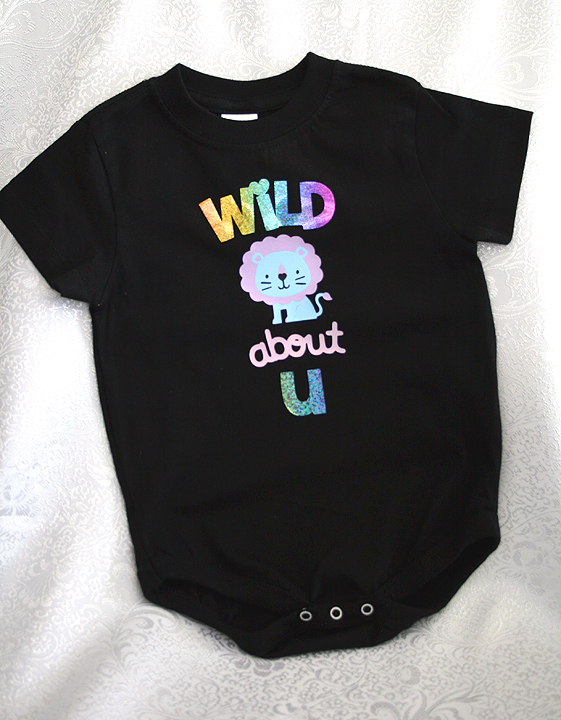
My project is a onesie gift set that includes a black onesie decorated with the lion and phrase designs from Create a Critter 2.  All were cut from heat transfer vinyl.  I constructed a box from Sweet Tooth Boxes and made a small gift card using the bird that is on the Icon tab of the lion feature on Create a Critter 2.

When using heat transfer vinyl, it is important to remember that you must mirror (flip) your images in Craft Room because you are cutting the back of the vinyl.  Then when you iron it on your garment everything is facing the correct way and you can read your phrases.

“Wild about U”  is cut from a holographic vinyl that I picked up years ago at a trade show — long before I knew what a Cricut was.   I fell in love with the sparkly rainbow colors and brought a roll home with me.  Unfortunately the vinyl did not come with application instructions, so I did some test runs before applying it on the onesie.  My first attempt at ironing it on produced negative results as I was getting it too hot.  I didn’t realize it and started increasing the time I was pressing, getting even worse results.  I finally dialed back on the heat and the time to get proper application.

The lion is cut from a vinyl that can be peeled hot or cold.  Because he has four layers, I applied him first.  I put down the first layer and pressed for only 4 seconds, immediately peeling off the backing.  I let that layer cool and then added the next.  Again, I pressed for 4 seconds and peeled.  I did this until all four layers were down.

When doing layers, you have to remember to cover up the vinyl that has already been applied and is no longer protected by the clear film.  I use a teflon sheet to cover my design before pressing each layer.

After the lion and the “about” from the phrase were in place, I then added the holographic phrase and applied it.

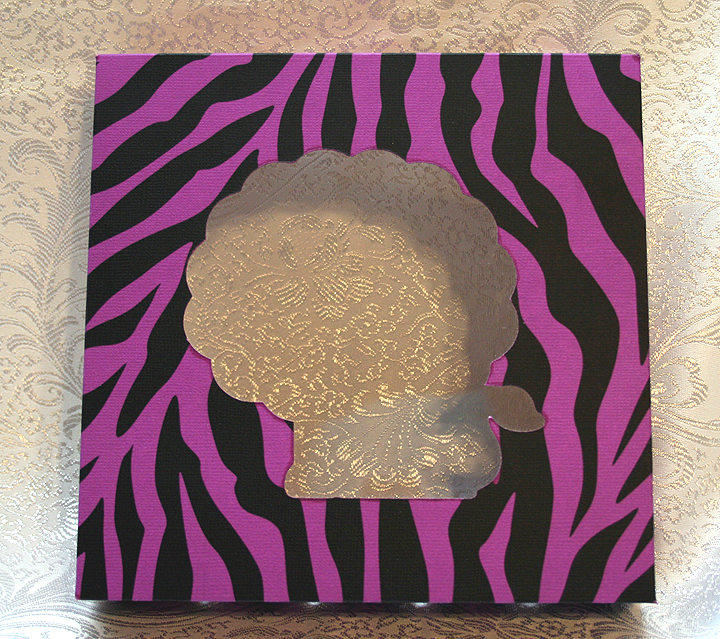
The gift box is from Sweet Tooth Boxes.  I cut the box that begins on page 10 of the handbook, using just the bottom and lid.  I hid the cut-out area in the lid and then added the shadow feature of the lion — so my box has a lion window to tie in with the theme of the onesie.

I printed the zebra paper for the box lid using my Imagine.  I used a bright purplish cardstock and printed the stripes using the Teresa Collin’s Black & White cartridge.  This put a lot of black ink on the paper, so I used a blow dryer on it and then I let it dry for over an hour.  When I rubbed my fingers on it, the black was still smudging, so I gave it a coat of clear matte spray.

Because Cricut Craft Room does not work with the Imagine, I used my Imagine only to print the paper.  I then transferred the paper to my Expression and cut the lid.  I scored all the lines on the box and lid and assembled them, adding a layer of clear acrylic to form the window of the box.

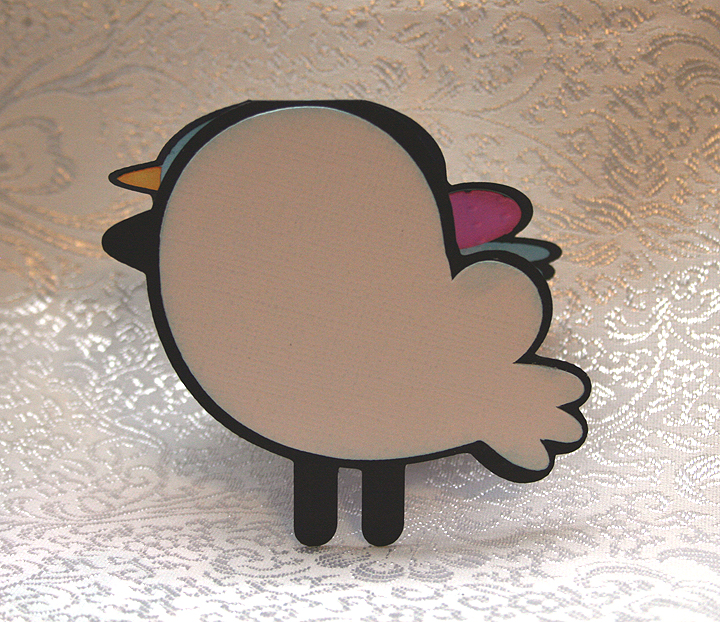
A gift card was created using the shadow feature and welding two shapes together at the top of the head.  I used two Cuttlebug folders on the bird, Charles (a chevron design) and Swiss Dots.   I did the layers on both the front and back of the card, as I wasn’t sure which way I wanted him facing.

I added a white layer to the inside of the card so there would be a place to write a message.

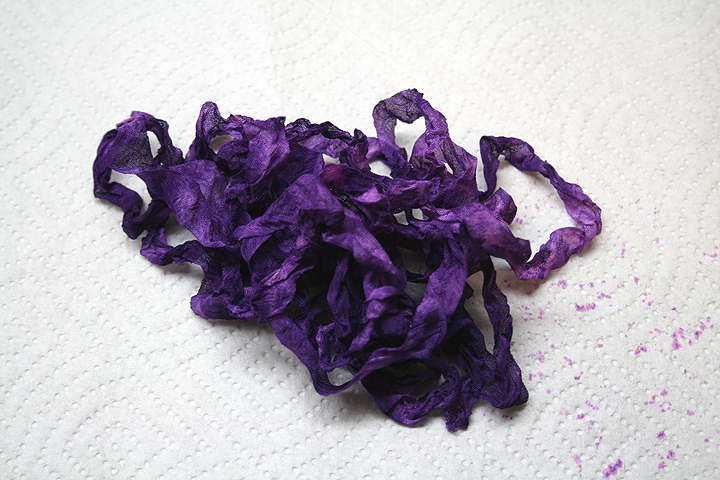
To finish off the box, I dyed some seam binding using Tattered Angels Glimmer Mist and Adirondak Color Wash.  I scrunched it up while it was wet and let it dry.  Then I tied a bow and made a couple of ribbon roses to add in the middle.

  • Cricut Craft Room:  Create a Critter 2, Sweet Tooth Boxes
  • Cricut Imagine:  Teresa Collin’s Black & White cartridge
  • Cricut Expression
  • Cuttlebug:  Charles and Swiss Dots
  • Tattered Angels Glimmer Mist
  • Adirondak Color Wash

Prom Princess Scrapbook Layout

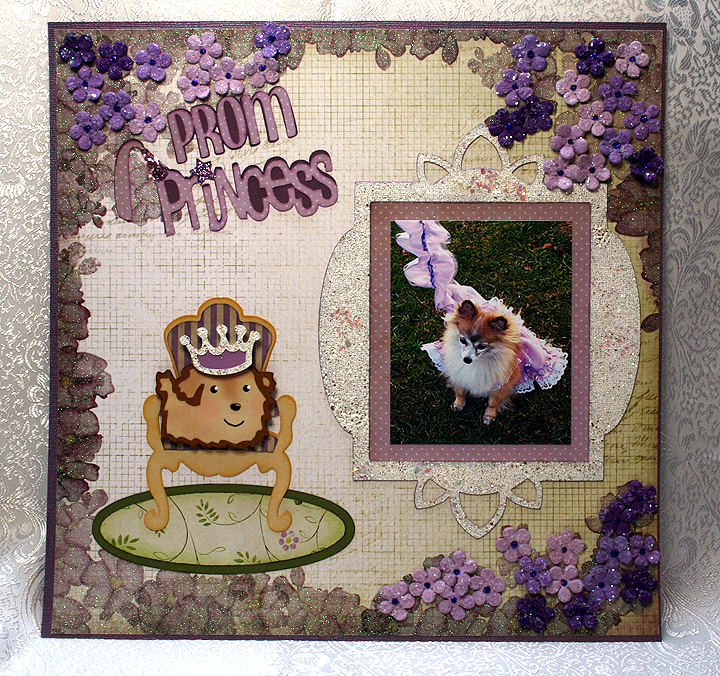
Wow, it has been so long since I posted something on our blog.  A couple of weeks ago, Bitten by the Bug 2, posted their Princess (the Word) Challenge and I decided I wanted to participate.  Of course, I waited until the last minute to finish my project.  Time is running so short, in fact, that I am going to post pictures right now so I can link my project to their blog and then come back and post the details.   I am hoping I can come back and add comments without creating a disaster — we’ll see how that works out 🙂

OK, now I will see if I can add some details.   The picture in this layout is of our dog and it was taken in 2006, shortly after we adopted her from a rescue group.  Fifi was in foster care for about a year before we got her, so we decided to keep the name she came with — even though it was not high on my hubby’s list of dog names.

Fifi also came with a few issues, the most worrisome was that she nipped.  We talked with our veterinarian about the problem and she recommended a dog trainer–Fifi likes to refer to her as her personal trainer.  Anyway, the trainer seemed to do the trick as Fifi has not nipped since getting individual and group training.

At the end of the year, the trainer had a party for the dogs.  She does this each year and always chooses a different theme.  For 2006 the theme was Prom.  The dogs all came dressed up, but once they walked for judging they got to get undressed and get down to some serious partying — which included running in the dog park and lots of doggy treats.

This was the first  (and so far only) time that Fifi has dressed up — and I wanted to make her something special to wear.  I altered a dog pattern to make her frilly dress.  I also made a matching cover for her leash.  I was surprised that Fifi did not mind wearing the dress.  After walking for the judges, Fifi was chosen as a Prom Princess and her award was a new chew toy.

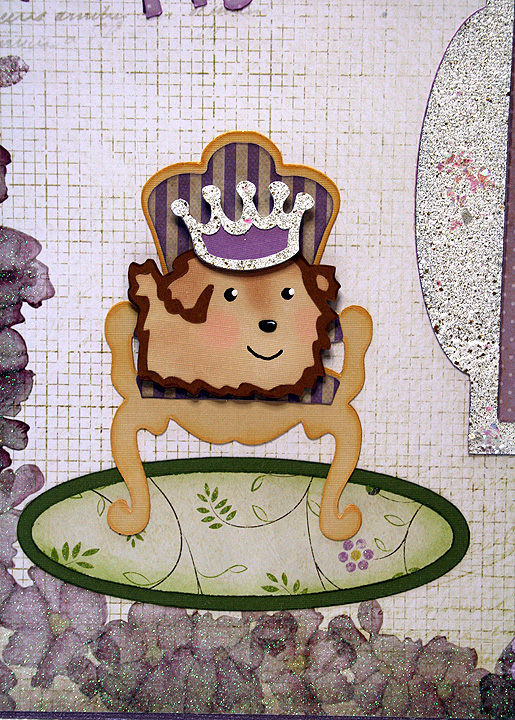
 I used a paper stack from Die Cuts With a View called The Chateau Lavender.  I laid out my design in Cricut Design Studio and I used the Once Upon a Princess cartridge for the title “Princess” cut and Don Juan for “Prom”.  The frame was cut from Elegant Edges, the throne from Formal Occasion and the dog and crown from Paper Pups.

 I did some heat embossing on the frame using some Stampendous products that I recently bought.  The embossing powder I used all over the frame is called Fran-tage Shabby White Opaque.  It is chunky and has lots of gold glitter in it.  I also added some Stampendous Shaved Ice on top of the powder before I heated it — the Shaved Ice adds chunks of bling.  My only problem was trying to keep it from blowing all over.  I heated the frame from underneath, as Stampendous recommends.

 I cut a throw rug to go underneath the throne using George and Basic Shapes.  For the white on the crown, I heat embossed it using the same Stampendous products that I used on the frame.  I did some chalking on the pup.

I used Stampendous Fran-Tage Lavender Crushed Glass Glitter on the princess hat in the title and used Stickles on the star that dots the “i”.  The last step was the small flowers, which are Recollections brand from Michaels that I recently got on clearance.  I used Stickles in the center of the flowers.

  • DCWV The Chateau Lavender
  • Cricut Cartridges:  Don Juan, Elegant Edges, Formal Occasion, Once Upon a Princess, Paper Pups
  • Stampendous Fran-tage Shabby White Opaque Embossing Powder, Lavender Crushed Glass Glitter, Shaved Ice
  • Recollections flowers
  • Stickles


2nd Banner Entry for Cricut Expression 2 Design Challenge


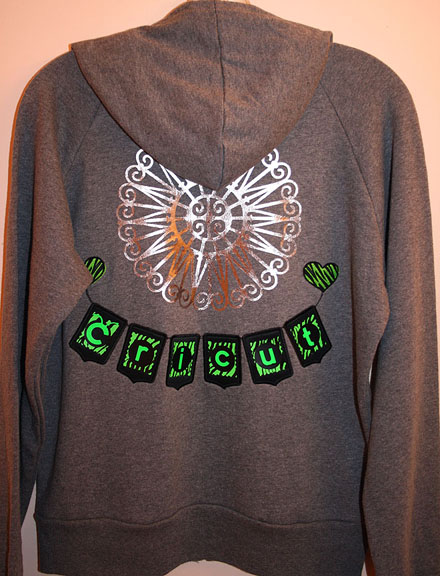
The second banner that I made for the HSN design challenge does not use any paper or cardstock — I decided to create a banner using heat transfer vinyl and applique.    I “hung” my banner on a gray Bella sweatshirt.  This was my first time cutting heat transfer vinyl and fabric with the Cricut and I was so impressed with the results.

This was a last-minute entry.  I had been working on the layout and design for a couple of days, but it got down the the weekend before the challenge ended before I was able to start cutting.  I stayed up all night to finish the sweatshirt so I could get it to the post office in time to meet the deadline.   I wish I had better pictures of it.

Back6

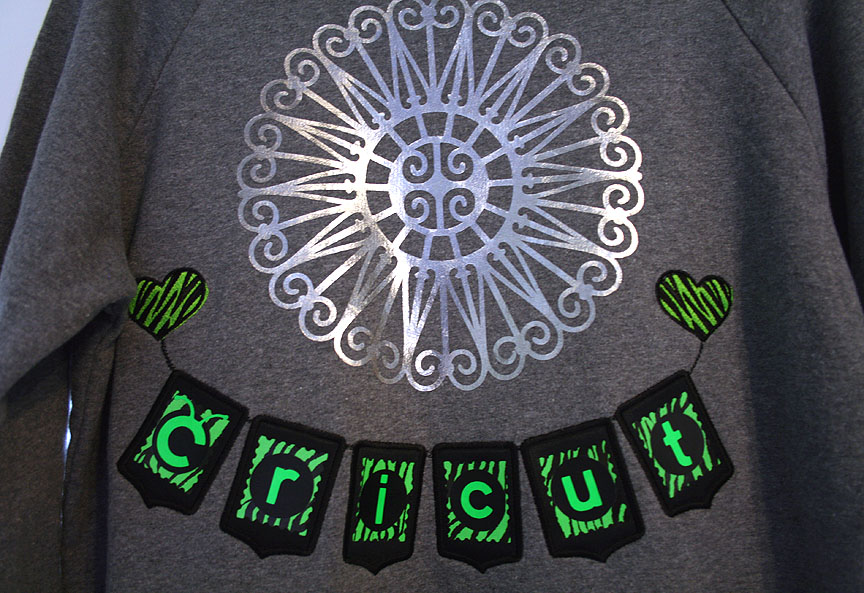
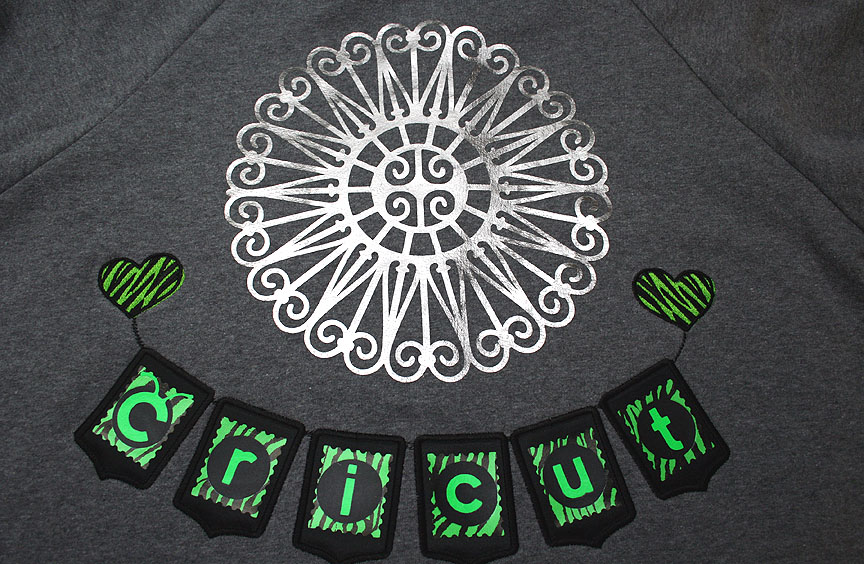
The banner is cut from black twill using the B is for Boy cartridge.  And, yes, I cut it on my Cricut!  I then cut the banner pieces from heat transfer vinyl (love the lime zebra print) and applied the pieces on my black banner base.  The Cricut lettering is from the Cricut Everyday cartridge.  From there I embroidered two hearts and some strings on my sweatshirt and then appliqued the banner pieces onto the heartstrings using a heavy satin stitch.
I also cut a large sunburst design from Ornamental Iron 2 to apply above the banner.  I used two semi-circles and welded them together in Design Studio.  I cut this design from a metallic heat transfer vinyl.  Here are two close-up pictures of the back.


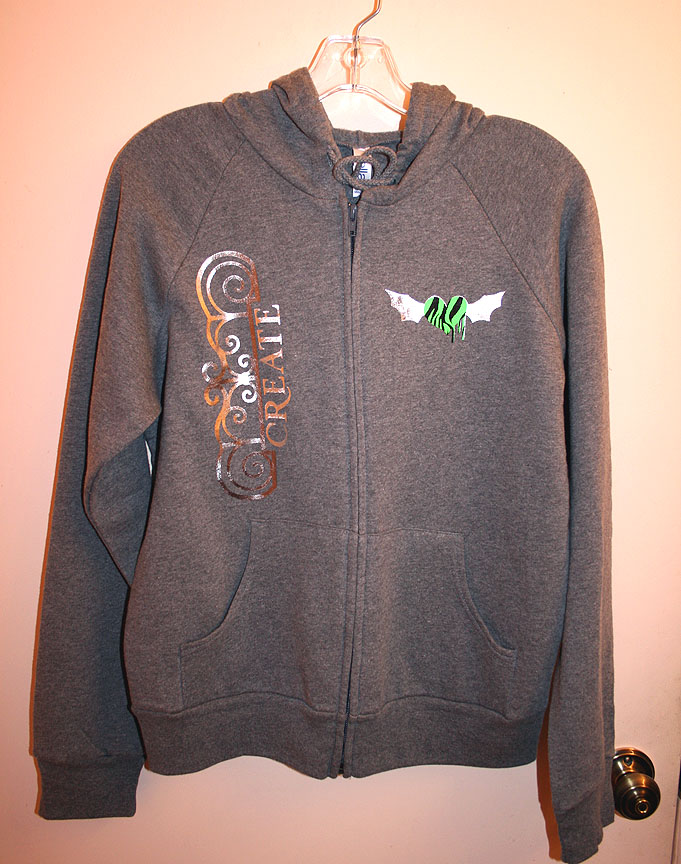
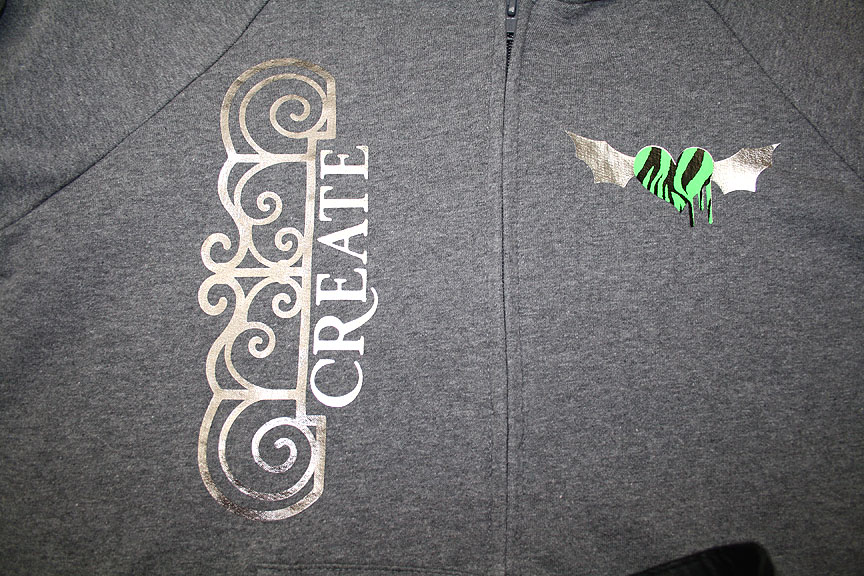
To decorate the front of the sweatshirt I again used Ornamental Iron 2.  I cut a scroll design for the right front and added the word “Create” using Paper Lace II.  They are cut from two different shades of metallic heat transfer vinyl but both look silver in the picture — probably from the flash.  I cut a winged heart design for the left front using the Rock Princess cartridge and the lime zebra print and silver metallic vinyls.

  • Cricut cartridges:  B is for Boy, Cricut Everyday, Ornamental Iron 2, Paper Lace II, Rock Princess
  • Heat transfer vinyl
  • Black twill

1st Banner for Cricut Expression 2 Design Challenge


On Monday, September 26 at 12:01 a.m. EST, Provo Craft is going to launch their newest machine — the Cricut Expression 2 on HSN.  They posted a challenge to design and make a banner and they are going to give away five new Expression 2’s to some very lucky winners.  You were able to make two banners to enter, so this is the first banner I made.

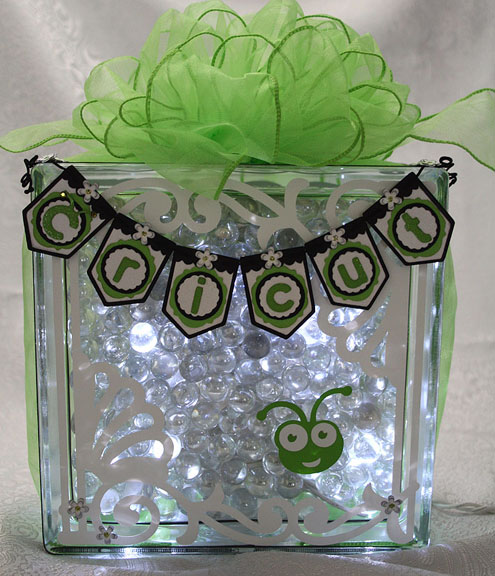
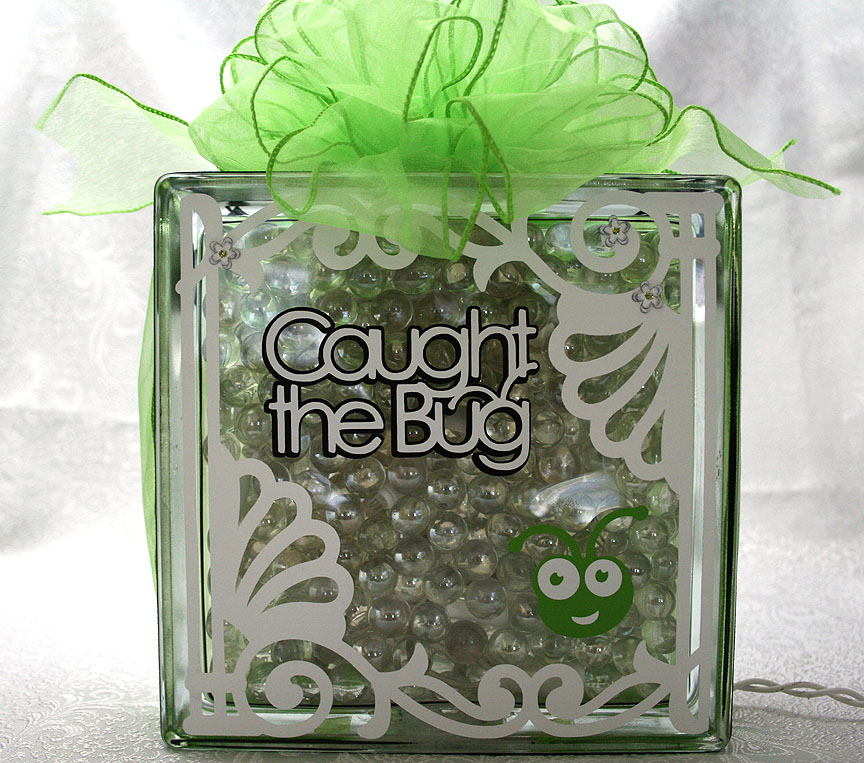
I knew the competition was going to be tough because there are so many talented Cricut users, so I tried to think a little “outside the box.”  For some reason, hanging a mini banner on a glass block was my first idea.   I originally planned on using etching cream to frost the glass, but because I was using a small string of LED lights I ended up putting glass marbles inside to help hold the lights in place.

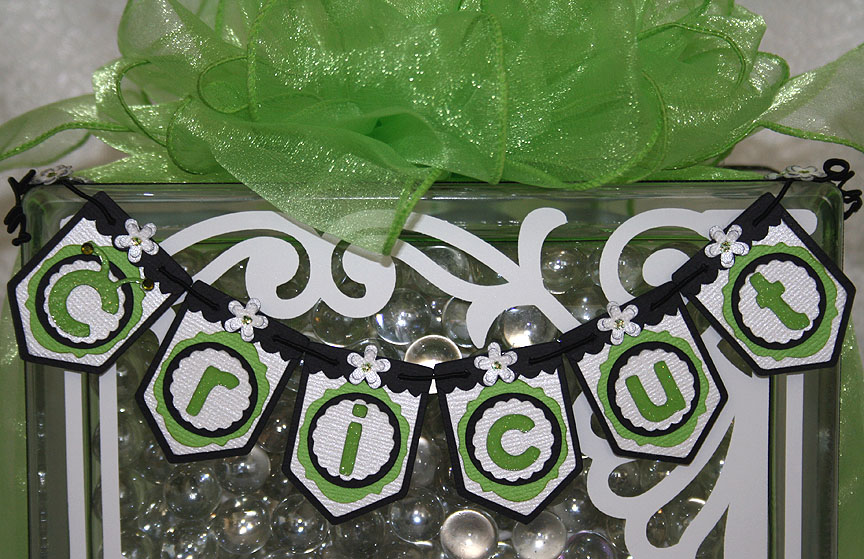
The banner is made using Bazzill and Core’dinations cardstock.  I used the Birthday Bash cartridge for my banner base.  The green frame was cut from Lacy Labels, the scalloped circles from Mini Monograms, the regular circles from George and Basic Shapes, and the black valances were cut from Straight from the Nest.  The Cricut lettering is from Cricut Everyday and I cut it out of a glitter cardstock from DCWV.  I used two Swarovski crystals on the antennae.  I added some small flowers punched from a Martha Stewart Punch Around the Page combo called Flower Shower and used lime green Stickles for the centers.

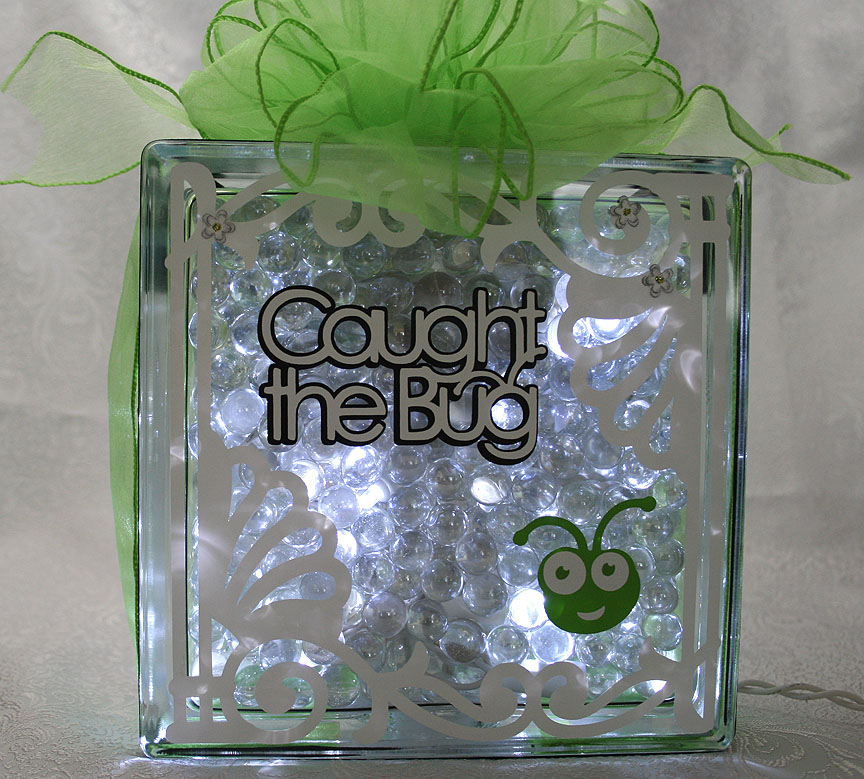
The pieces on the glass were cut from vinyl — the white fancy scroll frame is from Ornamental Iron 2 and the Bug head is from Cricut Everyday.  I was impressed with how well the Cricut cut the vinyl.  Here is a picture of the block all lit up.

FrontLit4

I decided to decorate the back of the block too and I used the same frame that I put on the front, cut from Ornamental Iron 2.  I recently bought this cartridge and I am lovin’ it!  It has some beautiful designs on it and I think they look great cut out of vinyl.

The phrase and Bug head on the back are both cut from Cricut Everyday.  And here is a picture of the back of the block with the lights on.

To hang the banner on the glass block, I glued some black & white dotted ribbon around the edges using Terrifically Tacky Tape.  I strung the banner together using DMC’s Memory Thread.  I sewed and glued the ends of the Memory Thread on the banner.  To cover up my stitches, I punched some more flowers and glued them on top.  I also scattered a few flowers on the front and back of the block.  I tied some wide Cricut green organza ribbon around the entire block and made a big bow using my Bowdabra.

The last picture is of the side of the block.

  • Cricut cartridges used:  Birthday Bash, Cricut Everyday, George and Basic Shapes, Lacy Labels, Mini Monograms, Ornamental Iron 2 and Straight from the Nest
  • Cardstock:  Bazzill, Core’dinations, DCWV
  • Cricut vinyl
  • DMC Memory Thread
  • Terrifically Tacky Tape
  • Martha Stewart Flower Shower punch
  • Lime green Stickles
  • Swarovski crystals