Surprise Birthday Layout — My First Layout


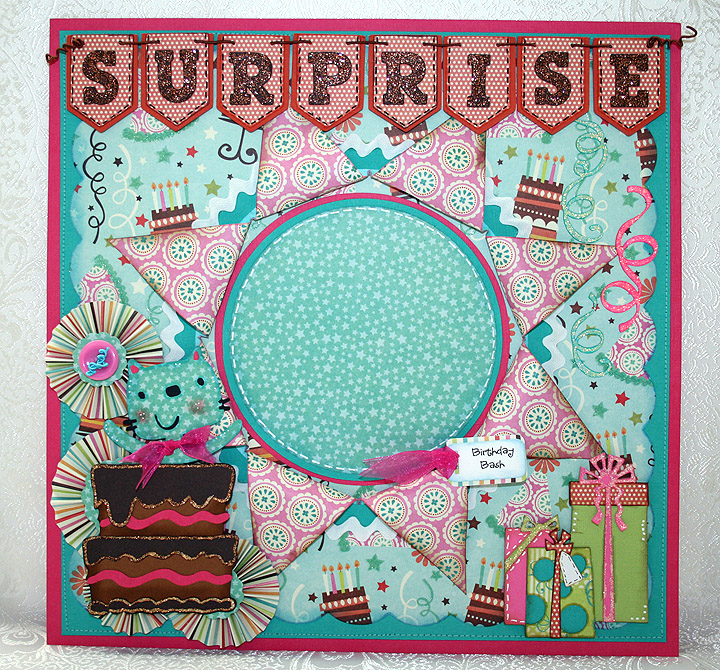
This is my first layout ever — and I really struggled with it.  Up to this point I have just made cards with my Cricut.  I have no trouble deciding and laying out what I want on my card fronts, but doing a 12″ x 12″ page proved to be a challenge. 

I wanted everything on my layout to flow and look like it was put there for a purpose.  I even went to the Cricut Circle Blog and watched their tutorial again on how to do a layout.  After watching the video I felt I had a better grasp of things, but once I started cutting I wasn’t so sure. 

The patterned paper is from SEI — their Happy Day collection.  Since I had the paper pad in my stash and knew I wanted to use it, that is the only thing I was certain about on this project.  Once I got my background paper laid out and the banner done, then the rest sort of came together.   I laid out everything in Design Studio before I started cutting anything. 

The large scallop square background is cut from the Cindy Loo cartridge.  The banner, the cat jumping out of the cake, and the gifts are all from Birthday Bash.  The streamers are from Celebrations and all the circles are from George. 

I think I cut the center circle at 7″.  Then I measured and found the center and started slicing the circle, but didn’t cut it all the way from edge to edge.  I left about 1/2″ intact at each edge of the circumference.  I glued it to the layout right-side down, so that when I pulled back the slices the pattern paper showed.  Before gluing each of the points down, I cut a ring of solid turquoise cardstock to cover the raw edges of my sliced circle.  I added some white rick rack to the ring.  Then I put adhesive on each of the points of the slices and adhered them to my layout. 

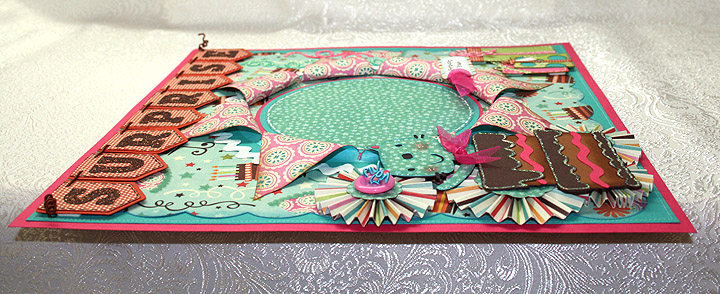
Side view so you can see the dimension of the layout

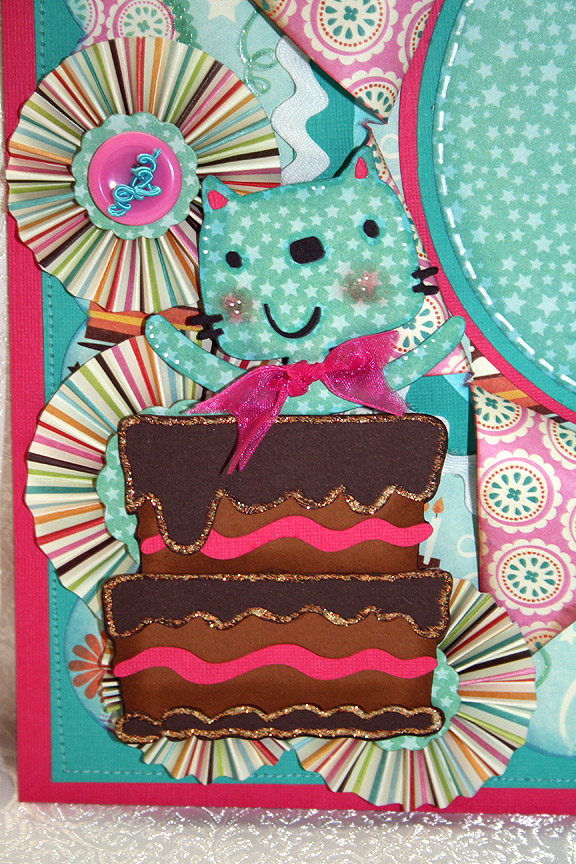
This was my first time making rosettes and I used my Martha Stewart scoreboard to make the pleats.  That was a lot of fun, except that making those score marks every 1/4″ is hard on arthritic hands. 

I used lots of Stickles — I coated all the letters in the banner.  I think the color I used was copper.  I added Stickles to the gifts, the cake, and all the streamers got coated in them.  I used DMC Memory Thread to string up my banner and for the center of the button on the rosette.  I love that stuff — it’s so easy to work with.
Close up of the title banner

Close up of the cat in the cake

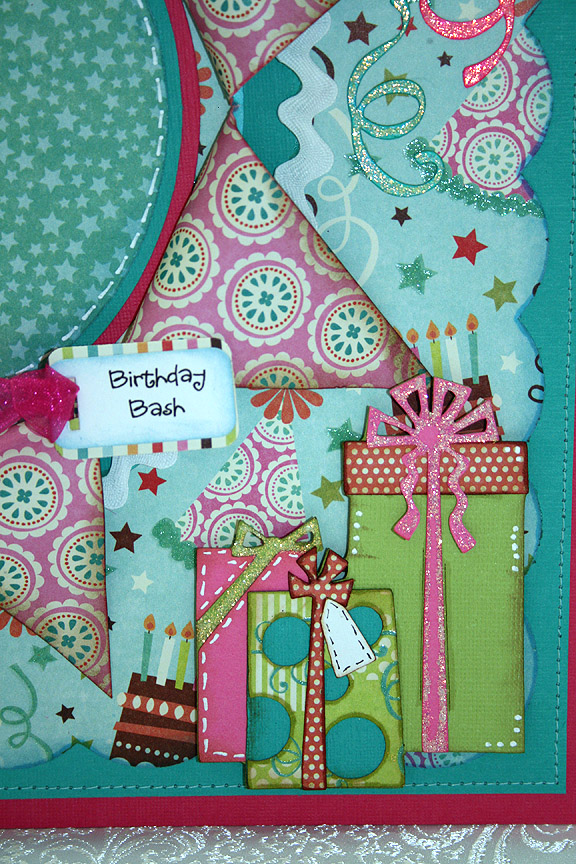
Close up of the gifts

The little “birthday bash” tag was cut with my Cuttlebug using the Tiny Tags die.  I did the sentiment on the computer.  Oh, also did lots of inking and doodling and stitched the turquoise cardstock to the pink cardstock with my sewing machine. 

  • SEI Happy Day paper
  • Cricut cartridges:  Birthday Bash, Celebrations, Cindy Loo, George & Basic Shapes
  • Cuttlebug — Tiny Tags die
  • Stickles
  • DMC Memory Thread
Jitterbuggin’ Challenge – Spring Butterfly Card

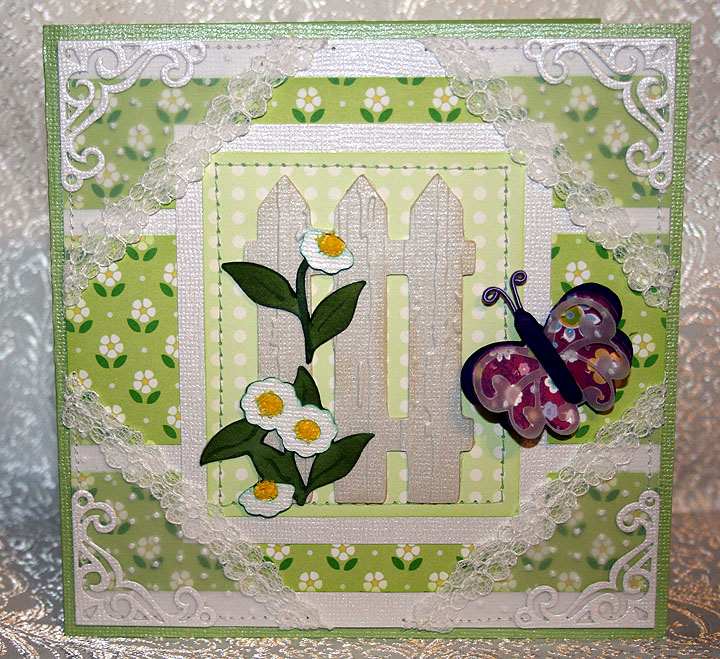
This week’s challenge over at Jitterbuggin’ is to follow the sketch, use green on your card and, of course, use your Cricut.  When I was planning this card in my head, it was going to be lavender.  But when I started picking out my paper, it suddenly became mostly green.  I wanted a card that looked like spring and when I saw this paper, I knew I wanted to go with daisies. 

I have sewn most of my life, and when Erin was young I made most of her clothes.  I loved making frilly dresses for her for Easter and dotted swiss was a favorite fabric.  The corners on my card are my papercrafting version of dotted swiss and lace. 

The daisy and dot print papers are from a pack by Martha Stewart that I got on clearance at Michaels some time ago.  The solid cardstock is Bazzill.  The corners are made from vellum and I ran them through my Cuttlebug using the Swiss Dots embossing folder.  I stitched some lace on the edge of the corners and then stitched the corners to the card.  I used my Cuttlebug again to cut some  fancy small corners out of white Bazzill that I glued in the uppermost part of the vellum corners.  The die I used for this is from a 4-pack called Vintage.

I used my Cricut and cut the fence and daisies from the Bloom Lite cartridge.  I cut everything out twice so I could layer them.  I ran the fence section through the Cuttlebug using the Distress Stripes folder so it would look like wood.  I inked the edges of all the cuts and used yellow Flower Soft in the center of the daisies.  The butterfly is from Graphically Speaking and I cut three layers, the top layer being vellum.  I used DMC Memory Thread for the antennae.  This was my first time using it and I love how easy it is to work with.  I pop-dotted the butterfly to the front of the card.

Close-up of front

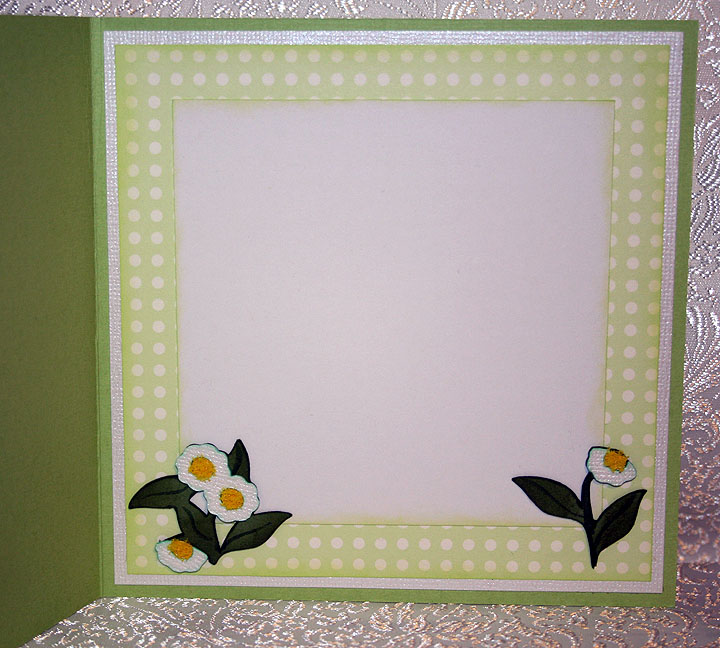
When I cut the flowers for the front of the card, I cut extras so I could use them inside. 

I found another challenge that my card qualifies for, so I am very excited.  It is always nice when you can bundle challenges together.  This newest challenge is at the Crafty Creations Challenge Blog and is called In Stitches.  Your project has to include some stitching. 

  • Bazzill cardstock
  • Martha Stewart paper
  • Vellum
  • Cricut Design Studio
  • Cricut cartridges:  Bloom Lite and Graphically Speaking
  • Cuttlebug embossing folders:  Distressed Stripes and Swiss Dots
  • Cuttlebug Vintage die
  • Flower Soft
  • DMC Memory Thread

Sunny Snail is Thinking of You!!


Erin is back in Taiwan after a lengthy visit here in the US.  I had lots of fun while she was staying with us.  We attended CHA every day and even managed to get in a scrapbook expo in Anaheim right before she left.  Once she got home to Taipei and settled in, she wanted to do a challenge together.  So we have been busily working,and thanks to Skype, we were able to scrap together.

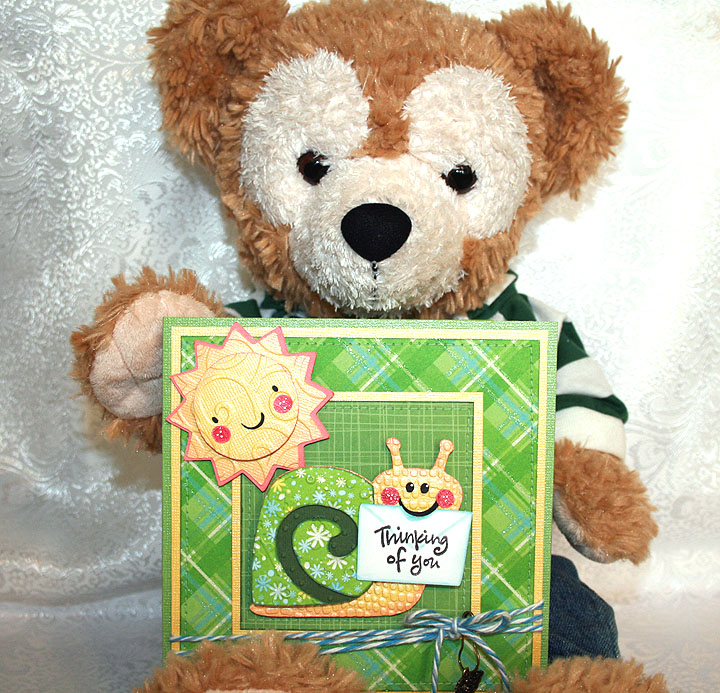
A member of the Cricut Circle recently had surgery and I wanted to send her a card to wish her a speedy recovery and let her know I am thinking of her.  I thought doing a challenge would be a perfect way to accomplish this.  And here is a little Duffy “spokesbear” model to present my card:

The base of the card is green Bazzill bling cardstock.  The glittery print cardstock is from two different DCWV paper stacks, Blossoms & Butterflies and The Glitter Stack.  I used a yellow bling cardstock from Bazzill for the contrast, sun and snail body. 

I laid out my card in Design Studio and I cut the sun, snail and flowers with my Cricut.  I used Create a Critter for the sun, Birthday Bash for the snail and the Bloom Lite cartridge for the flowers.  I used my Cuttlebug to emboss the sun and the snail.  I embossed the snail with four different embossing folders, Swiss Dots, D’Vine Swirl, Plum Blossom and Mesh Texture.  I inked the edges of all the pieces to give them some depth.  I used Stickles on the center of the flowers and an atyou Spica glitter pen for the cheeks on both the sun and snail.  The sentiment on the envelope the snail has in his mouth is from a $1 clear stamp I purchased at Michaels.  I used lots of pop-dots on the sun and snail, popping up layers and also the completed pieces. 

I am loving all the baker’s twine that is so popular right now, but  I have not purchased any yet.  When I was in Michaels a couple of weeks ago, I found some Lily Sugar ‘n Cream Twists string/thread in the yarn department that reminded me of the twine.  It was on sale so I bought a few different colors to see how it would work.  I wrapped some of the blue around the bottom of this card and I think it looks pretty good.  I attached a charm to the twine with a little hanger that is from Making Memories.  I think they are called garment pins. 
For the inside of the card I added a couple of flowers that I cut out twice so I could layer them together for some dimension.  I used Stickles for the bling on the center of the flowers.

This was a fun card to create and I am happy to say that my card qualifies for the following challenges:

Fantabulous Cricut Challenge Blog – Challenge #51 “Hip to be Square” -green & gold

Cooking With Cricut – It’s A GREEN  SCENE!

The Cuttlebug Spot –  All Tied Up: twine challenge

The Cuttlebug Spot –  Oh so Charming

  • Bazzill bling cardstock
  • Die Cuts With a View paper stacks
  • Cricut cartridges:  Birthday Bash, Bloom (Lite), Create a Critter
  • Cricut Design Studio
  • Cuttlebug Embossing Folders:  D’Vine Swirl, Plum Blossom, Swiss Dots
  • Twine:  Lily Sugar ‘n Cream Twists
  • Making Memories garment pins
  • Charm from my stash
  • Stickles
  • atyou Spica glitter pen

CHA 2011

Erin and I just finished up day 2 of the show and we are both so tired.  We spent the first day wandering all over, but today we started walking the show at one wall and are working our way towards the opposite side of the hall. 

Of course we began the first day at Provo Craft’s booth, and judging by the crowds in their booth, it is one of the more popular spots.  Provo Craft is doing a raffle at 3 p.m. each day and they are handing out tickets that have to be validated in order to be entered in the drawing.  To validate your ticket, you have to do fun things — like participate in a Make & Take, attend three of the many demonstations in their booth, or participate in a  survey.

When you receive your tickets for the raffle, Provo Craft is also giving away a cute stuffed Cricut.  They have a contest to see where you take Cricut and to enter this one, you need to take a picture of Cricut somewhere in L.A.  Today they announced three winners of the photo contest and each received a new Expression!  I loved one of the photos — the woman held her Cricut alongside a police car, capturing Cricut and the LAPD logo on the side of the car. 

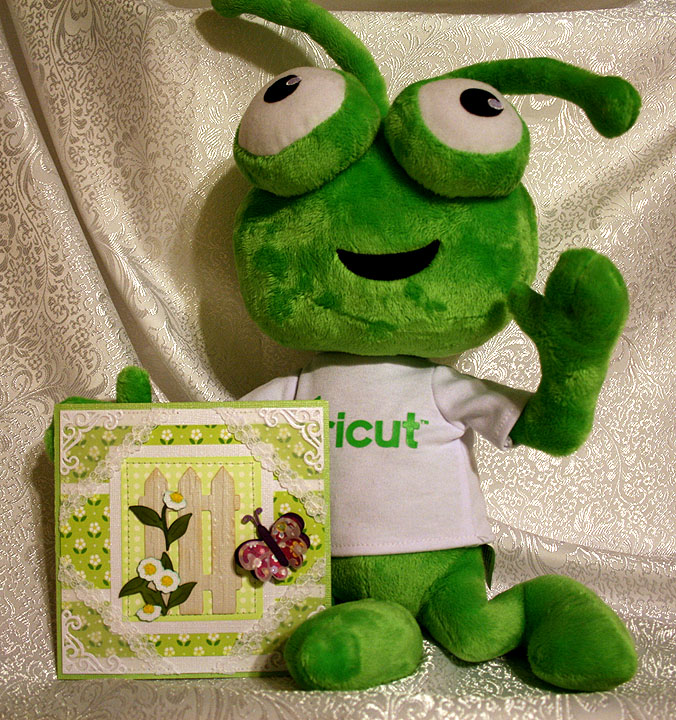
Erin took lots of pictures the first day of the show.  Here are some from Provo Craft’s booth.  I’ll begin with a shot of the new Cricut logo:

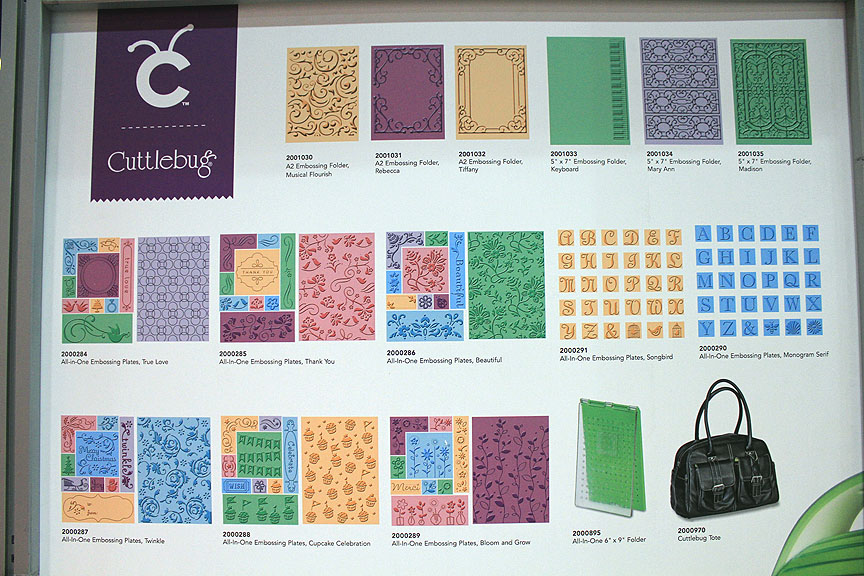
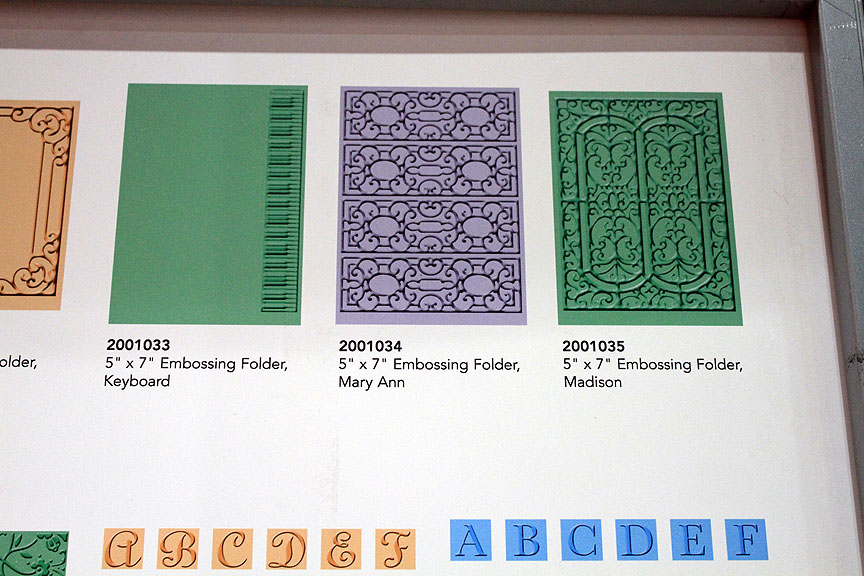
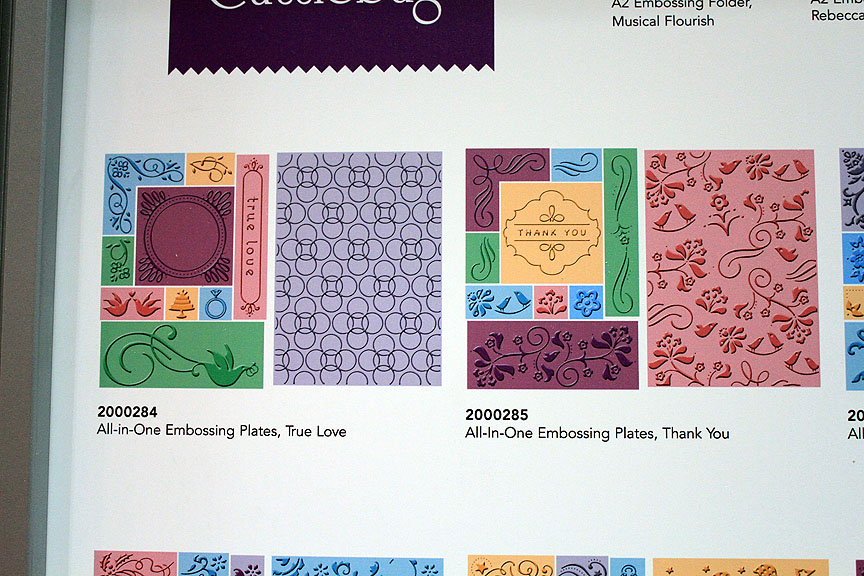
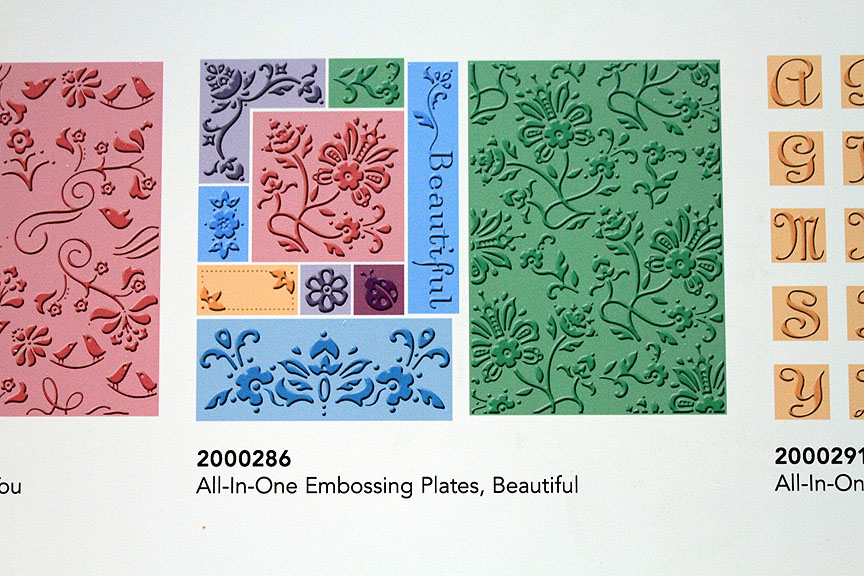
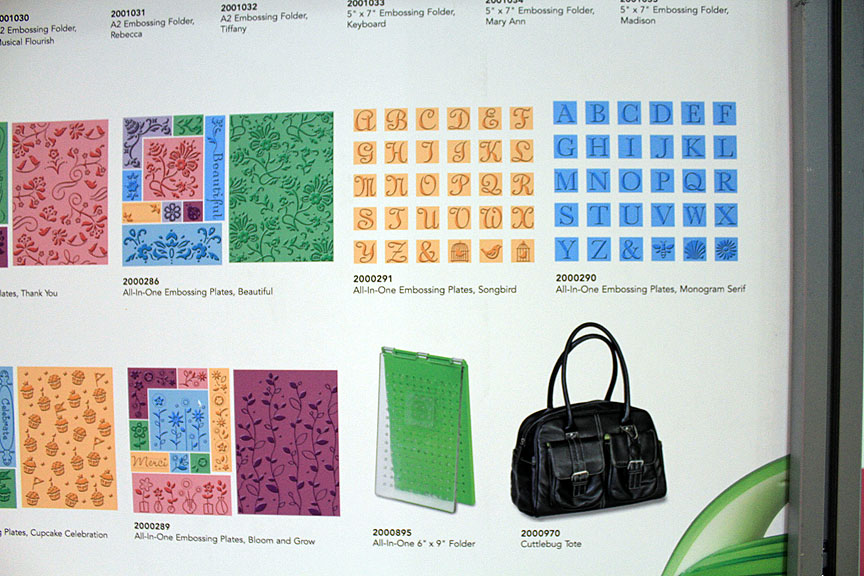
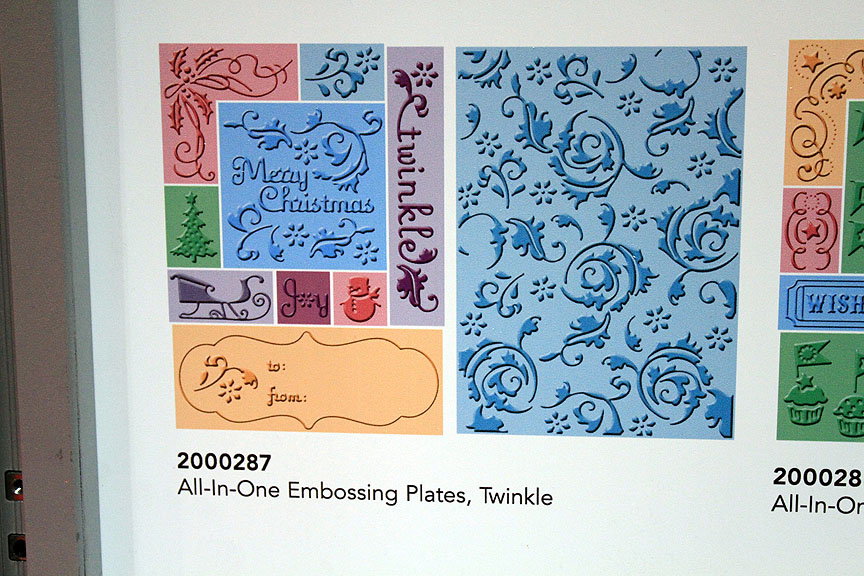
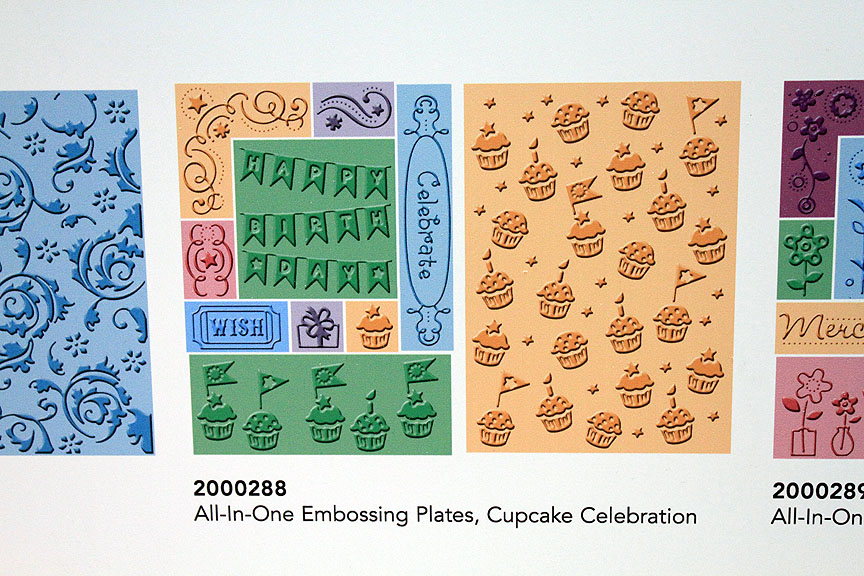
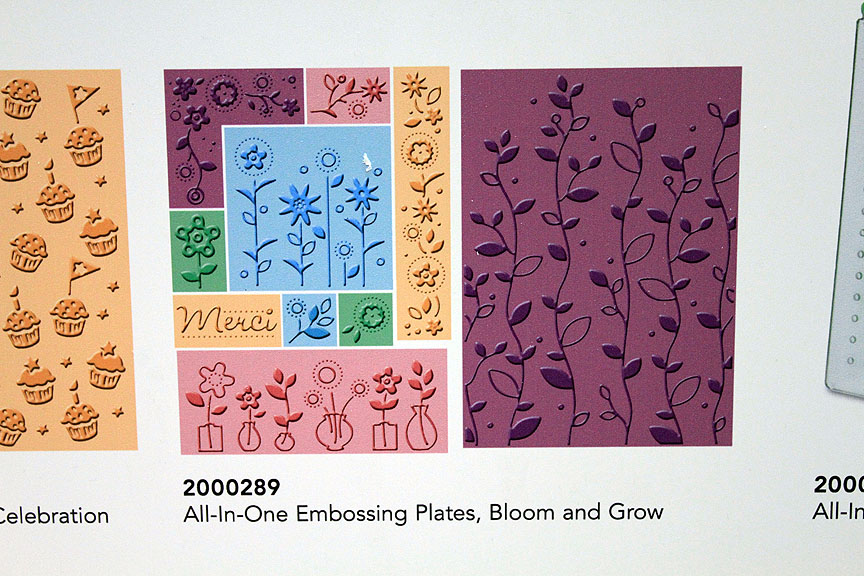
Here are some pictures of new Cuttlebug folders coming soon.   They are bringing out some fun new ones called All-In-One Embossing plates.  I was able to give them a try today at one of the demo stations.  You begin with the All-In-One 6″ x 9″ folder.  There are several different plate sets that you arrange on the folder to make your own custom embossing folders.  You can pick and use the pieces you want, or each set comes with an overall embossing plate too.  Because the All-In-One 6″ x 9″ folder has a thicker base, you just need to use the two “B” plates on top of it when running it through the Cuttlebug.

Close-up shots of the new Cuttlebug products:

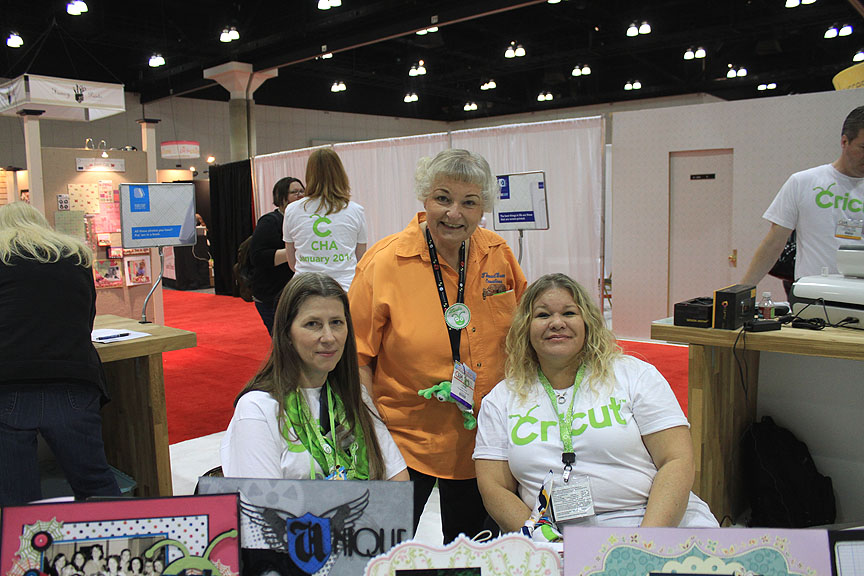
I got to meet two of the Cricut Circle Design Team members today, Shantaie Fowler and Cindy Royal. 

On April 27, the new Cricut Expression 2 will debut on HSN.  This machine has some cool new features.  It uses both regular Cricut cartridges and also the Imagine cartridges.  It will be able to cut the images and layers from the Imagine cartridges, but obviously it will not print. 

It has a new touch-screen feature that will eliminate using the overlays.  It also will also have Wi-Fi capability.  The “shoulders” on the machine (the colored end pieces) will be interchangeable so you can switch colors. 

The Provo rep we talked to yesterday told us the new Expression 2 will initially be available on HSN and then may move into other markets, but the anniversary release will be a limited edition machine. 

I asked today if we will be able to use the Gypsy and Jukebox with the new Expression2 and was told yes, it will be compatible with both products.  Check out the light by the blade on this new machine.

Another new exciting product is called Cricut CraftRoom, which will be an online site where you can design.  The rep said it will be compatible with both PC and MAC.  And the best part, it’s free!  I was able to sit and play with a Beta version for quite a while on Sunday.  While I was working in CraftRoom, the rep told me they are working on a shadow feature where you will be able to automatically add a shadow to any of your cuts.

Ok, so while exploring CraftRoom I looked at the list of cartridges and noticed some names that are not familiar to me.  I was able to look at some of the images on the screen, so I am wondering if these are going to be some new cartridges.  Here are the names:

American Alphabet

Beep Beep

Bump in the Night

Crocs Rule

Damask Decor

Elegant Edges

Happy Graduation

Love You a Latte

Luau

Martha Stewart Nature

Recess

Spring Fever Holiday

Spring Fever Seasonal

Storks Delivery

Summer Bliss Holiday

Summer Bliss Seasonal

Sweet Shop

Ultimate Creativity

Winter in the Air Holiday

Winter in the Air Seasonal

Yee Haw

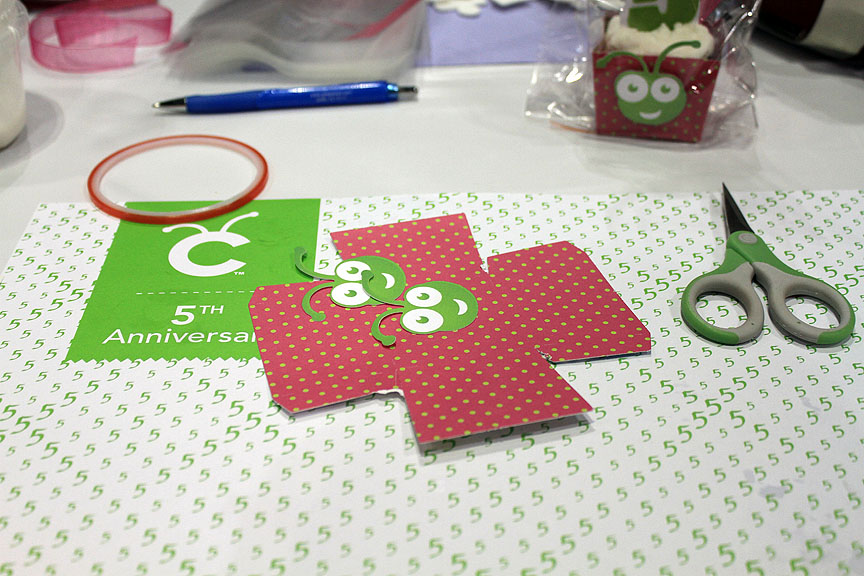
There are two Make & Take stations set up in Provo Craft’s booth and the projects change daily.  Yesterday we made a pirates wood frame and a cupcake holder, complete with a yummy cupcake.  This is from the cupcake station.

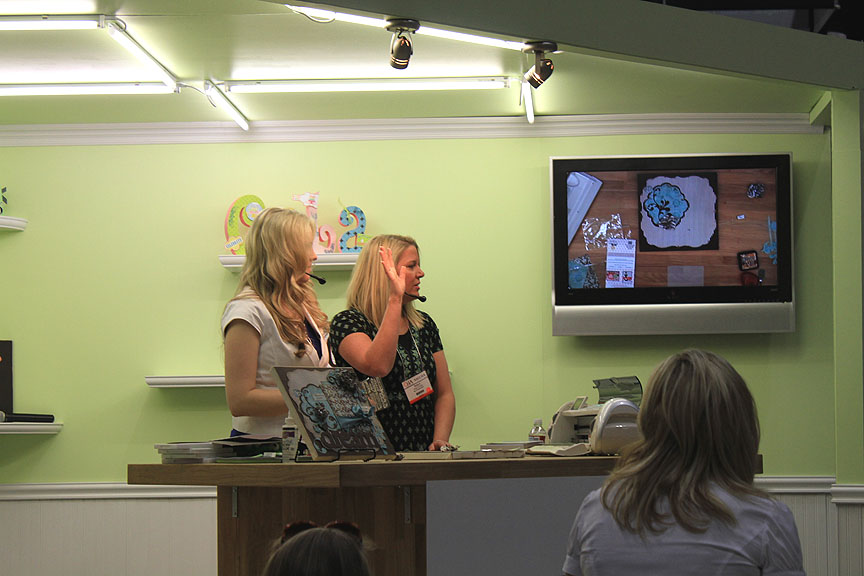
Provo Craft offers several classes daily, but you have to arrive early to sign up.  The classes fill up fast.  Erin and I arrived at the show around 10:30 a.m. this morning and the classes were already gone.  We are going to try and get there at opening tomorrow and see if we can get a class.  This picture is from a class Jinger and Robyn (My Pink Stamper) were conducting on Sunday afternoon.

As I stated above, Provo Craft is doing a daily raffle in their booth at 3 p.m.  These are pictures from the first day’s raffle.  Jinger drew a ticket and the winner came onstage.  Then the fun began — the winner could chose to take a cartridge (Birthday Bash) or spin the Cricut wheel, where prizes ranged from an Imagine to a high-five from the Cricut himself. 

The first name drawn was Erin’s, which was such a surprise because she says she never wins anything.  Since she already has Birthday Bash, she chose to spin the wheel.  Round and round it when until it landed on the Your Story Photo Machine. 

Everyone chose to spin the wheel and most were lucky — one won the new Yudu Cardmaking Machine, another won a Circle membership, but only one lady did not win.  Well, she won a high-five from Cricut himself, but as she was walking off, Jinger handed her the Birthday Bash cartridge.  So everyone was a winner!

Snow Bird


Here’s another card that I made for several challenges and I had a lot of fun making it.  Unfortunately it will be my last card for a while.  The next couple of weeks are going to be filled with embroidery and trade shows.  CHA is coming up at the end of the month and Erin is flying home from Taiwan to attend with me. 

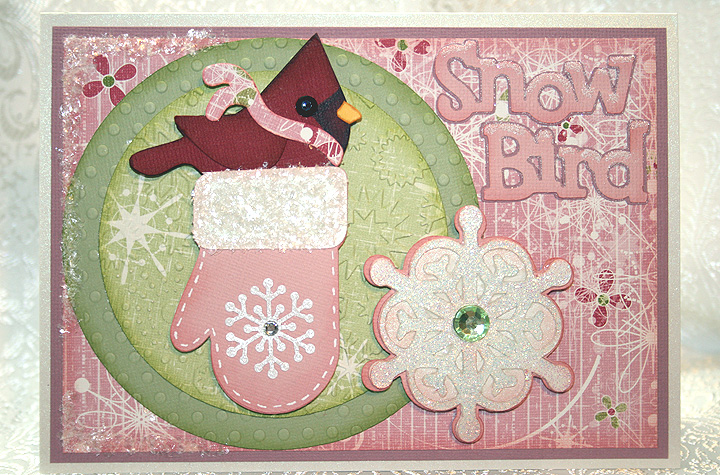
There’s lots of sparkle on this card as the little snow bird makes his winter home in a warm mitten.  The solid cardstock is from Bazzill and the patterned paper is called Snowflake Waltz and is from Daisy Bucket Designs.

I wanted to do a cardinal for my bird, but I wanted a chubby little guy and I couldn’t find one on any of my Cricut cartridges.  I found a cute bird on Straight from the Nest and decided to use him.  As I was laying out the card in Design Studio, I kept trying to figure out how to make the bird into a cardinal shape.  My solution was to use a lower case “v” from the Mickey Font cartridge.  I turned it upside down and welded it to the top of the bird’s head.  I used Copic markers to color the dark spot on his face.  I’m pleased with how he came out.

The circles are cut from the George and Basic Shapes cartridge and I used my Cuttlebug to emboss both of them.  The mitten is from Simply Charmed, the large snowflake is from Joys of the Season, “Snow Bird” is from Straight from the Nest, and the bird’s scarf is from 3 Birds on Parade. 

I added lots of bling to this card.  I heat embossed the large snowflake on the front using holographic embossing powder.  I put some fine snow on the sentiment using Martha Stewart glitter.  The coarser snow is also from Martha Stewart.  The small snowflake on the mitten is a Martha Stewart punch.  I added rhinestones to the centers of the snowflakes.

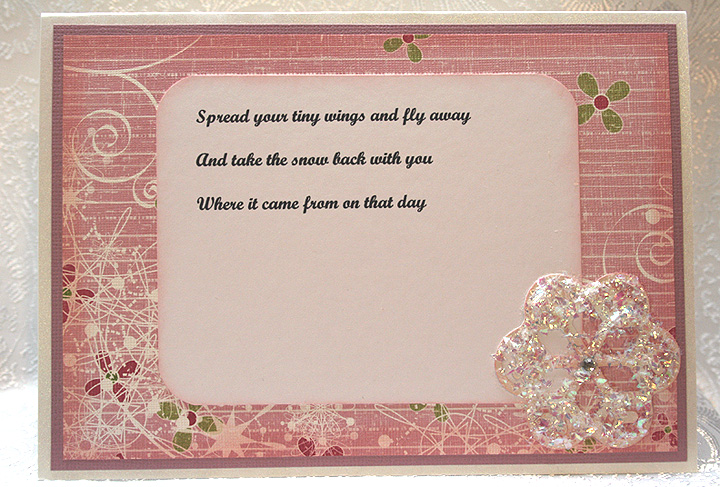
While I was working on this card, the song “Snowbird” by Anne Murray kept running through my head.  I printed part of the chorus and put it on the inside of the card.   The snowflake on the inside is from Joys of the Season.

 Here are the challenges I am entering and the requirements for each:

Jitterbuggin – For the Birds Challenge – follow the sketch, add a Cricut bird and use something pink.

Fantabulous Cricut – Challenge #42 Winter Warmies – create a project using some type of winter clothing or accessory.

Cooking With Cricut – Glittermania! – glitz up your project.

The Cuttlebug Spot – Inspired by a Song – find inspiration for your project in a song.

  • Bazzill cardstock
  • Designer paper – Snowflake Waltz from Daisy Bucket Designs
  • Cricut cartridges:  3 Birds on Parade, George and Basic Shapes, Joys of the Season, Mickey Font, Simply Charmed, and Straight from the Nest.
  • Cricut Design Studio
  • Cuttlebug
  • Copic markers
  • Ranger holographic embossing powder
  • Martha Stewart punch
  • Martha Stewart glitter
  • Rhinestones from stash


Jitterbuggin’ Gifts Galore Challenge and Fantabulous Cricut Ribbon Challenge


I haven’t been able to make many cards lately because this is my busy time of the year with the embroidery business.  I’ve had two machines running since Thanksgiving.  I’m taking a short break this weekend to go away with hubby to celebrate our 44th anniversay.  I wrapped up a couple of embroidery jobs on Tuesday and found time to make a card. 

I made this card to enter into two challenges.  At Jitterbuggin, Sherri asked us to make a card with a gift theme.  The sketch is not mandatory this week — we just have to add a bow and some bling — and, of course, use our Cricut.

At Fantabulous Cricut we have to use ribbon somewhere on our project and, again, have a Cricut cut on it.

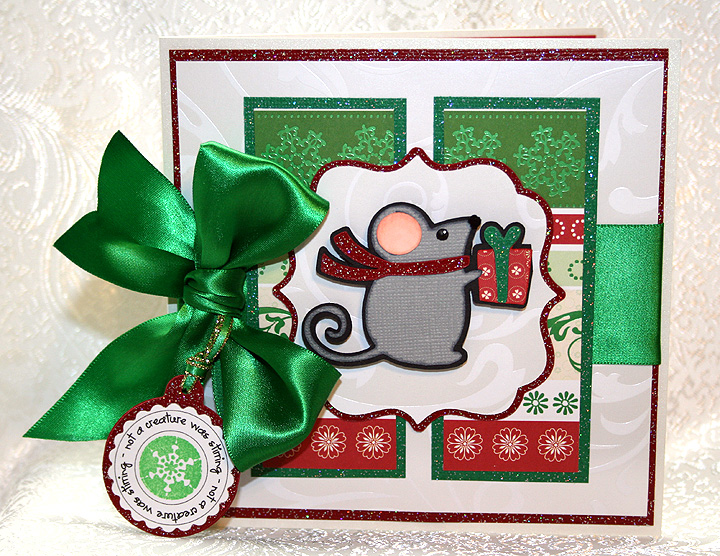
I made a card with a little mouse bearing a gift, which he wrapped up so prettily and tied with a bow.  The designer paper is Christmas Mint from SEI.  I used glitter cardstock from Core’dinations for my bling.  I am really happy with the way it cuts in the Cricut.

The little mouse is from the Winter Frolic Cricut cartridge.  The frame he is mounted on is from Lacy Labels Lite cartridge and I cut the tag from the Very Merry Tags cartridge.  The printing on the tag, “not a creature is stirring”, is a download I got from the Cutting Cafe.  I wanted something small and didn’t have time to try and put text on a circle myself, so I was happy to find the saying I wanted for a very reasonable price — just 99 cents.  The text on the inside of the card is also from this same download.  I cut out the text for the tag using my Cuttlebug and Nestabilities scalloped circles.

I cut the tag, the scarf, the bow on the present as well as mats from the glitter cardstock.  I found a piece of 1 1/2″ wide green satin ribbon in my stash and tied it around the middle of the card.  I attached the tag to the bow with a scrap of ribbon edged in metallic gold. 

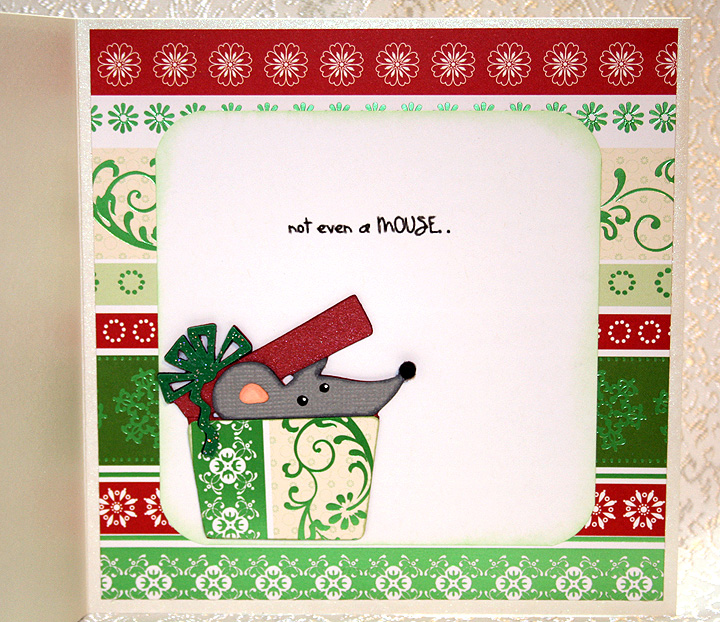
The inside of the card has another little mouse and I cut this one from the new Birthday Bash cartridge.  When I laid out my card in Design Studio, I planned on putting this mouse on the front of the card and the mouse with the gift on the inside of the card.  But once I started cutting out the pieces and laying out the actual card, I decided to switch mice.  I thought the mouse carrying the gift looked better on the front of the card.  Oh, I almost forgot — for both mice I used very small pom poms for their noses. 

  • SEI Christmas Mint paper
  • Core’dinations glitter cardstock
  • Cricut cartridges:  Birthday Bash, Lacy Labels, Very Merry Tags and Winter Frolic
  • Cuttlebug
  • Spellbinders Nestabilities
  • Text for tag from Cutting Cafe
  • Ribbon and pom poms from stash

Jitterbuggin’ Challenge – Let’s Give Thanks! – Thanks From the Bottom of My Heart

The current challenge at Jitterbuggin’ is to follow the sketch, add a Cricut cut and emboss something. 

I’m not sure where my colors for this card came from — I must have been in a “bright” mood.  I recently received an order from Stampin’ Up and it was sitting in a box and I started pulling out colors.  All the colored cardstock is from Stampin Up’.

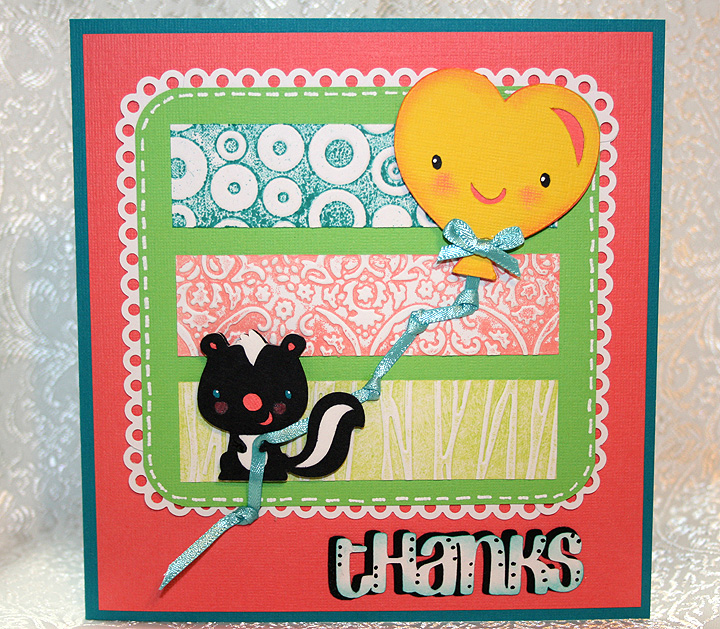
I embossed the three center sections using my Cuttlebug and the following folders:  Spots & Dots, Textile Texture and Forest Branches.  I inked each folder with a different color of ink and then ran white cardstock through the Cuttlebug.  The white scalloped trim around the center section is a Martha Stewart Punch Around the Page set called Scallop 3-Dot.  I used just the very top part of the punched piece — the top dot.  I had to piece it because my cardstock size was not the exact size to take advantage of the punch-around-the-page feature.

I used my Cricut to cut out the skunk from the Create a Critter cartridge.  I also cut the heart-shaped balloon from Create a Critter.  The “thanks” is cut from Don Juan.  I attached some ribbon to the ballon and then attached it to the skunk’s hand.  I added a bow to the ballon. 

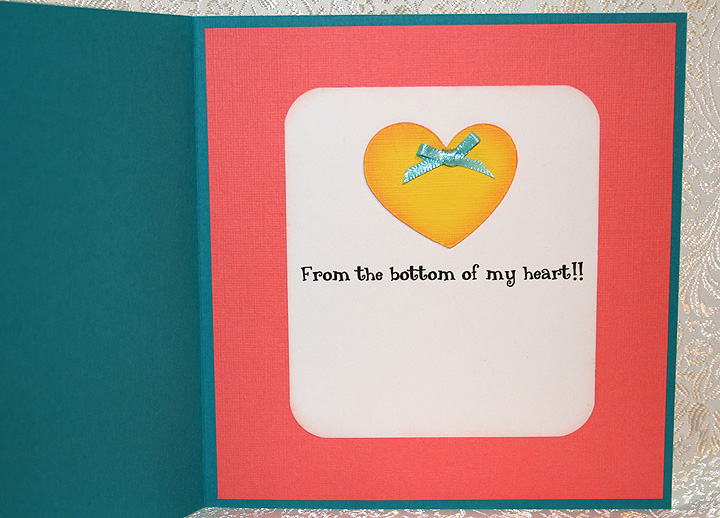
For the inside of the card, I cut another heart from Create a Critter.  I printed the sentiment on the computer.  I added another bow to the inside heart.

  • Stampin’ Up cardstock
  • Cricut cartridges:  Create a Critter and Don Juan
  • Cuttlebug folders:  Spots & Dots, Textile Texture and Forest Branches
  • Martha Stewart Scallop 3-Dot Punch Around the Page set
  • Ribbon from my stash

Speedy Turtle – Fantabulous Cricut Challenge Blog – Challenge #36 Achoo!

Here is my card for the current challenge at the Fantabulous Cricut Challenge Blog, which is to make a project that has something to do with being sick.  I don’t know why, but this challenge stumped me.  I couldn’t think of anything exciting that I wanted to make.  I started several different projects before the light bulb finally went off and I had a clear vision of what I wanted to make.

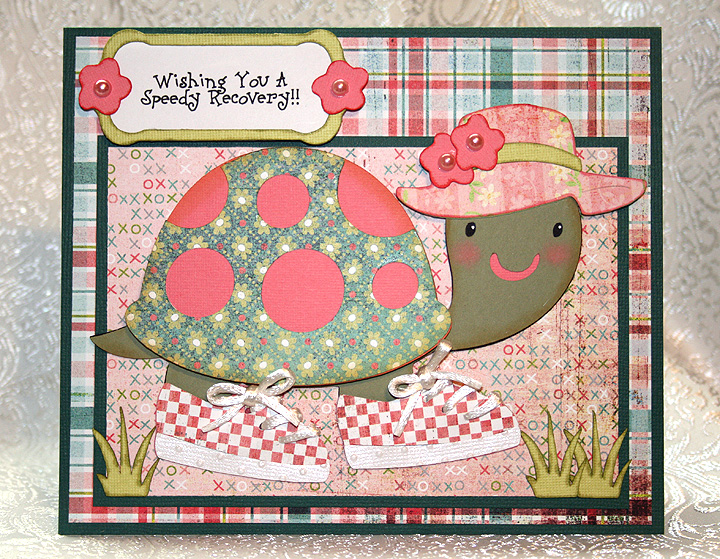
The card base is Bazzill cardstock, the patterned paper is Basic Grey, and the solid that the turtle is cut from is Stampin’ Up.  I cut the turtle using my Cricut and the Create a Critter cartridge.  Since I am wishing the recipient a speedy recovery, I figured I needed to give my turtle some running shoes so she could speed things up a bit.  I cut the shoes from My Community and laced them up with some white cording that I found in my stash.  I used the Cuttlebug embossing folder Swiss Dots to emboss the bottom edge of her shoes.  I also gave her a hat, which I cut from Paper Doll Dress Up.  The label that the sentiment is printed on is from a Lite cartridge, Lacy Labels.  I used Create a Critter for the flowers and the tufts of grass.  I added pearls to the centers of the  flowers. 

The flowers on the inside of the card are also from Create a Critter. 

  • Bazzill cardstock
  • Stampin’ Up cardstock
  • Basic Grey designer paper
  • Cricut cartridges:  Create a Critter, Lacy Labels (Lite), My Community, Paper Doll Dress Up
  • Cuttlebug Swiss Dots embossing folder
  • Pearls
  • Cording from my stash