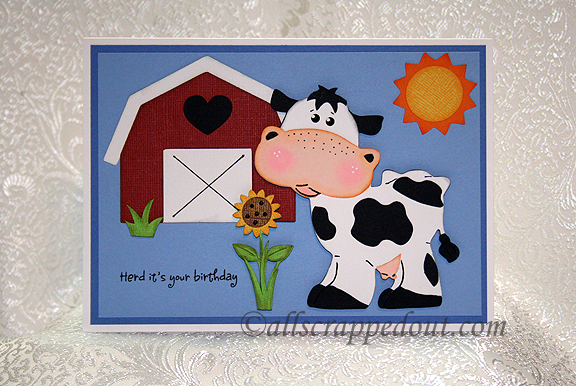
Herd It’s Your Birthday


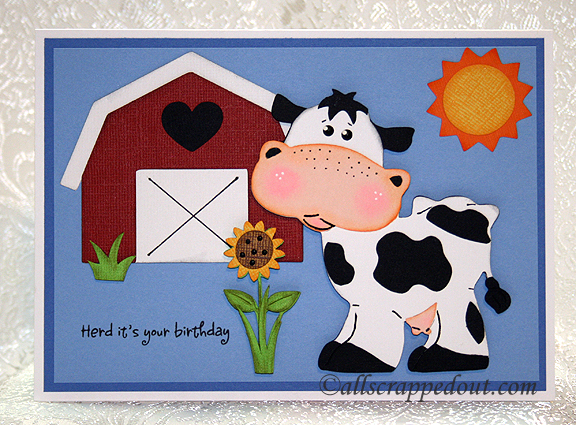
My hubby (Steve) has an uncle who will be celebrating his 95th birthday on Sunday.  His family is having a card shower for him and my SIL sent me an email asking if I would make Uncle Donald a birthday card.  I remembered stories Steve told me about visiting Uncle Donald on his farm.  He had dairy farm, so I thought I’d make a card with a cow on it.

When I asked Steve what he thought about my plan, he said a cow would be fine, but make it a Holstein as that is what Uncle Donald had.  OK, a Holstein?  I looked up Holstein and luckily it is the cow I had in mind — a black and white one.  Since I like whimsical critters, I wanted to use the cute cow on the Cricut Paper Doll Dress Up cartridge.

The pictures of the Holsteins that I saw showed the cows without horns.  I read that the horns are removed when they are young calves.  Since the cow on Paper Doll Dress Up has horns, I just did some trimming before assembling her.

CowSm

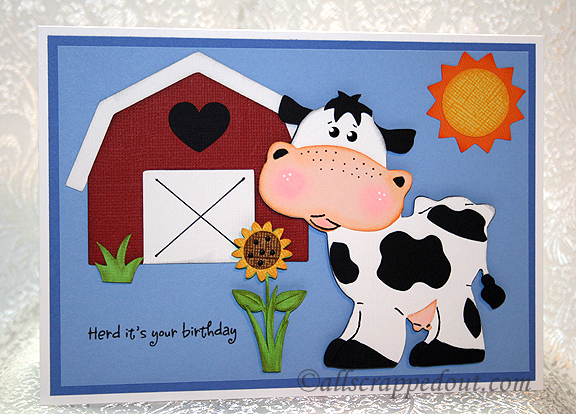
All of the cardstock is Michael’s Recollection brand.   I cut the cow at 4″ and did some inking and chalking on her. The spots are from the cow on the Animal Kingdom cartridge, along with the little top knot of hair.   The barn is from Create A Critter, cut at 2″.  The sun is also from Create a Critter cut at 1 1/2″.   The sunflower is from Walk In My Garden and the little patches of grass are from Create A Critter.

Cow3

Oh, I almost forgot the sentiment.  It is a stamp from Elzybells Art Stamps.  It came with some cute sheep stamps in a set called Jump for Joy.

Cow4

  • Recollection cardstock
  • Cricut cartridges:  Animal Kingdom, Create A Critter, Paper Doll Dress Up, Walk In My Garden
Cute Bee Card Created in Cricut Craft Room


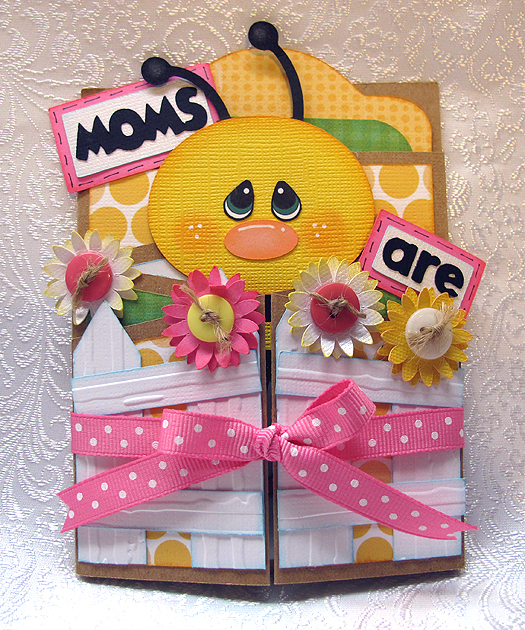
I spent most of this weekend creating this card in Cricut Craft Room.  I found a cute paper piecing card from Treasure Box Designs and fell in love with it.  When I saw the card, I wondered if I could create it in Cricut Craft Room.  I thought the cute bee on the Create a Critter cartridge would be perfect for it.
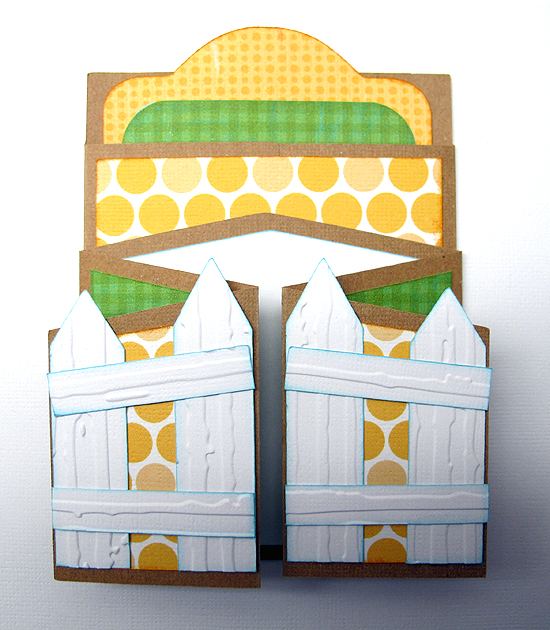
When a challenge was posted on the Cricut Circle message board to create a project in conjunction with Circle Mania that was going on in Atlanta, I decided to get cutting.  I was so happy that my design for the base of the card worked the first time I cut it.  I’m not sure how to describe this card, maybe a gate-fold card with a pocket for a tag in the back.

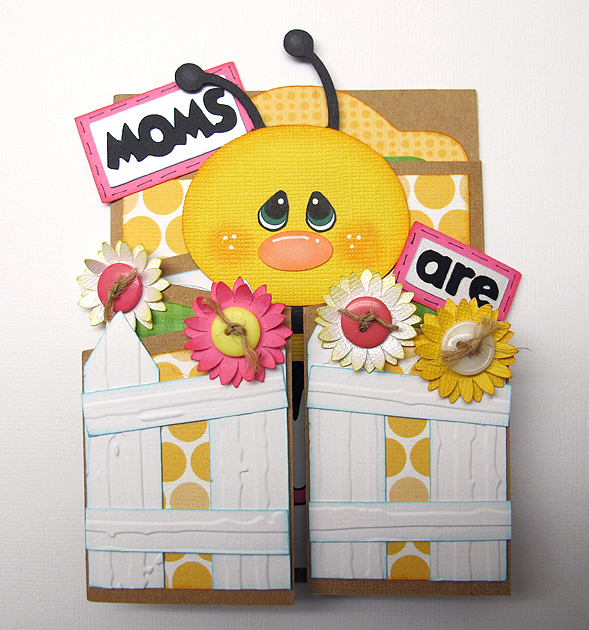
Card

Open

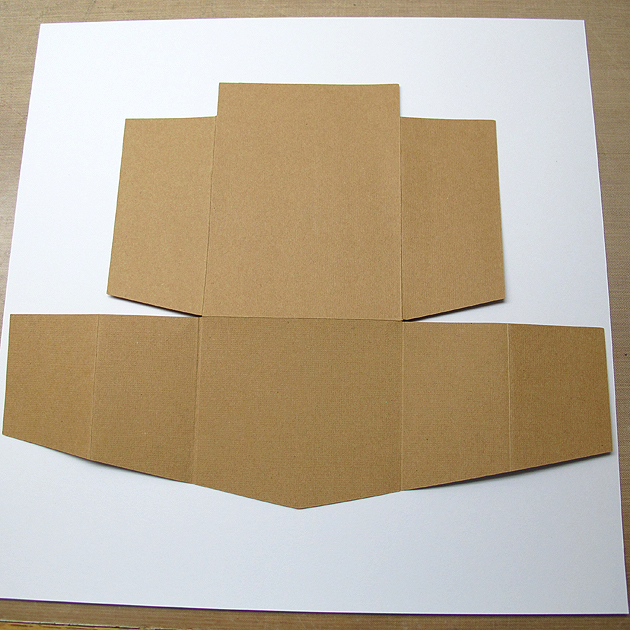
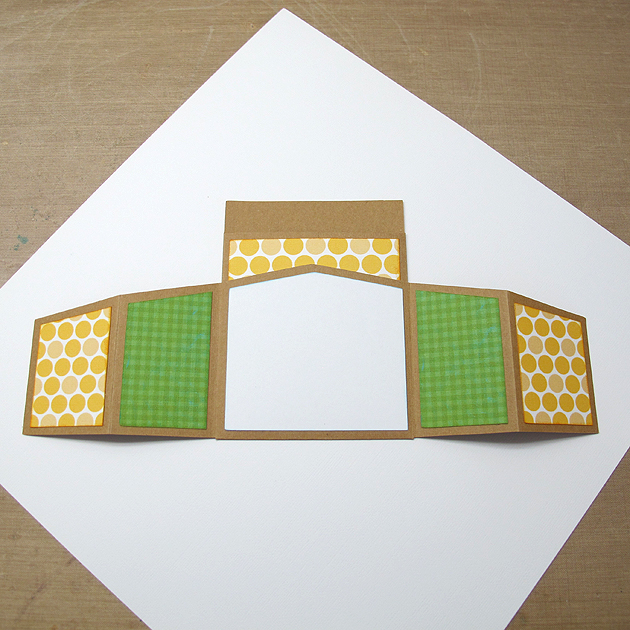
I cut the card base from kraft cardstock.  This is what the piece looked like after cutting and scoring.  And maybe you can see why it took me so long to design this card — I was doing a lot of figuring!  I used George and Basic Shapes and Cricut Craft Room Basics to design the card base.

ScoredPiece

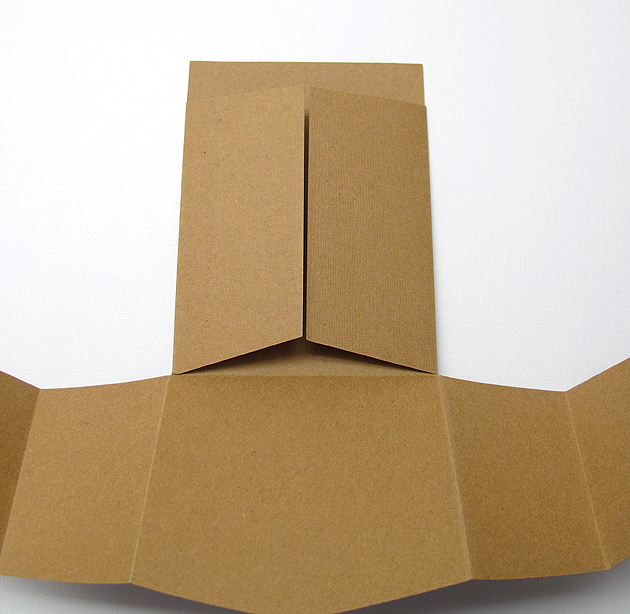
 After scoring, the first step was folding the edges of the pocket towards the center.

FoldPocket

 I printed all the patterned paper for this card on my Imagine.  I love that I can print the exact paper that I want when creating a project.  I used three cartridges for the paper, Bubble Gum Stripes for the gold circles, Blast Off for the green checks, and Hopscotch for the gold print on the tag.

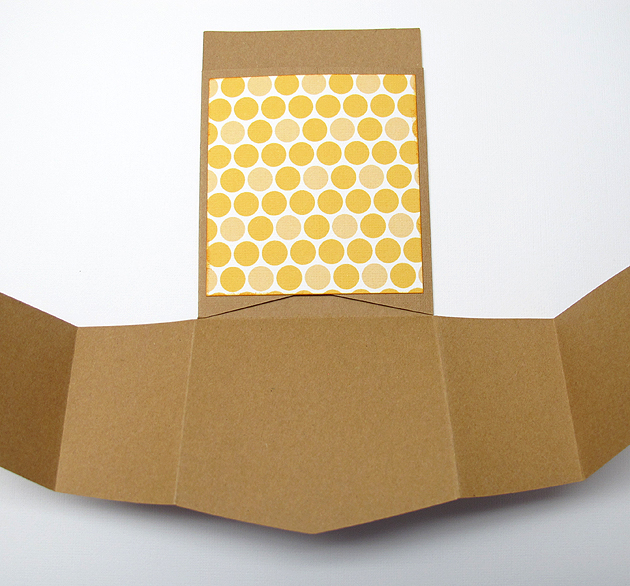
I adhered the piece over the pocket, being careful to not glue the bottom.  I applied glue to the top and side edges only.

GluePaperPocket

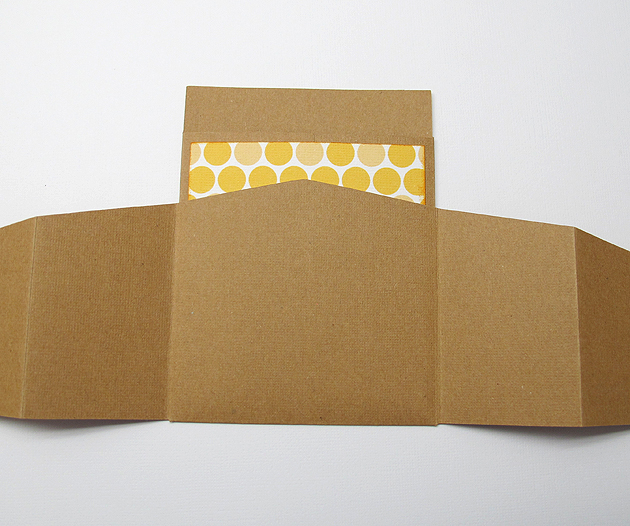
Next I folded the bottom piece up towards the top.  I glued the center section of the bottom piece and attached it to the pocket.  Again, I only glued three sides — the top and two sides.  I did not glue the bottom.

FoldUpBottom

The next step was attaching the patterned paper to the panels on the card.  I cut two of the gold circles for the very front pieces and four of the green checked paper.  I attached a white piece of paper to the center panel.  It then looked like this.

GluePaperFront

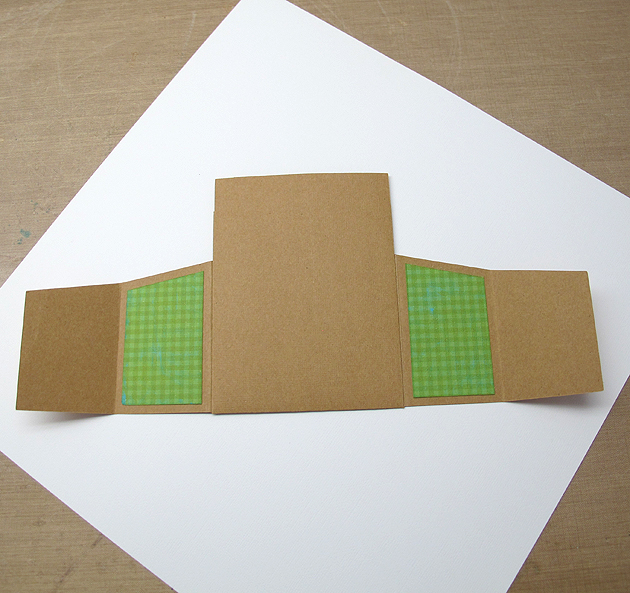
I adhered two green checked pieces to the back of the panels, as they show on the front when the card is folded.  This is a view of the back of the card, showing the two panels.

GluePaperBackSide

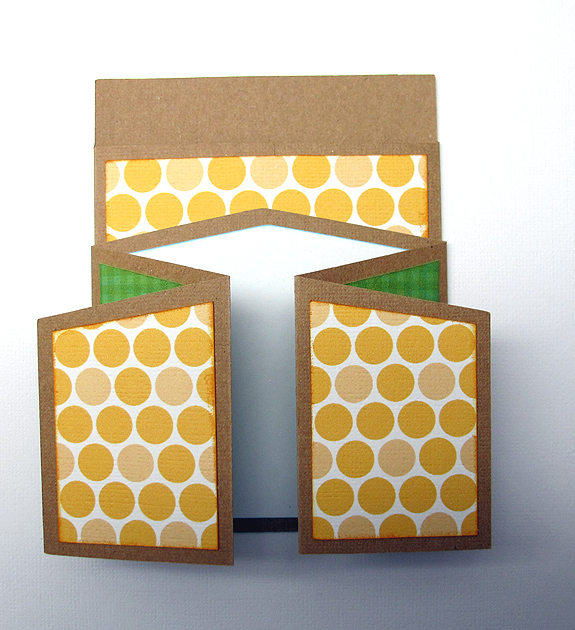
And here is what it looks like from the front, with the panels folded up.

GluePaperNoTag

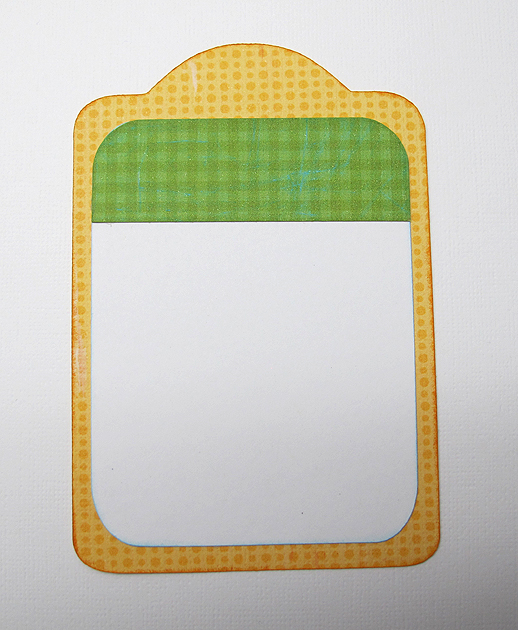
The tag was cut from Tags, Bags, Boxes & More.  The dimensions of the tag are roughly 3 3/8″ x 5 3/8″.  I adhered the white panel to the tag.  I also cut a piece of green checked paper for the top and rounded the upper corners with a punch.  I adhered that to the white panel on the tag, so the white didn’t show when the tag is in the pocket.

Tag

The fence posts are also from Tags, Bags, Boxes & More.  They are the pointed tag, just made skinny and with the hole hidden.  I cut four of the posts, with two of them being slightly taller.  Those I adhered to the center front of the card.  I ran the fence posts through the Cuttlebug using the Distressed Stripes folder before gluing them down.

GlueFence2

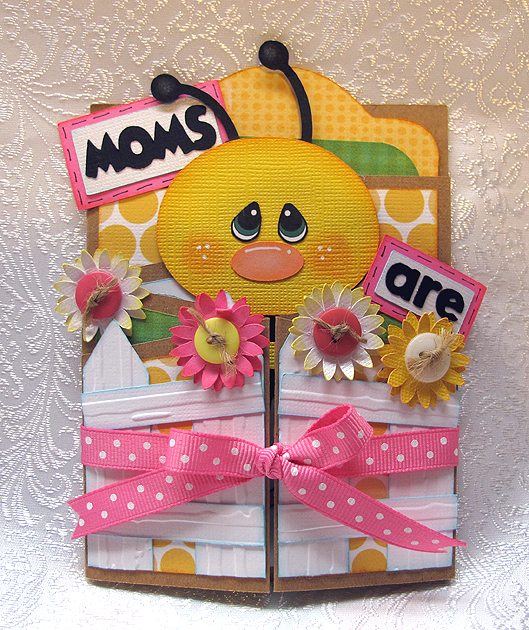
Next, I assembled the bee, flowers and letters.  The flowers were cut at 1″ using Flower Shoppe, using two layers for each flower.  I inked the edges and curled up the petals on the top layers.  I ran some twine through buttons and glued them to the center of the flowers.

The bee was cut at 4″ using Create a Critter.  I hid the facial features and used an oval that I made using Cricut Craft Room Basics (I squashed a circle until I got the shape I wanted) for his nose.  For his eyes, I printed out a free cut file I got at The Beary Scrap.  I don’t quite feel confident enough to try and paint my own eyes.  I did think about adding eyelashes but decided not to because I cut the bee’s face from textured cardstock.  I know my pen marks would have been all over heck and I would not have been happy.

The lettering was done using Craft Room Basics and Mickey Font.

BeeFlowers

All that was left was to adhere these pieces to the card.  I attached the bee first.   After he was adhered to the card, I glued the sentiment on and then the flowers.  My card looked like this.

GluingFlowers

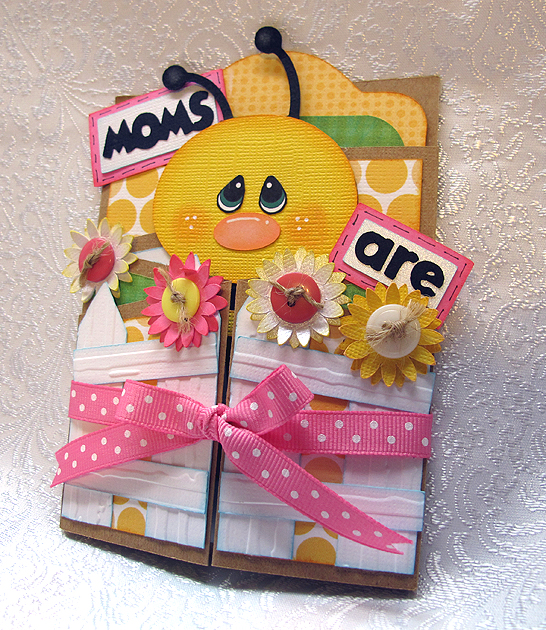
To keep the front of the card closed, I tied a ribbon around it.

Card2

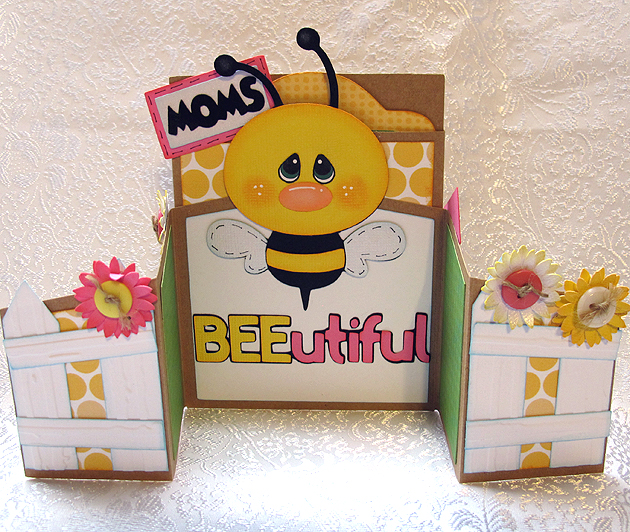
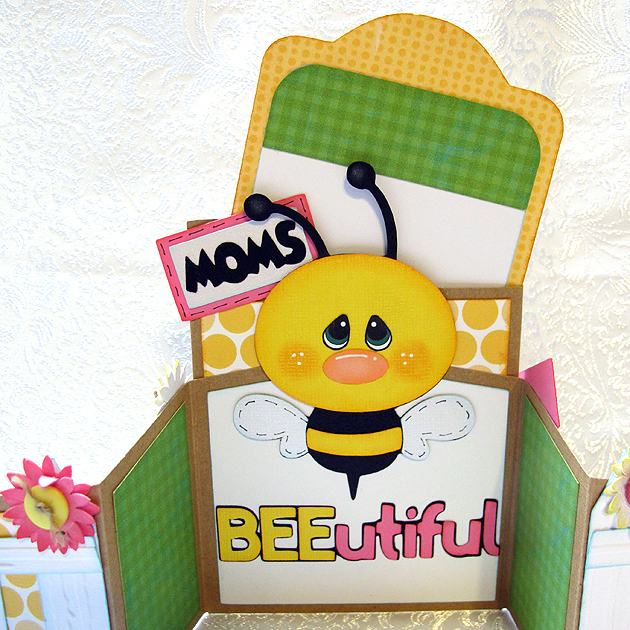
I’ll add a few more pictures, showing the card open and the tag part way out.  I am very happy with how it turned out — made me feel all the work was worth it.  I will cut this card base again — I can picture many uses for it.  And I will also make the bee again, but with a different sentiment.  My mom is no longer living and this is the first Mother’s Day card I have made since she passed away.  I will probably give it to a friend or relative.

GluingInside

TagPartOut

Card3

  • Cricut Craft Room
  • Cricut cartridges used:  Cricut Craft Room Basics, George and Basic Shapes, Create a Critter, Flower Shoppe, Mickey Font, Tags, Bags, Boxes & More
  • Cricut Imagine cartridges used:  Blast Off, Bubblegum Stripes, Hopscotch
  • Cuttlebug — Distressed Stripes folder
  • Ink
  • Chalk
  • Buttons
  • Ribbon

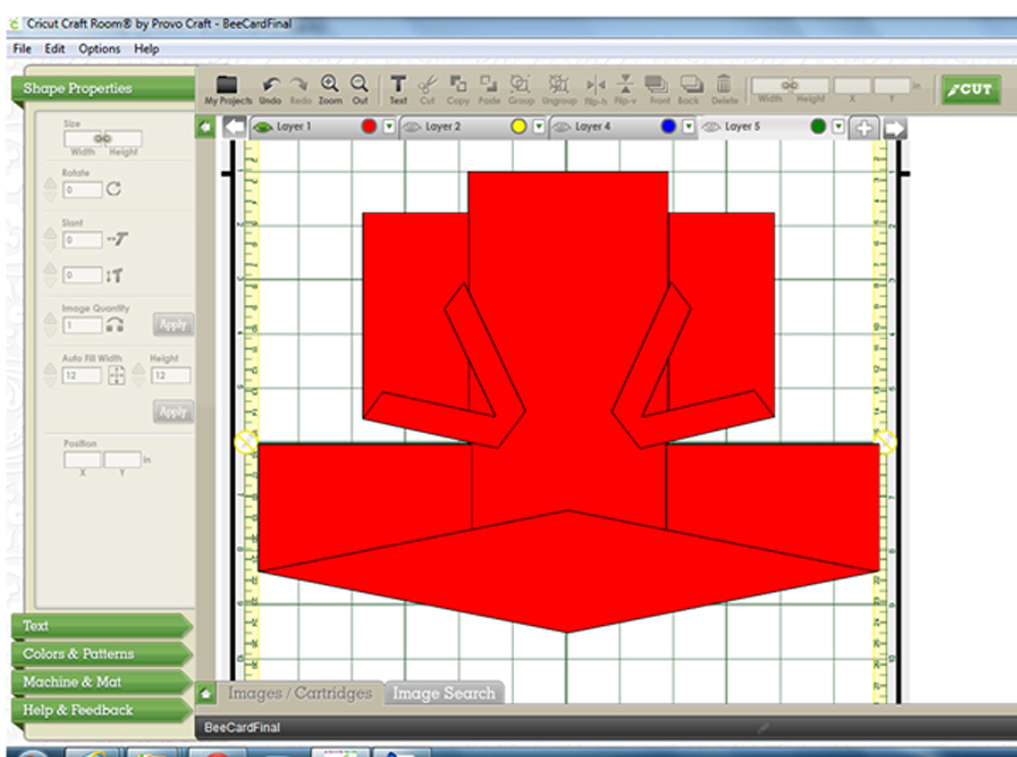
I’m going to add one last phot photo, which is a screen shot of my CCR file, to show what shapes I used to create the card base.  I hope this will help others wanting to re-create it.

ScreenShot

Wee Wee Wee!! Pig With Pinwheels Shaped Card

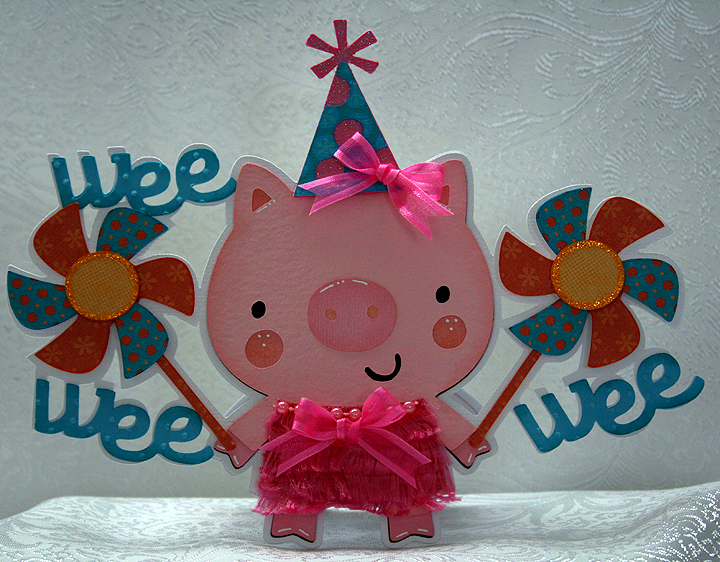
I wanted to make a birthday card for my sister-in-law and I wanted to create one that was very whimsical — and I hope I succeeded.  I enjoy making shaped cards and when I found the All Shaped Up Challenge on Bitten by the Bug 2, the idea for my card was hatched.

I love the pig with the pinwheels in the Geico commercials.  You can’t help but smile when one comes on TV, and I have been wanting to do something along those lines for while now.   I decided to make my pig a girly girl and give her a fancy party dress, complete with a birthday party hat.

I started laying out my design in Cricut Craft Room.  Unfortunately, the program still has issues and I ran into some of them while creating this card — and ended up wasting time.  I find CCR so frustrating at times that bad words will just start popping out of my mouth.

When I got ready to cut my card, Cricut Craft Room was down and I could not log in.  I kept getting a message that the program couldn’t connect to the internet.   I kept trying and after an hour or so, I was able to log in and cut my layers.

All the solid color cardstock is from Bazzill, except for the glitter cardstock on the hat — that is from Core’dinations. The patterned paper I printed on the Imagine using the Blast Off cartridge.

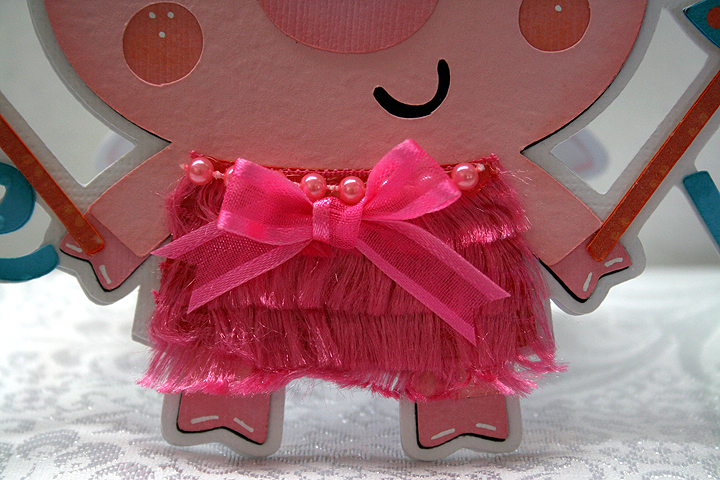
I used Create a Critter for the pig and pinwheels and B is for Boy, a Lite cartridge, for the “wee” words.  I welded them all together to form the base of the card.  I used the Swiss Dots folder and my Cuttlebug to emboss the words.  I found some eyelash-type yarn at Joann’s that I used for her dress, layering it so it looks like a fringe dress — reminds me of a flapper dress.  I added some pearls at the neckline and a bow on both the dress and hat.  I used Stickles on the center of the pinwheels.

The inside of the card features a computer-generated sentiment.

I hope this little piggy card brings a smile to my sister-in-law’s face.  I need to make an envelope so I can get it in the mail.  Since it is a over-sized card, I will probably send it in a padded envelope.

I am also entering this card into the following challenges:

Cricut Chirp Challenge #6 – Create a Critter Craft:  use any animal Cricut cut on your project

Scrappy Moms Stamps – Terrific Tuesday Challenge – Shape Up:  create a shape project

  • Cricut cartridges:   B is for Boy Lite, Blast Off (Imagine), Create a Critter
  • Cuttlebug:  Swiss Dots embossing folder
  • Bazzill cardstock
  • Stickles
  • Yarn, pearls, ribbon

Easter Bunny Inside His Jelly Bean Seed Packet Card


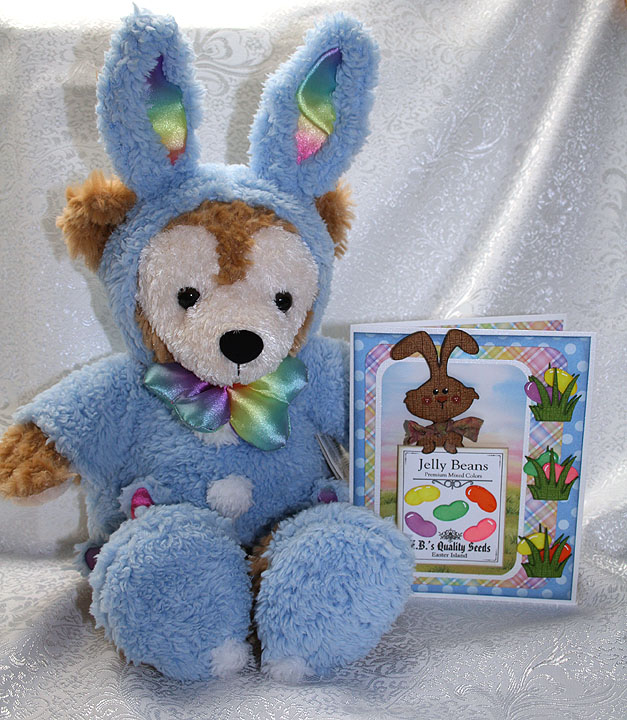
This was a fun card to make.  I wanted to make an Easter card so I could enter it in Jitterbuggin’s Spring Fling contest.  We had extra time to complete this challenge, but I waited until the last minute and am getting this in just under the wire.  It took a while for me to take my concept and come up with a finished project.   This time the challenge is open to voting, so that part is new to me. 

I was inspired by the movie Hop — I loved it and can’t wait for it to come out on DVD.  But my little bunny has to use seeds for his beans as he does not have the talent EB does when it comes to producing jelly beans.

I was a member of PC Hug Club for many years and received some very cute clip art each month.  Because I have such a large collection and never use it, I decided I was going to print my own paper to make this card.  All the background prints are images that I printed on an inkjet printer.  I really like using the clip art because I can resize it — so a 12″ x 12″ background can be reduced to 6″ x 6″ to make a card.  The size of the print becomes smaller too, so it is perfect for cardmaking. 

Fantabulous Cricut has a challenge called Do the Bunny Hop! this week that I will enter this card in.  You have to create a project using a rabbit or chick.

Also, at Cooking With Cricut, their challenge is called Cash in Your Stash and you are supposed to use things in your stash — items that you have had for at least a year.  My clip art collection certainly qualifies, and I also used scraps that I have had for ages to make the bunny and the grass.

I made the seed packet in Adobe Illustrator.  I am such a beginner using that program and was thrilled when I actually made something with it.  I made it a complete packet so I could slip the bunny inside. 

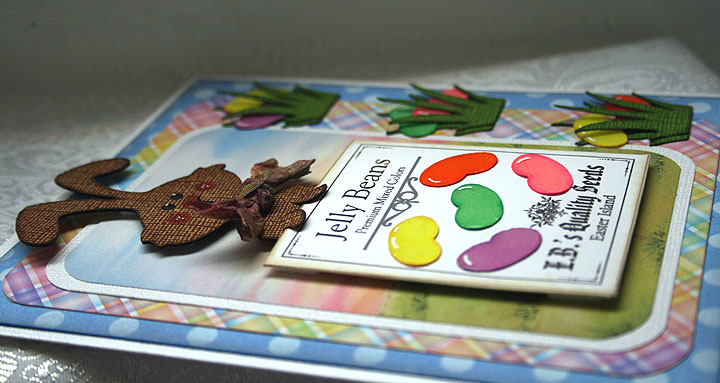
Making the jelly beans was probably the most time-consuming aspect of the card.  I first did an online search to see if I could find a Cricut cut file for a jelly bean as I was pretty sure there were no jelly beans on any of the Cricut cartridges.  I found a post where someone said they made a jelly bean using the George and Basic Shapes cartridge, using the crescent and heart shapes.    I used the same shapes and laid the beans out in Design Studio.  I cut the jelly beans from white cardstock and then colored them with Copic markers.  I applied two layers of Glossy Accents to give the beans their shine. 

The bunny is from the Paper Doll Dress Up cartridge — he’s the bunny from the magician’s costume.  I made a bow for him from seam binding that I spritzed with Glimmer Mist.  The grass is from Create a Critter.  I cut two layers of the grass for each clump so the jelly beans could be seen growing between the layers.  After I placed the bunny inside the seed packet, I pop dotted the entire piece on the front of the card.

Side view showing some of the dimension of the card.

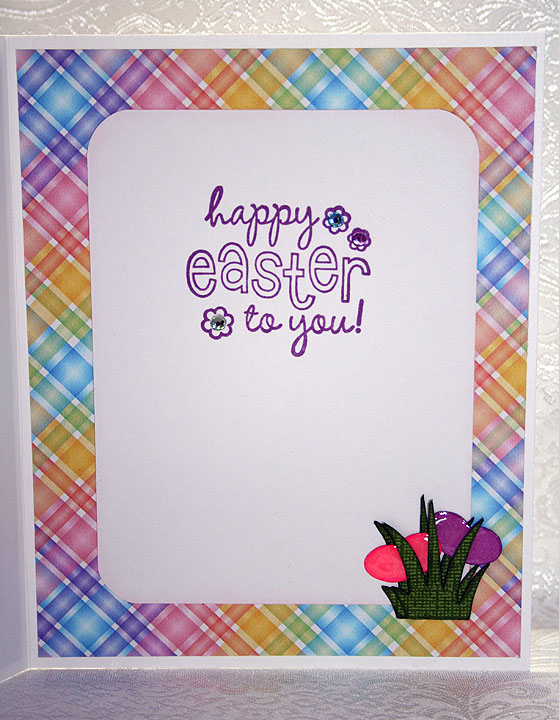
For the inside of the card, I used a stamp from a clear set that I picked up at a scrapbooking expo several months ago.  It came with the rhinestones that I put inside the stamped flowers.  I added another clump of grass with some more jelly beans.


  • Cricut cartridges:  George & Basic Shapes, Create a Critter, Paper Doll Dress Up
  • Cricut Design Studio
  • PC Hug Club clip art
  • Copic markers
  • Glimmer Mist
  • Rayon seam binding

Challenges:

Jitterbuggin — Follow the sketch, make an Easter card and use a Cricut cut somewhere on your card.

Cooking With Cricut — Use stuff in your stash, items that you have had for a year or more.

Fantabulous Cricut — Use a bunny or chick in your project.

Sunny Snail is Thinking of You!!


Erin is back in Taiwan after a lengthy visit here in the US.  I had lots of fun while she was staying with us.  We attended CHA every day and even managed to get in a scrapbook expo in Anaheim right before she left.  Once she got home to Taipei and settled in, she wanted to do a challenge together.  So we have been busily working,and thanks to Skype, we were able to scrap together.

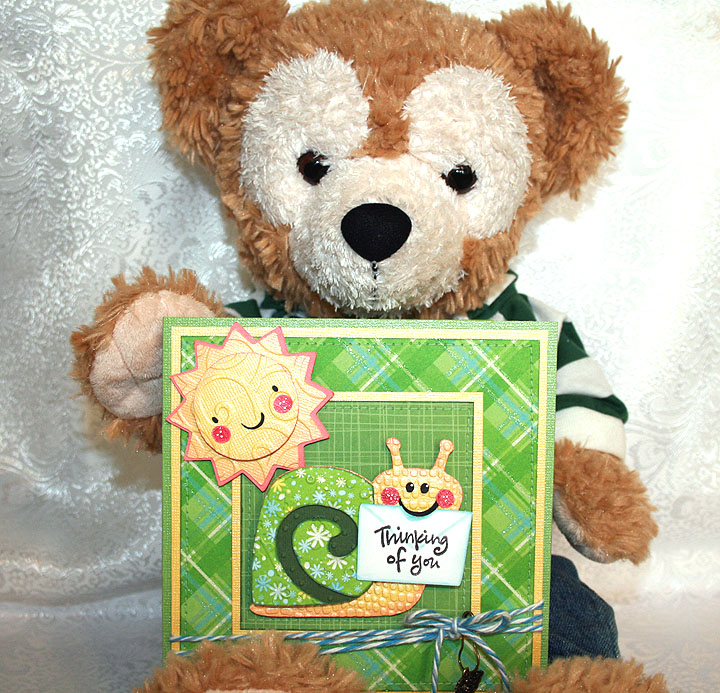
A member of the Cricut Circle recently had surgery and I wanted to send her a card to wish her a speedy recovery and let her know I am thinking of her.  I thought doing a challenge would be a perfect way to accomplish this.  And here is a little Duffy “spokesbear” model to present my card:

The base of the card is green Bazzill bling cardstock.  The glittery print cardstock is from two different DCWV paper stacks, Blossoms & Butterflies and The Glitter Stack.  I used a yellow bling cardstock from Bazzill for the contrast, sun and snail body. 

I laid out my card in Design Studio and I cut the sun, snail and flowers with my Cricut.  I used Create a Critter for the sun, Birthday Bash for the snail and the Bloom Lite cartridge for the flowers.  I used my Cuttlebug to emboss the sun and the snail.  I embossed the snail with four different embossing folders, Swiss Dots, D’Vine Swirl, Plum Blossom and Mesh Texture.  I inked the edges of all the pieces to give them some depth.  I used Stickles on the center of the flowers and an atyou Spica glitter pen for the cheeks on both the sun and snail.  The sentiment on the envelope the snail has in his mouth is from a $1 clear stamp I purchased at Michaels.  I used lots of pop-dots on the sun and snail, popping up layers and also the completed pieces. 

I am loving all the baker’s twine that is so popular right now, but  I have not purchased any yet.  When I was in Michaels a couple of weeks ago, I found some Lily Sugar ‘n Cream Twists string/thread in the yarn department that reminded me of the twine.  It was on sale so I bought a few different colors to see how it would work.  I wrapped some of the blue around the bottom of this card and I think it looks pretty good.  I attached a charm to the twine with a little hanger that is from Making Memories.  I think they are called garment pins. 

For the inside of the card I added a couple of flowers that I cut out twice so I could layer them together for some dimension.  I used Stickles for the bling on the center of the flowers.

This was a fun card to create and I am happy to say that my card qualifies for the following challenges:

Fantabulous Cricut Challenge Blog – Challenge #51 “Hip to be Square” -green & gold

Cooking With Cricut – It’s A GREEN  SCENE!

The Cuttlebug Spot –  All Tied Up: twine challenge

The Cuttlebug Spot –  Oh so Charming

  • Bazzill bling cardstock
  • Die Cuts With a View paper stacks
  • Cricut cartridges:  Birthday Bash, Bloom (Lite), Create a Critter
  • Cricut Design Studio
  • Cuttlebug Embossing Folders:  D’Vine Swirl, Plum Blossom, Swiss Dots
  • Twine:  Lily Sugar ‘n Cream Twists
  • Making Memories garment pins
  • Charm from my stash
  • Stickles
  • atyou Spica glitter pen

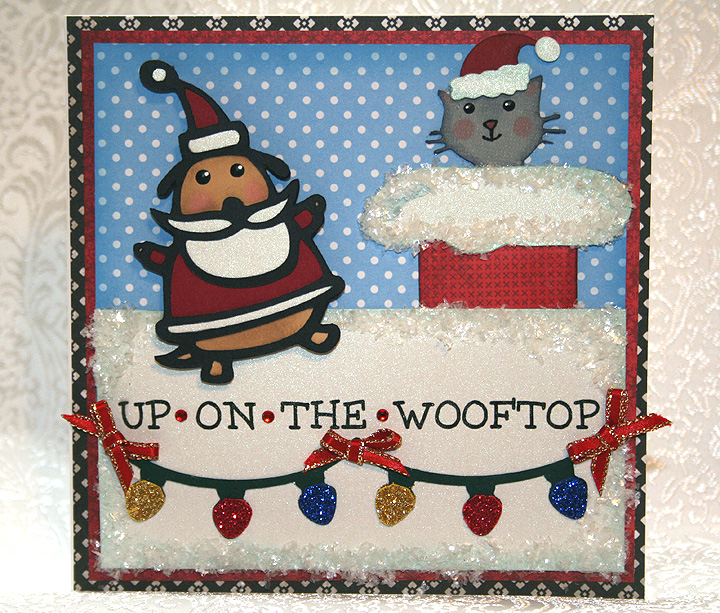
Up On The Wooftop for Jitterbuggin’ Challenge – Here Comes Santa Claus!

 Ho, ho, ho!
Who wouldn’t go!
Ho, ho, ho!
Who wouldn’t go!
Up on the rooftop
Click, click, click
Down thru the chimney with
Good Saint Nick

The above chorus is the inspiration for this card.  I haven’t made a card in so long that I finally took a little time and came up with this card for this week’s challenge at Jitterbuggin.  Now I have to put all the papercrafting supplies away and get back to embroidering. 

I don’t know why, but this card seemed to take forever to make.  I’m glad I didn’t keep track of the hours I have in it — it would probably be embarrassing to admit I took that long.  

The challenge was fairly easy — no sketch to follow or any requirements other than to use a Santa on your card.  I sure hope Santa Paws counts because he is certainly busy up on the wooftop with his little kitty helper.

I laid the card out in Design Studio and used a house from the Cricut Lite cartridge Jolly Holidays for the roof.  The house is over 10″, but I laid it on the mat so that the house part was off the mat and the only part that cut was the roof.  I wanted the roof to fill the entire front of my card, which is 5.5″ square.  The house design I used has Santa’s feet hanging out of the chimney, but I trimmed them off for this card.  I also used the hide contour feature of Design Studio to hide the footprints in the snow that are on this particular house. 

The patterned paper is all from various DCWV paper stacks and the solid white cardstock on the front is Pearls from Core’dinations. 

Santa Paws is cut from Paper Pups.  The cat is from ZooBalloo and his hat is from Jolly Holidays.  I printed the sentiment directly on the Pearls cardstock, leaving an extra space between the words so I could add a small rhinestone.  The strands of lights are from Create a Critter and I glittered the bulbs.  The snow on the roof is from Martha Stewart.  I added bows from 1/8″ ribbon to give a festive look to the lights.

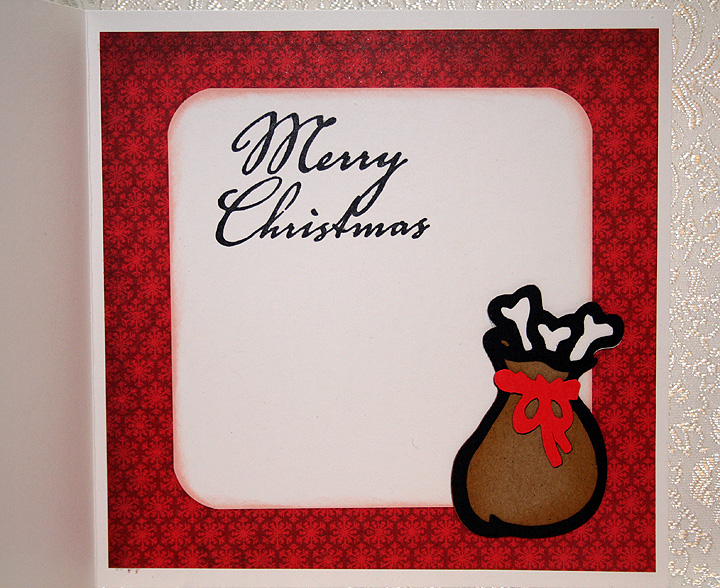
I cut Santa’s sack from Paper Pups and put it on the inside of the card.  The sentiment is a $1 stamp that I got at Michaels. 

  • Cricut Design Studio
  • Cricut cartridges:  Create a Critter, Jolly Holidays, Paper Pups, Zooballoo
  • DCWV — various paper stacks
  • Core’dinations Pearl cardstock
  • Martha Stewart Snow
  • Glitter, rhinestones, rubber stamp — all from Michaels $1 bins
  • Ribbon from stash

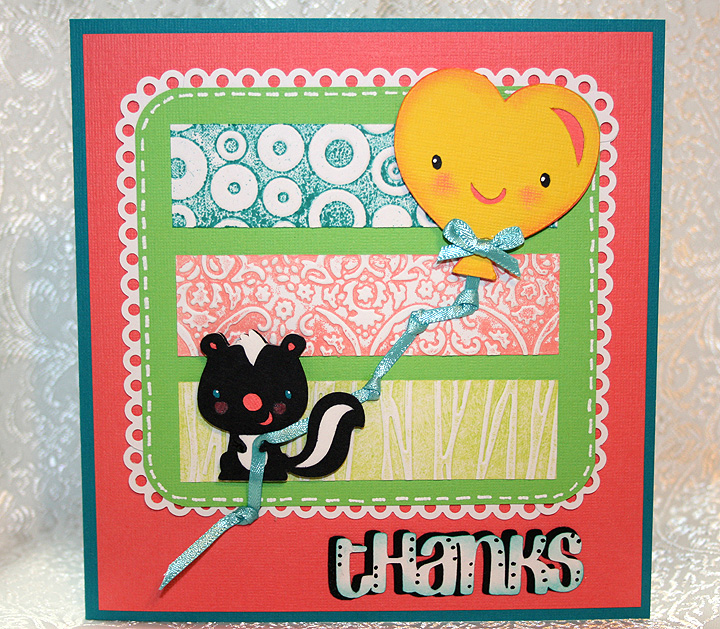
Jitterbuggin’ Challenge – Let’s Give Thanks! – Thanks From the Bottom of My Heart

The current challenge at Jitterbuggin’ is to follow the sketch, add a Cricut cut and emboss something. 

I’m not sure where my colors for this card came from — I must have been in a “bright” mood.  I recently received an order from Stampin’ Up and it was sitting in a box and I started pulling out colors.  All the colored cardstock is from Stampin Up’.

I embossed the three center sections using my Cuttlebug and the following folders:  Spots & Dots, Textile Texture and Forest Branches.  I inked each folder with a different color of ink and then ran white cardstock through the Cuttlebug.  The white scalloped trim around the center section is a Martha Stewart Punch Around the Page set called Scallop 3-Dot.  I used just the very top part of the punched piece — the top dot.  I had to piece it because my cardstock size was not the exact size to take advantage of the punch-around-the-page feature.

I used my Cricut to cut out the skunk from the Create a Critter cartridge.  I also cut the heart-shaped balloon from Create a Critter.  The “thanks” is cut from Don Juan.  I attached some ribbon to the ballon and then attached it to the skunk’s hand.  I added a bow to the ballon. 

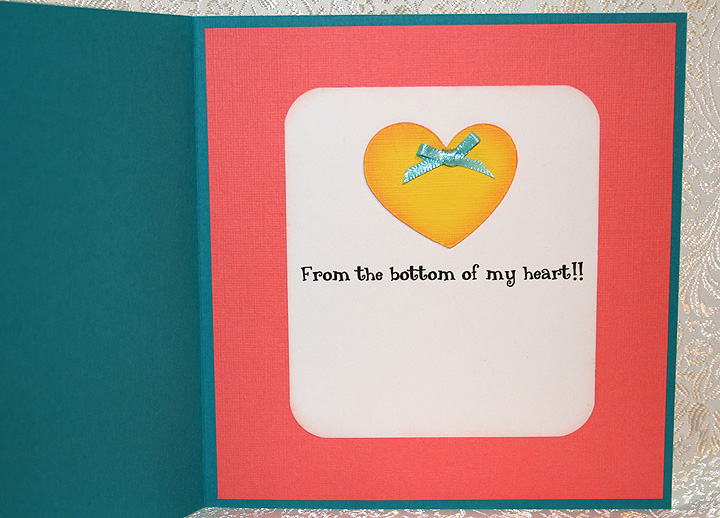
For the inside of the card, I cut another heart from Create a Critter.  I printed the sentiment on the computer.  I added another bow to the inside heart.

  • Stampin’ Up cardstock
  • Cricut cartridges:  Create a Critter and Don Juan
  • Cuttlebug folders:  Spots & Dots, Textile Texture and Forest Branches
  • Martha Stewart Scallop 3-Dot Punch Around the Page set
  • Ribbon from my stash

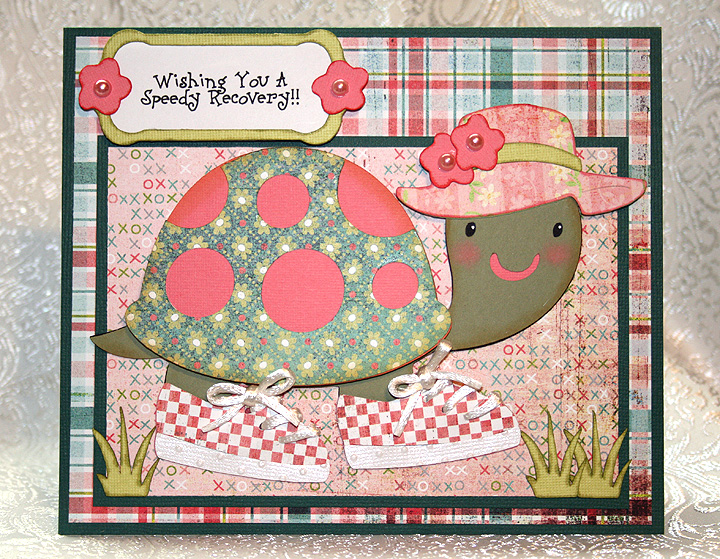
Speedy Turtle – Fantabulous Cricut Challenge Blog – Challenge #36 Achoo!

Here is my card for the current challenge at the Fantabulous Cricut Challenge Blog, which is to make a project that has something to do with being sick.  I don’t know why, but this challenge stumped me.  I couldn’t think of anything exciting that I wanted to make.  I started several different projects before the light bulb finally went off and I had a clear vision of what I wanted to make.

The card base is Bazzill cardstock, the patterned paper is Basic Grey, and the solid that the turtle is cut from is Stampin’ Up.  I cut the turtle using my Cricut and the Create a Critter cartridge.  Since I am wishing the recipient a speedy recovery, I figured I needed to give my turtle some running shoes so she could speed things up a bit.  I cut the shoes from My Community and laced them up with some white cording that I found in my stash.  I used the Cuttlebug embossing folder Swiss Dots to emboss the bottom edge of her shoes.  I also gave her a hat, which I cut from Paper Doll Dress Up.  The label that the sentiment is printed on is from a Lite cartridge, Lacy Labels.  I used Create a Critter for the flowers and the tufts of grass.  I added pearls to the centers of the  flowers. 

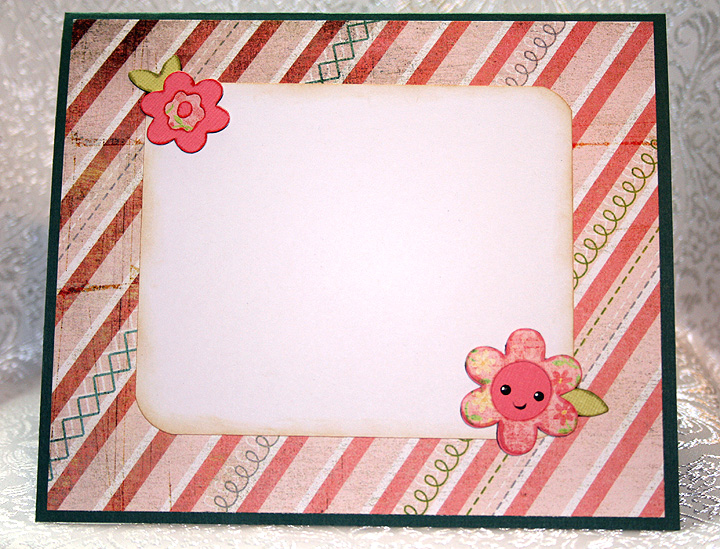
The flowers on the inside of the card are also from Create a Critter. 

  • Bazzill cardstock
  • Stampin’ Up cardstock
  • Basic Grey designer paper
  • Cricut cartridges:  Create a Critter, Lacy Labels (Lite), My Community, Paper Doll Dress Up
  • Cuttlebug Swiss Dots embossing folder
  • Pearls
  • Cording from my stash