Cricut Candy Corn Box and Totes


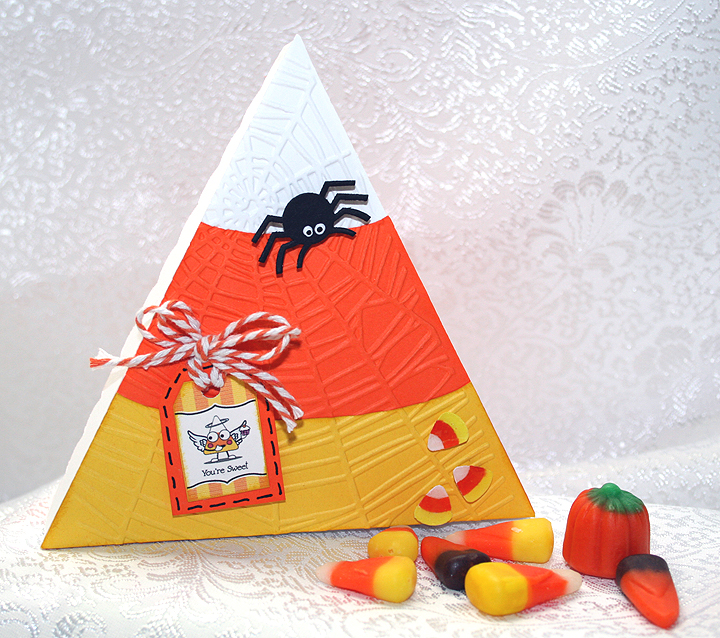
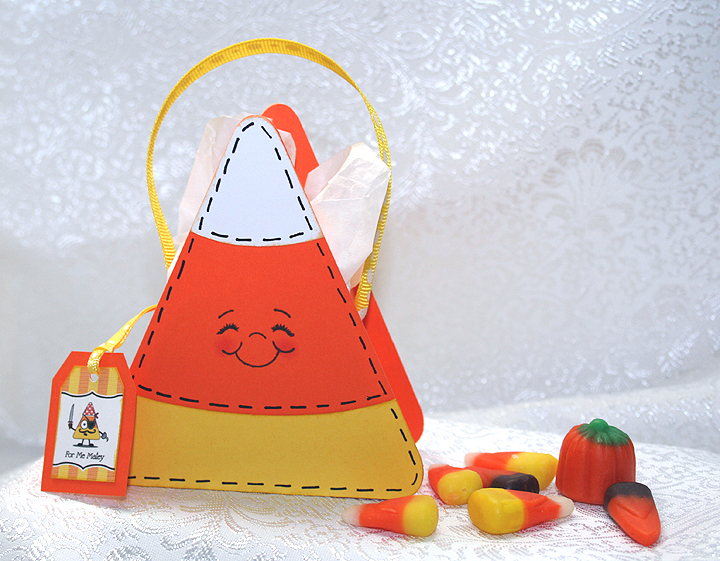
My goal this weekend was to make a candy corn box, but then I had an idea and soon had candy corn boxes all over my craft room.  I wanted to participate in two challenges, the 3D Halloween Treat Container challenge at Bitten by the Bug 2, and the 3D Treats challenge at Cooking with Cricut.

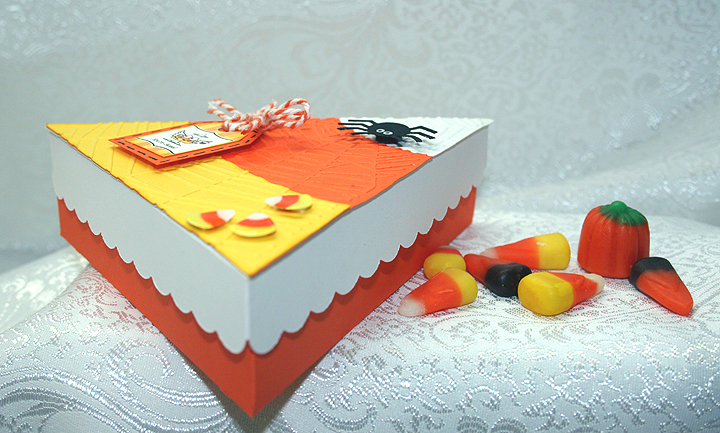
I have seen several versions of Cricut candy corn boxes using a cake box cut on the internet.  Using Cricut Craft Room, I chose the triangle box cut from Sweet Tooths cartridge.  I liked that it is a 2-piece box, with a separate top and bottom.  The paper is Michael’s Recollection brand.

I cut the bottom at 6″, from orange cardstock and cut the top from white cardstock.  Using George and Basic Shapes, I put a triangle on my mat and sized it to match the triangle on the top of the box.  I then cut that from white cardstock.

I laid out two more triangles in CCR, one in yellow and one in orange.  Using ovals from George and Basic Shapes to intersect the triangles, I got the shapes I wanted for the corresponding pieces.  I then glued the orange and yellow layers onto the white triangle.

Using my Cuttlebug and the spider web folder, I embossed the entire front piece after it was glued together.  I then adhered the piece onto the top of my box.

I sometimes forget about all the dies I have for my Cuttlebug, opting to cut with my Cricut instead.  But this time I remembered I had some cute Halloween dies and that is what I used for my spider and the tiny candy corns on the front of the box.  I used the 3″x3″ Cuttlebug Halloween die.

I painted the eyes on the spider and colored the candy corns using Copics.  Then then applied Glossy Accents on the candy corn to give them some shine.  I added pop-dots to the spider and candy corns and attached them on the top of the box.

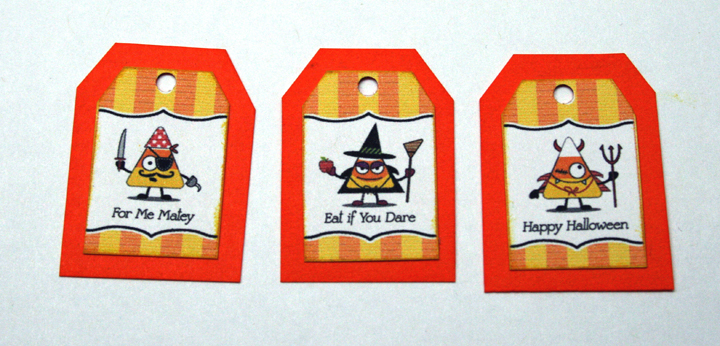
The tags I used on all my candy corn boxes is a free printable I found on a website called HelloCuteness.com.  The printable is from their old website, but you can get to their new site with the link I am sharing.

I hand cut around the tags, glued them onto some orange cardstock and again hand cut around the orange cardstock. For the cake box candy corn, I tied some twine through the hole on the tag and pop-dotted it onto the top.

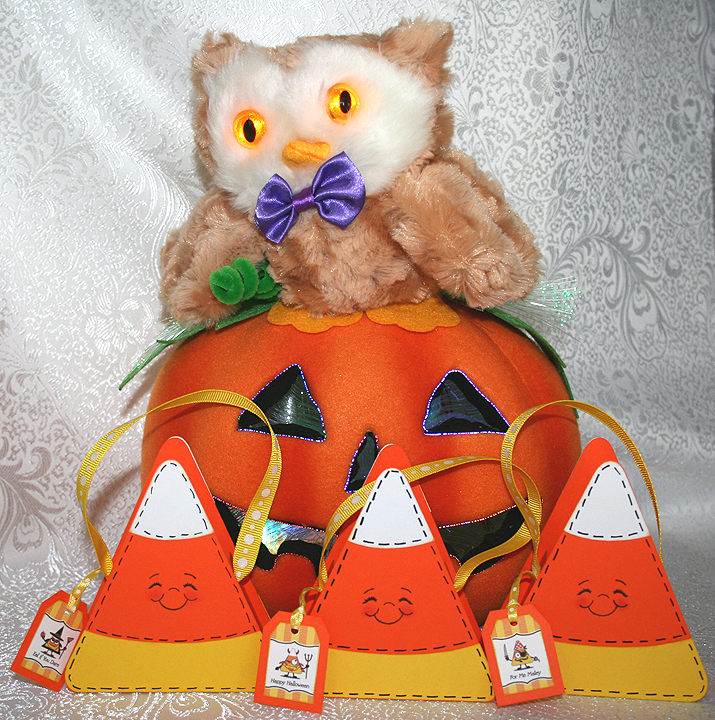
While I was working on the cake box version, I got an idea to create a different type of candy corn box —  one that is more like a tote.  Using CCR and George and Basic Shapes, I started laying out triangles and rectangles to get what I wanted.  It took a little time and several attempts, but I finally got it worked out.

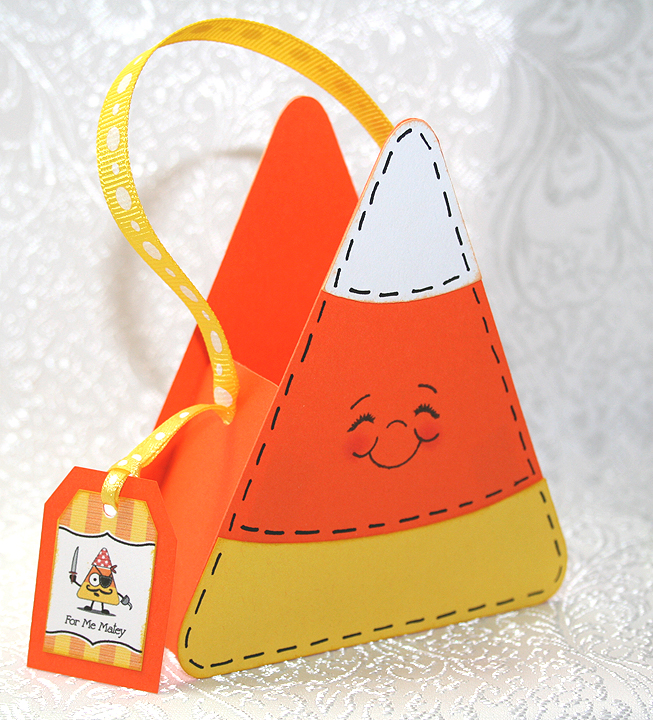
Here is my final version, along with two of my better attempts.  They look pretty much the same — the main difference is in the tabs where they attach together and how I assembled them.  The base shape is cut from orange cardstock and then there is a yellow and white piece that attaches to the front and back.

I used a Peachy Keen face stamp, stamping just one side.  I thought about stamping both sides of the tote but decided I didn’t want any two-faced candy corns!  I used a black pen to add the stitch marks to the fronts and backs.

For the first tote, I put it all together and then realized it would be much easier to attach the white & yellow pieces, stamp the face, and punch the holes for the ribbon handle if the tote was still flat.  The next two totes were done flat and it was a lot easier.  I used Terrifically Tacky Tape to assemble the totes.

I used a Crop-A-Dile to punch the holes in the side and 12″ of ribbon for the handle.  After threading the ribbon through the hole, I tied a knot and used some hot glue to glue the ends down inside.  The tags are hung using 1/8″ ribbon and I threaded it through the same hole as the handle before using the hot glue.  Again, I did this on the first tote after it was assembled.  For the next totes I added the ribbon before assembling the them.

  • Cricut Craft Room
  • Cricut cartrideges:  George and Basic Shapes, Sweet Tooth Boxes
  • Copics
  • Glossy Accents
  • Ribbon
Spooky Halloween Pumpkin Card


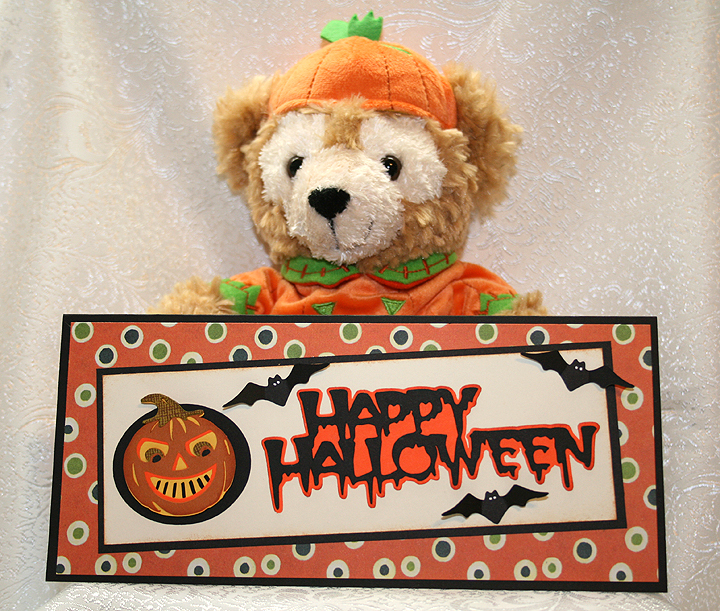
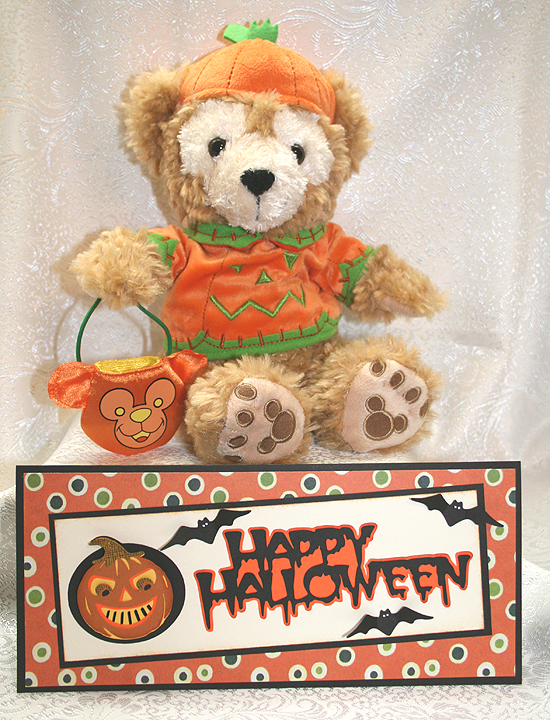
This is a Halloween card I made for a couple of challenges.  The first one is Cooking With Cricut, and their challenge is to make a project using a pumpkin and circles or dots.  The second one is Fantabulous Cricut Challenge Blog, and their challenge is to make a Halloween project using the colors black and orange.

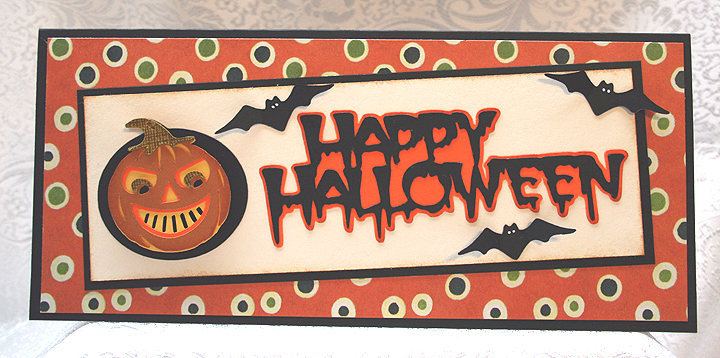
My card fits in a #10 business envelope — it’s approximately 9″ x 4″. The pattern paper is from a DCWV stack from a year or so ago.  I laid the design out in Cricut Craft Room and used my Expression to cut everything.

I used the Happy Hauntings cartridge for the sentiment and cut it at 1.75″.   The pumpkin is from Autumn Celebrations, cut at 2″.  The bats are from Holiday Cakes and were cut on shadow feature at 1″.  I bent their wings up and glued down just the bodies.

And here is the inside of the card.

The little bear posing with my card is my newest Disney Duffy Bear, the Halloween 2012 bear.  He is so cute with his little treat bag that is shaped like a Duffy bear.

  • Cricut Craft Room
  • Cricut cartridges:  Autumn Celebrations, Happy Hauntings, Holiday Cakes
  • DCWV holiday stack

Happy Thanksgiving Pumpkin Card


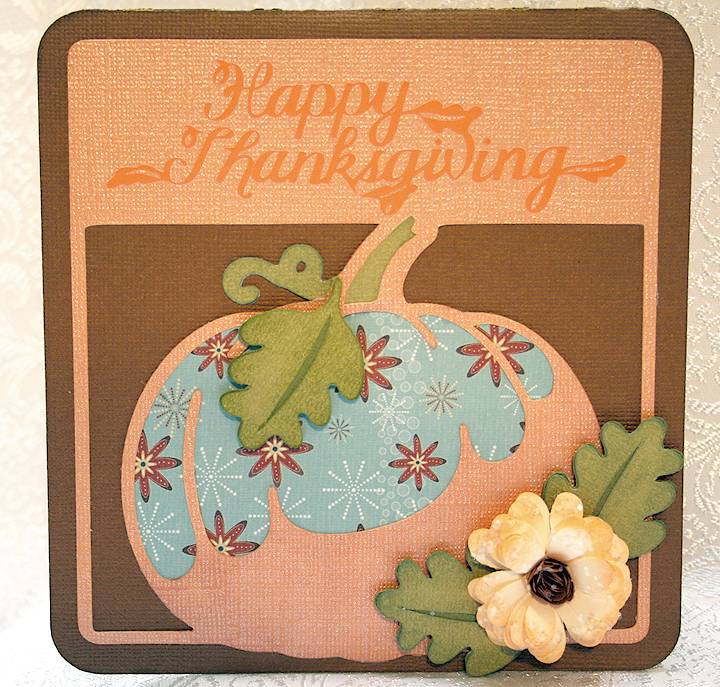
I made this card for the latest challenge at Cooking With Cricut.  The challenge was to make a Thanksgiving card for the I Feel the Love Project (IFTL).  Each month they select a different person, organization or group to receive handmade projects.  This month the cards are going to Surrey Place Care Center, a 60-bed skilled nursing facility.

I am getting my card in just under the wire.  In fact, I had better go link my card before time runs out.  Well, I got my card linked to Cooking With Cricut’s page, but for some reason the photo is not showing up.

I made my card in Cricut Craft Room.  I used the pumpkin card feature on Autumn Celebrations, cutting it at 5.75″. The solid color cardstock is from Core’dinations.  The patterned papers are from a paper pad I picked up at Joann’s called Cocoa Mint by Cloud 9 Design.

The leaves are cut at 3″ using two shades of green.  The sentiment is from the Thanksgiving cartridge and is cut at 1.35″.  I used orange vinyl for the sentiment .  I like using vinyl for smaller, more intricate cuts because it cuts so well and you don’t have to put adhesive on it.

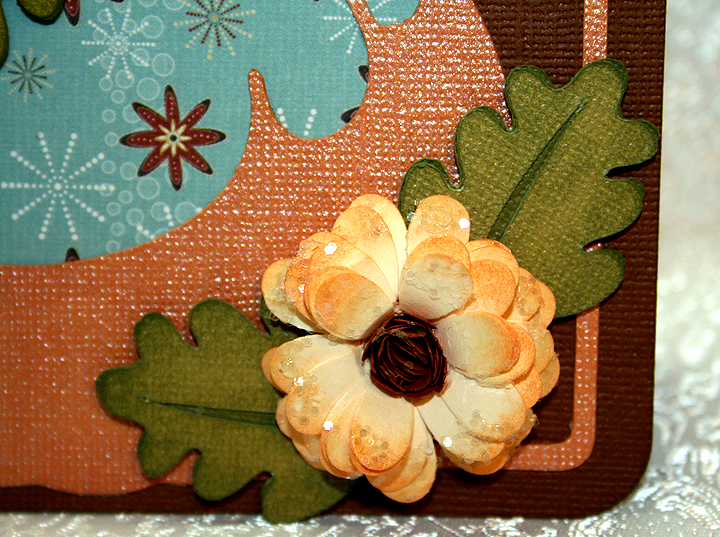
The flower was made using my Cuttlebug and the Daisy quilling kit.  It is my first flower made using this kit and I am happy with the result.  I inked the edges of the petals before rolling them up.  I used some Glossy Accents and Martha Stewart crystal glitter on the flower petals.  I attached the leaves to the card using pop dots.

 The inside of the card is simple, mainly because I ran out of time.

Here is another picture where I was able to lighten it up and kill some of the glare so you can see the sentiment better.  I didn’t realize the first pic was so dark.

  • Cricut Craft Room
  • Cricut cartridges:  Autumn Celebrations, Thanksgiving
  • Cuttlebug Daisy quilling kit
  • Core’dinations cardstock
  • Orange vinyl
  • Glitter – crystal

Cricut Art Nouveau Hummingbird Birthday Card


I wanted to make a card to enter in a couple of challenges and this is what I came up with.  The first challenge is Things that Fly in Nature over at Bitten by the Bug 2. The second challenge is Texture at Cooking with Cricut.

I made a 5″ x 5″ card and the patterned paper was all printed on the Imagine using the Country Carnival cartridge.  I love the paper selection on this cartridge and have been wanting to use the design that is on the background of my card for some time.  The reason I bought this cartridge is because of the paper — and the very cool font that it has.

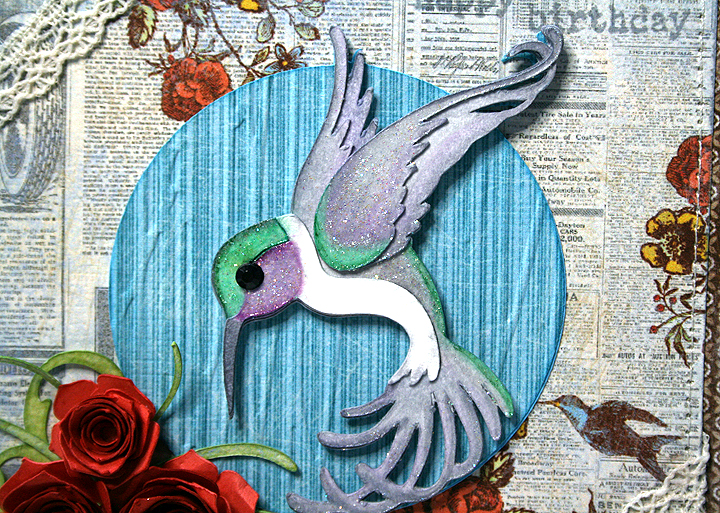
 I cut the hummingbird (at 3″) from watercolor paper using the Art Nouveau cartridge and colored him with Copics.  This is only my second time trying to color with Copics, and I have lots to learn.  I discovered I don’t have enough green markers — I didn’t have enough in the same color group to do any blending.

After I colored the hummingbird, I used a crystal glaze (something I got years ago) to go over sections of his body to try and simulate the iridescence you see in their feathers.

Oh, dear — after looking at the close-up I’m not too sure I should be posting it.  My coloring definitely leaves a lot to be desired!  The circle behind the hummingbird was embossed using the Forest Branches folder.

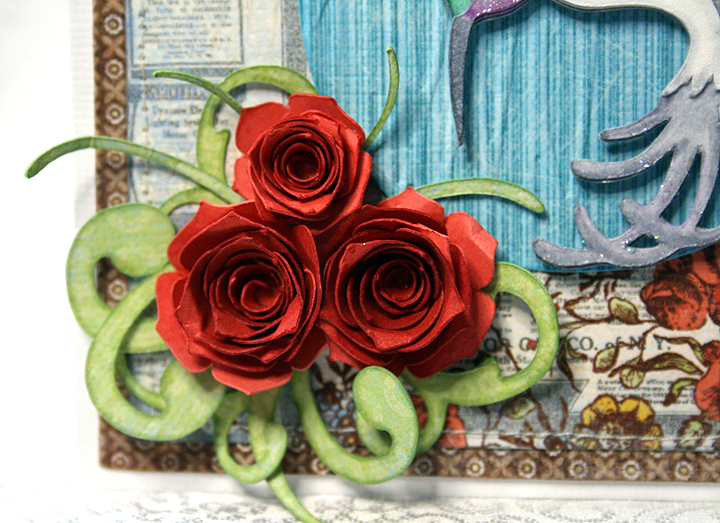
I recently got the Art Philosophy cartridge, mainly because of the flowers I have seen so many crafters make with it. The roses on this card represent my first time using this cartridge.  I cut them at 2″ and 2.5″ using some Recollections paper from Michaels.  I inked the edges with Tim Holtz Fired Brick Distress Ink.  I used a quilling tool from one of my Cuttlebug quilling kits to roll up the flowers.  I was surprised at how quickly they went together.  The greenery behind the roses is also from Art Philosophy.

I wanted the sentiment to be subtle, so I stamped it in the upper right hand corner (using distress ink) trying to make it look like it is part of the print on the paper.  I added a couple of pieces of lace across two corners and used my sewing machine to stitch around the card.

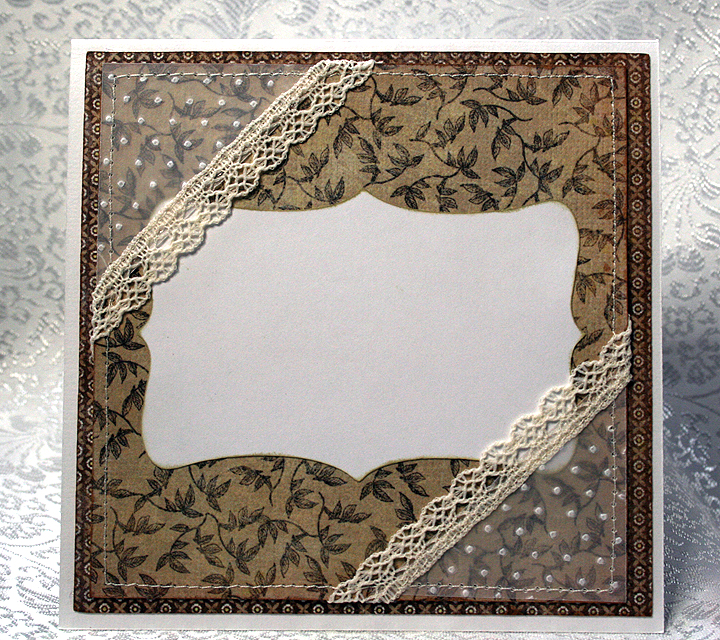
For the inside of the card, the white area is a shape cut using Art Philosophy.  The corners are a 2″ square of vellum, cut diagonally, embossed with the Swiss Dots folder, and trimmed with lace sewn across the top edges.  I then secured them to the card by stitching around the entire piece.

I originally planned on using the vellum corners on the front of the card, but when I laid everything out, I thought they hid too much of the paper on the front.  So they got moved inside, which worked out fine because I had no plans yet for the inside of the card.

  • Cricut cartridges:  Art Nouveau, Art Philosophy, Imagine Country Carnival
  • Cuttlebug embossing folders:  Forest Branches, Swiss Dots
  • Copics
  • Vellum, scraps of lace

Cricut Create a Critter 2 Owl Witch Card


I was able to use my new Create a Critter 2 cartridge last night to make a card to participate in the latest challenge at Cooking With Cricut,  their Card Outreach Challenge.  The challenge is to make fun Halloween cards (no scary ones) for the I Feel the Love Project.

The “I Feel the Love” Project for September is to make Halloween Cards to be given to the kids who live at Casa Pacifica.   Casa Pacifica serves abused and neglected children and adolescents, and those with severe emotional, social, behavioral, and mental health challenges on California’s Central Coast.  Each year the facility has an amazing Halloween party for the kids. It is IFTL’s goal to send a card to each of the 70 children who reside there. (For more information about Casa Pacifica please visit their website.)
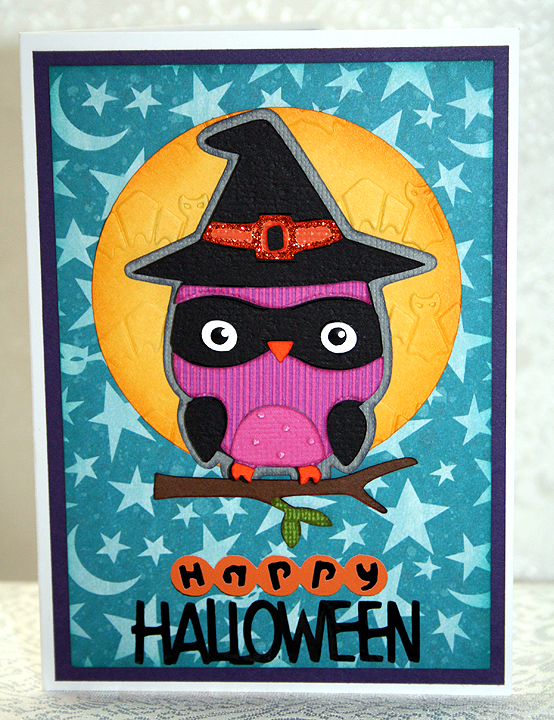
I laid out my card in Cricut Craft Room, cutting the owl at 3″.  The owl’s body was printed and cut on my Imagine, using the Bubblegum Stripes cartridge for the small purple stripes.  I did not use CCR for this step, as it still is not compatible with the Imagine.  I embossed the small tummy piece with the Cuttlebug Swiss Dots embossing folder.
For the owl’s eye, I hid the cut that forms the pupil in CCR.  On the mat in CCR, the circles look perfectly round.  But when I cut the eyes with my Expression, they did not come out round.   I had what looked like a cross-eyed owl.  So I took black paint  and a stylus (you can also use the round end of a paintbrush), dipped the stylus into the paint and then formed black circles on the white part of the eye.  Once the paint dried, I put a white highlight on the black dot.
I added a moon behind the owl, which is a circle that I also cut at 3″.  I embossed the moon with a new Cuttlebug folder I recently got, the bat folder from the Midnight Hauntings set.  The phrase was cut at 1″.  Because of the small size of the phrase, I cut it out of vinyl.  The Cricut easily cuts vinyl.  Vinyl is great for small pieces because it already has adhesive, so you don’t have to fuss trying to put glue on them.
I added Stickles to the band and buckle on the hat.
For the inside of the card, I lined it with a couple of pieces of patterned paper.  I cut the pumpkin treat bag and candy piece, also from Create a Critter 2, at 1.5″.  I cut the shadow layer from cardstock and the black and orange layers from vinyl.
The background paper and print paper inside my card are from a K & Company Halloween collection that came out a year or so ago.  I picked it up on sale and don’t remember exactly when I bought it.
  • Cricut cartridges:  Create a Critter 2, Imagine Bubblegum Stripes
  • Cuttlebug:  Midnight Hauntings embossing folder set
  • K & Company Halloween paper pad
  • Stickles

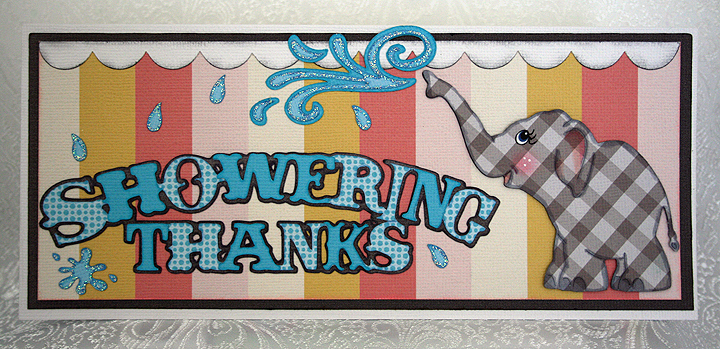
Showering Thanks Elephant Card


This week I was able to make a card to enter into two challenges.  The first is over at Bitten by the Bug 2 for their Elephantly Speaking challenge. The requirement is to use an elephant from any Cricut cartridge — we can chose any theme we want.

The second challenge is at Cooking With Cricut, and this week it’s pretty special because they are celebrating their 100th challenge.  They are doing a surprise thank you for their leader, Melin, and ask that you submit a thank you card to enter the challenge.

My card is approximately 4″ x 9″, made to fit inside a #10 envelope.  All the paper and images for this card were printed and cut on the Imagine, using the Hey Diddle Diddle cartridge.  The only piece I did not cut on the Imagine is the scalloped border across the top, which I cut on my Expression.  I laid that piece out in Design Studio, welding together three scalloped pieces from Accent Essentials to form the border.

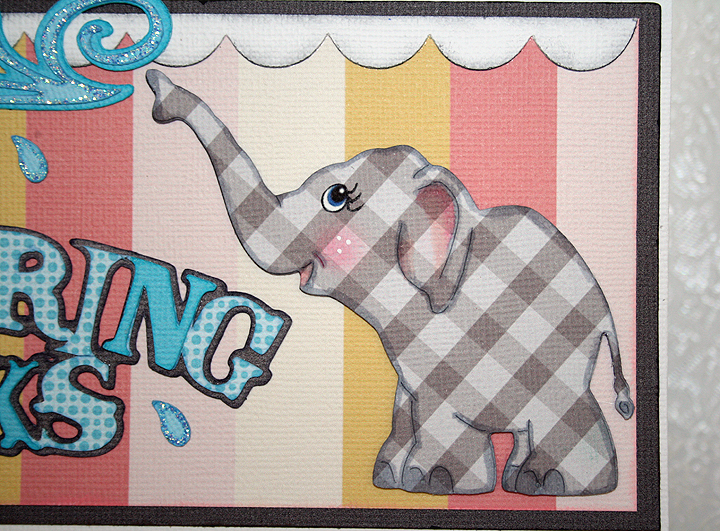
My card features an elephant from Everyday Paper Dolls cartridge.  I colored all the detail on my elephant with Copics. The eye is actually printed and then I hand cut it out.  I got the free file for the eyes from My Scrap Chick and was able to resize it small enough to fit.

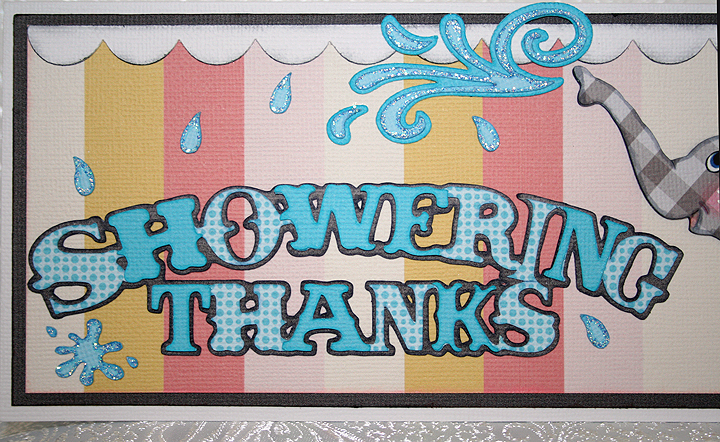
The title is what lead to the inspiration for this card.  I found it on the Everyday Pop-Up cartridge and when I saw it, I thought of an elephant spraying water.  The style of the lettering reminded me of a circus-type font, so I thought it went well with my little pachyderm.

The spray of water is from the Cake Basics cartridge and the individual drops of water and the water splat are from Everyday Paper Dolls.  I added some Stickles to the water.  I kept the inside of the card simple, using some more water for accents.

  • Cricut cartridges:  Accent Essentials, Cake Basics, Everyday Paper Dolls, Everyday Pop-Up
  • Cricut Imagine:  Hey Diddle Diddle
  • Copics
  • Stickles

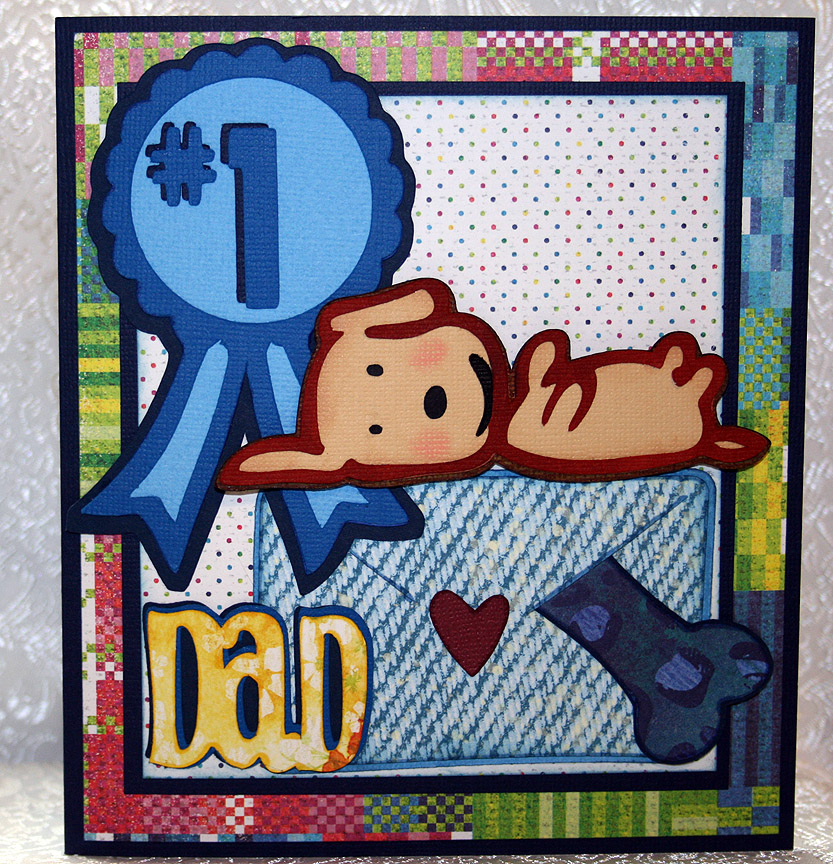
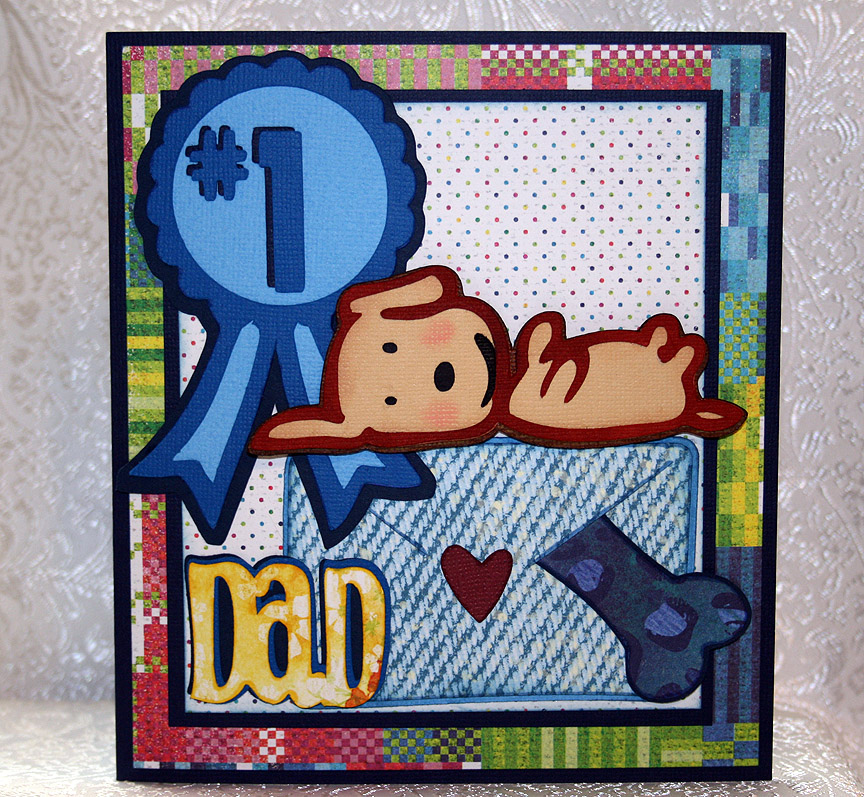
Father’s Day Card From The Smoochy Poochy


I decided to make my dear hubby a Father’s Day card from our dog.  Her name is Fifi and she is a rescue dog — part Pomeranian and part Chihuahua.  She is such a daddy’s girl that I figured he would enjoy it.

I call her our Smoochy Poochy because she loves to give kisses.  She also loves toys — her favorites are the fake fur bones with squeakers inside.  She has an assortment of them in all different types of prints — from giraffe to leopard prints. 

I made this card to enter into two challenges.  The weekly challenge at the Cricut Circle Blog is a sketch challenge, so I followed that for the layout of my card. 

The latest challenge at Cooking With Cricut is a Father’s Day related project that includes a Cricut cut.  I used several Cricut cuts on this card.

I couldn’t find a dog that looked like Fifi, so I opted for this cutie on the Paper Pups cartridge.  I chose this one because the dog is on its back and Fifi has a tendency to go “belly up” while she is sleeping.  The dog is lying on an envelope that she has so thoughtfully placed one of her squeaky bones inside for Dad.  The ribbon and bones are from Paper Pups also.
I used Doodlecharms for the envelope, Beyond Birthdays for “Dad” and Sans Serif for “#1”. 

The solid cardstock is Bazzill and the printed paper is all from Basic Grey — their Lauderdale collection.

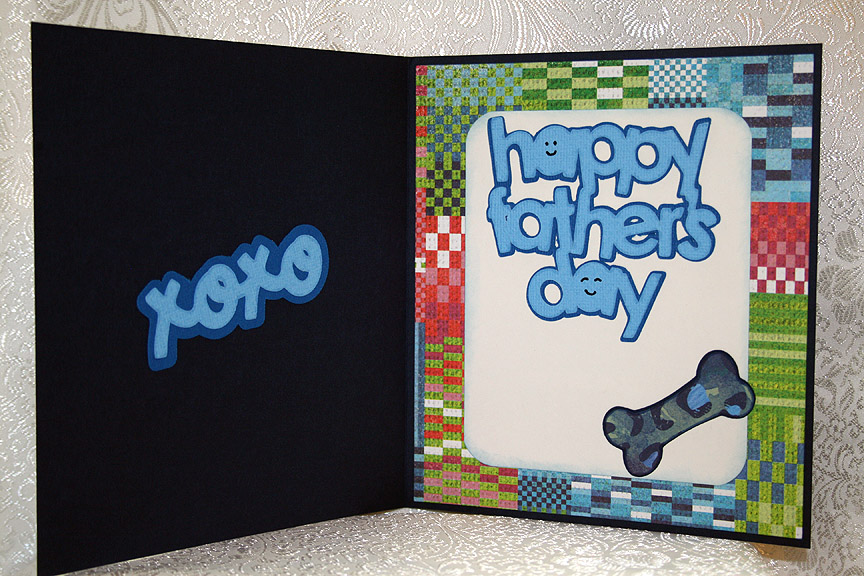
For the inside of the card, I used Paisley for the “xoxo” and Simply Charmed for the “Happy Father’s Day” sentiment.  I added another bone inside.

  • Cricut cartridges used:  Beyond Birthdays, Doodlecharms, Paisley, Paper Pups, Sans Serif, Simply Charmed
  • Bazzill cardstock
  • Basic Grey — Lauderdale collection

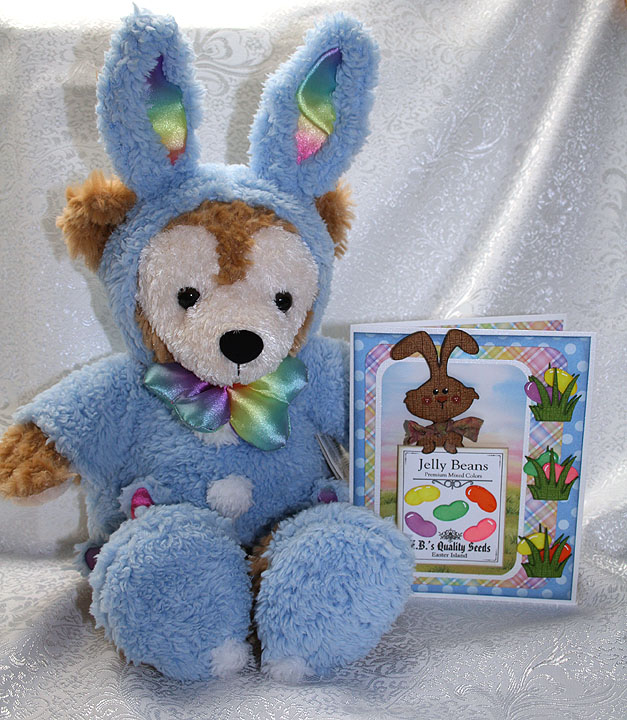
Easter Bunny Inside His Jelly Bean Seed Packet Card


This was a fun card to make.  I wanted to make an Easter card so I could enter it in Jitterbuggin’s Spring Fling contest.  We had extra time to complete this challenge, but I waited until the last minute and am getting this in just under the wire.  It took a while for me to take my concept and come up with a finished project.   This time the challenge is open to voting, so that part is new to me. 

I was inspired by the movie Hop — I loved it and can’t wait for it to come out on DVD.  But my little bunny has to use seeds for his beans as he does not have the talent EB does when it comes to producing jelly beans.

I was a member of PC Hug Club for many years and received some very cute clip art each month.  Because I have such a large collection and never use it, I decided I was going to print my own paper to make this card.  All the background prints are images that I printed on an inkjet printer.  I really like using the clip art because I can resize it — so a 12″ x 12″ background can be reduced to 6″ x 6″ to make a card.  The size of the print becomes smaller too, so it is perfect for cardmaking. 

Fantabulous Cricut has a challenge called Do the Bunny Hop! this week that I will enter this card in.  You have to create a project using a rabbit or chick.

Also, at Cooking With Cricut, their challenge is called Cash in Your Stash and you are supposed to use things in your stash — items that you have had for at least a year.  My clip art collection certainly qualifies, and I also used scraps that I have had for ages to make the bunny and the grass.

I made the seed packet in Adobe Illustrator.  I am such a beginner using that program and was thrilled when I actually made something with it.  I made it a complete packet so I could slip the bunny inside. 

Making the jelly beans was probably the most time-consuming aspect of the card.  I first did an online search to see if I could find a Cricut cut file for a jelly bean as I was pretty sure there were no jelly beans on any of the Cricut cartridges.  I found a post where someone said they made a jelly bean using the George and Basic Shapes cartridge, using the crescent and heart shapes.    I used the same shapes and laid the beans out in Design Studio.  I cut the jelly beans from white cardstock and then colored them with Copic markers.  I applied two layers of Glossy Accents to give the beans their shine. 

The bunny is from the Paper Doll Dress Up cartridge — he’s the bunny from the magician’s costume.  I made a bow for him from seam binding that I spritzed with Glimmer Mist.  The grass is from Create a Critter.  I cut two layers of the grass for each clump so the jelly beans could be seen growing between the layers.  After I placed the bunny inside the seed packet, I pop dotted the entire piece on the front of the card.

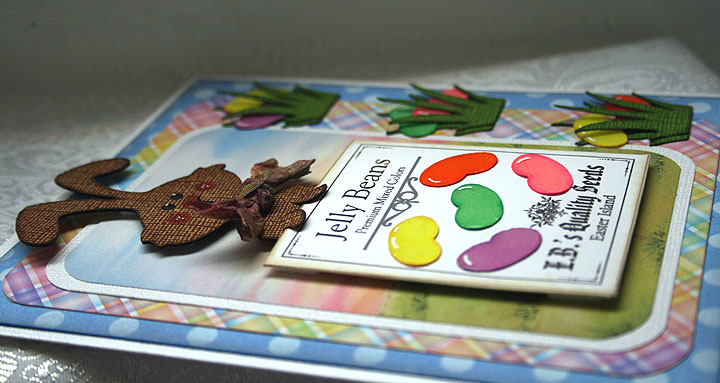
Side view showing some of the dimension of the card.

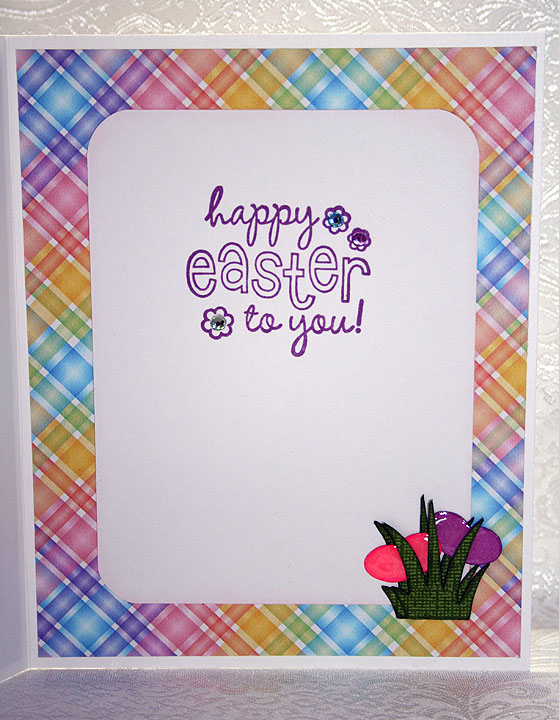
For the inside of the card, I used a stamp from a clear set that I picked up at a scrapbooking expo several months ago.  It came with the rhinestones that I put inside the stamped flowers.  I added another clump of grass with some more jelly beans.


  • Cricut cartridges:  George & Basic Shapes, Create a Critter, Paper Doll Dress Up
  • Cricut Design Studio
  • PC Hug Club clip art
  • Copic markers
  • Glimmer Mist
  • Rayon seam binding

Challenges:

Jitterbuggin — Follow the sketch, make an Easter card and use a Cricut cut somewhere on your card.

Cooking With Cricut — Use stuff in your stash, items that you have had for a year or more.

Fantabulous Cricut — Use a bunny or chick in your project.

Sunny Snail is Thinking of You!!


Erin is back in Taiwan after a lengthy visit here in the US.  I had lots of fun while she was staying with us.  We attended CHA every day and even managed to get in a scrapbook expo in Anaheim right before she left.  Once she got home to Taipei and settled in, she wanted to do a challenge together.  So we have been busily working,and thanks to Skype, we were able to scrap together.

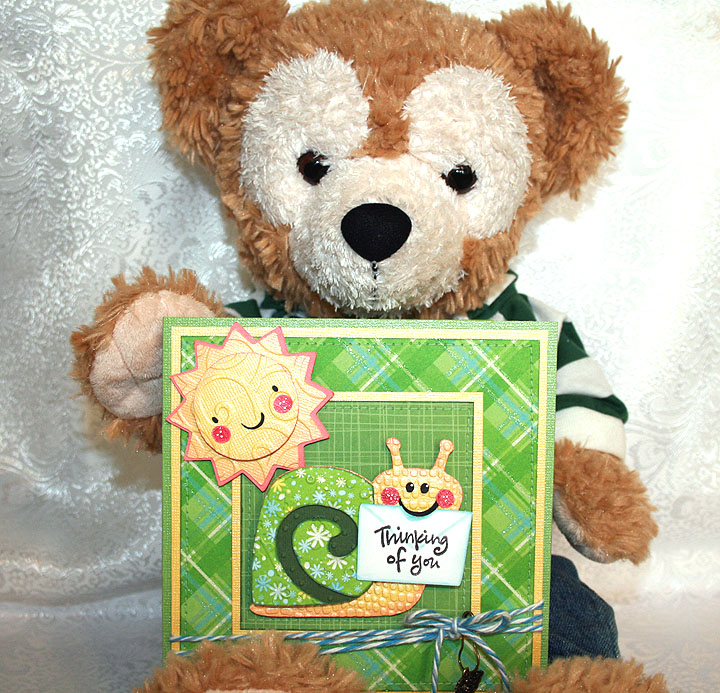
A member of the Cricut Circle recently had surgery and I wanted to send her a card to wish her a speedy recovery and let her know I am thinking of her.  I thought doing a challenge would be a perfect way to accomplish this.  And here is a little Duffy “spokesbear” model to present my card:

The base of the card is green Bazzill bling cardstock.  The glittery print cardstock is from two different DCWV paper stacks, Blossoms & Butterflies and The Glitter Stack.  I used a yellow bling cardstock from Bazzill for the contrast, sun and snail body. 

I laid out my card in Design Studio and I cut the sun, snail and flowers with my Cricut.  I used Create a Critter for the sun, Birthday Bash for the snail and the Bloom Lite cartridge for the flowers.  I used my Cuttlebug to emboss the sun and the snail.  I embossed the snail with four different embossing folders, Swiss Dots, D’Vine Swirl, Plum Blossom and Mesh Texture.  I inked the edges of all the pieces to give them some depth.  I used Stickles on the center of the flowers and an atyou Spica glitter pen for the cheeks on both the sun and snail.  The sentiment on the envelope the snail has in his mouth is from a $1 clear stamp I purchased at Michaels.  I used lots of pop-dots on the sun and snail, popping up layers and also the completed pieces. 

I am loving all the baker’s twine that is so popular right now, but  I have not purchased any yet.  When I was in Michaels a couple of weeks ago, I found some Lily Sugar ‘n Cream Twists string/thread in the yarn department that reminded me of the twine.  It was on sale so I bought a few different colors to see how it would work.  I wrapped some of the blue around the bottom of this card and I think it looks pretty good.  I attached a charm to the twine with a little hanger that is from Making Memories.  I think they are called garment pins. 

For the inside of the card I added a couple of flowers that I cut out twice so I could layer them together for some dimension.  I used Stickles for the bling on the center of the flowers.

This was a fun card to create and I am happy to say that my card qualifies for the following challenges:

Fantabulous Cricut Challenge Blog – Challenge #51 “Hip to be Square” -green & gold

Cooking With Cricut – It’s A GREEN  SCENE!

The Cuttlebug Spot –  All Tied Up: twine challenge

The Cuttlebug Spot –  Oh so Charming

  • Bazzill bling cardstock
  • Die Cuts With a View paper stacks
  • Cricut cartridges:  Birthday Bash, Bloom (Lite), Create a Critter
  • Cricut Design Studio
  • Cuttlebug Embossing Folders:  D’Vine Swirl, Plum Blossom, Swiss Dots
  • Twine:  Lily Sugar ‘n Cream Twists
  • Making Memories garment pins
  • Charm from my stash
  • Stickles
  • atyou Spica glitter pen

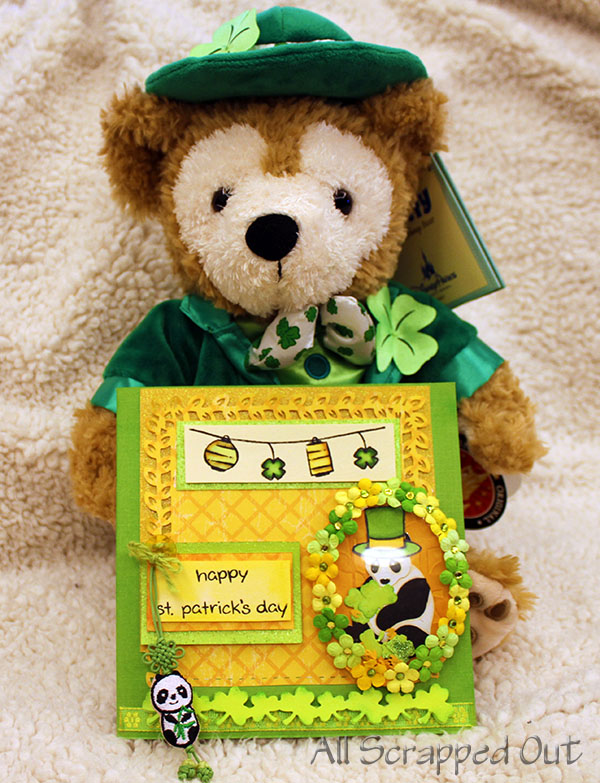
Asian Inspired Panda St. Patrick’s Day Card

After months of travel and procrastination on cleaning my office/craft room, I finally had time to sit down this week and wanted to make a card.  Since this would be only the fourth card I’ve ever made to date, participating in some of the fun blog challenges out there might give me some design direction.

I’m now back in Taiwan and one of the ways I keep connected with Mom back in the U.S. is to craft together! She picked a few of her favorite challenges and we each came up with our own unique take on the required elements.  For this card, a few of the elements include green & gold, square card, use of a charm, twine, along with Cuttlebug and Cricut cuts.

To pay homage to both my Irish roots and my current life in Asia, I decided to combine the both and do an Asian inspired St Patrick’s Day card using a few of the new supplies exclusively available here in Asia.

Asian inspired St. Patrick's Day Card

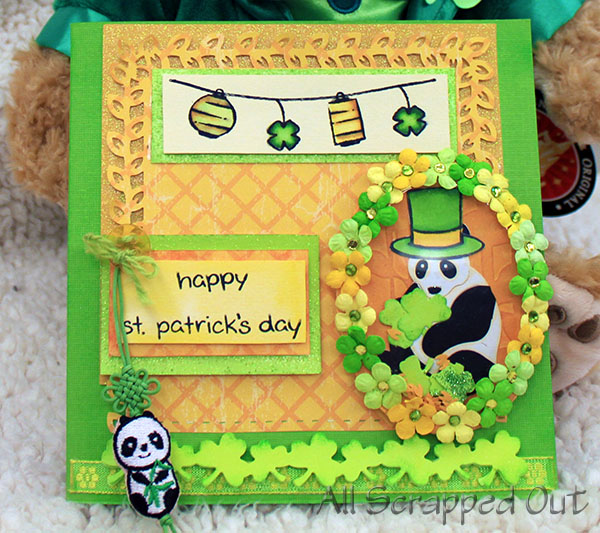
Close up of St. Patrick's Day card

The card is 6 x 6 and uses a variety of papers I had laying around (not entirely sure which stacks they are all from – sorry!).

The large square paper cuts on the background and the oval on the panda were made with Cricut using Plantin Schoolbook.  (Took the circle shape and just made it an oval).  The yellow printed paper’s three sided border was made with Martha Stewart’s Punch Around the Page punches.

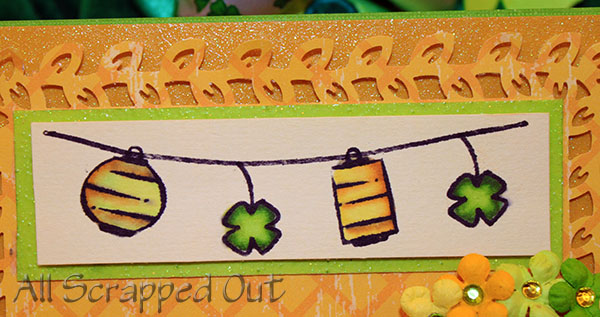
The stamped string of lanterns up top are some of my favorite new photo-polymer stamps from Lawn Fawn.  The string and Chinese lanterns are from their Lunar Lights collection and I used the shamrock in the Hats Off To You collection and just turned it upside down to “hang” them as well.  I colored them with Copics, and popped them up on some glitter green cardstock.

Lawn Fawn stamps used to make shamrock & Chinese lanterns

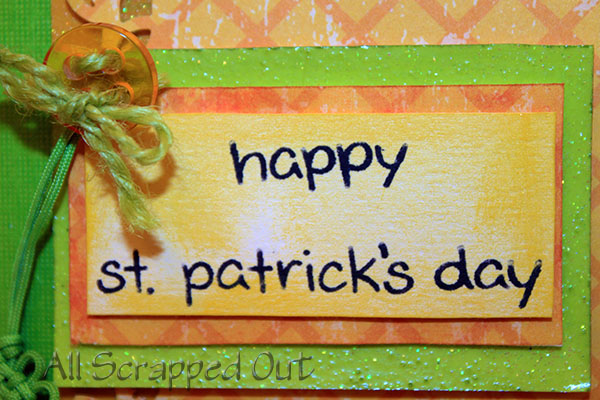
The Happy St. Patrick’s Day sentiment is also Hats Off To You stamp collection. I took a dark yellow ink pad & rubbed the paper with a makeup pad to give it a more yellow appearance.  It’s also popped up several times using the green glittery cardstock and a scrap of the yellow paper.

Sentiment also uses Lawn Fawn stamps

On the bottom I used a $1.00 ribbon find from Michaels that has green and yellow flowers.  The border of shamrocks is a local Taiwan-made die.  I just bought this last week, which was my first weekend back in town since leaving in January.  It’s so cute and the main reason I wanted to make a St. Patrick’s Day card for these challenges.  I used Marigold Glimmer Mist and then took a dark green ink pad to shade the edges.
Border die is from local Taiwan scrapbook and stamp store

Shamrock border die

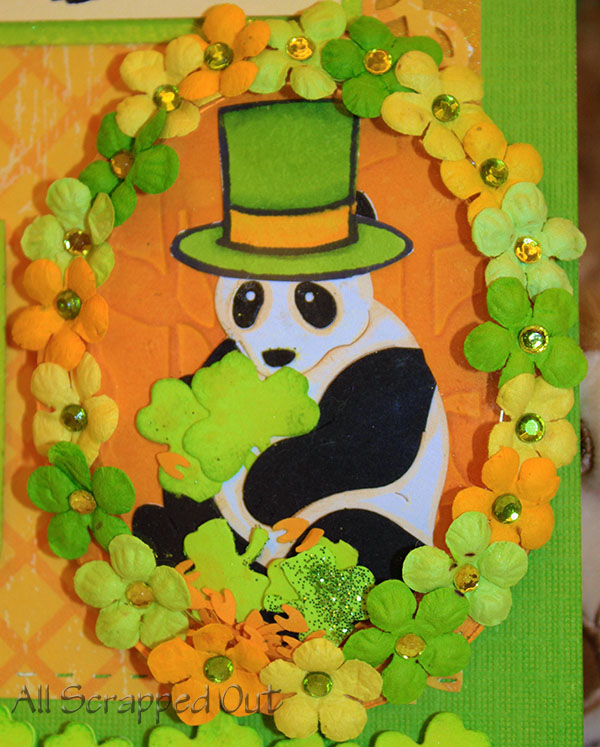
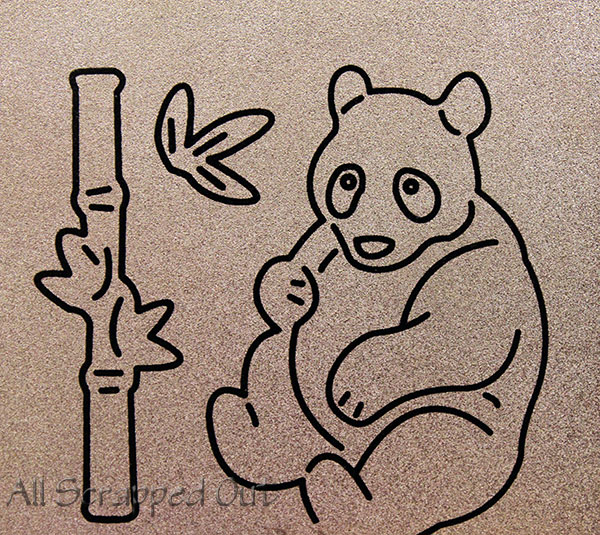
I was a bit overzealous and decided to try a shaker and after hours of unsuccessful attempts of cutting a frame border that fit the perimeter of the shaker, I ended up going in a different direction.  The panda in the shaker was cut using a Cuttlebug style die purchased from a local store here in Taiwan.  The locally made die comes with the panda and a bamboo stalk as well.

Panda shaker element

Panda die from Taiwan

The panda’s hat is part of the Lawn Fawn Hats Off To You collection.  I cut it out and colored it with Copics.  The shamrocks in the panda’s hand were cut from the border design die and I used three smaller ones along with the tiny pieces left from the Martha Stewart punches to create the “shaker” elements. They reminded me of little hearts and provided an easy addition to the shaker.

Since I couldn’t manage to cut the right size frame for the shaker oval, I used small prima flowers all around the edges.  These are Summer Fun and Limeade “Iced Got Flowers” jars.  The centers on the flowers are jewels in the Imaginisce set for the I-rock tool.

The background paper on the panda is embossed with a bamboo stalk folder only available in Taiwan as well and matches the panda die.  Although supplies here are anything but inexpensive, I love picking up these great designs that I’ve never seen produced elsewhere (yet).  I used a dark orange ink pad to give some dimension to the bamboo stalks and then sprayed the paper with marigold glimmer mist again.

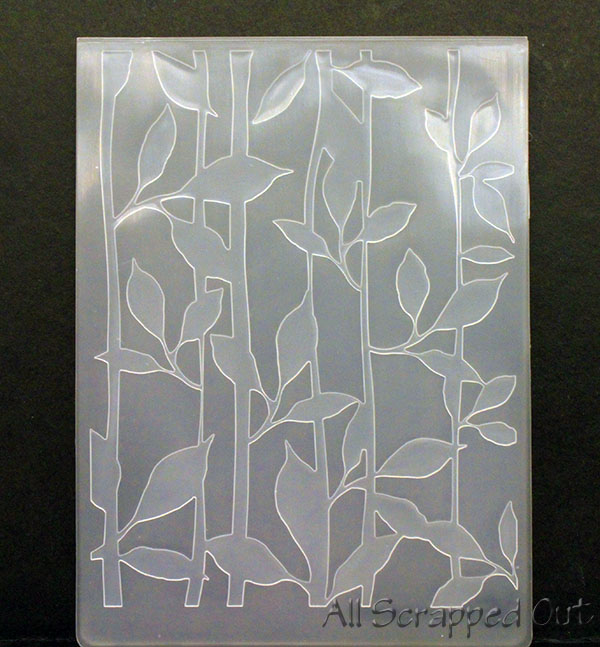
Bamboo embossing folder from Taiwan

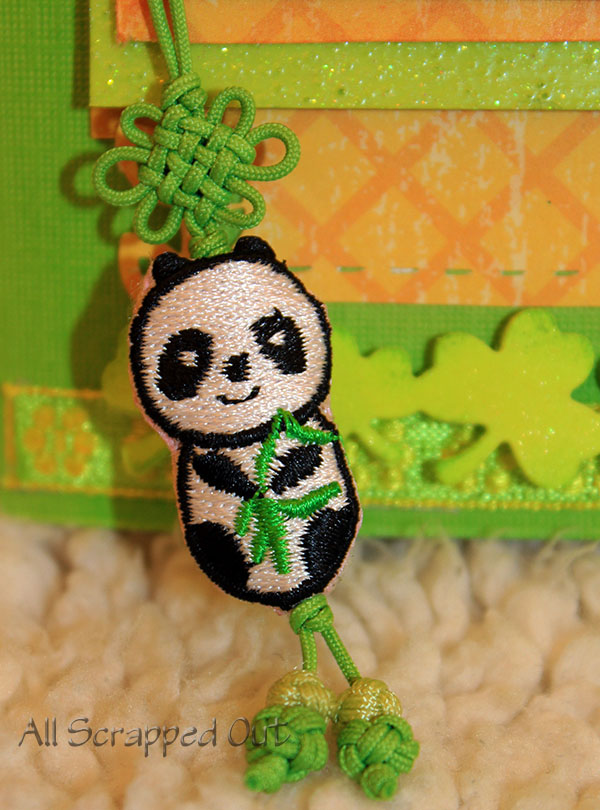
The panda charm and twine are both items I picked up in my Taiwan scrapbook shopping travels as well.

Close up of panda charm

On the inside of the card, I went very simple and just used a Plantin Schoolbook square cut paper embossed with the Provo Craft Bamboo folder.  Again, I used some ink to give the bamboo stalks and the inside card edges some shading.

The challenges we are entering include:

The Cuttlebug Spot: All Tied Up: twine challenge

The Cuttlebug Spot: Oh so charming

Fantabulous Cricut: Hip to be Square -Green & Gold

Cooking with Cricut: Challenge 21: It’s a GREEN SCENE!