Christmas Mini Album for Cricut Circle Stocking Stuffer Swap

I participated in the Cricut Circle Stocking Stuffer Swap for the first time in 2013.  I figure it’s about time I posted the mini album I made to send to my partner, Sherry (Octoberbeauty).  I’ll warn you — there are lots of pictures.

This is the second mini album I’ve made and I again used a tutorial from Cathy, whose etsy shop is called So Much Scrap.   For this album I used her All Hallow’s Eve tutorial.  I really like her tutorials because they are very detailed and easy to follow.

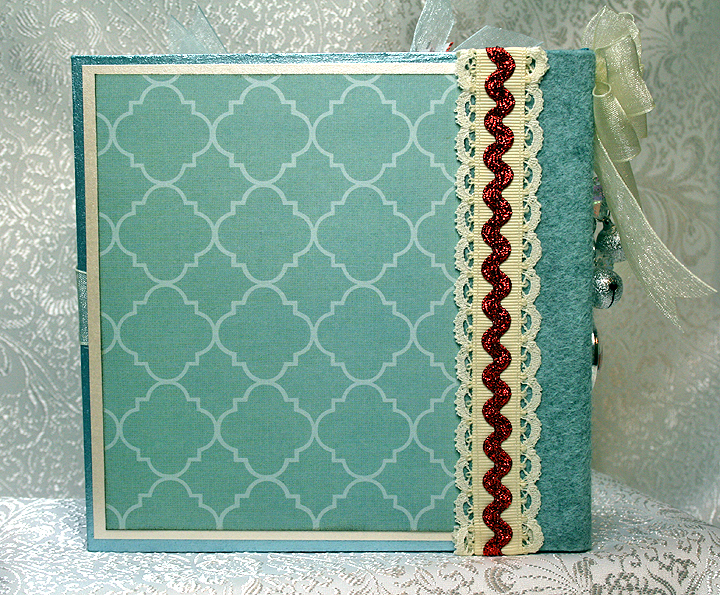
I did something a little different on this album than what the directions call for.  I made the spine and binding system using only chipboard and book binding cloth — I didn’t use any cardstock in the construction.  I am happy with the way it turned out — the binding system is very flexible.

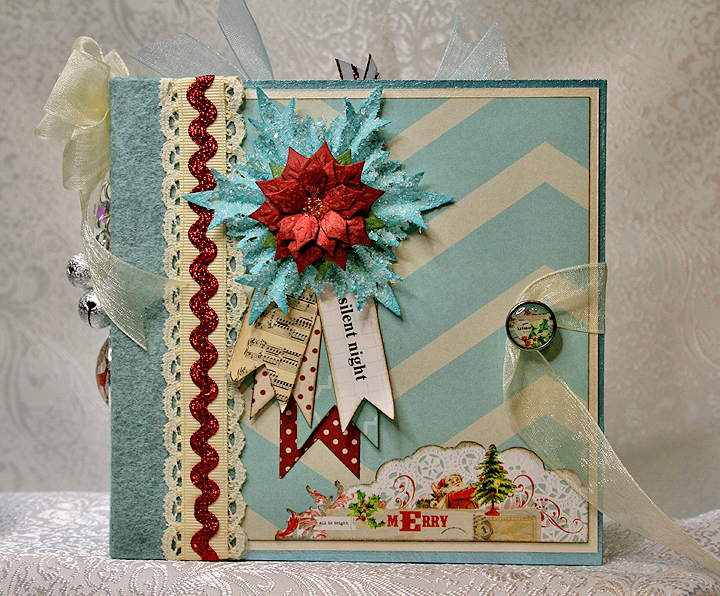
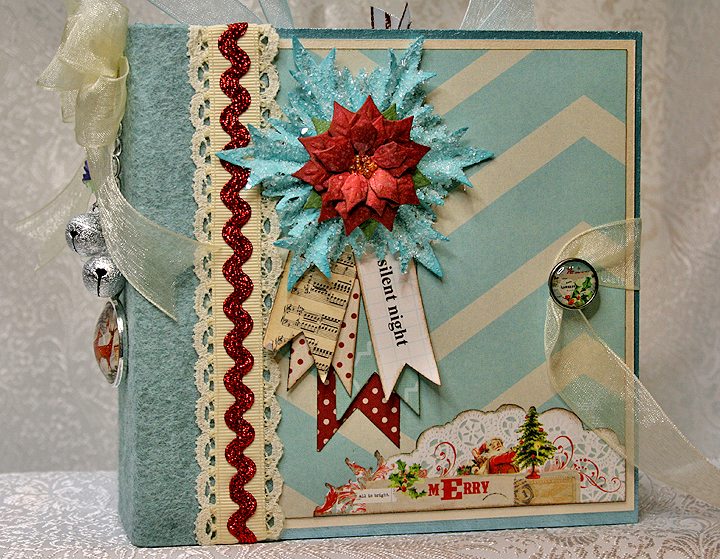
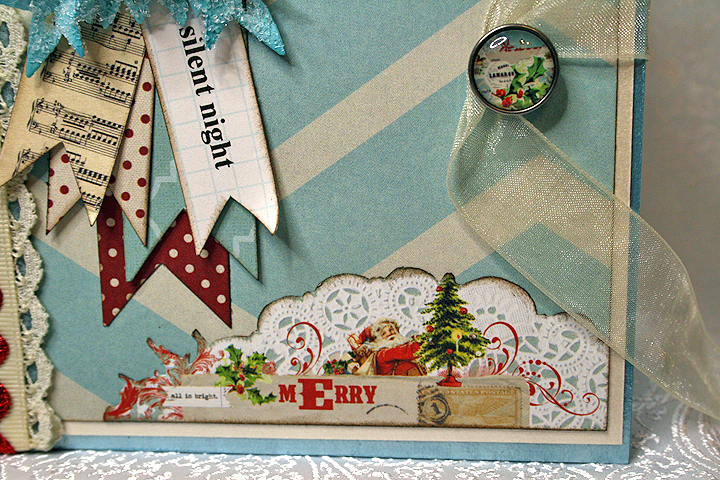
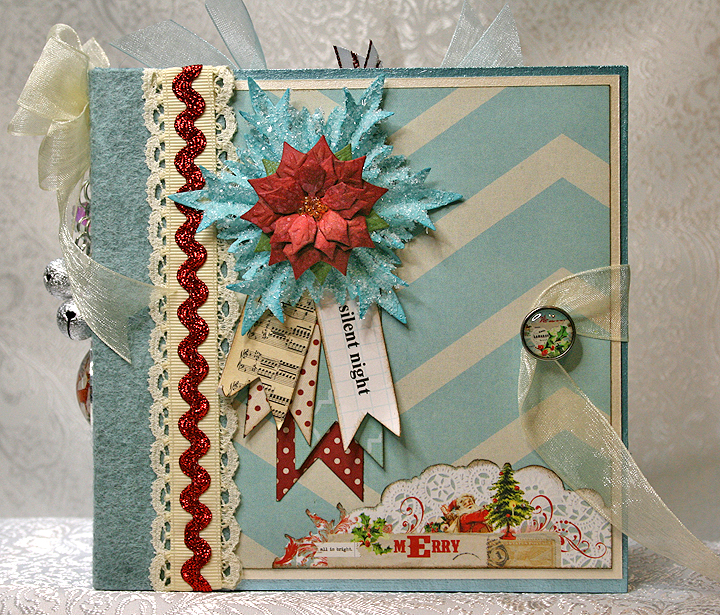
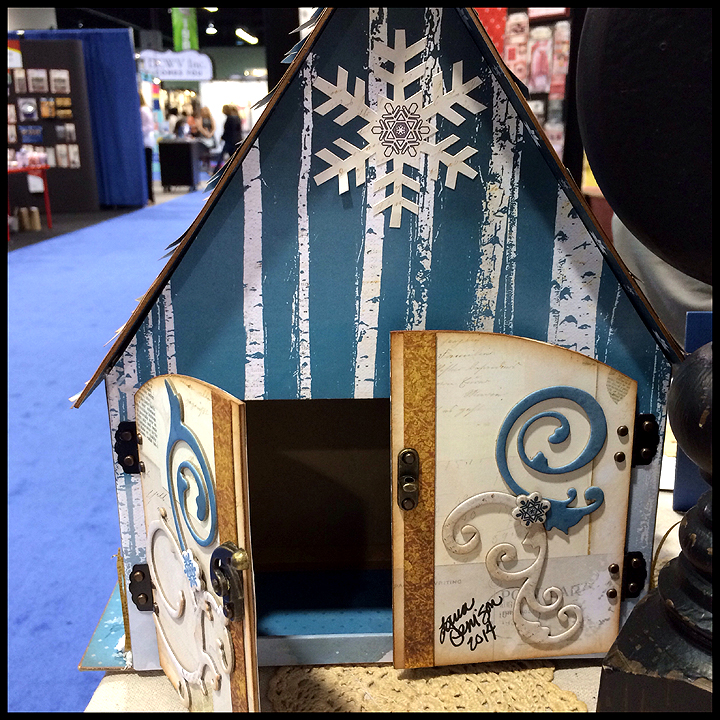
The patterned paper I used throughout the album is from My Mind’s Eye Merry & Bright collection.  The solid cardstock is all Basis 80#.  The edges of the chipboard are painted with Martha Stewart pearl paint.  I covered the outside of the spine in wool felt and added some ribbon, lace and metallic rick rack trim to the edges.

Front10B

Front12B

Back2

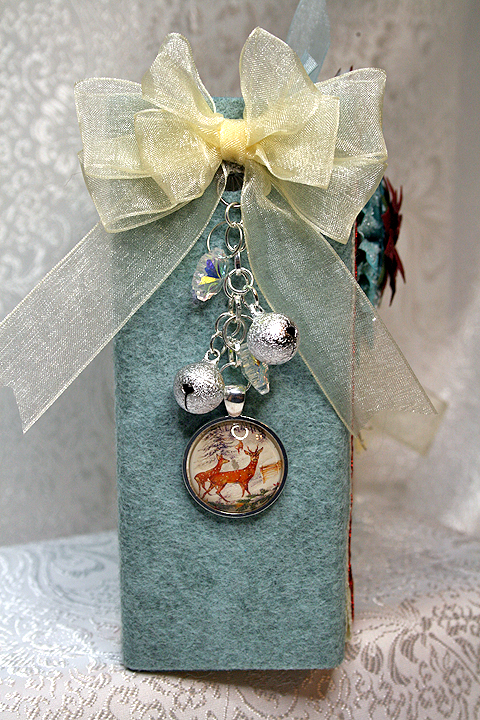
I made the charm on the spine using stardust jingle bells, crystal snowflake beads and a deer pendant I got from eBay. I made the bow using my Zutter Bow-It-All.  I’m really liking the bows I can make using this handy tool.

Charm

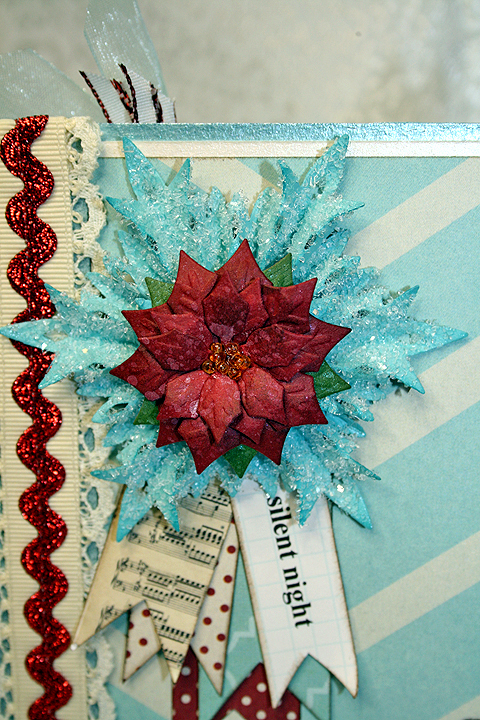
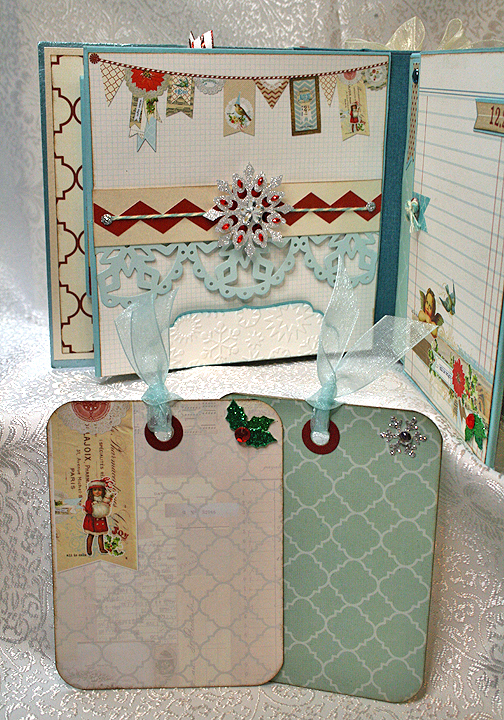
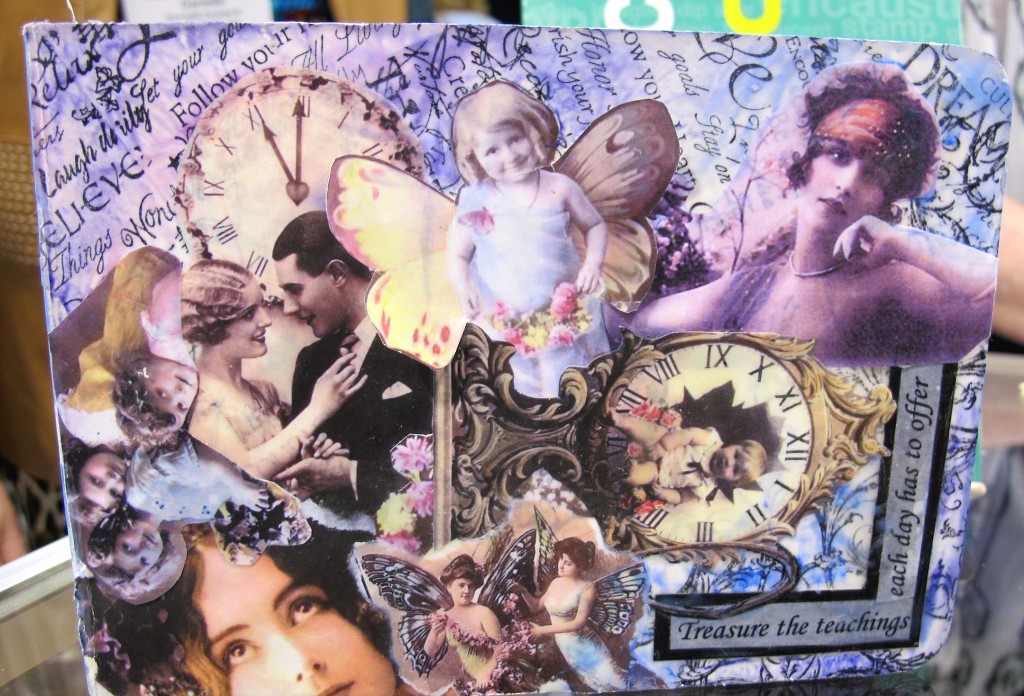
Here are some close-up details of the album front.  The poinsettia is made from the Layered Poinsettia die by Spellbinders, sprayed with Lindy’s Stamp Gang’s Starburst spray, and I added glass seed beads to the center.  The snowflake is from the Tim Holtz Snowflake Rosette die and is coated in coarse glitter.  The album closure is a ribbon that wraps around a brad on the front cover — another of Cathy’s wonderful ideas.
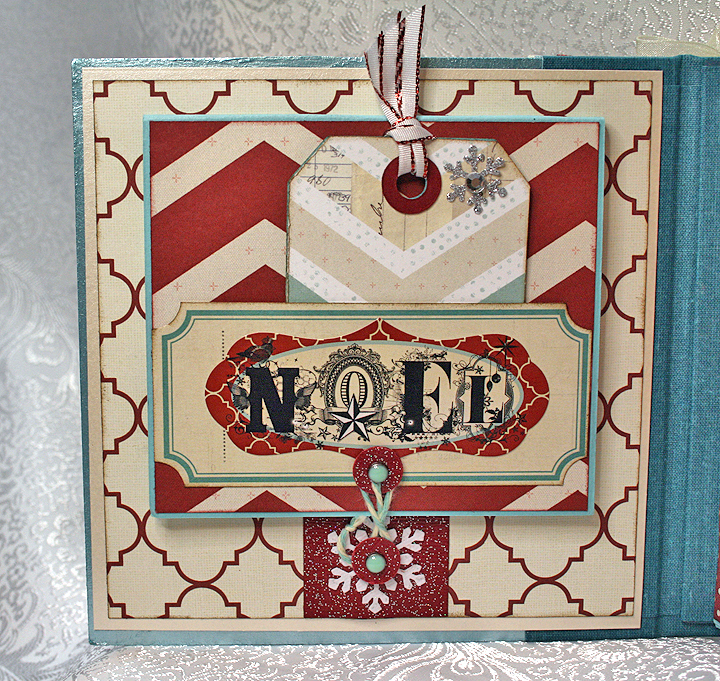
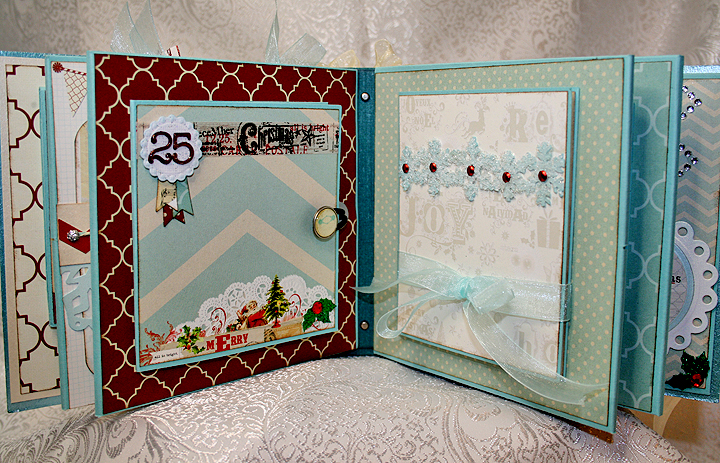
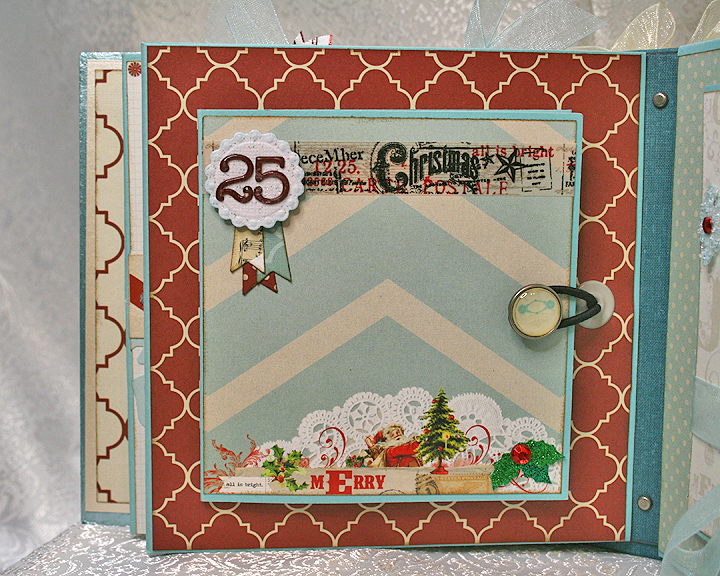
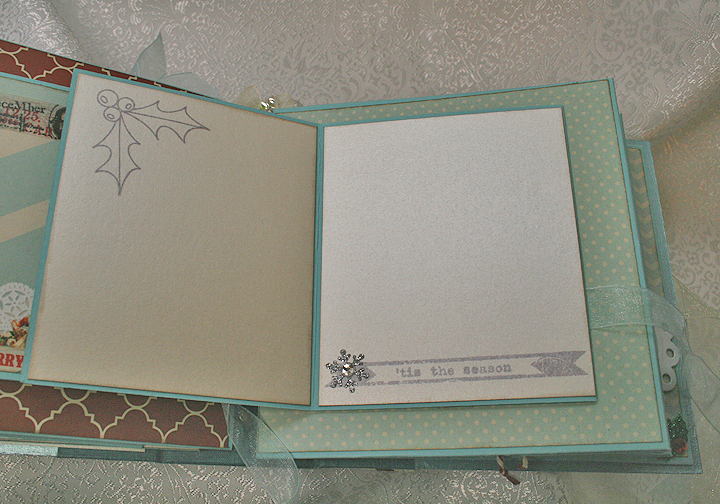
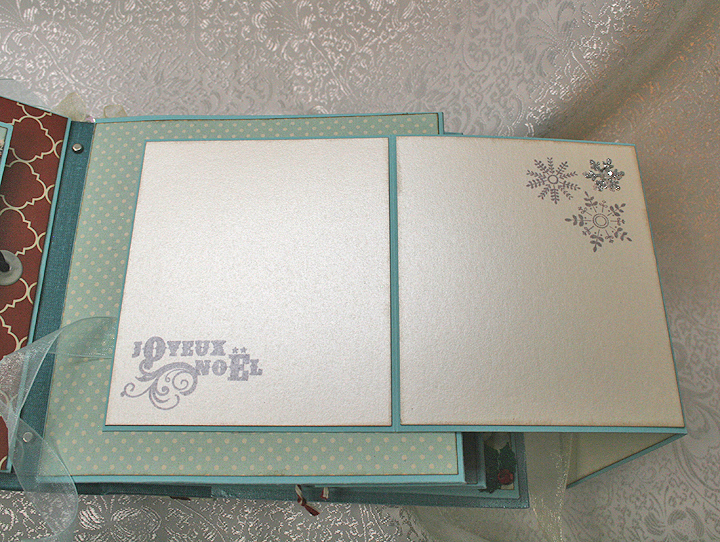
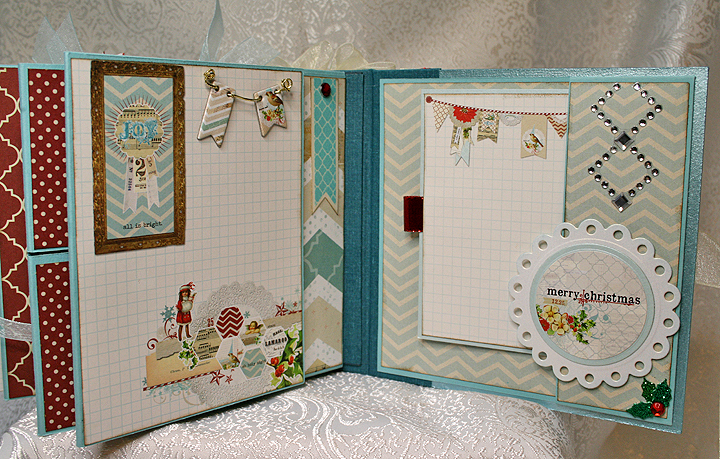
FrontPoinsettia

CoverDetail

Pages 1 and 2:

P1-2

P1B

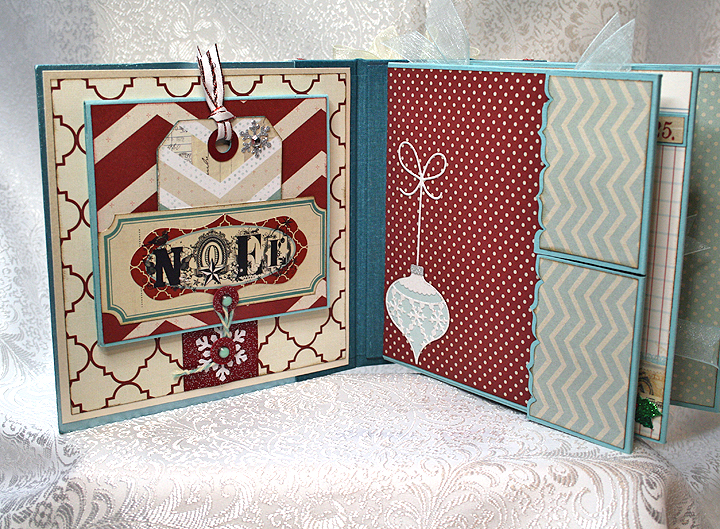
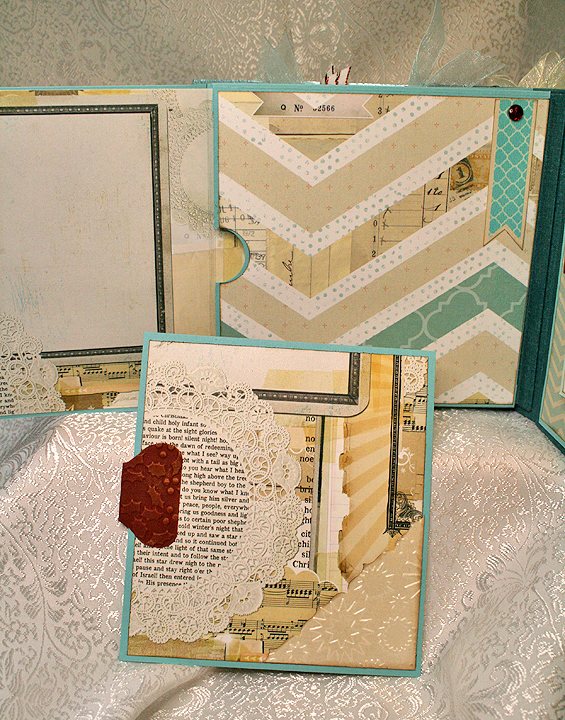
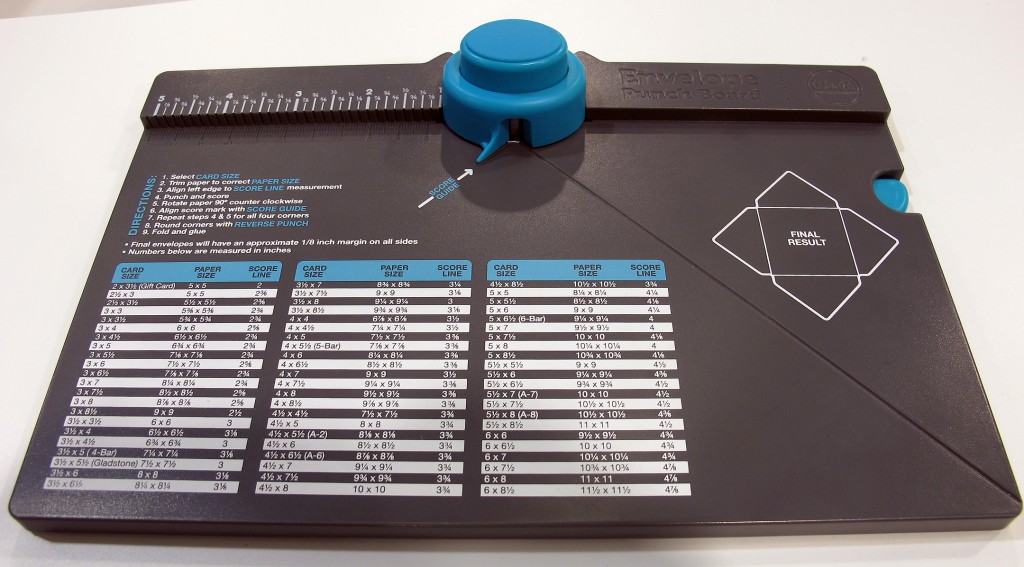
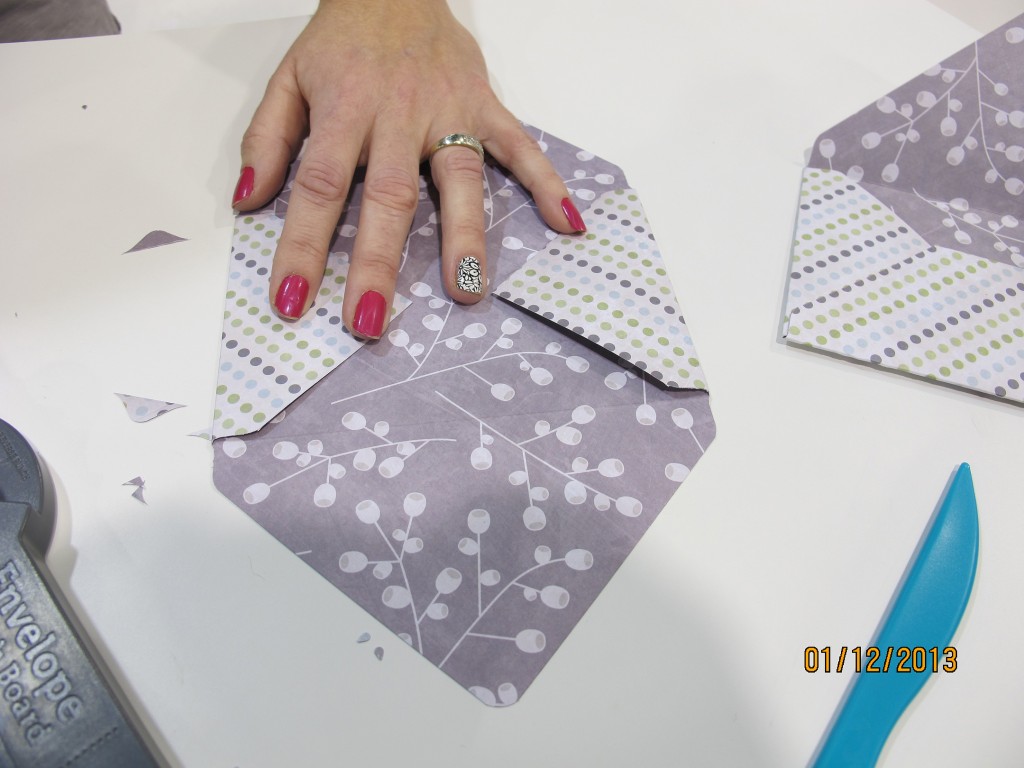
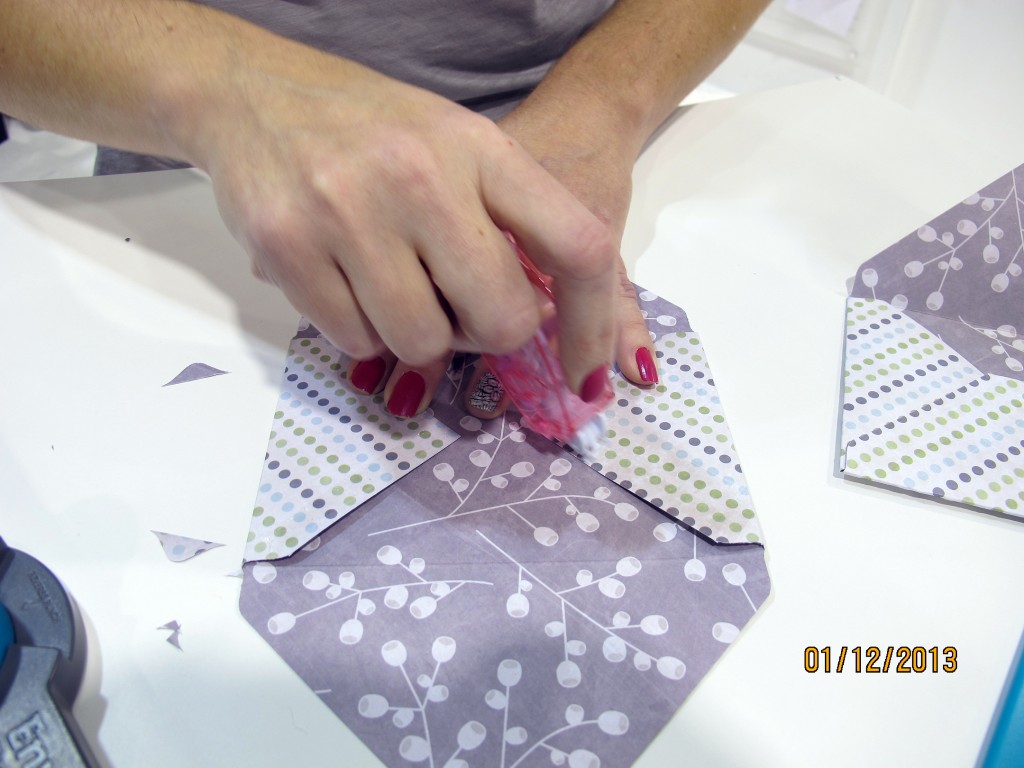
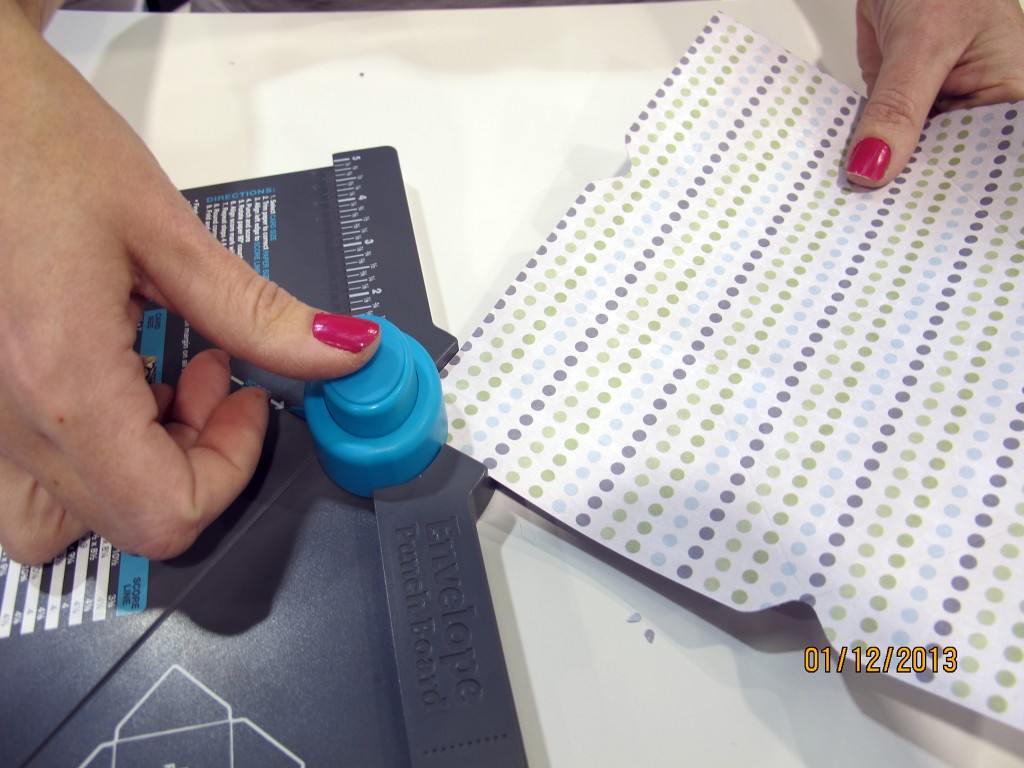
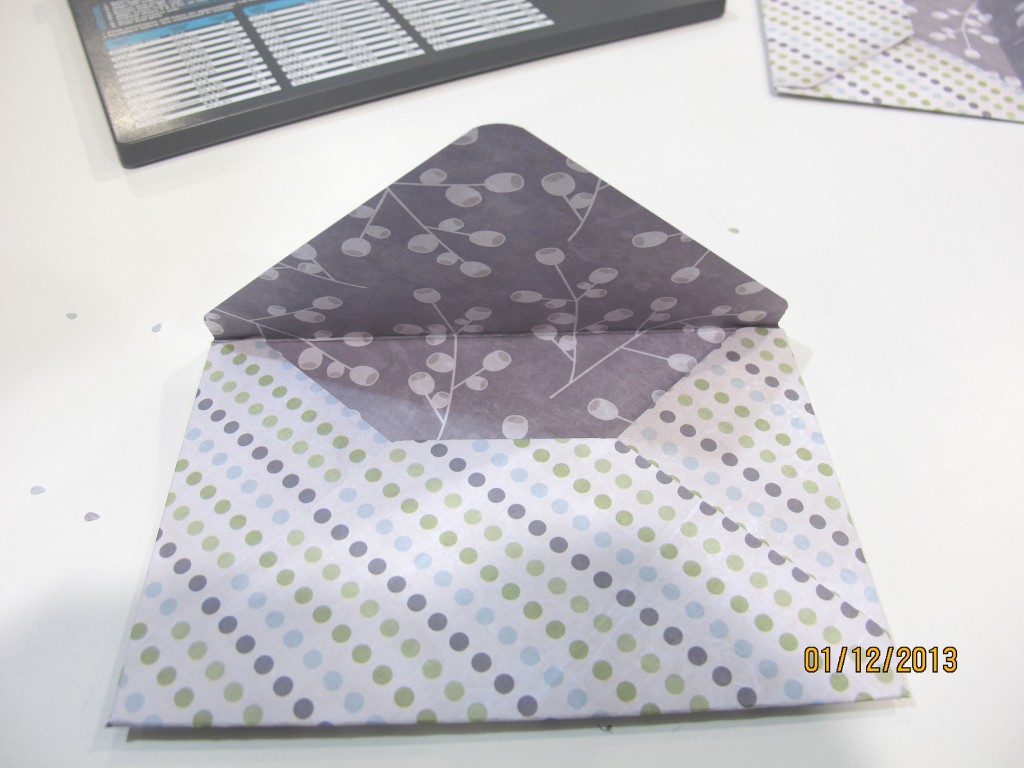
The pocket opens up to reveal a photo mat inside.  I made all the tabs for the photo mats using my We R Memory Keepers Envelope Punch Board and embossed the tabs with my Cuttlebug.

P1TagB

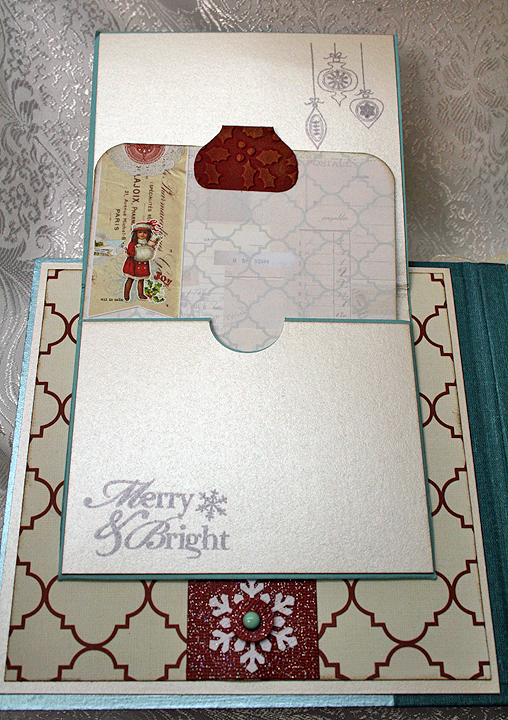
The ornament is cut from a Memory Box die.  The edges on the pocket flaps were done with a punch — I think it was an EK Success Bracket border punch.  The flaps close with a magnet — there are lots of magnetic closures used in this album.

P2

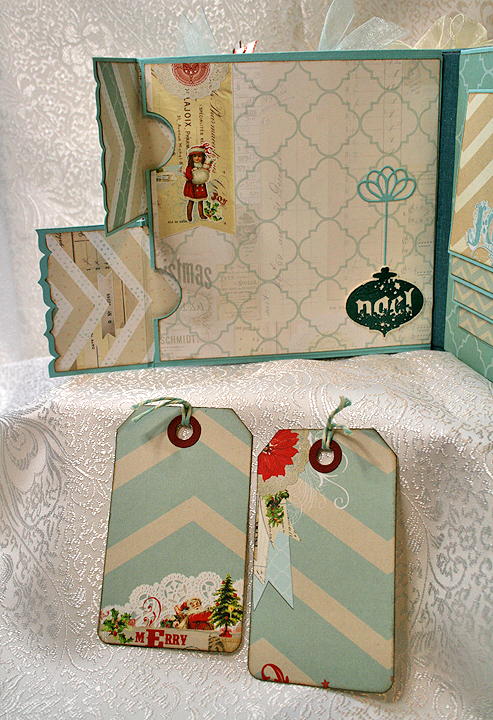
I made the small tags using Tim Holtz’s Tag & Tie die.
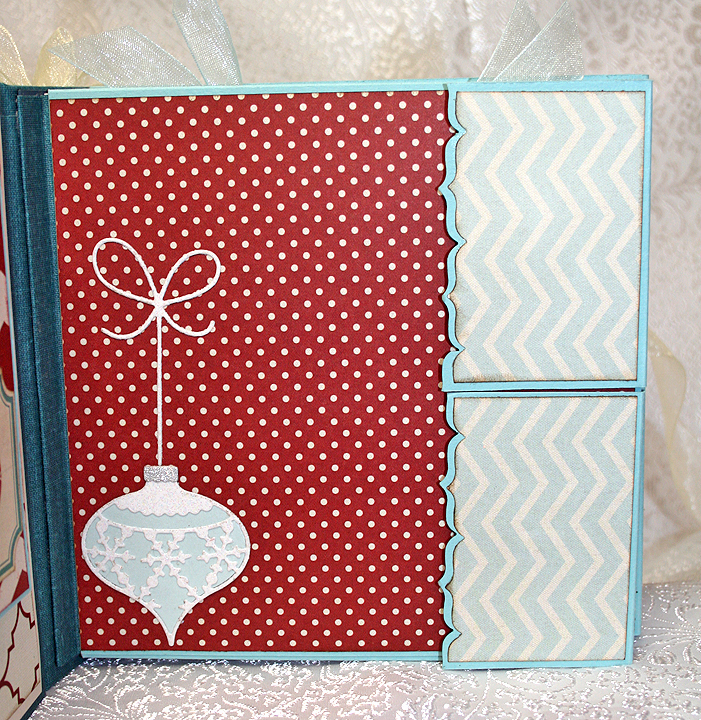
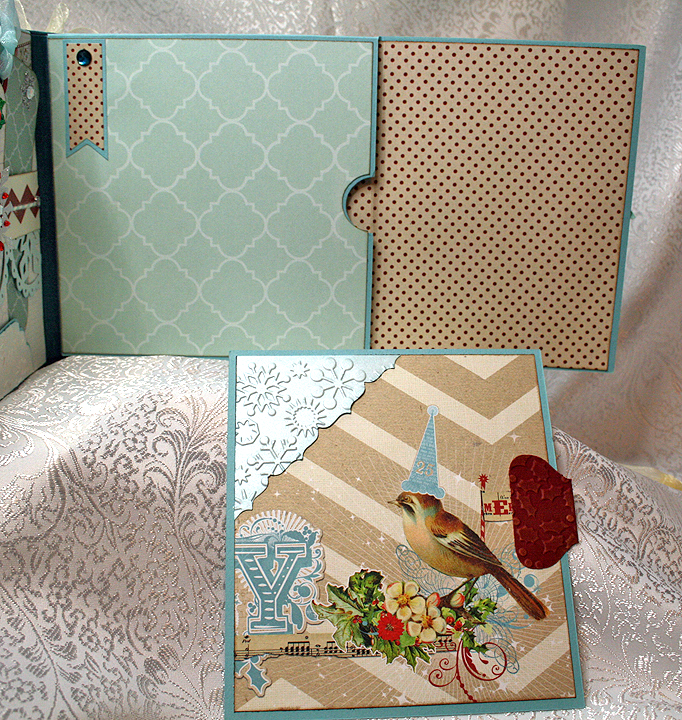
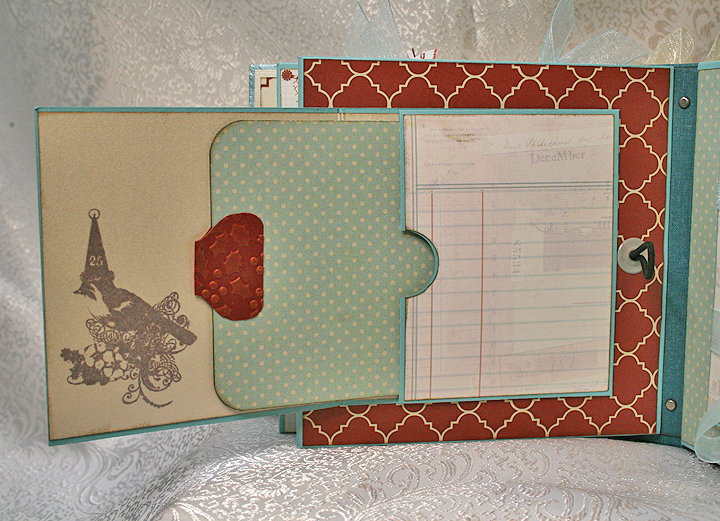
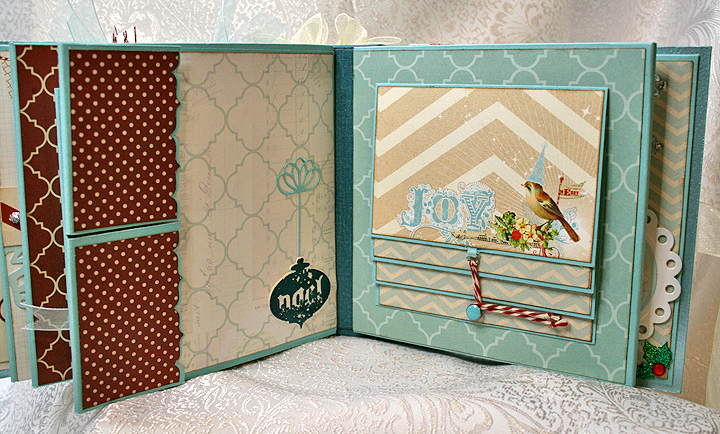
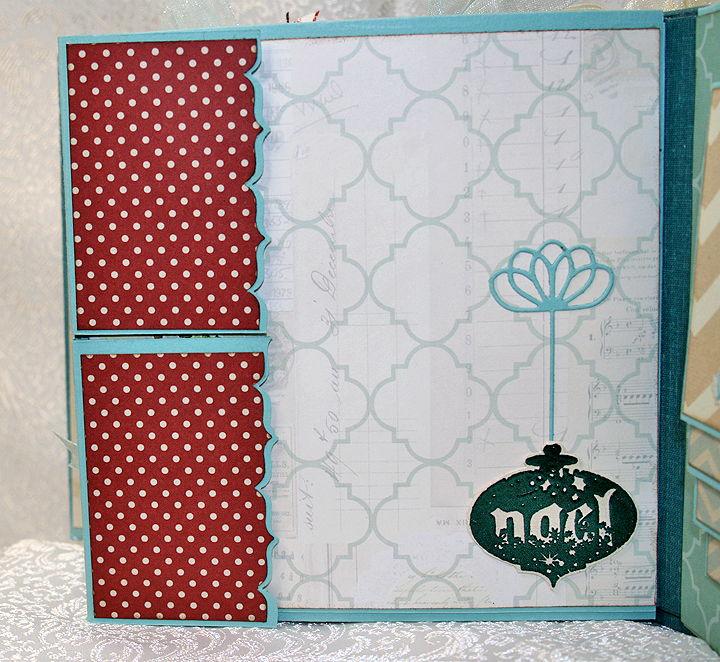
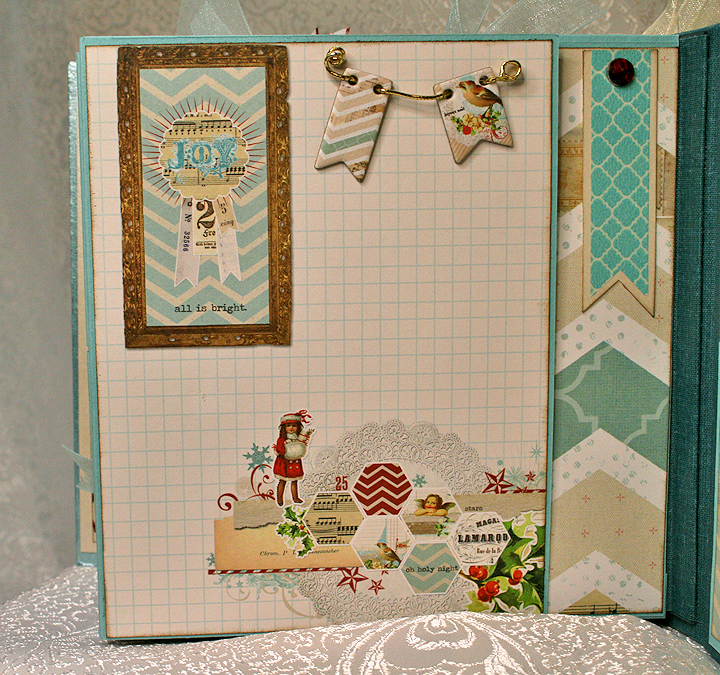
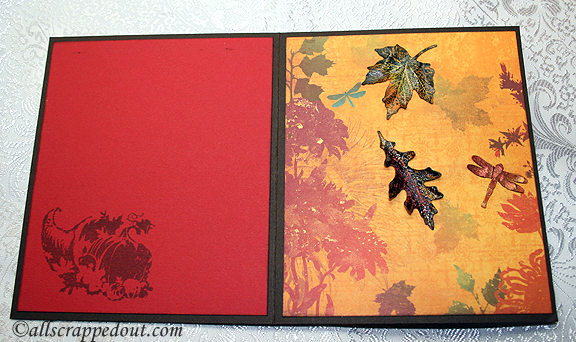
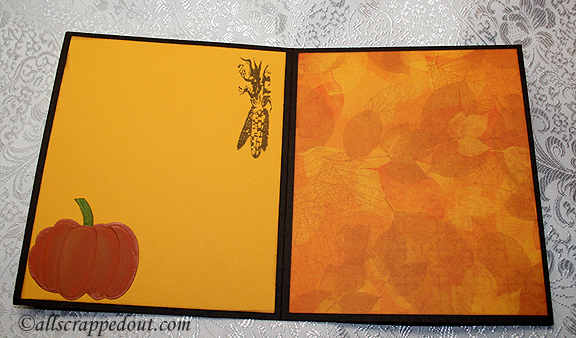
P2Tags

Pages 3-4:

P3-4

P3Tags

P4

Page 4 opens and has a photo mat inside the pocket.
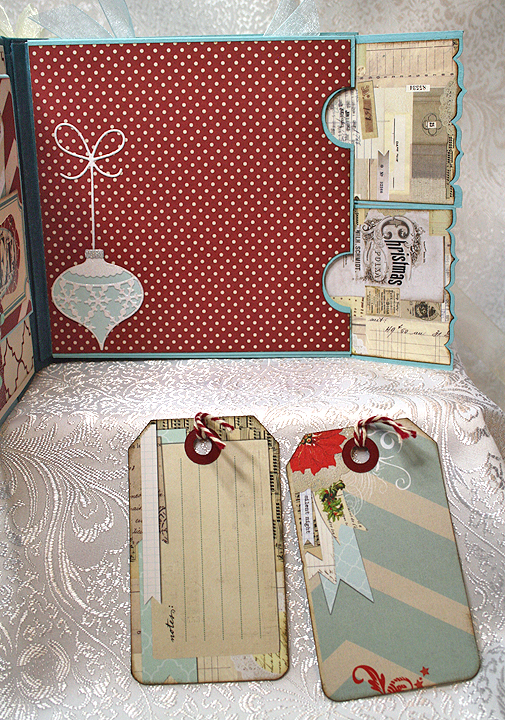
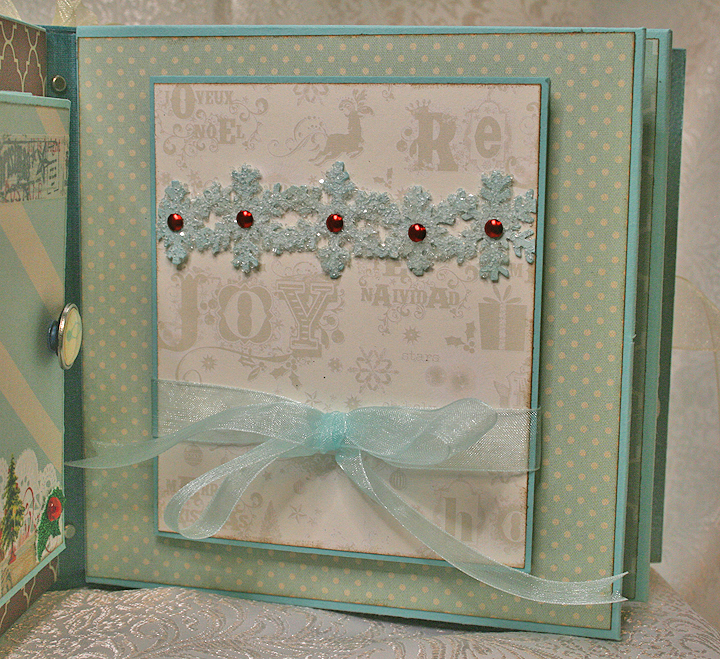
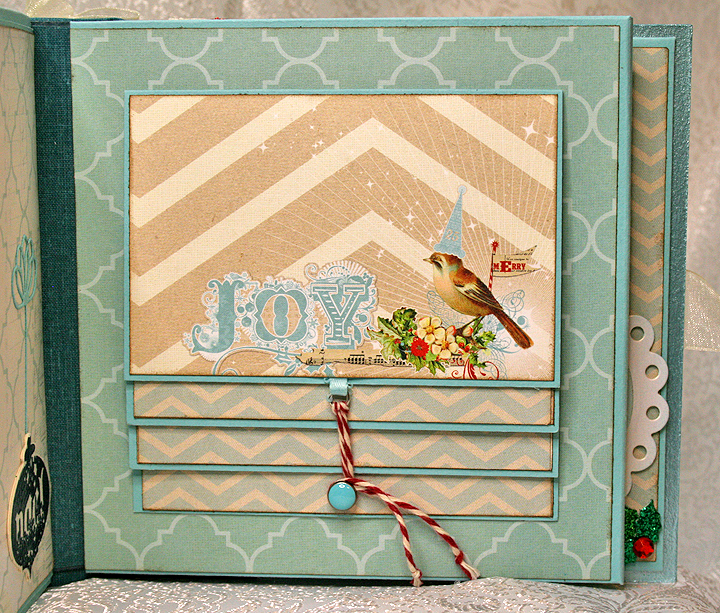
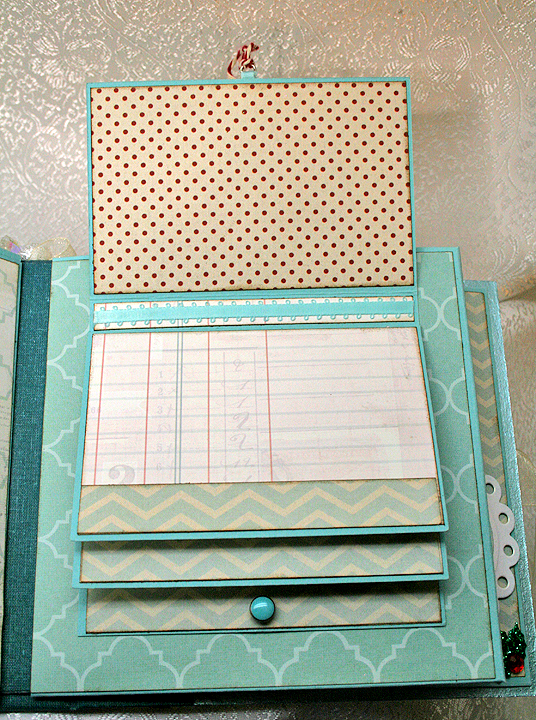
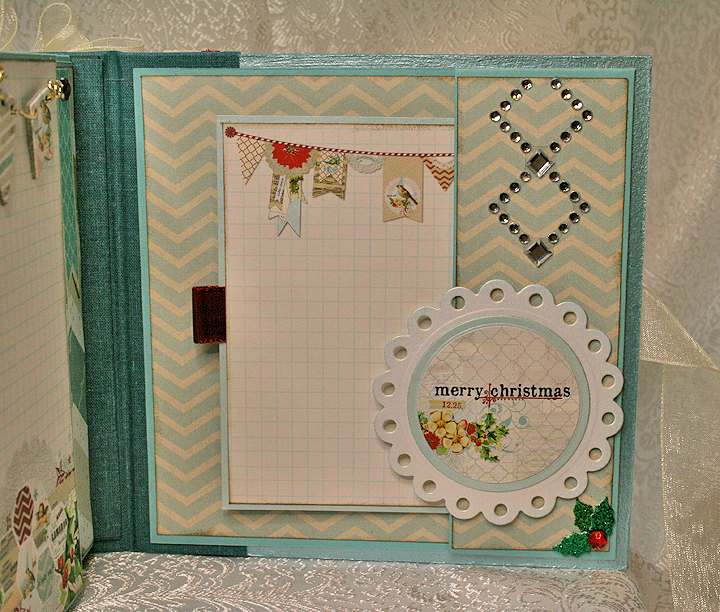
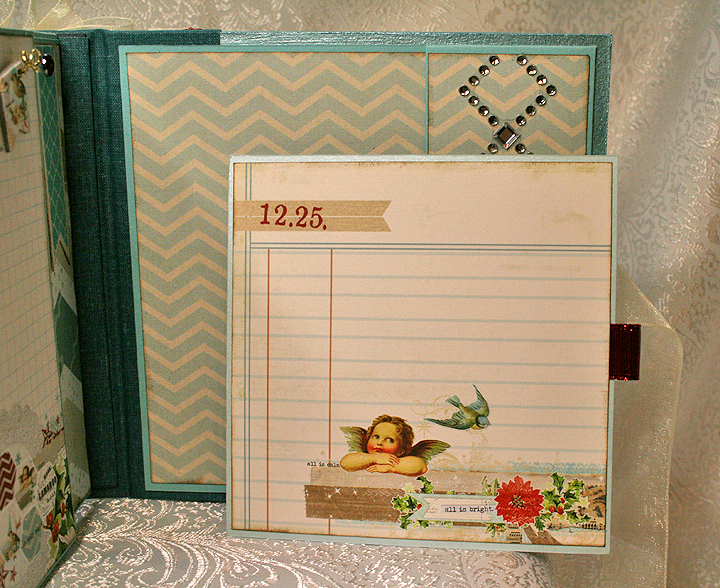
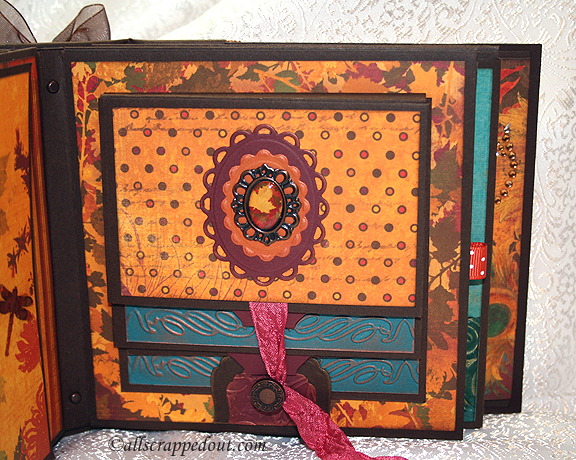
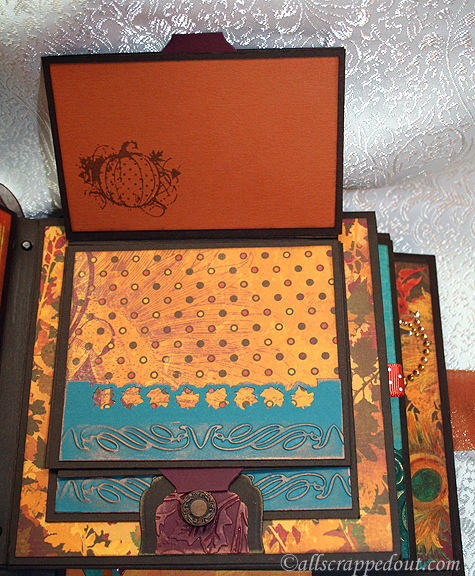
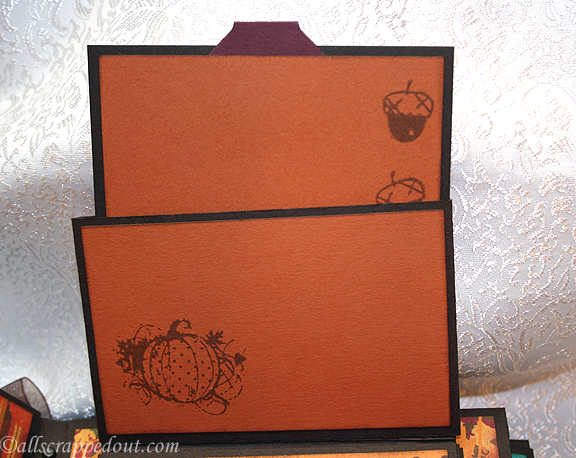
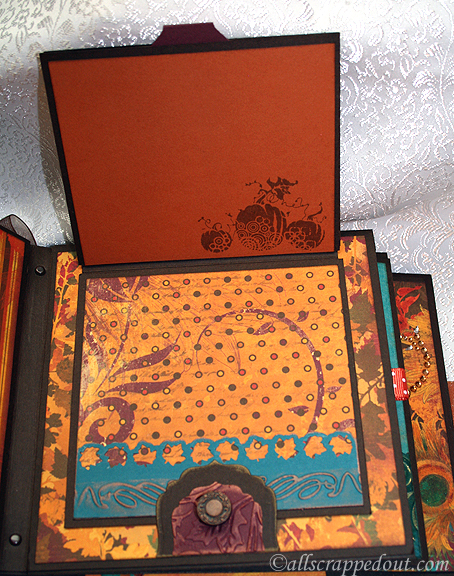
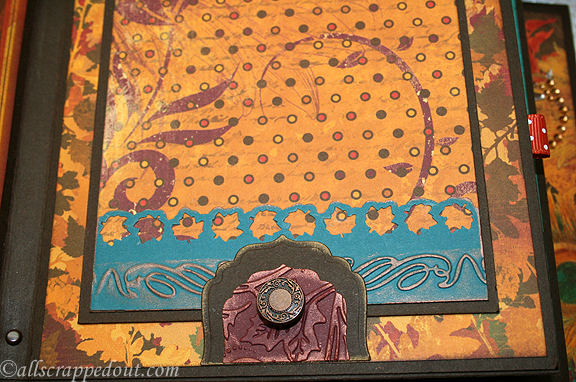
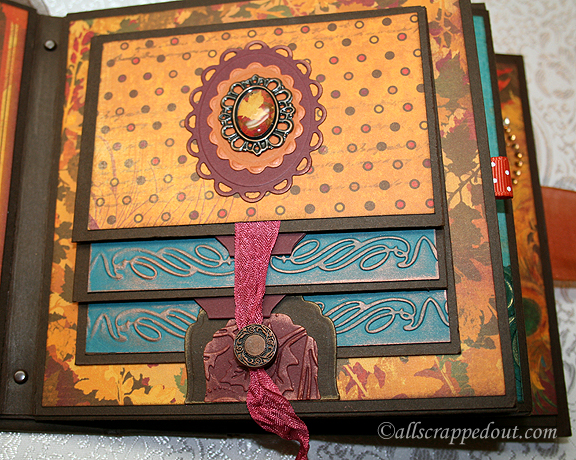
P4Open

P4Tag

Pages 5 and 6:

P5-6B

The pocket closes using an elastic hair band and a brad.

P5B

P5Open

Page 6 has an accordion fold feature that folds up and is held closed with a ribbon.  The snowflake trim is from a Martha Stewart punch.
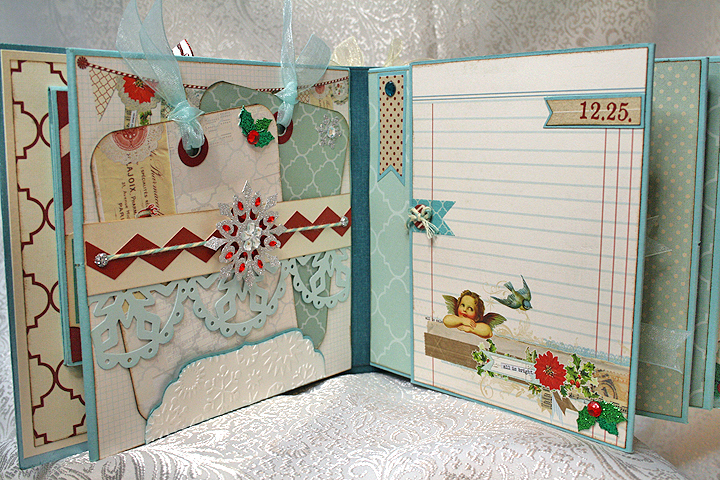
P6

P6Open

P6OpenB

Pages 7 and 8:

P7-8B

The ornament is embossed with Lindy’s Stamp Gang embossing powder.  I can’t remember what stamp I used for the ornament — that’s what I get for waiting so long to post this on our blog.  The ribbon hanger is a Memory Box die.

P7B

P7TagsB

Page 8 has a waterfall feature.
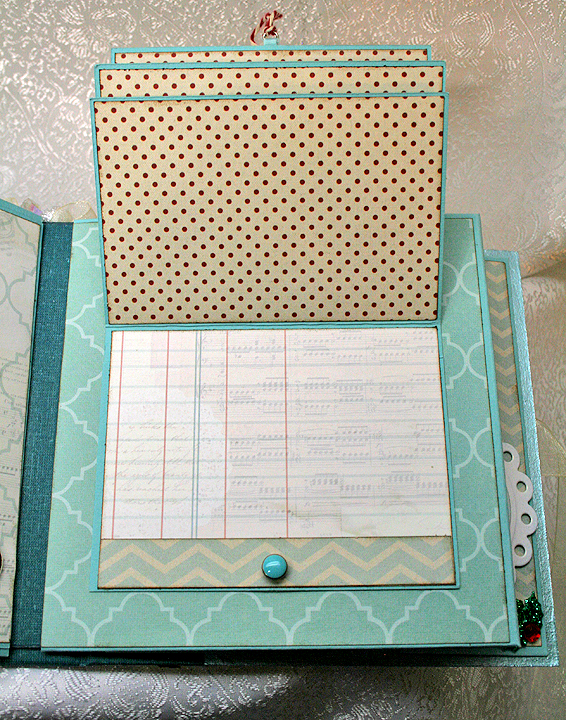
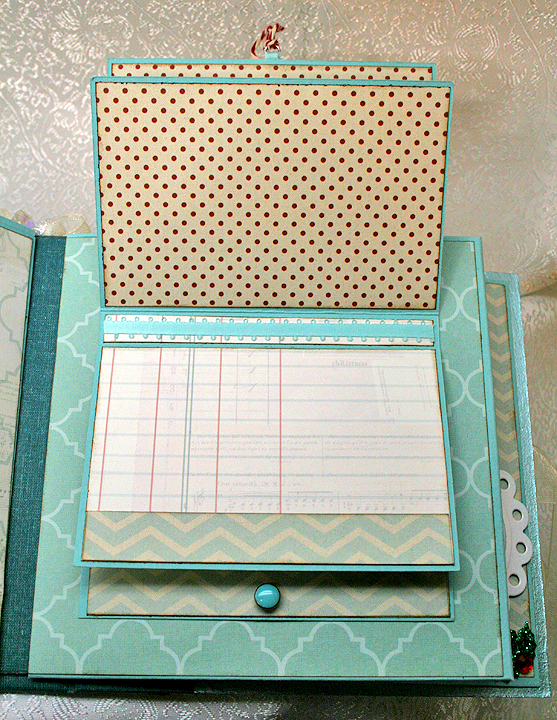
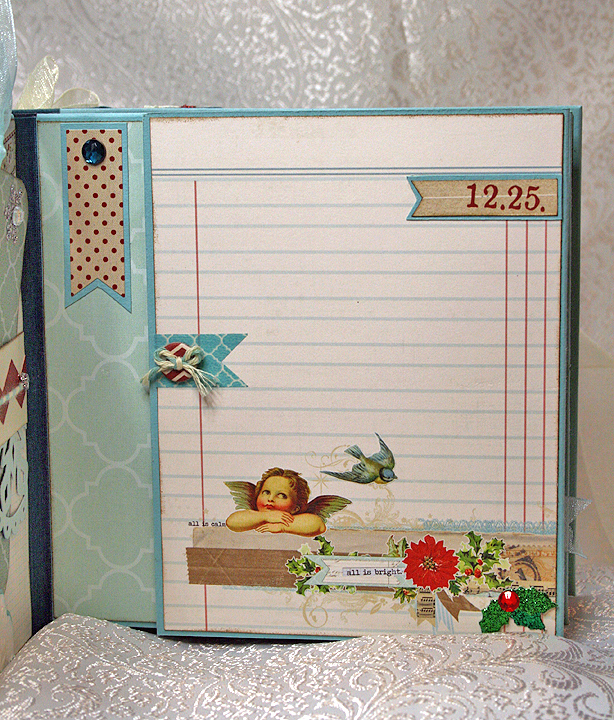
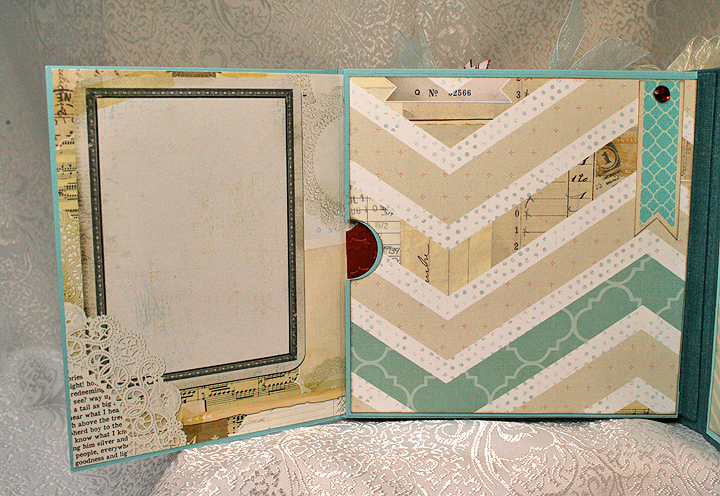
P8B

P8OpenC

P8OpenB

P8Open

Pages 9 and 10:

P9-10B

P9

P9OpenB

P9TagC

P10

P10WTag

Thanks for checking out my Christmas album.  I have a Valentine mini to post next — I hope it doesn’t take me two months to get it written up, like it did with this album.

Front6B

  • My Mind’s Eye Merry & Bright paper collection
  • Basis 80# cardstock
  • So Much Scrap (etsy shop), All Hallow’s Eve tutorial
  • Tim Holtz dies: Snowflake Rosette and Tag & Tie
  • Memory Box ornament and bow dies
  • Spellbinders Layered Poinsettia die
  • Lindy’s Stamp Gang embossing powder
  • EK Success Bracket edger punch
  • We R Memory Keeps Envelope Punch Board
  • Zutter Bow-It-All
  • Martha Stewart pearl paint
  • Cuttlebug

CHA Winter 2014 Conference & Trade Show, Day Two

Today we saw some really neat products — and we got to see Vanna White.  Vanna was in Lion Brands Yarn’s booth for a fashion show. It was standing room only, but we had a pretty good spot to watch.  After the show ended, several people went up to have their picture taken with Vanna.  There was a large group of men and women from Michaels (all wearing red shirts) posing for pictures.

Vanna

After the crowd started thinning out, Erin was able to take some pics of the displays around the stage.  They were very impressive — all made from yarn.   The display was titled, “The 7 Wonders of the Yarn World” and featured 7 yarn sculptures.

Lion2

Lion3

Soon after we left Lions booth, I spotted a banner for a 3D printer and we headed right there.  It was Klic-N-Kut’s booth and they were doing a demo on the printer.  We watched as it made a mini goblet.  Both Erin and I (and lots of other people) were fascinated by the printer.  The printer is $1300.  You have to have a software program that enables you to draw 3D objects, then you bring that file into the printer’s software program and from there it prints out the object.

3D

We visited Bo Bunny’s booth again because I wanted to look at the two buildings that Laura Denison (of Following the Paper Trail) created.  Erin took more pictures and this time got some pics of the back of the Winter Fairy House.  It opens up and has space to hold a mini album.

LauraFairyHouse

And here is another pictured of Laura’s Pet Shoppe.

LauraPetShoppe

There is plenty of bling on the other half of the showroom floor, too.  We found 3 more blinged out projects in glass cases along the front walkway.  They are all eye catching, but the Kitchen Aid mixer covered in rhinestones is really a knock out.

Bling

Bling2

We spent a little time in the We R Memory Keepers booth.  We watched a demonstration of the Lifestyle Crafts Letterpress.  When the man finished with the demo, he showed us a prototype of a new die cutting/embossing machine.  It reminded me a little of my Cuttlebug, but it has a lot of different features.  One is a button that you turn and it raises or lowers the bed.  You need only one set of plates — no more sandwiches.  It also has an optional motor that slips over where the handle attaches — so you can have a motorized version, when you want it.

WeR

Once again it is getting late, so I am just going to add the rest of the pictures with short captions.

7Gyp

7 Gypsies


7 Gypsies

7 Gypsies – I love how they did the banner on this layout. The banners are on small hangers that are hung on a chain.


7 Gypsies

7 Gypsies

We got to see the new Brother ScanNCut.  It was impressive to watch — the demonstrator stamped an image and cut it out.  Erin came up with a very good point.  So many stamp companies are now selling dies to coordinate with some of their stamps so you don’t have to fussy cut around the images.  Why not take the money you would invest in dies and buy this machine?  That way you don’t have to store the dies and you will be able to cut around any stamped image.  As you can see, it cuts around the fine details.

ScanNCut from Brother cutting out a stamped image.

ScanNCut from Brother cutting out a stamped image.


Removing the cut from Brother's ScanNCut.

Removing the cut from Brother’s ScanNCut.


Bro3

Decorated cell phone cases.

Decorated cell phone cases.


More cell phone cases.

More cell phone cases.


Fabscraps

Fabscraps


Crows in the Kaisercraft booth.

Crows in the Kaisercraft booth.


Lindy's Stamp Gang

Lindy’s Stamp Gang


Lindy's Stamp Gang

Lindy’s Stamp Gang


The Modge Podge mascot -- she was kind enough to pose for us.

The Modge Podge mascot — she was kind enough to pose for us.


Displays in the Plaid booth.

Displays in the Plaid booth.


Prima

Prima


Prima

Prima


Prima

Prima


Prima

Prima


SEI

SEI


Stampendous

Stampendous


Stampendous

Stampendous


Stampendous

Stampendous


Stampendous

Stampendous


Teresa Collins

Teresa Collins


Teresa Collins -- the bottom picture shows an album that doesn't look like much in the package.  But you pull the tab on the one end and it flips through the pages.

Teresa Collins — the bottom picture shows an album that doesn’t look like much in the package. But you pull the tab on the one end and it flips through the pages.


Tim Holtz demonstrating his new spritzer.

Tim Holtz demonstrating his new spritzer.


My First Mini Album

Yesterday I posted the mini album I received in a swap.  Today I want to share the mini album I made for my swap partner.  I took a ton of pictures — I think because after spending so much time making the album, it was hard for me to part with it.  I felt like it was part of the family 🙂

I made several wonderful discoveries along the way while making the album.  First and foremost, I discovered some wonderful mini album tutorials on Etsy.  You can find them in Cathy’s shop, which is called SoMuchScrap.

I have been researching minis on the internet for a long time and knew I wanted to make something with interactive pages.  After finding Cathy’s tutorials, I knew this was the way to go for me.    I purchased her binding tutorial and her Je’ T’ Adore tutorial for a 6″ x 6″ mini.  All I did was change the papers to a fall theme.  The tutorials are excellently written and have step-by-step instructions as well as pictures to guide you through each page.  Another plus about purchasing from Cathy is that she readily answers any questions you might have.  So, with big thanks to Cathy, here is my mini.

Thumb

I used paper from BoBunny’s Forever Fall collection.  The solid cardstock is all from papertemptress.com.  The brown trim and ribbon are from Joann’s.  Another discovery I made was book cloth — I used imitation suede book cloth to cover the spine of the album and a glue specifically designed for bookbinding.  I was amazed at how easy it was to apply the cloth.  I picked up these supplies at Hollander’s.

Front2

The title is from two Spellbinders dies, Labels 4 and Grommet Tags.  I embossed the bottom layer with the Distressed Striped Cuttlebug embossing folder.  I added highlights with a copper ink pad and sponge.  The “Autumn Splendor” is from a Close to My Heart stamp set with the same name, heat embossed with Lindy’s Stamp Gang’s embossing powder.

That is another of my discoveries — Lindy’s Stamp Gang‘s products.  I bought their Autumn Leaves Mega Set and I can’t say enough good things about it.  I love their sprays and embossing powders — they are gorgeous.  Look at the heat embossing close up — their powder not only embosses but also adds a shimmer, which you will see in the second picture.

Title

The dragonfly is from a Martha Stewart punch and I sprayed him with Lindy’s Starburst Spray and dried him with a heat gun.  I added a chocolate pearl to each side of the tag.

TitleEmboss

The rhinestone embellishment is from Michaels, from their Recollections brand.  I made the three flowers on the front, using Spellbinders Jewel Flowers and Flourishes for the sunflower.  The two smaller flowers are cut with my Cricut using the Flower Shoppe cartridge.  I added Stickles to the centers of the small flowers and Flower Soft to the center of the sunflower.

Flowers 

Flowers2

On the spine I hung a charm on a Tim Holtz ring fastener that I made with supplies I picked up at Joann’s. This was my first time making a charm — and I love the way it turned out.

Spine

The pendant is glass and it reminded me of a leaf shape — so I figured it would go well with the album.

Charm

OK, let’s look inside the album.  Here are pages 1 and 2.

1-2

The first page has a pocket and I used a Martha Stewart border punch on it.   There is also ribbon running under the sentiment.

1

The sentiment is a graphic I got from the Internet and cut out with a EK Success punch.  I made the leaves using a Cuttlebug die.  I found this video on making leaves and they were really easy to do.  She uses the Tim Holtz Tattered Leaves die for her leaves, but I found them to be too large for what I wanted.  The Cuttlebug die leaves were just the right size.  The leaf on the right has Crackle Accents on top of it and the leaf on the left has matte medium coating it.

1Verse

I made two tags to sit inside the pocket, using Distress Ink, stamping, heat embossing , and seam binding ribbon to create them.  The ribbon is colored with Lindy’s sprays.  

1Tags

The pumpkin is from a Cuttlebug Cut and Emboss die, the sentiment is computer generated,  and there is another dragonfly from the Martha Stewart punch.  I kept the backs simple.

1TagsBack

Page 2 is an interactive page, folding up and closing with a small magnet.  I used Basic Grey magnetic snaps throughout the mini.   The Scrabble letters are from a Whimsy stamp (Spell It Out), heat embossed with Lindy’s embossing powder.  The sunflower is from a Heartfelt Creations stamp, colored with Copics and cut out.

2

This is page 2, partially open, revealing a tag inside.  The flowers are Recollection from Michaels, sprayed with Lindy’s Starburst Spray and topped with Stickles in the centers.  The pocket that holds the tag is a label shape from Spellbinders, cut in half.  The rectangle on the mat at the right is attached only at the bottom and right hand side to create a pocket to slip a photo in.

2Open1

I learned so much making this mini — like how to make tabs for tags using the We R Memory Keepers Envelope Punch Board.  I watched this video.

2Tag

I made the backs of all the tags the same — I created a little spot for journaling.  I used the Cricut cartridge Simply Charmed for the notebook paper, using colored pencils and a ruler to go over the score lines.

TagsBack

This is page 2, fully opened.  I created corners by cutting a square in half and embossing them with Darice’s Fall Leaf folder. The stamps I used throughout the album are either Close To My Heart, Inkadinkado, or from Michaels $1 bin.

2Open

Next up are pages 3 and 4.

3-4

The leaf is from a Spellbinders die and the sentiment is heat embossed.  The square the leaf is on is only glued at the bottom and left hand edge to the page — to create another pocket.  There is a mat that pulls out with a ribbon tab.

3

The mat is good sized.  This is the back, which I stamped with a Close To My Heart Stamp.  I used Memento Rich Cocoa Ink for the stamps that aren’t heat embossed.

3Mat2

Page 4 is another interactive page.   The title is from the Simply Scarecrows Cricut cartridge and sprayed with Lindy’s Starburst sprays.  The small leaves are from a Martha Stewart punch.  The ribbon opener features a brad from the BoBunny Forever Fall collection and closes with a magnet.

4

And here’s what it looks like open.

4Open

Now were moving on to pages 5 and 6.

5-6

Page 5 has a mat that pulls out of a pocket and folds over, forming the front.  It is held in place with a magnet.  I kept the front simple, adding a couple of leaves and another dragonfly.

5

This is page 5 open.  There is a tag inside.  The pumpkin on the mat is from the same Cuttlebug Cut and Emboss die that is on the tag in the pocket on page 1, with the leaf cut off.  It is attached only at the bottom and left side, so a photo can slip inside.

5Open

Two pictures of the mat, front and back.

5Mat


5Mat2

Page 6 has a waterfall feature.   The BoBunny charm sits on two Spellbinders ovals.  The brad is also from the Forever Fall collection, using dyed seam binding to wrap around it as a closure.

6

Each layer of the waterfall has an embossed trim strip at the bottom and a pocket with a tag at the top.  This is the uppermost layer.

6WF

Here is the tag, partially pulled out.

6WF2

The second layer of the waterfall.

6WF3

This is a close-up of the brad.  I again used the Martha Stewart border punch for the leaf border.

6Brad

This shows how the waterfall closes.  You will also notice two brads in the spine of my album.  Cathy’s binding tutorial shows how to add strength to your binding system by not only taping it to your spine, but by adding brads.

6Closed

We’re getting near the end.  Here are pages 7 and 8.

7-8

Page 7 has a pocket at the bottom.  The label is a Spellbinders die and the sentiment is heat embossed.  There is another pull out mat in the pocket on this page.

7Open

Page 8 features a mat that folds around to the front and is held in place with a magnet.  There is a pocket at the bottom and the curved oval shape (a Spellbinders die) is attached at the bottom to the pocket only.  The embossing is from the Cuttlebug Divine Swirls folder and is highlighted with gold metallic ink.  And there is one more of those little dragonflies on this page.

8

This picture again shows how wonderful Lindy’s Stamp Gang products are — look at all that sparkle.  I used more than one color on the dragonfly.

8Emboss

This is page 8 with the mat partially out.

8Open2

And we’re to the last of the pages, pages 9 and 10.

9-10

Page 9 is a fun interactive page.  It has a brad and seam binding closure.

9

The sentiment is attached at the lower and left edges only, forming a pocket.  The small leaves are the negative cuts from the Martha Stewart border punch, sprayed with Starburst Spray.

9Verse

Page 9 opens to reveal another tag.

9Open

The left side of the page then opens up to reveal two more spots for photos.

9Flap

Page 10 is the inside of the back cover.  It has a pocket at the right hand side with a folded photo mat tucked inside.

10

I again used some Recollection brand rhinestones on the pocket.

10Rhinestones

The photo mat features a hexagon made with the BoBunny paper using an Epiphany Crafts tool and  bubble cap.

10Mat3

How cool is that hexagon?

10Epiphany

This is the inside of the mat.

10MatInside

And, finally, we are to the back cover of the album.

Back

Thank you for taking a “tour” of my mini album.  And I want to share my last discovery — I discovered that I love to make mini albums.  I am already planning my next one.

Front


  • BoBunny Forever Fall Collection
  • Cricut cartridges:  Flower Shoppe, Simply Charmed, Simply Scarecrows
  • Cuttlebug:  Divine Swirls folder, Distressed Stripes folder,  Fall Leaves die, Cut and Emboss Pumpkin Spice
  • Spellbinders:  Labels Four, Grommet Tags, Jewel Flowers and Flourishes
  • Lindy’s Stamp Gang embossing powder and Starburst Sprays
  • We R Memory Keepers Envelope Punch Board
  • Martha Stewart punches
  • Recollections rhinestones
  • Stickles
  • Flower Soft

Winter CHA 2013 – First Day of Exhibition


Today, CHA’s winter exhibition opened in Anaheim, California.  I do not believe the show is as large as previous years, but there is still so much to see and do.  I took a lot of pictures so I can share some of the excitement.

First up, I will show you Die Cut With a View’s booth.  They always have an outstanding booth — I can’t believe their display this year.  To sum it up, you certainly can’t ignore the elephant in this room:

Elephant

Elephant2

 I found out they made the elephant by using a topiary frame.  They covered that with newspapers and then added their own paper on top.  The blanket is gorgeous — it’s made of what looks like a turquoise quilted lame fabric and the embellishments are all done with beads.

Blanket

Beading

Beading2

I had to take a pic of the tail too:

ElephantTail

They also have a cobra in their booth — made of jewelry findings and chain.  He is just amazing.

Cobra

Here are some of the stacks that are featured:

Stacks2

And finally, some framed art on the outside of their booth:

Butterflies

Our next stop will be Jinger Adams’ booth.  She is in the new exhibitor’s section and it was good to see both her and Kristy today.

JingerBooth

JingerKristy

Display

And here is Jinger’s over-the-door Craft Armoire that is getting a lot of attention.  The first picture shows it closed and the second one shows it open.

Armoire

ArmoireOpen

As usual, Graphic 45 has a stunning booth:

G45Booth

One of their new collections, French Country:

FCCabinet

FCTop

FCMiddle

FCBottom

FCPapers

Another new collection, Secret Garden:

SGCabinet

SGTop

SGMiddle

SGBottom

SGPapers

I made it a point to stop at We R Memory Keepers’ booth to check out their new Envelope Punch Board.  I watched a demo of it and was even able to make one myself, along with a card.  This is a really neat tool and after using it, I will definitely be purchasing one.

Booth

This is what the Envelope Punch Board looks like:

EnvelopePunchBoard

Measurements for envelopes are listed right on the board and it tells you what size paper to cut and where to place your paper on the board.  There is a punch at the top that cuts out the little areas where the score lines meet.  It is so much easier than trying to snip that little piece out with a pair of scissors.  Once you score and snip it all the way around, you then fold and assemble your envelope.

FoldingEnvelope

ApplyAdhesive

It also has a corner rounder punch on the back of the board so you can round the corner on your flap.

CornerRounder

CompletedEnvelope

For the card, I got to use one of their Lucky 8 punches.   I used it in conjunction with a doily border punch and ended up with a fancy oval to attach to my card.  Sorry about the blurred hand in the background.

Lucky8Punch

DoilyBorderPunch

Doily

I folded the doily in half and added it, along with some embellishments, to my card.  I think it turned out cute.

Card

In the new exhibitor section I found another neat tool — it’s called a Laser Square.  It has a mat that is magnetic and you place your paper on it.  The paper is held in place by magnets.  They are strong magnets and can hold several layers of paper, so if you do a lot of matting your page will stay in place.  The laser is powered by a 9 v. battery and it enables you to line up all your work on your page.  They said it helps line up your paper for stamping too.  I think it will also work great with cards.

The company is called Kellycraft and the man said his wife came up with the idea at 2 in the morning — I guess she woke him up to share her idea.  They also make Laser Skins so you can customize your Laser Square.

LaserSquare

LaserSkins

The Copic booth and some of the cards on display:

CopicBooth

Card1

Card2

Card3

Card4

The Prima booth:

Booth

One of their new lines, Hello Pastel.

HelloPastel

HPDisplay

Another new collection, Sunrise Sunset:

SunriseSunset

Some layouts on display:

Display

Layout

Layout2

And look at this gorgeous work of art:

MixedMedia

Prima and Leeza Gibbons have teamed up and she has a collection called Wishes & Dreams.

LeezePoster

Wishes&Dreams

WDDisplay

WDDisplay2

WDDisplay3

WDLayout

Leeza was in Prima’s booth today.

Leeza

Another new exhibitor is Farm House Paper Co.  They have a great display and a nice product line.

FHBooth

Layout1

Layout2

Layout3

Layout4

BoBunny’s booth was very busy when we walked by.

BoothFront

This is the back of their booth, with close-ups of their displays:

BoothBack

Display

Display2

Display3

I spent a little time watching the demo in Purple Cow’s booth.  The lady was showing how to use their craft iron and encaustic wax paints.  She cut a piece from an old silk necktie and was coating it in wax on a piece of paper.

PCDemo

PCBegin

PCEncausticWax

PCTie3

PCDisplay

PCDisplay2

Here are a couple of finished pieces that were on display:

PCCover

PCCover2

This picture shows a napkin with a picture of Queen Elizabeth on it and how the lady incorporated it into her cover:

PCQECover

I plan on going back to Purple Cow’s booth so I can learn more about this technique.

I haven’t knitted in years, but this display using Bernat yarn caught my eye.  The afghan was so soft.

BunnyBear

Bernat

I have a lot more pictures to post, but for some reason it is taking forever to upload them onto my blog.  I have been working for several hours now just to get these up.  Since I want to be back at the show when they open in the morning, it’s time to call it a night.

My final picture will be of my one purchase today.  I hadn’t planned on buying this, just knew that I was going to at some point.  I had my dear hubby at the show with me today, and when we stopped in the booth to look at Klic-n-Kut’s Zing die cutting machine, he must have noticed me drooling because he said to go ahead and buy it.  The lady said they brought a machine with them and it is at their hotel.  She is bringing the machine to the show tomorrow and I can bring it home with me.  I am very excited!  It will be a week or two before I can play with it though — I have several embroidery orders I have to get out first.

Zing