Birthday Cards

World Card Making Day was Saturday, Oct 4, and I actually got a couple of cards made. Well, I made one card on Saturday and the other one on Sunday, so it was a weekend endeavor.

First up is a birthday shaker card.  I love shaker cards and this one has a birthday cake on the front.  I used the Arched Top Card Base and Party Shaker Tags from svgcuttingfiles.com to make this card.  The stamps are from Jaded Blossom — Birthday Treat Tags and Birthday Candies.  I also used one of the  Mini Tag 2 dies to cut the sentiment circle.  I heat embossed the sentiments.

The pattern paper is from SEI and I used Doodlebug Design sequins inside the shaker.  I outlined the candle flames with Stickles.

1

The next card I made for our dog, Fifi, to give to Steve for his birthday in a couple of weeks.  Steve doesn’t look at our blog, so I don’t have to worry about him seeing the card.

I used the Dog Bone Shaped Card and the Pomeranian Pup files for this card.  Fifi is a mix of Pomeranian/Chihuahua, but she looks like a Pom.

I used the computer to generate the sentiment and cut it out with one of the Flag Dies from Jaded Blossom.

3


I am entering both cards in svgcuttingfiles.com’s monthly challenge, which is a Birthday Card Challenge.  I’m also posting them to the Cricut Circle Message Board, where Sara is hosting a challenge for World Card Making Day.

  •  SVG Cutting Files – Arched Top Card Base, Party Shaker Tags, Dog Bone Shaped Card, and Pomeranian Pup
  • Jaded Blossom Stamps – Birthday Treat Tags, Birthday Candies, Mini Tags 2 die and Flag dies
  • SEI paper pad
  • Embossing powder
  • Doodlebug Designs sequins
  • Stickles
  • Baker’s Twine

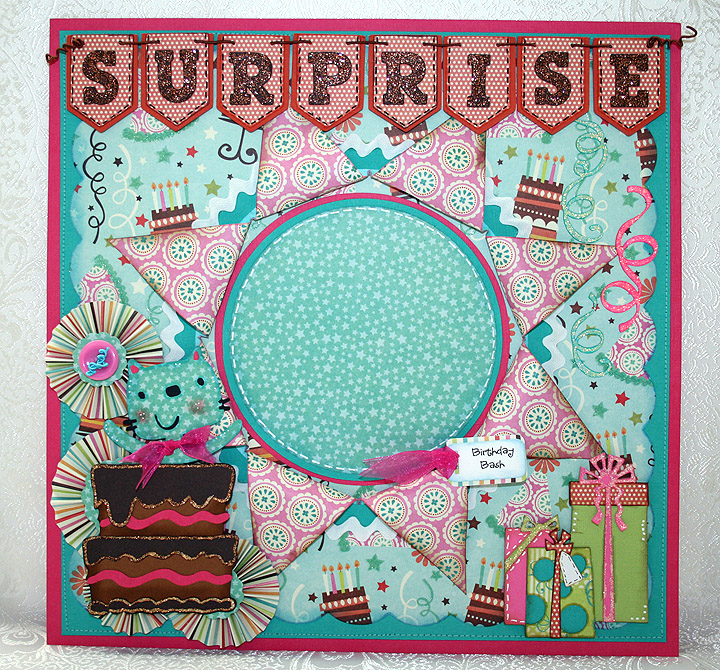
Surprise Birthday Layout — My First Layout


This is my first layout ever — and I really struggled with it.  Up to this point I have just made cards with my Cricut.  I have no trouble deciding and laying out what I want on my card fronts, but doing a 12″ x 12″ page proved to be a challenge. 

I wanted everything on my layout to flow and look like it was put there for a purpose.  I even went to the Cricut Circle Blog and watched their tutorial again on how to do a layout.  After watching the video I felt I had a better grasp of things, but once I started cutting I wasn’t so sure. 

The patterned paper is from SEI — their Happy Day collection.  Since I had the paper pad in my stash and knew I wanted to use it, that is the only thing I was certain about on this project.  Once I got my background paper laid out and the banner done, then the rest sort of came together.   I laid out everything in Design Studio before I started cutting anything. 

The large scallop square background is cut from the Cindy Loo cartridge.  The banner, the cat jumping out of the cake, and the gifts are all from Birthday Bash.  The streamers are from Celebrations and all the circles are from George. 

I think I cut the center circle at 7″.  Then I measured and found the center and started slicing the circle, but didn’t cut it all the way from edge to edge.  I left about 1/2″ intact at each edge of the circumference.  I glued it to the layout right-side down, so that when I pulled back the slices the pattern paper showed.  Before gluing each of the points down, I cut a ring of solid turquoise cardstock to cover the raw edges of my sliced circle.  I added some white rick rack to the ring.  Then I put adhesive on each of the points of the slices and adhered them to my layout. 

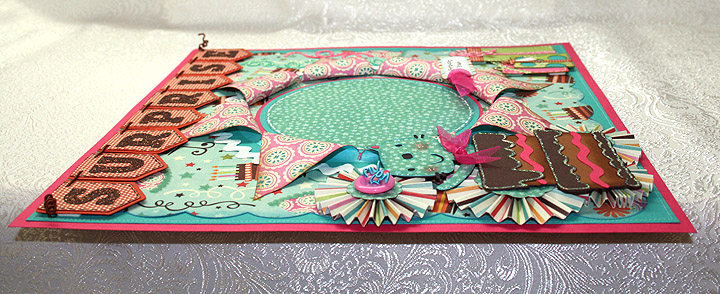
Side view so you can see the dimension of the layout

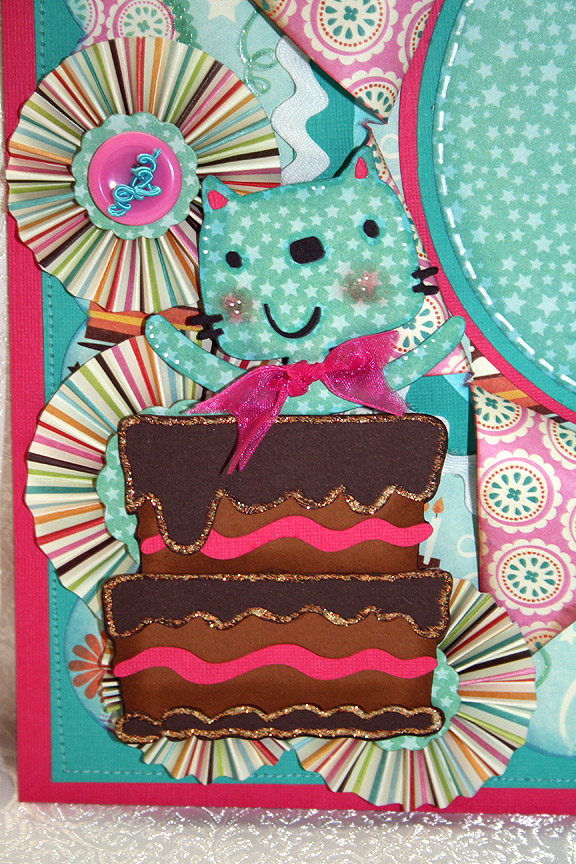
This was my first time making rosettes and I used my Martha Stewart scoreboard to make the pleats.  That was a lot of fun, except that making those score marks every 1/4″ is hard on arthritic hands. 

I used lots of Stickles — I coated all the letters in the banner.  I think the color I used was copper.  I added Stickles to the gifts, the cake, and all the streamers got coated in them.  I used DMC Memory Thread to string up my banner and for the center of the button on the rosette.  I love that stuff — it’s so easy to work with.

Close up of the title banner

Close up of the cat in the cake

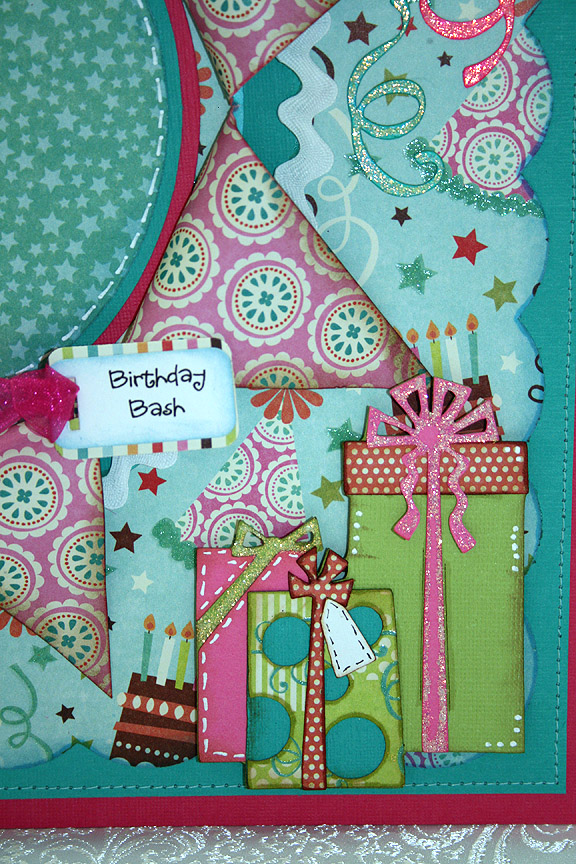
Close up of the gifts

The little “birthday bash” tag was cut with my Cuttlebug using the Tiny Tags die.  I did the sentiment on the computer.  Oh, also did lots of inking and doodling and stitched the turquoise cardstock to the pink cardstock with my sewing machine. 

  • SEI Happy Day paper
  • Cricut cartridges:  Birthday Bash, Celebrations, Cindy Loo, George & Basic Shapes
  • Cuttlebug — Tiny Tags die
  • Stickles
  • DMC Memory Thread

Jitterbuggin’ Gifts Galore Challenge and Fantabulous Cricut Ribbon Challenge


I haven’t been able to make many cards lately because this is my busy time of the year with the embroidery business.  I’ve had two machines running since Thanksgiving.  I’m taking a short break this weekend to go away with hubby to celebrate our 44th anniversay.  I wrapped up a couple of embroidery jobs on Tuesday and found time to make a card. 

I made this card to enter into two challenges.  At Jitterbuggin, Sherri asked us to make a card with a gift theme.  The sketch is not mandatory this week — we just have to add a bow and some bling — and, of course, use our Cricut.

At Fantabulous Cricut we have to use ribbon somewhere on our project and, again, have a Cricut cut on it.

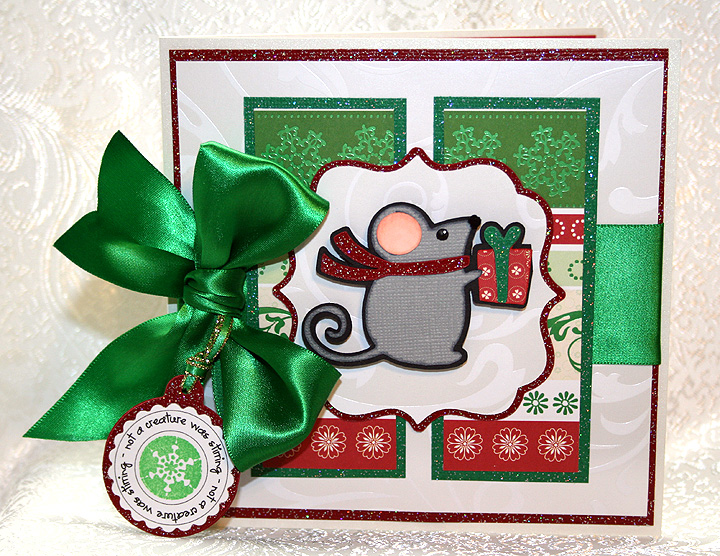
I made a card with a little mouse bearing a gift, which he wrapped up so prettily and tied with a bow.  The designer paper is Christmas Mint from SEI.  I used glitter cardstock from Core’dinations for my bling.  I am really happy with the way it cuts in the Cricut.

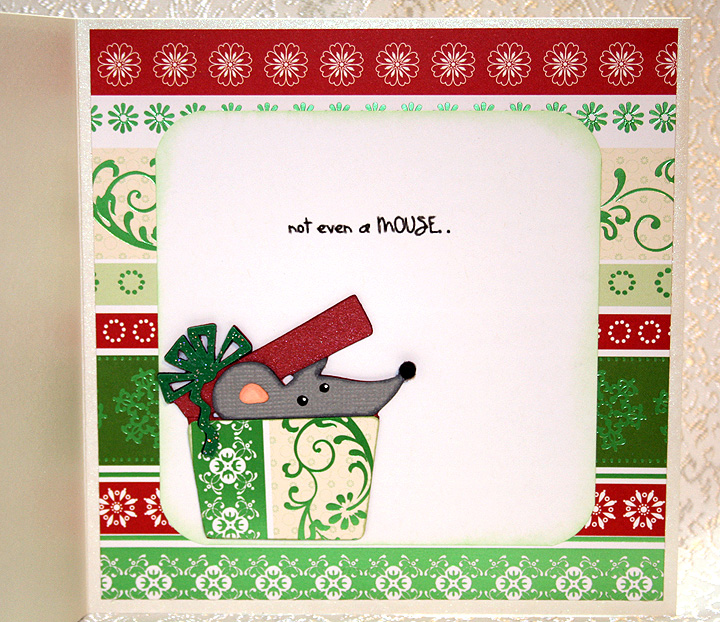
The little mouse is from the Winter Frolic Cricut cartridge.  The frame he is mounted on is from Lacy Labels Lite cartridge and I cut the tag from the Very Merry Tags cartridge.  The printing on the tag, “not a creature is stirring”, is a download I got from the Cutting Cafe.  I wanted something small and didn’t have time to try and put text on a circle myself, so I was happy to find the saying I wanted for a very reasonable price — just 99 cents.  The text on the inside of the card is also from this same download.  I cut out the text for the tag using my Cuttlebug and Nestabilities scalloped circles.

I cut the tag, the scarf, the bow on the present as well as mats from the glitter cardstock.  I found a piece of 1 1/2″ wide green satin ribbon in my stash and tied it around the middle of the card.  I attached the tag to the bow with a scrap of ribbon edged in metallic gold. 

The inside of the card has another little mouse and I cut this one from the new Birthday Bash cartridge.  When I laid out my card in Design Studio, I planned on putting this mouse on the front of the card and the mouse with the gift on the inside of the card.  But once I started cutting out the pieces and laying out the actual card, I decided to switch mice.  I thought the mouse carrying the gift looked better on the front of the card.  Oh, I almost forgot — for both mice I used very small pom poms for their noses. 

  • SEI Christmas Mint paper
  • Core’dinations glitter cardstock
  • Cricut cartridges:  Birthday Bash, Lacy Labels, Very Merry Tags and Winter Frolic
  • Cuttlebug
  • Spellbinders Nestabilities
  • Text for tag from Cutting Cafe
  • Ribbon and pom poms from stash