Pac-Man Card


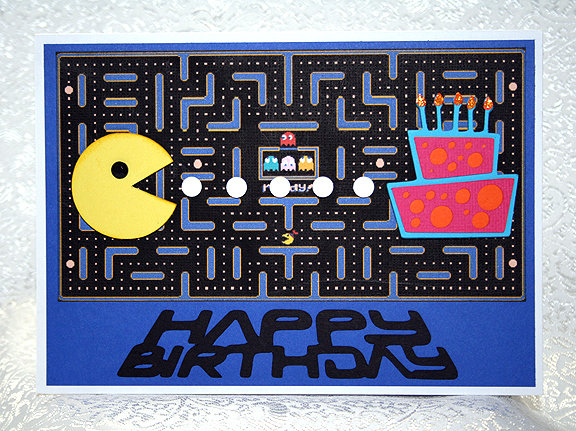
Erin asked me to make a birthday card for her to give to one of her friends and she requested something with an 80’s video arcade game on it, like Pac-Man.  I found a print card showing Pac-Man eating dots and heading towards a birthday cake.  So I did my version of that card using my Cricut.

I first printed a maze from the game that I found online.  I thought it would make a neat background for the card.  I designed Pac-Man in Cricut Craft Room, using the George & Basic Shapes cartridge.  I used a circle and laid a triangle over it (not using the weld feature) to make the mouth.  His eye is a black faceted stone from my stash — I think I got them at Joann’s.

Front5

The white dots are from an EK Success punch — I think it’s called Swiss Cheese. The birthday cake is from Life’s A Party and I added orange Stickles for the flames on the candles.  Pac-Man, the white dots, and the birthday cake are all popped up with foam dots.

Front

When I was laying out the card in Cricut Craft Room, I happened upon a really neat sentiment that I thought would be great with this card.  It is from a project cartridge called Space Party.  But wouldn’t you know it, it was one of the few cartridges that I didn’t have.  I looked at other fonts, but nothing grabbed me like the Space Party sentiment.

So I went on eBay, found a Space Party cartridge that wasn’t being bid too high and placed a bid.  I ended up getting it for less than $2.50 — can you believe that?  Still, I hope I use it for more than just the sentiment on this one card!

This was a pretty quick and easy card to make — and Erin was very happy with it.  I even made an envelope for it using my We R Memory Keepers Envelope Punch Board.

I am going to enter this card in the Cricut Circle Challenge, which is to use or try something new.  Since I have never used Space Party before, I figure that will satisfy the requirements.  And I used the Swiss Cheese punch, which I have owned for some time and have never used either.

  • Cricut cartridges used:  George & Basic Shapes, Life’s A Party, Space Party
  • EK Success Swiss Cheese punch
  • Stickles
  • Faceted stone from stash


Easter Bunny Inside His Jelly Bean Seed Packet Card


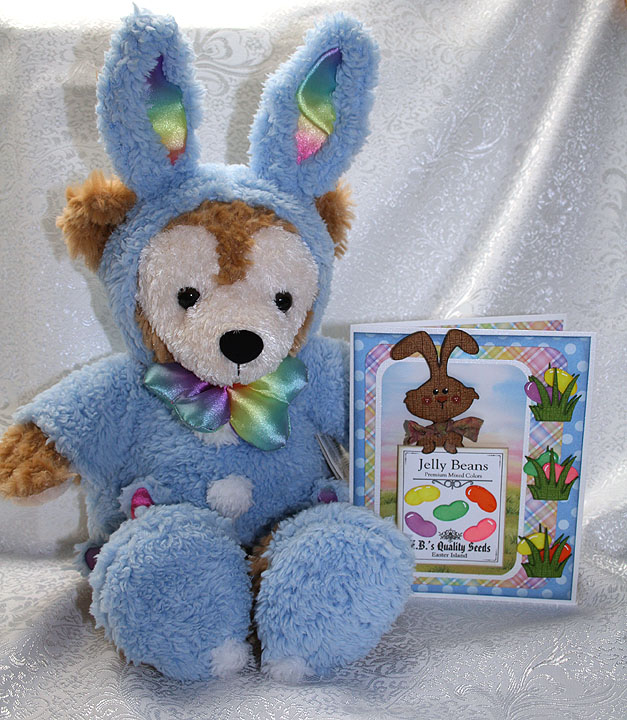
This was a fun card to make.  I wanted to make an Easter card so I could enter it in Jitterbuggin’s Spring Fling contest.  We had extra time to complete this challenge, but I waited until the last minute and am getting this in just under the wire.  It took a while for me to take my concept and come up with a finished project.   This time the challenge is open to voting, so that part is new to me. 

I was inspired by the movie Hop — I loved it and can’t wait for it to come out on DVD.  But my little bunny has to use seeds for his beans as he does not have the talent EB does when it comes to producing jelly beans.

I was a member of PC Hug Club for many years and received some very cute clip art each month.  Because I have such a large collection and never use it, I decided I was going to print my own paper to make this card.  All the background prints are images that I printed on an inkjet printer.  I really like using the clip art because I can resize it — so a 12″ x 12″ background can be reduced to 6″ x 6″ to make a card.  The size of the print becomes smaller too, so it is perfect for cardmaking. 

Fantabulous Cricut has a challenge called Do the Bunny Hop! this week that I will enter this card in.  You have to create a project using a rabbit or chick.

Also, at Cooking With Cricut, their challenge is called Cash in Your Stash and you are supposed to use things in your stash — items that you have had for at least a year.  My clip art collection certainly qualifies, and I also used scraps that I have had for ages to make the bunny and the grass.

I made the seed packet in Adobe Illustrator.  I am such a beginner using that program and was thrilled when I actually made something with it.  I made it a complete packet so I could slip the bunny inside. 

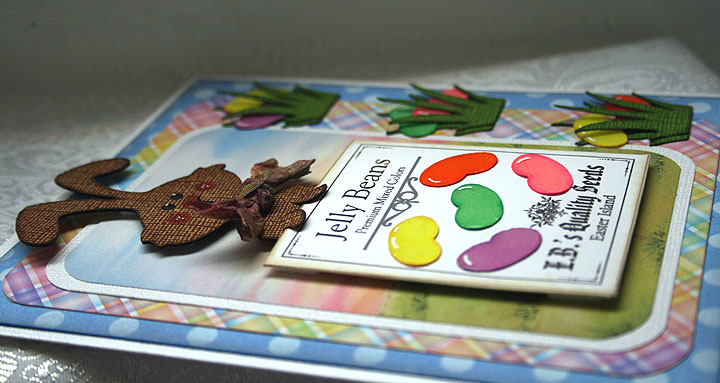
Making the jelly beans was probably the most time-consuming aspect of the card.  I first did an online search to see if I could find a Cricut cut file for a jelly bean as I was pretty sure there were no jelly beans on any of the Cricut cartridges.  I found a post where someone said they made a jelly bean using the George and Basic Shapes cartridge, using the crescent and heart shapes.    I used the same shapes and laid the beans out in Design Studio.  I cut the jelly beans from white cardstock and then colored them with Copic markers.  I applied two layers of Glossy Accents to give the beans their shine. 

The bunny is from the Paper Doll Dress Up cartridge — he’s the bunny from the magician’s costume.  I made a bow for him from seam binding that I spritzed with Glimmer Mist.  The grass is from Create a Critter.  I cut two layers of the grass for each clump so the jelly beans could be seen growing between the layers.  After I placed the bunny inside the seed packet, I pop dotted the entire piece on the front of the card.

Side view showing some of the dimension of the card.

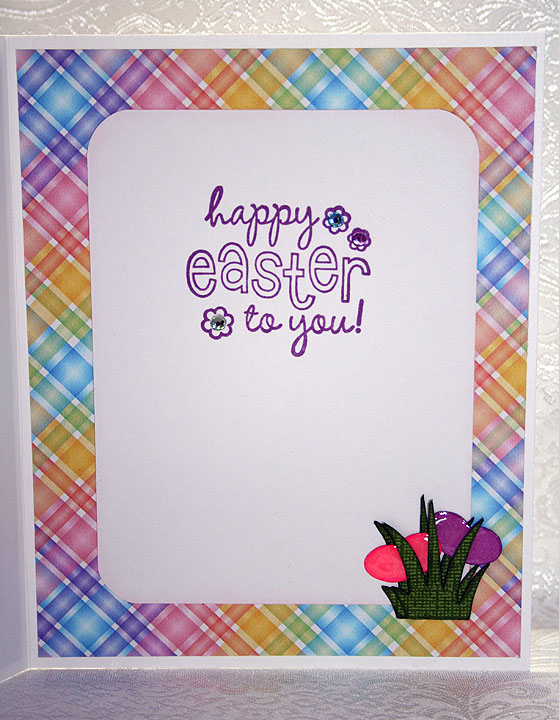
For the inside of the card, I used a stamp from a clear set that I picked up at a scrapbooking expo several months ago.  It came with the rhinestones that I put inside the stamped flowers.  I added another clump of grass with some more jelly beans.


  • Cricut cartridges:  George & Basic Shapes, Create a Critter, Paper Doll Dress Up
  • Cricut Design Studio
  • PC Hug Club clip art
  • Copic markers
  • Glimmer Mist
  • Rayon seam binding

Challenges:

Jitterbuggin — Follow the sketch, make an Easter card and use a Cricut cut somewhere on your card.

Cooking With Cricut — Use stuff in your stash, items that you have had for a year or more.

Fantabulous Cricut — Use a bunny or chick in your project.

Challenge Friday: Eerie – Weekly Challenge #1 at the Cricut Circle Blog

I am a member of the Cricut Circle, a select community of Provo Craft Cricut enthusiasts.  The new Circle blog was launched on October 1 and will be open to the public for the first ten days.  After that it will be available to Circle members only.

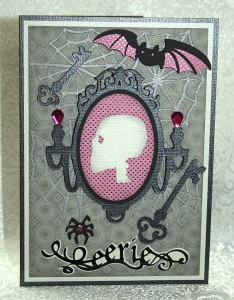
The blog is featuring weekly challenges and the first one began the day the blog launched.  This challenge is open to Circle members and requires you to use two cuts from the French Manor cartridge, an exclusive members-only cartridge.   You also had to use pearls or jewels on your project.

I created a Halloween card using DCWV’s Black Currant cardstock stack.  The solid color cardstock is from Bazzill.  I used French Manor for the mirror and the keys.  The bat, skull, spider and “eerie” sentiment are from the Happy Hauntings cartridge.  The spider webs are from Wild Card.  I used Stickles on the bodies of the spiders and added some teardrop-shaped jewels above the sconces on the mirror.  I bought the jewels at Joann’s (in the $1 bin) the night I did the card, not knowing at the time that they would work so well with the design. 

A few days ago, a Circle member (Capadia) posted a helpful tip for cutting small letters.  She suggested cutting them from vinyl.  You can find her post on her blog here.  I cut the “eerie” letters using vinyl and it worked perfectly, right down to the tiny dot for the “i”. 

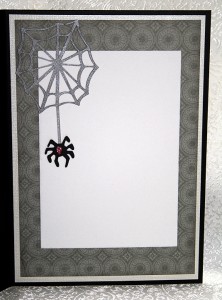
On the inside of the card, I layered some cardstock and added another spider and web.

  • DCWV Black Currant stack
  • Bazzill Bling cardstock
  • Black vinyl (scrap) for sentiment
  • Cricut cartridges:  French Manor, Happy Hauntings, and Wild Card
  • Jewels from Joann’s ($1 bin)
  • Ranger Stickles – pink