Birthday Cards

World Card Making Day was Saturday, Oct 4, and I actually got a couple of cards made. Well, I made one card on Saturday and the other one on Sunday, so it was a weekend endeavor.

First up is a birthday shaker card.  I love shaker cards and this one has a birthday cake on the front.  I used the Arched Top Card Base and Party Shaker Tags from svgcuttingfiles.com to make this card.  The stamps are from Jaded Blossom — Birthday Treat Tags and Birthday Candies.  I also used one of the  Mini Tag 2 dies to cut the sentiment circle.  I heat embossed the sentiments.

The pattern paper is from SEI and I used Doodlebug Design sequins inside the shaker.  I outlined the candle flames with Stickles.

1

The next card I made for our dog, Fifi, to give to Steve for his birthday in a couple of weeks.  Steve doesn’t look at our blog, so I don’t have to worry about him seeing the card.

I used the Dog Bone Shaped Card and the Pomeranian Pup files for this card.  Fifi is a mix of Pomeranian/Chihuahua, but she looks like a Pom.

I used the computer to generate the sentiment and cut it out with one of the Flag Dies from Jaded Blossom.

3


I am entering both cards in svgcuttingfiles.com’s monthly challenge, which is a Birthday Card Challenge.  I’m also posting them to the Cricut Circle Message Board, where Sara is hosting a challenge for World Card Making Day.

  •  SVG Cutting Files – Arched Top Card Base, Party Shaker Tags, Dog Bone Shaped Card, and Pomeranian Pup
  • Jaded Blossom Stamps – Birthday Treat Tags, Birthday Candies, Mini Tags 2 die and Flag dies
  • SEI paper pad
  • Embossing powder
  • Doodlebug Designs sequins
  • Stickles
  • Baker’s Twine
Two Tickets to Paradise – NSD 2014 Challenge

I was finally able to finish my first project for NSD.  I started working on this layout on Saturday.  By the evening I was not feeling well — I had caught a cold/flu.  My head was so screwed up that I couldn’t focus on anything until Wednesday, when I was at last starting to feel human again.

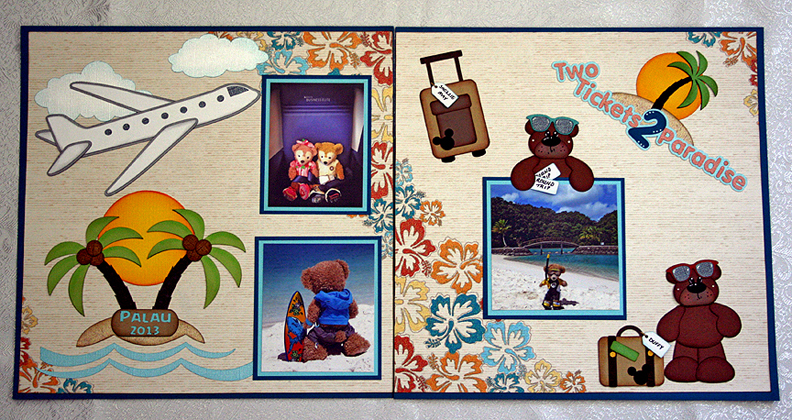
I made this for the Two Tickets to Paradise challenge, where you are to make a project that represents what paradise is to you.  I had these pictures that Erin took during her trip to Palau last year and I figured this has to be as close to paradise as anywhere.  Erin not only documents her own travels, but she always has some Disney Duffy bears with her and documents their travels as well.

I had not even heard of Palau until Erin mentioned that it was on her bucket list of places to visit.  It is in Micronesia and is famous for its diving.  As you can see from the pics, the bears obviously enjoyed their trip.

LOd

I think this is my first two-page layout — and it took me a while to figure out where I wanted everything to go.  The die cuts are all from Treasure Box Designs — the file is called Two Tickets to Paradise.

The background paper is from the Tahiti stack byDCWV.  Most of the solid cardstock is from Bazzill.

1b

I added some Mickey heads to the luggage and put Duffy’s and Shellie May’s names on the tags.  I also made sure the bears had round-trip tickets 🙂

2c


  • Treasure Box Designs svg cut file
  • DCWV Tahiti Stack
  • Bazzill cardstock

Pac-Man Card


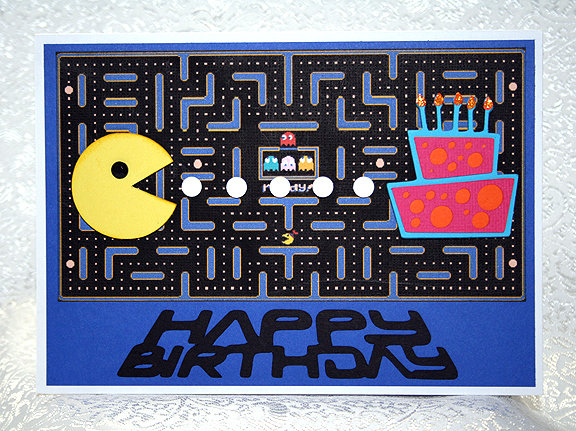
Erin asked me to make a birthday card for her to give to one of her friends and she requested something with an 80’s video arcade game on it, like Pac-Man.  I found a print card showing Pac-Man eating dots and heading towards a birthday cake.  So I did my version of that card using my Cricut.

I first printed a maze from the game that I found online.  I thought it would make a neat background for the card.  I designed Pac-Man in Cricut Craft Room, using the George & Basic Shapes cartridge.  I used a circle and laid a triangle over it (not using the weld feature) to make the mouth.  His eye is a black faceted stone from my stash — I think I got them at Joann’s.

Front5

The white dots are from an EK Success punch — I think it’s called Swiss Cheese. The birthday cake is from Life’s A Party and I added orange Stickles for the flames on the candles.  Pac-Man, the white dots, and the birthday cake are all popped up with foam dots.

Front

When I was laying out the card in Cricut Craft Room, I happened upon a really neat sentiment that I thought would be great with this card.  It is from a project cartridge called Space Party.  But wouldn’t you know it, it was one of the few cartridges that I didn’t have.  I looked at other fonts, but nothing grabbed me like the Space Party sentiment.

So I went on eBay, found a Space Party cartridge that wasn’t being bid too high and placed a bid.  I ended up getting it for less than $2.50 — can you believe that?  Still, I hope I use it for more than just the sentiment on this one card!

This was a pretty quick and easy card to make — and Erin was very happy with it.  I even made an envelope for it using my We R Memory Keepers Envelope Punch Board.

I am going to enter this card in the Cricut Circle Challenge, which is to use or try something new.  Since I have never used Space Party before, I figure that will satisfy the requirements.  And I used the Swiss Cheese punch, which I have owned for some time and have never used either.

  • Cricut cartridges used:  George & Basic Shapes, Life’s A Party, Space Party
  • EK Success Swiss Cheese punch
  • Stickles
  • Faceted stone from stash


Greetings From California Card


There is a challenge on the Cricut Circle Message Board to create a project using the new Circle cartridge, Charmed.  And the challenge has turned into a battle between the teddy bear image and the pig image. While the pig  is very cute, I had to do a teddy bear.

Since I am a native Californian, I decided to make a California bear.  We have a bear on our flag — a grizzly bear.  While we no longer have grizzly bears in California, I made this little brown bear greeting everyone from California.

Front


The background is printed from one of my clipart collections I got from PC Crafter.  It was a wonderful site that had lots of great clipart.  Unfortunately, it ceased operating a while ago and the website is no longer available.

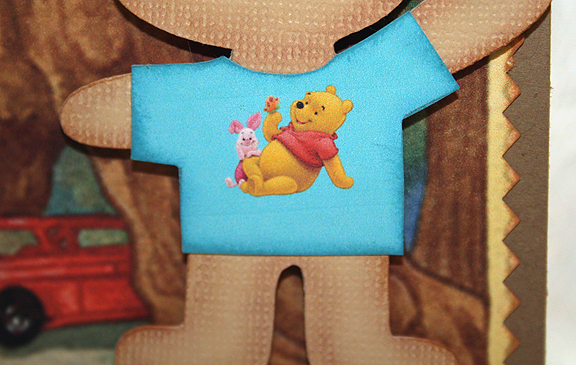
The bear is cut from the Charmed cartridge at 2.5″.  I inked and chalked him.  Then I decided to give him a t-shirt, featuring two of my favorite characters — who just happen to be a bear and a pig.  It’s Pooh & Piglet!  I hand cut the t-shirt and inked the edges.

Here is a close up of the graphic on the t-shirt.

ShirtCloseUp

This was a quick and easy card to do — and it was fun.  Now to go post it before the midnight deadline hits.

  • Cricut Charmed cartridge
  • Kraft cardstock for card base, scraps for bear
  • Ink and chalk

Bee Towing Banner Thank You Card


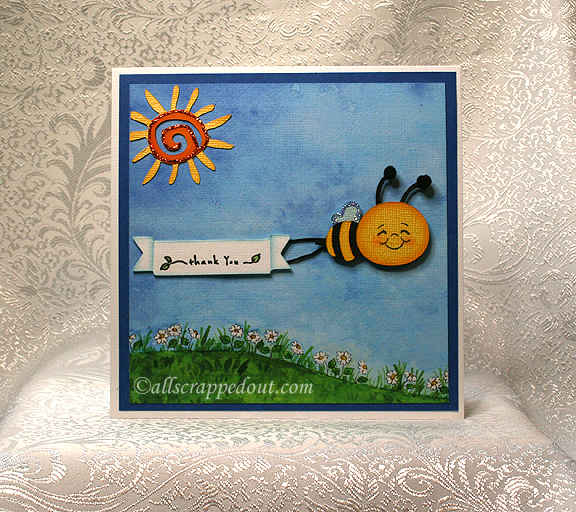
I made this whimsical card for the weekend challenge on the Cricut Circle Message Board.  The challenge is to make a project using a sun.

The card measures 6″ x 6″ and the background is printed from a graphic I purchased when I was a member of the PC Hug Club.   Unfortunately, that site no longer exists — I wish it did because they had some really cute clipart.

FrontSm

The sun is cut from Gypsy Wanderings at 2″ and embellished with some Stickles.   The bee is from Creative Critters 2 and it is cut at 1.75″.  I trimmed the hearts off the ends of the antennae and added pompoms.   I added some Stickles around the edge of the wing.  The bee’s face is a Peachy Keen stamp.   I inked and chalked the face.

The banner is cut from New Arrival (it is the banner with the plane) and it is cut at 1.5″.  I inked the banner and added a stamped sentiment from one of the many Studio G $1 stamps that are in my collection.   I used DMC Memory Thread for the banner’s tow ropes.

Front5

For the inside of the card, I used another graphic from my clipart collection.

Inside

  • Cricut cartridges:  Create a Critter 2, Gypsy Wanderings, New Arrival
  • Provo Craft clipart
  • American Craft cardstock
  • DMC Memory Thread
  • Stickles
  • Ink, chalk
  • Peachy Keen stamp
  • Studio G stamp
  • Pompoms

Cricut Circle Weekend Challenge Card


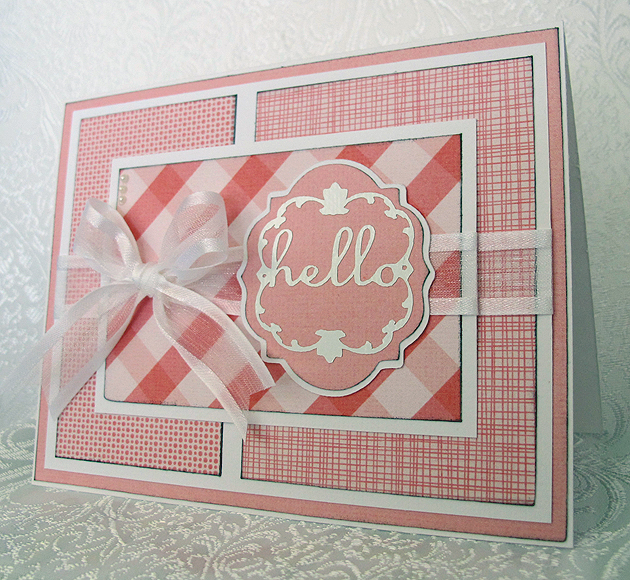
This is a quick card I did for a weekend challenge on the Cricut Circle message board.  Di challenged us to create a project using several tones of the same color.

I decided to go the easy route and went to my Imagine library for my papers, since it would have taken me hours to dig through my paper collection trying to decide what I wanted to use.  I used the Hey Diddle Diddle cartridge and printed out several different pink prints.

Front

The sentiment was cut from the Lacy Labels Lite cartridge at 2″.  The white letters at that size are very intricate, so I cut that layer from white vinyl.  I like using vinyl for intricate cuts because it is like making a sticker – I don’t have to apply any glue to the cut.  At that small a size, I would smear glue all over.  I do take a little stickiness off the transfer tape by sticking it a couple of times to a piece of cloth before applying it to the vinyl.  That way it doesn’t stick too tightly to my paper piece when I apply the vinyl.

Front4

I added some ribbon to two of the layers and then a bow to the top layer.  I also put three small pearls in the upper left corner.

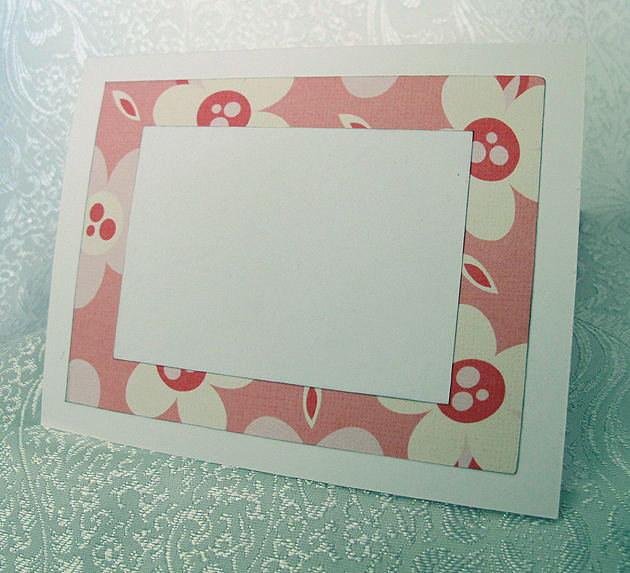
The inside is another piece of the pink print paper with a white piece on top for writing.

Inside

  • Cricut cartridges used:  Hey Diddle Diddle Imagine and Lacy Labels lite
  • American Craft cardstock
  • White vinyl
  • Pearls
  • Ribbon

Graphic 45 A Ladies’ Diary Birthday Card


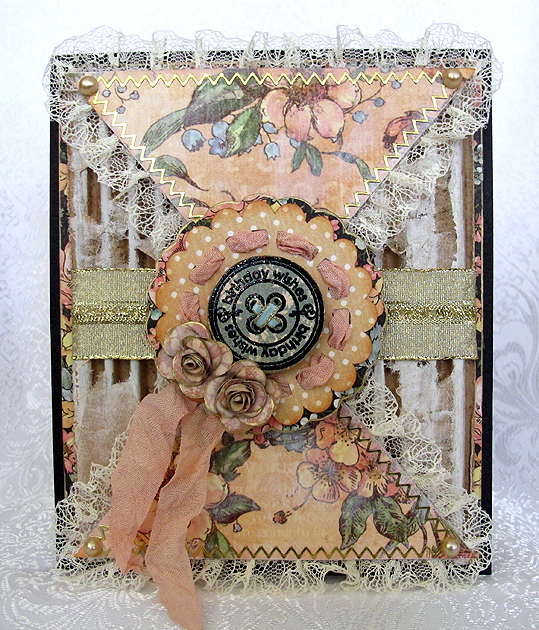
I wanted to make a special birthday card and only knew that I wanted to use some of my beautiful Graphic 45 paper (that I seem to be hoarding) to make it.  I went looking on the web for some inspiration and it didn’t take long for me to decide on my design.

I found a card sketch on Stuck On U Sketches that I liked and got out my paper.  All the printed paper is from A Ladies’ Diary collection.  The base of the card, the solid black cardstock, is from Bazzill.

Front6

The background is a piece of corrugated cardboard — I removed one of the layers so you can see the ribs.  Then I took some gesso and dry brushed it on.  I wrapped a piece of gold ribbon from my stash around the middle.

I cut the triangle pieces in Cricut Craft Room using George & Basic Shapes.  I dry brushed some gesso on the triangles and glued lace trim around the edges using Farbri-Tac glue.  The gold trim around the edges is stickers.  I attached pearls at the corners.

Front5

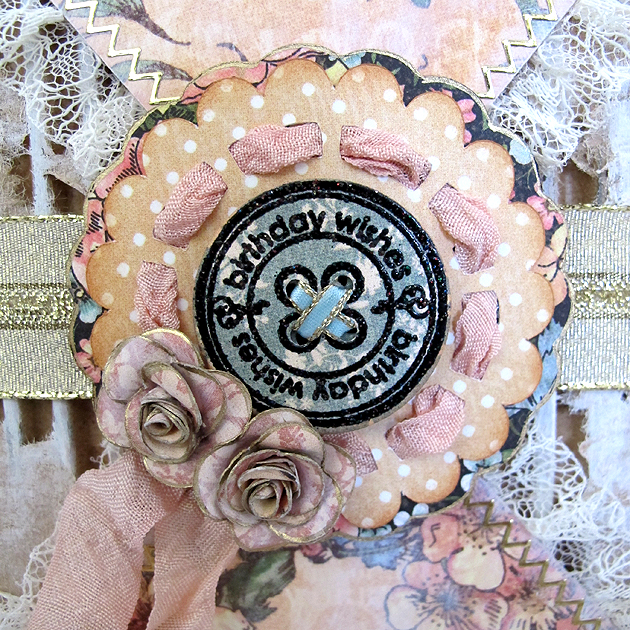
The scallop circle is from Cricut Alphabet, <Doily12>, and it is cut at 2.5″.  I used a Krylon 18kt. Gold Leafing pen to go around the edges of the shadow scallop.  I dyed some seam binding using Tattered Angels Glimmer Mist and threaded it through the holes in the doily, leaving the tails to hang down.

ScallopCircle

The birthday button in the center of the scallop is a new stamp and die set that I just got from Whimsy Stamps.  I heat embossed the sentiment using Stampendous Stardust embossing powder.

Button

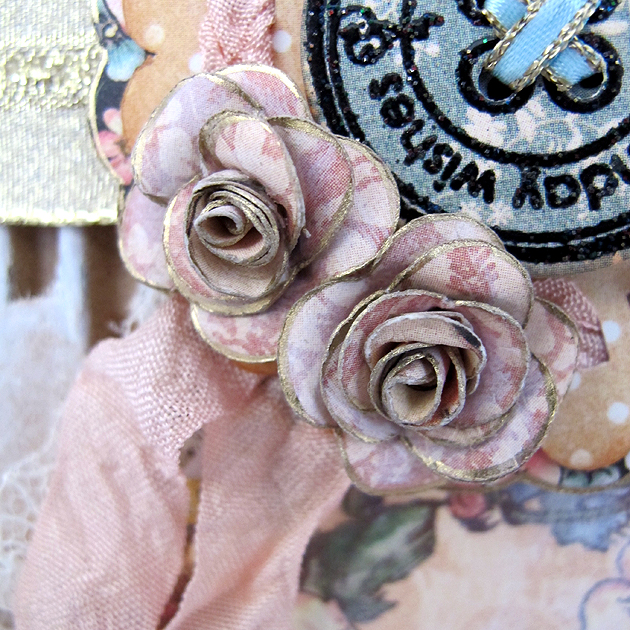
The two small roses were made following this tutorial, from Scraps of Life’s blog.  I used a flower shape from Paisley, Layer1 + <Shoes1>, cut at 4.5″.  I dry brushed the layers with gesso and used the gold leafing pen on the edges of the petals before I assembled the flowers.    I love how tiny they are — they are under 1″ across.

Roses

The scallop layer and the button are attached to the card using foam pop dots.

On the inside of the card, I edged the black floral layer with the gold leafing pen.  I still have to do my sentiment layer.  I think I will write it first before attaching it.  If I make a mistake, then I can just redo it rather than having my blunder permanently attached to the card.

Inside

  • Graphic 45 A Ladies’ Diary collection
  • Bazzill cardstock
  • Cricut Craft Room
  • Cricut cartridges:  Cricut Alphabet, George & Basic Shapes, Paisley
  • piece of corrugated cardboard
  • ribbon from my stash
  • seam binding
  • Tattered Angels Glimmer Mist
  • Stampendous Stardust embossing powder
  • gold border stickers
  • self-adhesive pearls
  • Gesso
  • Krylon 18kt Gold Leafing Pen
  • Whimsy Stamps — Everyday Button Sentiments and Button Die
  • Fabri-Tac adhesive


Welcome Spring — Cricut Campin’ Critters

This little card is for the Spring is in the Air weekly challenge at Bitten by the Bug 2.   The seasons may be more subtle here in California than in other states, but I always look forward to spring.  I love seeing all the birds and listening as they fill the air with chirping.  Right now we have mockingbirds building nests in the trees outside our kitchen door.   And yesterday I watched a hummingbird in our orange tree as I sat at the dining table.

My card is whimsical — a little fox doing some bird watching on a beautiful spring day.  I printed the papers using my Imagine and the Nursery Tails cartridge.  I love that you can print to fit whatever you are making, as in the background.  I printed this at 5″.

Front2

I made the  “welcome spring” sentiment for the card using Photoshop.  I took the text and put it on an arc.  I printed it out on a piece of plain paper and put the background piece over top.  I held both up to a light so I could see where the sentiment was going to be and when I got it where I wanted it, I held it in place with a few pieces of the blue painter’s tape.  I just lightly pressed the tape down — I didn’t want it sticking too much and removing any of the color.  Then I ran both pieces through the printer.

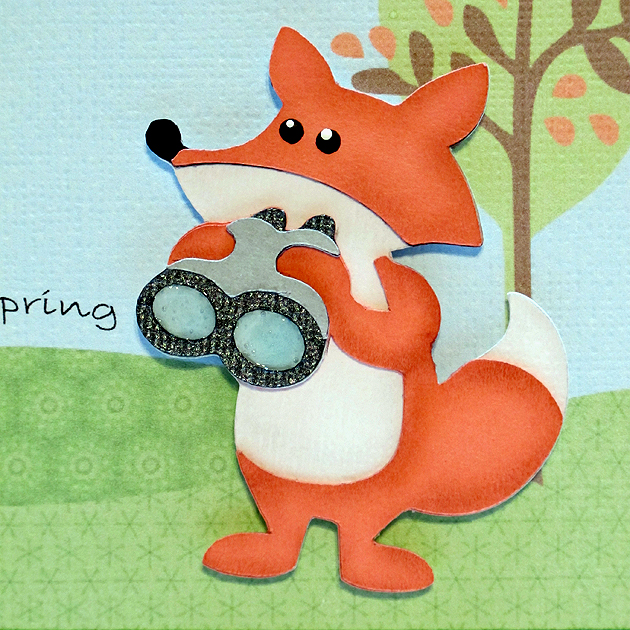
The fox is from Campin’ Critters and cut at 2.5″.  I used chalk to give his body some definition and used pop-dots to attach him to the front.  I added Glossy Accents to the lenses in his binoculars.

Fox2

I cut an extra bird and layered it on the front.  For the inside I added another bird and a frog, also from Nursery Tails.

Inside

I hope you enjoy my spring card.

  • Cricut cartridges – Campin’ Critters, Imagine Nursery Tails
  • White cardstock – American Crafts
  • Chalk
  • Ranger Glossy Accents

Spooky Halloween Pumpkin Card


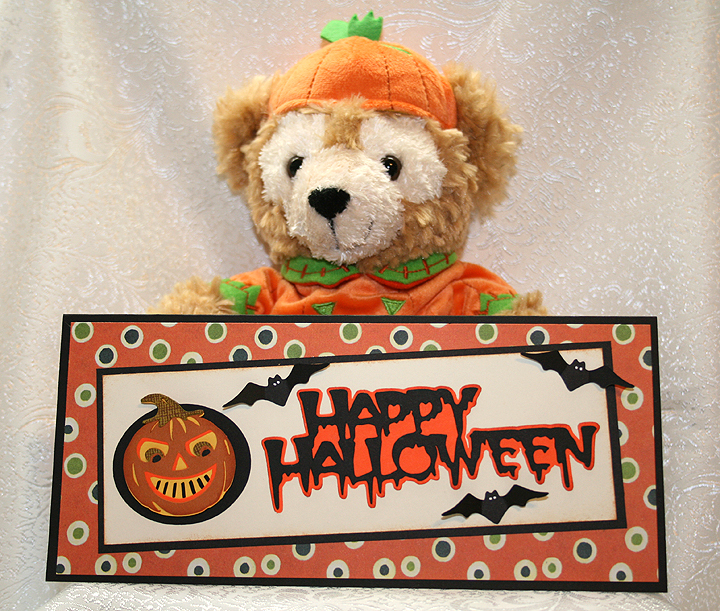
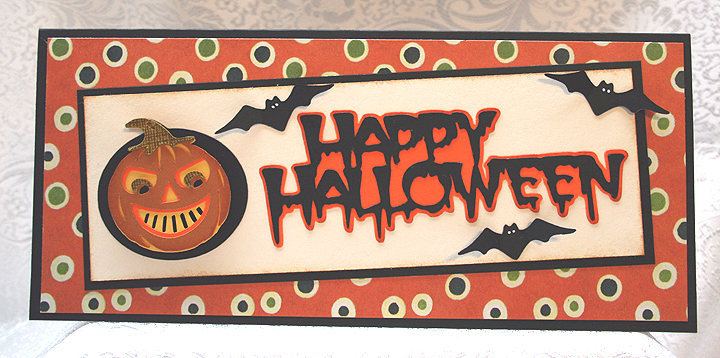
This is a Halloween card I made for a couple of challenges.  The first one is Cooking With Cricut, and their challenge is to make a project using a pumpkin and circles or dots.  The second one is Fantabulous Cricut Challenge Blog, and their challenge is to make a Halloween project using the colors black and orange.

My card fits in a #10 business envelope — it’s approximately 9″ x 4″. The pattern paper is from a DCWV stack from a year or so ago.  I laid the design out in Cricut Craft Room and used my Expression to cut everything.

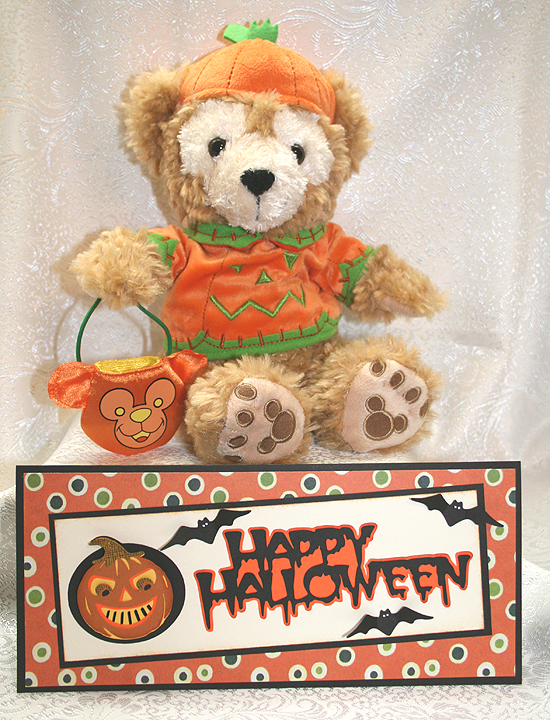
I used the Happy Hauntings cartridge for the sentiment and cut it at 1.75″.   The pumpkin is from Autumn Celebrations, cut at 2″.  The bats are from Holiday Cakes and were cut on shadow feature at 1″.  I bent their wings up and glued down just the bodies.

And here is the inside of the card.

The little bear posing with my card is my newest Disney Duffy Bear, the Halloween 2012 bear.  He is so cute with his little treat bag that is shaped like a Duffy bear.

  • Cricut Craft Room
  • Cricut cartridges:  Autumn Celebrations, Happy Hauntings, Holiday Cakes
  • DCWV holiday stack

Happy Thanksgiving Pumpkin Card


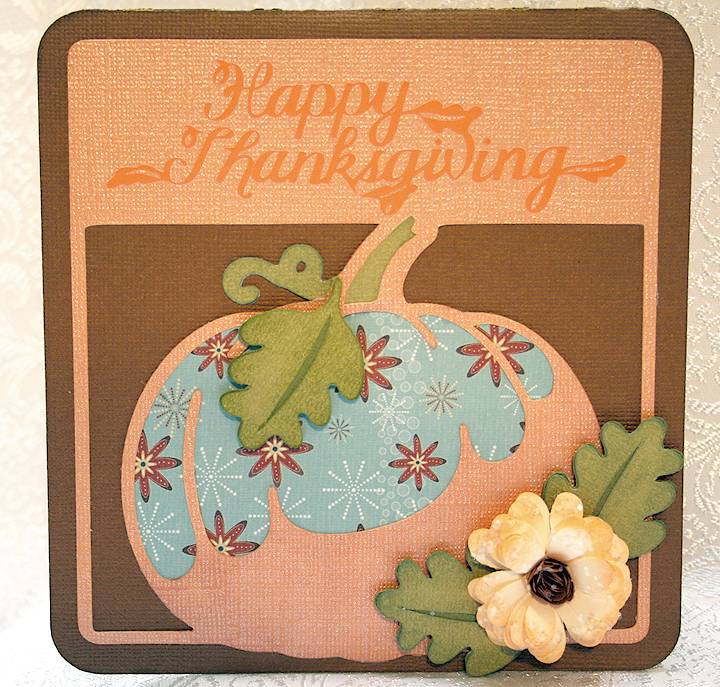
I made this card for the latest challenge at Cooking With Cricut.  The challenge was to make a Thanksgiving card for the I Feel the Love Project (IFTL).  Each month they select a different person, organization or group to receive handmade projects.  This month the cards are going to Surrey Place Care Center, a 60-bed skilled nursing facility.

I am getting my card in just under the wire.  In fact, I had better go link my card before time runs out.  Well, I got my card linked to Cooking With Cricut’s page, but for some reason the photo is not showing up.

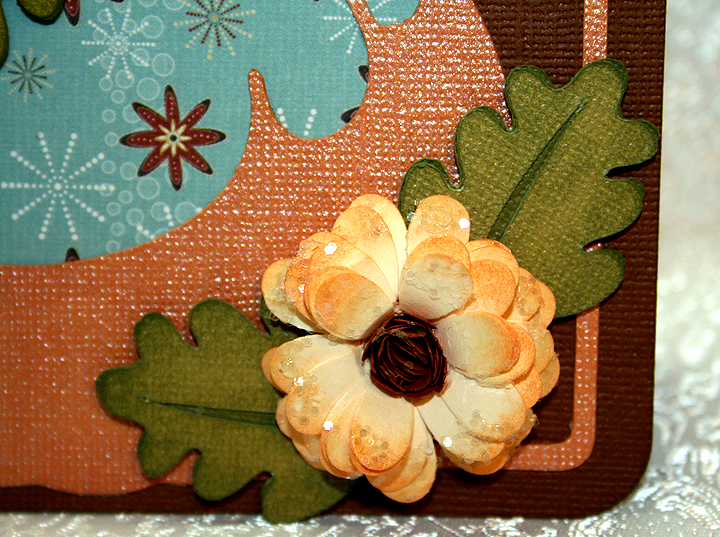
I made my card in Cricut Craft Room.  I used the pumpkin card feature on Autumn Celebrations, cutting it at 5.75″. The solid color cardstock is from Core’dinations.  The patterned papers are from a paper pad I picked up at Joann’s called Cocoa Mint by Cloud 9 Design.

The leaves are cut at 3″ using two shades of green.  The sentiment is from the Thanksgiving cartridge and is cut at 1.35″.  I used orange vinyl for the sentiment .  I like using vinyl for smaller, more intricate cuts because it cuts so well and you don’t have to put adhesive on it.

The flower was made using my Cuttlebug and the Daisy quilling kit.  It is my first flower made using this kit and I am happy with the result.  I inked the edges of the petals before rolling them up.  I used some Glossy Accents and Martha Stewart crystal glitter on the flower petals.  I attached the leaves to the card using pop dots.

 The inside of the card is simple, mainly because I ran out of time.

Here is another picture where I was able to lighten it up and kill some of the glare so you can see the sentiment better.  I didn’t realize the first pic was so dark.

  • Cricut Craft Room
  • Cricut cartridges:  Autumn Celebrations, Thanksgiving
  • Cuttlebug Daisy quilling kit
  • Core’dinations cardstock
  • Orange vinyl
  • Glitter – crystal