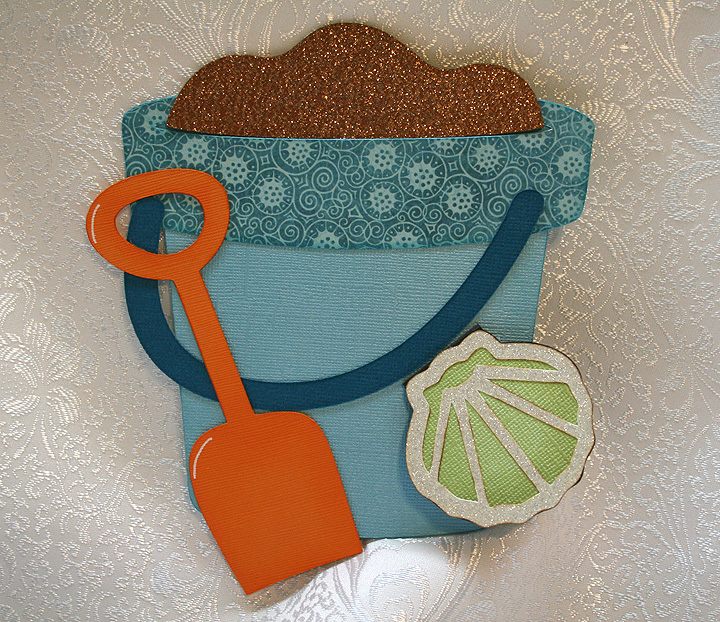
Cricut Circle National Scrapbook Day Crop Color Challenge: Beach Pail Gift Card Holder


To celebrate National Scrapbooking Day ( May 5), the Cricut Circle blog hosted a two-day online event.  There were challenges, tutorials, games, question-and-answers sessions — all kinds of fun.   Unfortunately I was not able to “attend” much of the live portion, but I did manage to make a project for one of the challenges.

When the Circle blog event was posted, I had just finished making eight beach pail gift card holders for a Kelly doll convention (Kelly is Barbie’s younger sister).  So I decided to make another one for the Color Challenge.  The challenge was to create a project using the color inspiration that they provided, which is shown below.  You had to use at least two Cricut image cuts on your project.

This is the picture the Circle blog provided for the color inspiration:

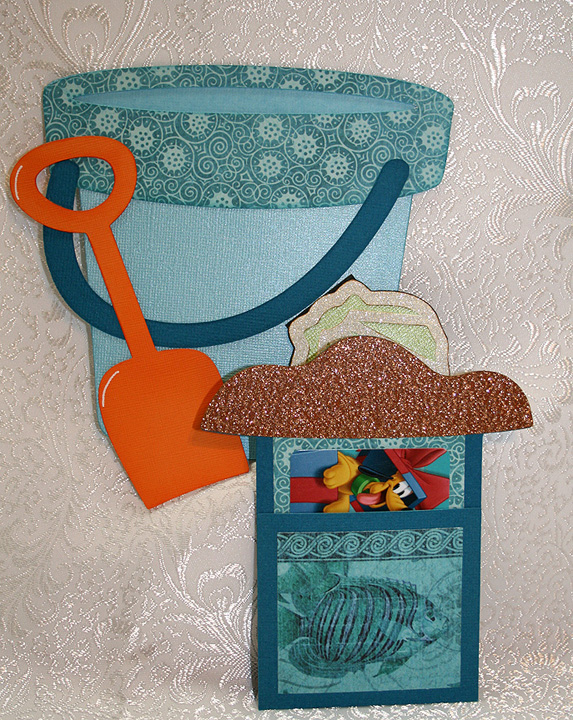
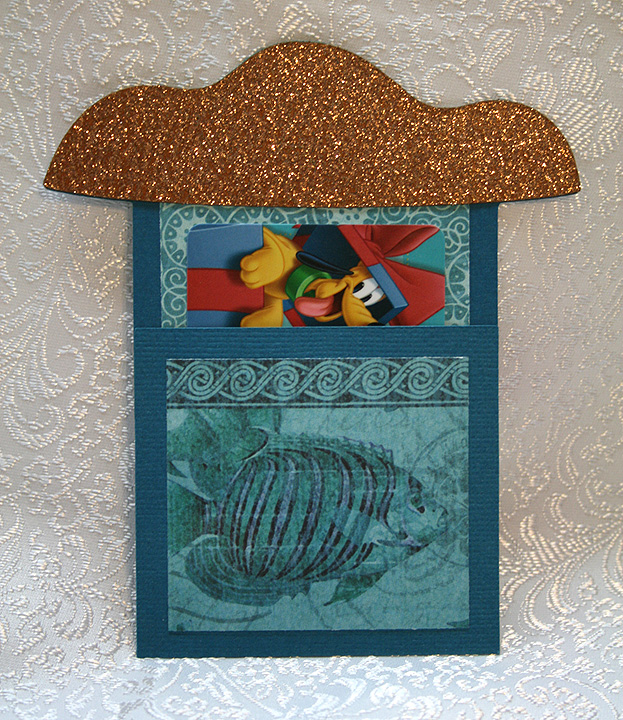
I made this card so that the sand section pulls out of the pail, similar to the flower pot cards where the flowers pull out.  I laid out the entire design in Design Studio.  I used Life is a Beach cartridge for the pail and shovel.  I glued around the outside edges only, leaving the oval section at the top open so the pocket holding the gift card would slide in.  I welded a rectangle from George & Basic Shapes to the sand to form the holder.

All the solid cardstock is from Bazzill and the printed pattern paper is from Graphic 45’s Tropical Travelogue collection — such beautiful paper!  I made the trim on the rim of the bucket using the patterned paper and cut the handle from a darker shade of cardstock.  The sand is cut from some glittered cardstock I bought at my local Joann’s.

Here is a picture showing the sand pulled out of the pail — holding the gift card.

And another picture, showing  a close up of the gift card holder.

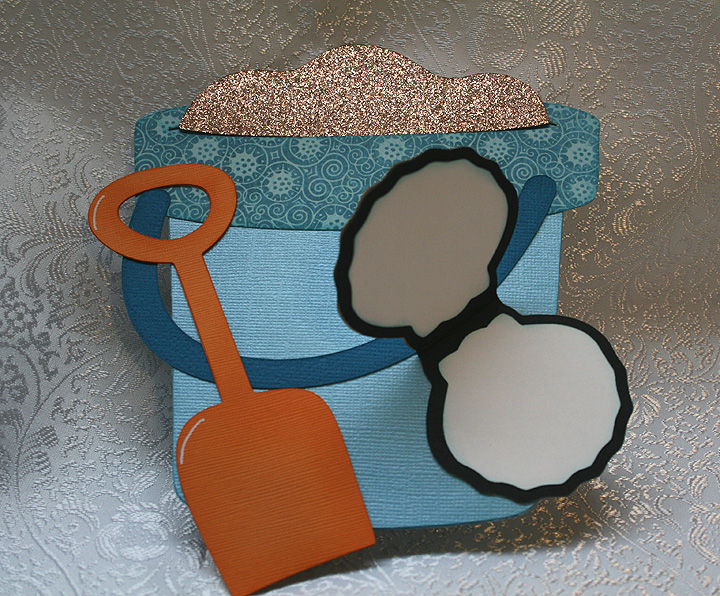
I decided to add a small tag to the card, so there would be a place for some writing.  I welded two shell shapes from Picturesque together to form the tag.  The top detail piece on the shell is cut from a piece of off-white glitter cardstock.  The shell flips open and there is a space on the top and bottom for some writing.

  • Cricut Cartridges:  Life is a Beach, Picturesque, George & Basic Shapes
  • Graphic 45 Tropical Travelogue paper
  • Bazzill solid color cardstock
  • Glitter cardstock


1st Banner for Cricut Expression 2 Design Challenge


On Monday, September 26 at 12:01 a.m. EST, Provo Craft is going to launch their newest machine — the Cricut Expression 2 on HSN.  They posted a challenge to design and make a banner and they are going to give away five new Expression 2’s to some very lucky winners.  You were able to make two banners to enter, so this is the first banner I made.

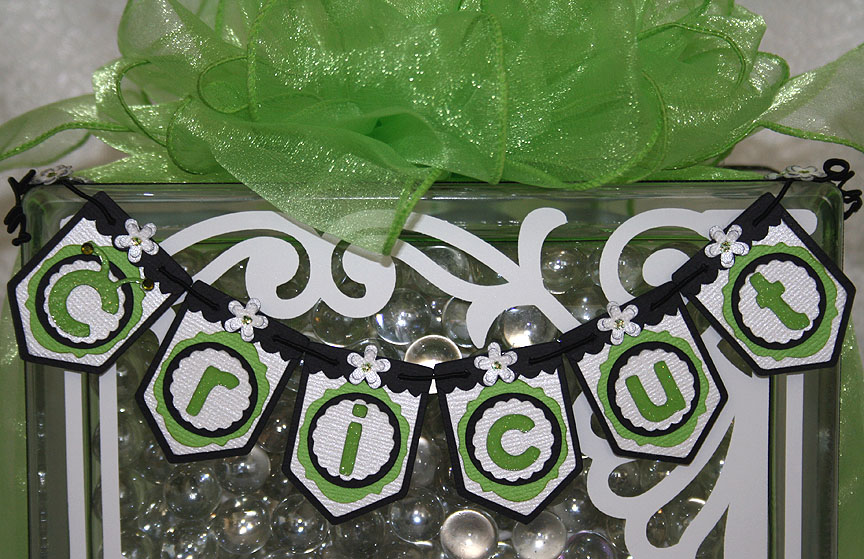
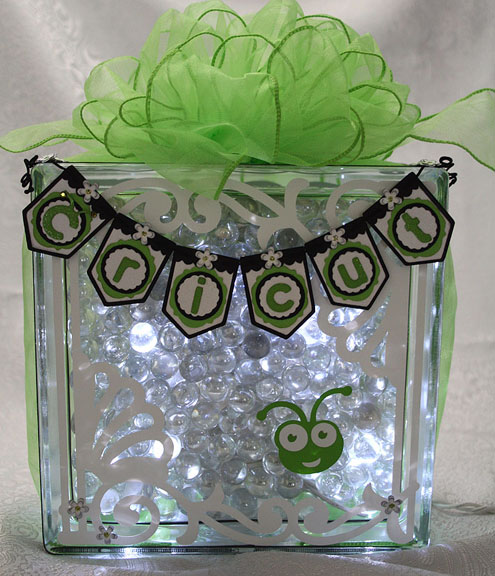
I knew the competition was going to be tough because there are so many talented Cricut users, so I tried to think a little “outside the box.”  For some reason, hanging a mini banner on a glass block was my first idea.   I originally planned on using etching cream to frost the glass, but because I was using a small string of LED lights I ended up putting glass marbles inside to help hold the lights in place.

The banner is made using Bazzill and Core’dinations cardstock.  I used the Birthday Bash cartridge for my banner base.  The green frame was cut from Lacy Labels, the scalloped circles from Mini Monograms, the regular circles from George and Basic Shapes, and the black valances were cut from Straight from the Nest.  The Cricut lettering is from Cricut Everyday and I cut it out of a glitter cardstock from DCWV.  I used two Swarovski crystals on the antennae.  I added some small flowers punched from a Martha Stewart Punch Around the Page combo called Flower Shower and used lime green Stickles for the centers.
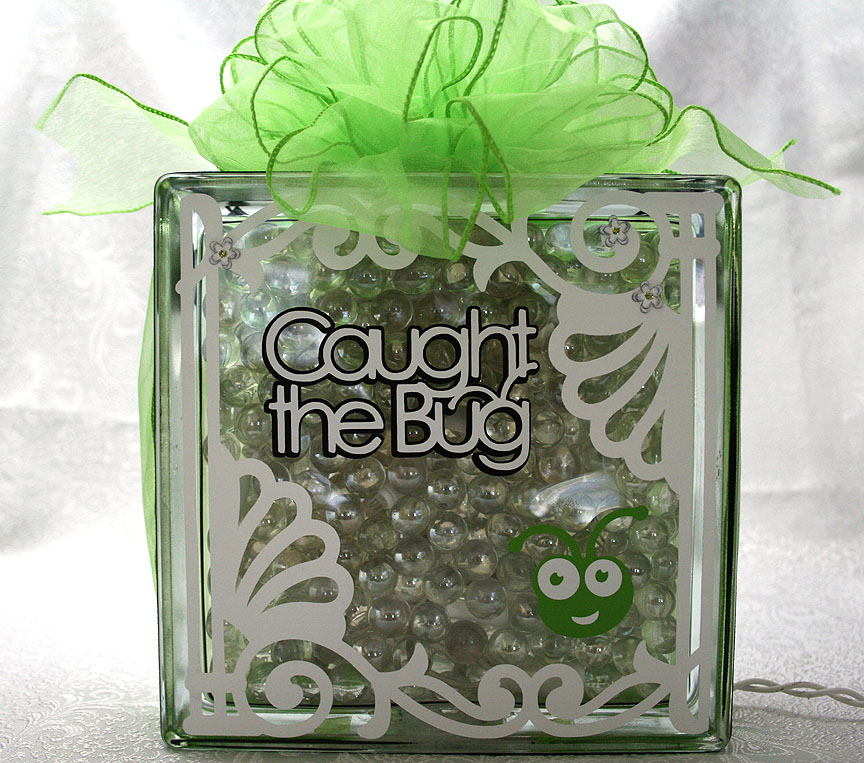
The pieces on the glass were cut from vinyl — the white fancy scroll frame is from Ornamental Iron 2 and the Bug head is from Cricut Everyday.  I was impressed with how well the Cricut cut the vinyl.  Here is a picture of the block all lit up.

FrontLit4

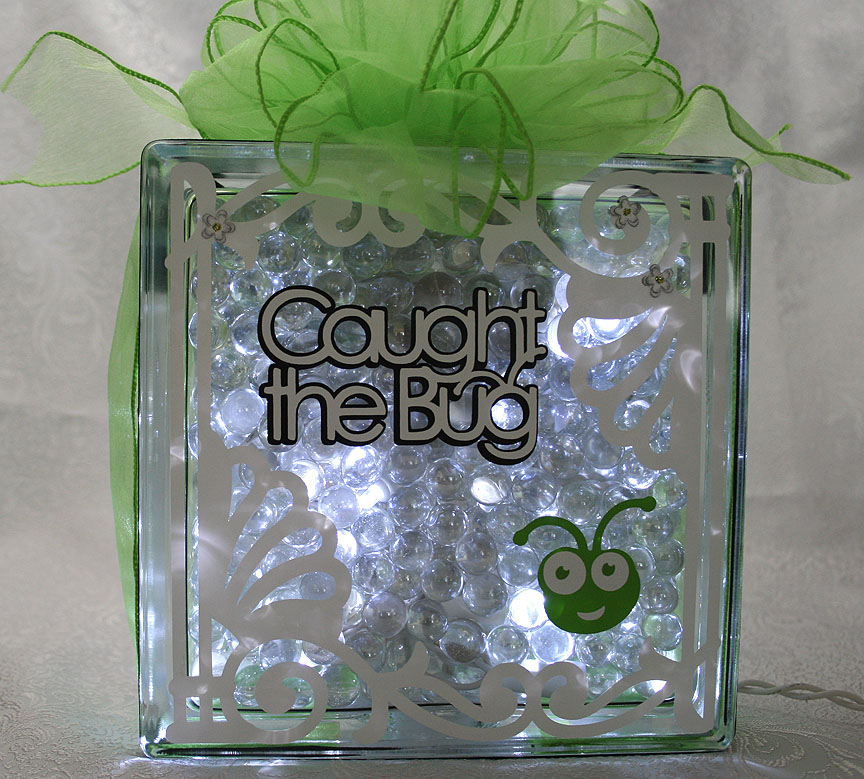
I decided to decorate the back of the block too and I used the same frame that I put on the front, cut from Ornamental Iron 2.  I recently bought this cartridge and I am lovin’ it!  It has some beautiful designs on it and I think they look great cut out of vinyl.

The phrase and Bug head on the back are both cut from Cricut Everyday.  And here is a picture of the back of the block with the lights on.

To hang the banner on the glass block, I glued some black & white dotted ribbon around the edges using Terrifically Tacky Tape.  I strung the banner together using DMC’s Memory Thread.  I sewed and glued the ends of the Memory Thread on the banner.  To cover up my stitches, I punched some more flowers and glued them on top.  I also scattered a few flowers on the front and back of the block.  I tied some wide Cricut green organza ribbon around the entire block and made a big bow using my Bowdabra.

The last picture is of the side of the block.

  • Cricut cartridges used:  Birthday Bash, Cricut Everyday, George and Basic Shapes, Lacy Labels, Mini Monograms, Ornamental Iron 2 and Straight from the Nest
  • Cardstock:  Bazzill, Core’dinations, DCWV
  • Cricut vinyl
  • DMC Memory Thread
  • Terrifically Tacky Tape
  • Martha Stewart Flower Shower punch
  • Lime green Stickles
  • Swarovski crystals

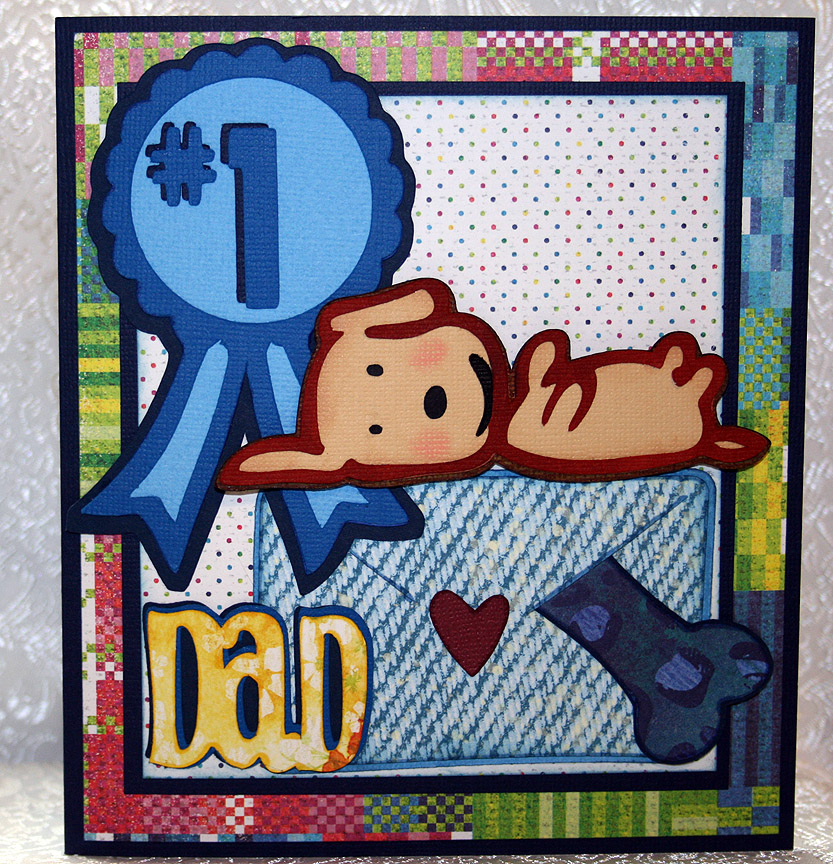
Father’s Day Card From The Smoochy Poochy


I decided to make my dear hubby a Father’s Day card from our dog.  Her name is Fifi and she is a rescue dog — part Pomeranian and part Chihuahua.  She is such a daddy’s girl that I figured he would enjoy it.

I call her our Smoochy Poochy because she loves to give kisses.  She also loves toys — her favorites are the fake fur bones with squeakers inside.  She has an assortment of them in all different types of prints — from giraffe to leopard prints. 

I made this card to enter into two challenges.  The weekly challenge at the Cricut Circle Blog is a sketch challenge, so I followed that for the layout of my card. 

The latest challenge at Cooking With Cricut is a Father’s Day related project that includes a Cricut cut.  I used several Cricut cuts on this card.

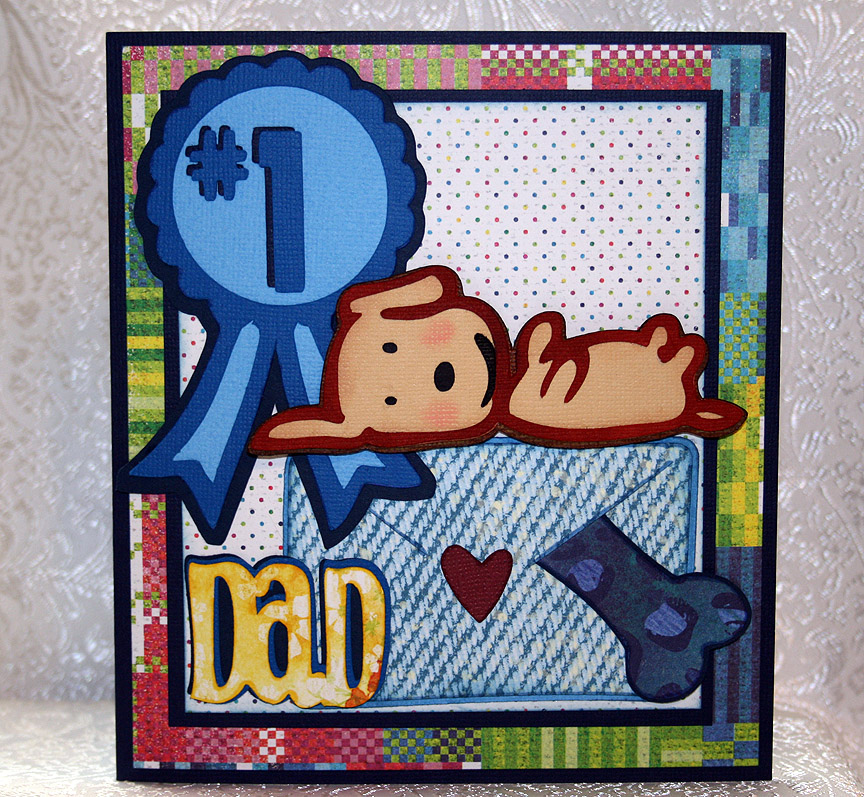
I couldn’t find a dog that looked like Fifi, so I opted for this cutie on the Paper Pups cartridge.  I chose this one because the dog is on its back and Fifi has a tendency to go “belly up” while she is sleeping.  The dog is lying on an envelope that she has so thoughtfully placed one of her squeaky bones inside for Dad.  The ribbon and bones are from Paper Pups also.

I used Doodlecharms for the envelope, Beyond Birthdays for “Dad” and Sans Serif for “#1”. 

The solid cardstock is Bazzill and the printed paper is all from Basic Grey — their Lauderdale collection.

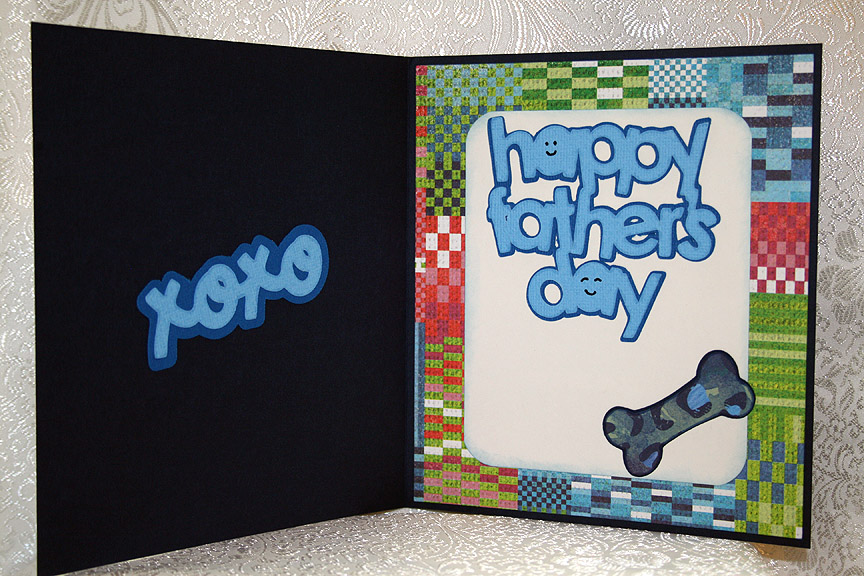
For the inside of the card, I used Paisley for the “xoxo” and Simply Charmed for the “Happy Father’s Day” sentiment.  I added another bone inside.

  • Cricut cartridges used:  Beyond Birthdays, Doodlecharms, Paisley, Paper Pups, Sans Serif, Simply Charmed
  • Bazzill cardstock
  • Basic Grey — Lauderdale collection

Ice Cream Shop Card for Cricut Circle Weekly Challenge


Weekly Challenge #33 over at the Cricut Circle Blog is called the Sweet Summertime Challenge.  You have to incorporate the shape of your favorite summertime treat and use a stamp somewhere on your project.

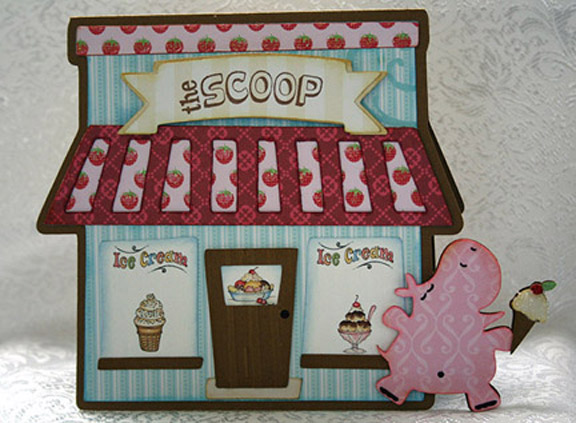
My summertime treat is easy — it’s the same treat I love all year long — ice cream!!  That being said, I knew right away what my card was going to have on it.  But I decided that I would not only include an ice cream cone but also the ice cream shop.

The lastest exclusive cartridge for Cricut Circle members is Pop-Up Neighborhood.  I was looking through the handbook and really liked some of the buildings.  While I didn’t use the pop-up feature on this card, I did take the bakery and turned it into an ice cream shop.

In Design Studio, I laid out two of the bakery shadow shapes and welded them together at the top.   I remembered the cute little hippo from Birthday Bash, who is blissfully running with her ice cream cone, and knew I wanted her on my card too.  So I laid out the hippo shape onto my base and welded that also.

I cut the shapes from the Sweet Stack by Die Cuts With A View.  The solid color cardstock is from Bazzill.  I used just the two cartridges — Birthday Bash and Pop-Up Neighborhood.   Oops, I just remembered a third cartridge that I used — the Lite cartridge Twinkle Toes.  I cut the banner for the shop name from it.
For the windows on my ice cream shop, I used graphics from Provo Craft — from their pccrafter.com site.  I thought they were perfect with my design.  I used a stamp to do the name of the shop.  I found a clear stamp in a set that I bought from K & Company that said “The Scoop” and when I saw it I knew that would be the name.

I used the Cuttlebug on the front door, the Distressed Stripes folder, and also on the ice cream cone, the Mesh Texture folder.  I needed something with a small pattern because the ice cream cone on the front of the card is quite small and this folder was great.  It gives the look of a waffle cone.  I used coarse glitter on the ice cream itself and red Stickles for the cherry on top.

Front3

This is a happy and fun creation and when I look at my card I can’t help but think of a book Erin had as a child.  It was called Yummers! and featured Miss Emily (a pig) and Eugene (a turtle).  When I look at the pink hippo, she just looks like she is running along thinking, yummers!!

The patterned paper on the inside of the card is from daisyd’s.  I made another ice cream cone, this time a little larger, to adhere to a corner.

  • Cricut Design Studio
  • Cricut cartridges:  Birthday Bash, Pop-Up Neighborhood, Twinkle Toes
  • Cuttlebug folders:  Distressed Stripes and Mesh Texture
  • DCWV — Sweet Stack
  • Bazzill solid cardstock
  • Coarse glitter
  • Red Stickles

Jitterbuggin’ Challenge – Spring Butterfly Card

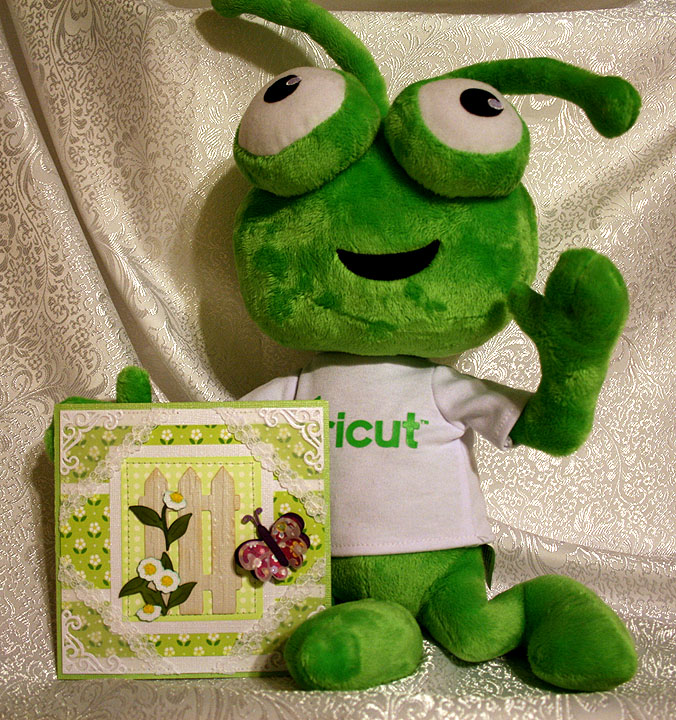
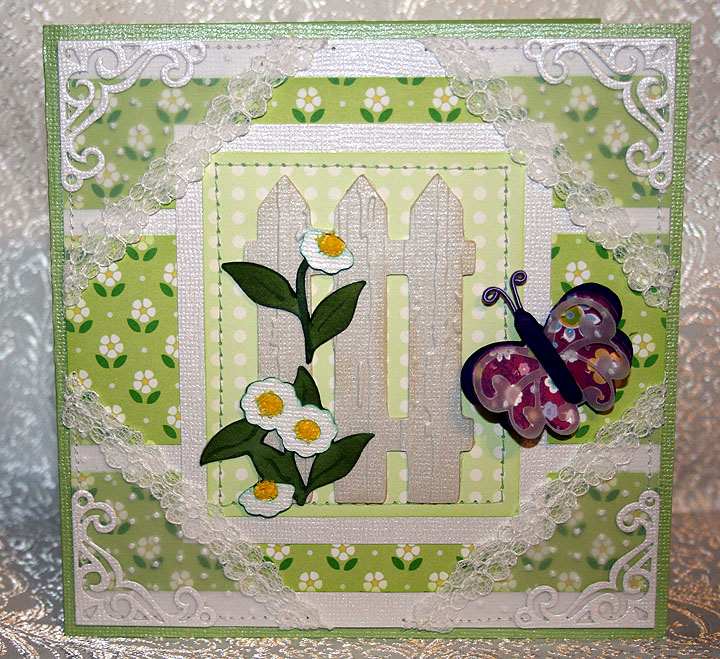
This week’s challenge over at Jitterbuggin’ is to follow the sketch, use green on your card and, of course, use your Cricut.  When I was planning this card in my head, it was going to be lavender.  But when I started picking out my paper, it suddenly became mostly green.  I wanted a card that looked like spring and when I saw this paper, I knew I wanted to go with daisies. 

I have sewn most of my life, and when Erin was young I made most of her clothes.  I loved making frilly dresses for her for Easter and dotted swiss was a favorite fabric.  The corners on my card are my papercrafting version of dotted swiss and lace. 

The daisy and dot print papers are from a pack by Martha Stewart that I got on clearance at Michaels some time ago.  The solid cardstock is Bazzill.  The corners are made from vellum and I ran them through my Cuttlebug using the Swiss Dots embossing folder.  I stitched some lace on the edge of the corners and then stitched the corners to the card.  I used my Cuttlebug again to cut some  fancy small corners out of white Bazzill that I glued in the uppermost part of the vellum corners.  The die I used for this is from a 4-pack called Vintage.
I used my Cricut and cut the fence and daisies from the Bloom Lite cartridge.  I cut everything out twice so I could layer them.  I ran the fence section through the Cuttlebug using the Distress Stripes folder so it would look like wood.  I inked the edges of all the cuts and used yellow Flower Soft in the center of the daisies.  The butterfly is from Graphically Speaking and I cut three layers, the top layer being vellum.  I used DMC Memory Thread for the antennae.  This was my first time using it and I love how easy it is to work with.  I pop-dotted the butterfly to the front of the card.

Close-up of front

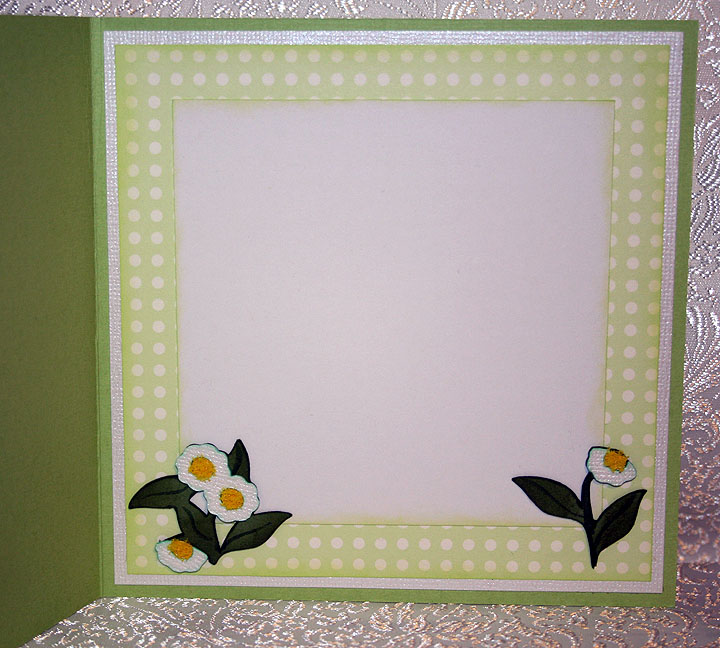
When I cut the flowers for the front of the card, I cut extras so I could use them inside. 

I found another challenge that my card qualifies for, so I am very excited.  It is always nice when you can bundle challenges together.  This newest challenge is at the Crafty Creations Challenge Blog and is called In Stitches.  Your project has to include some stitching. 

  • Bazzill cardstock
  • Martha Stewart paper
  • Vellum
  • Cricut Design Studio
  • Cricut cartridges:  Bloom Lite and Graphically Speaking
  • Cuttlebug embossing folders:  Distressed Stripes and Swiss Dots
  • Cuttlebug Vintage die
  • Flower Soft
  • DMC Memory Thread

Sunny Snail is Thinking of You!!


Erin is back in Taiwan after a lengthy visit here in the US.  I had lots of fun while she was staying with us.  We attended CHA every day and even managed to get in a scrapbook expo in Anaheim right before she left.  Once she got home to Taipei and settled in, she wanted to do a challenge together.  So we have been busily working,and thanks to Skype, we were able to scrap together.

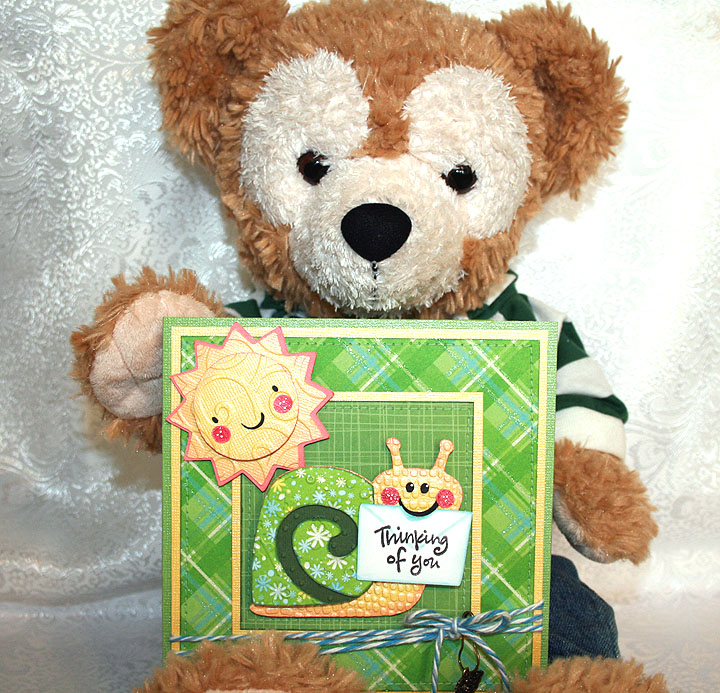
A member of the Cricut Circle recently had surgery and I wanted to send her a card to wish her a speedy recovery and let her know I am thinking of her.  I thought doing a challenge would be a perfect way to accomplish this.  And here is a little Duffy “spokesbear” model to present my card:

The base of the card is green Bazzill bling cardstock.  The glittery print cardstock is from two different DCWV paper stacks, Blossoms & Butterflies and The Glitter Stack.  I used a yellow bling cardstock from Bazzill for the contrast, sun and snail body. 

I laid out my card in Design Studio and I cut the sun, snail and flowers with my Cricut.  I used Create a Critter for the sun, Birthday Bash for the snail and the Bloom Lite cartridge for the flowers.  I used my Cuttlebug to emboss the sun and the snail.  I embossed the snail with four different embossing folders, Swiss Dots, D’Vine Swirl, Plum Blossom and Mesh Texture.  I inked the edges of all the pieces to give them some depth.  I used Stickles on the center of the flowers and an atyou Spica glitter pen for the cheeks on both the sun and snail.  The sentiment on the envelope the snail has in his mouth is from a $1 clear stamp I purchased at Michaels.  I used lots of pop-dots on the sun and snail, popping up layers and also the completed pieces. 

I am loving all the baker’s twine that is so popular right now, but  I have not purchased any yet.  When I was in Michaels a couple of weeks ago, I found some Lily Sugar ‘n Cream Twists string/thread in the yarn department that reminded me of the twine.  It was on sale so I bought a few different colors to see how it would work.  I wrapped some of the blue around the bottom of this card and I think it looks pretty good.  I attached a charm to the twine with a little hanger that is from Making Memories.  I think they are called garment pins. 

For the inside of the card I added a couple of flowers that I cut out twice so I could layer them together for some dimension.  I used Stickles for the bling on the center of the flowers.

This was a fun card to create and I am happy to say that my card qualifies for the following challenges:

Fantabulous Cricut Challenge Blog – Challenge #51 “Hip to be Square” -green & gold

Cooking With Cricut – It’s A GREEN  SCENE!

The Cuttlebug Spot –  All Tied Up: twine challenge

The Cuttlebug Spot –  Oh so Charming

  • Bazzill bling cardstock
  • Die Cuts With a View paper stacks
  • Cricut cartridges:  Birthday Bash, Bloom (Lite), Create a Critter
  • Cricut Design Studio
  • Cuttlebug Embossing Folders:  D’Vine Swirl, Plum Blossom, Swiss Dots
  • Twine:  Lily Sugar ‘n Cream Twists
  • Making Memories garment pins
  • Charm from my stash
  • Stickles
  • atyou Spica glitter pen

Snow Bird


Here’s another card that I made for several challenges and I had a lot of fun making it.  Unfortunately it will be my last card for a while.  The next couple of weeks are going to be filled with embroidery and trade shows.  CHA is coming up at the end of the month and Erin is flying home from Taiwan to attend with me. 

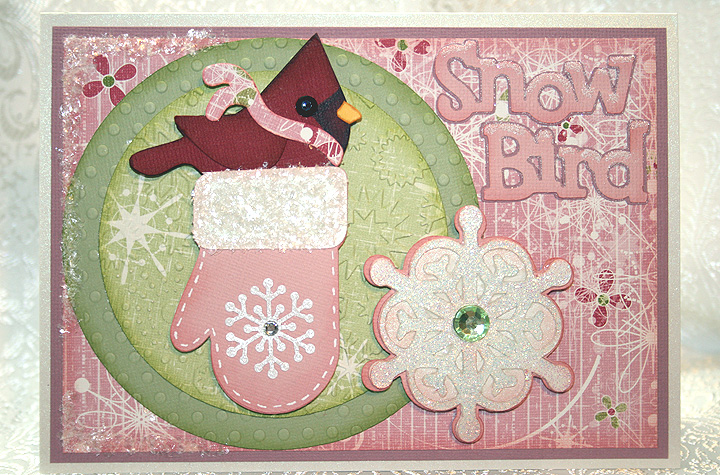
There’s lots of sparkle on this card as the little snow bird makes his winter home in a warm mitten.  The solid cardstock is from Bazzill and the patterned paper is called Snowflake Waltz and is from Daisy Bucket Designs.

I wanted to do a cardinal for my bird, but I wanted a chubby little guy and I couldn’t find one on any of my Cricut cartridges.  I found a cute bird on Straight from the Nest and decided to use him.  As I was laying out the card in Design Studio, I kept trying to figure out how to make the bird into a cardinal shape.  My solution was to use a lower case “v” from the Mickey Font cartridge.  I turned it upside down and welded it to the top of the bird’s head.  I used Copic markers to color the dark spot on his face.  I’m pleased with how he came out.

The circles are cut from the George and Basic Shapes cartridge and I used my Cuttlebug to emboss both of them.  The mitten is from Simply Charmed, the large snowflake is from Joys of the Season, “Snow Bird” is from Straight from the Nest, and the bird’s scarf is from 3 Birds on Parade. 

I added lots of bling to this card.  I heat embossed the large snowflake on the front using holographic embossing powder.  I put some fine snow on the sentiment using Martha Stewart glitter.  The coarser snow is also from Martha Stewart.  The small snowflake on the mitten is a Martha Stewart punch.  I added rhinestones to the centers of the snowflakes.

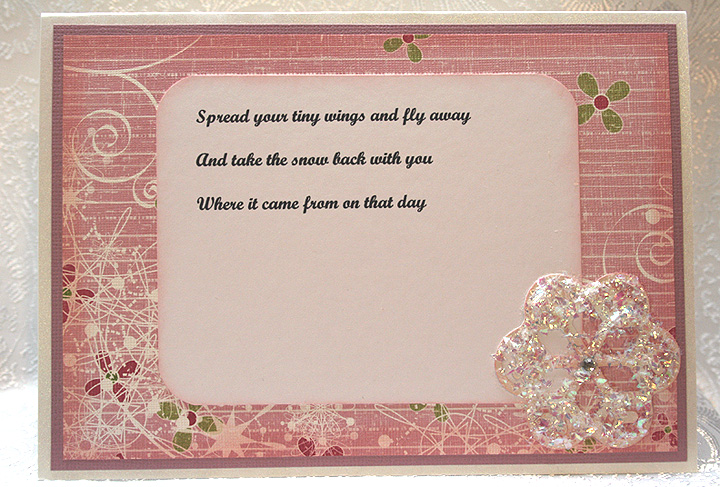
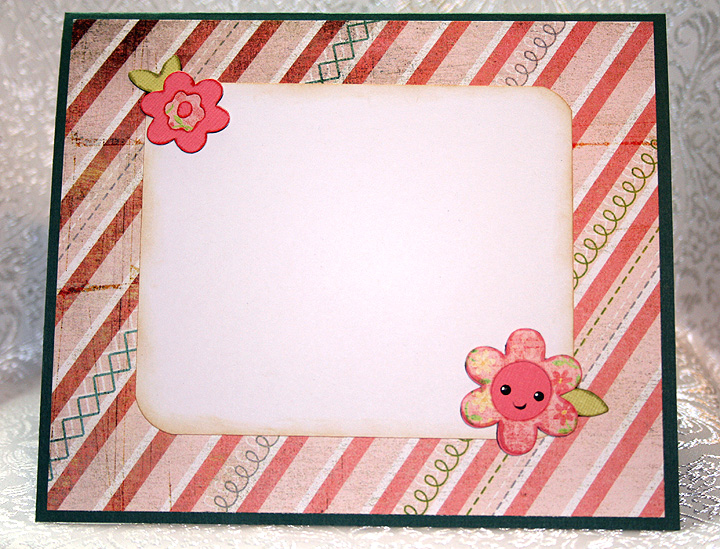
While I was working on this card, the song “Snowbird” by Anne Murray kept running through my head.  I printed part of the chorus and put it on the inside of the card.   The snowflake on the inside is from Joys of the Season.

 Here are the challenges I am entering and the requirements for each:

Jitterbuggin – For the Birds Challenge – follow the sketch, add a Cricut bird and use something pink.

Fantabulous Cricut – Challenge #42 Winter Warmies – create a project using some type of winter clothing or accessory.

Cooking With Cricut – Glittermania! – glitz up your project.

The Cuttlebug Spot – Inspired by a Song – find inspiration for your project in a song.

  • Bazzill cardstock
  • Designer paper – Snowflake Waltz from Daisy Bucket Designs
  • Cricut cartridges:  3 Birds on Parade, George and Basic Shapes, Joys of the Season, Mickey Font, Simply Charmed, and Straight from the Nest.
  • Cricut Design Studio
  • Cuttlebug
  • Copic markers
  • Ranger holographic embossing powder
  • Martha Stewart punch
  • Martha Stewart glitter
  • Rhinestones from stash


Provo Craft Card Making Contest

Provo Craft is going to be announcing a new product on HSN on January 20, 2011.   Anna Griffin is also going to be introducing a new product on the same day.  Provo Craft is sponsoring a card making contest and the winners will receive both new products.  After each airing on HSN, two winners will be posted on Jinger Adam’s Facebook Page.

The requirements for the contest are that you create a card using at least one Anna Griffin product and one or more of these Cricut cartridges:  Don Juan, Wall Decor & More, and Winter Lace.  Entries have to arrive at Provo Craft offices no later than Tuesday, January 18, 2011.

I just mailed my card today, January 13, and I am hoping it arrives it time.  I sent it priority mail and it just has to go from CA to UT, but with this being a holiday weekend I am going to be holding my breath.

I went searching through my stockpile of cardstock because I was pretty sure I had some Anna Griffin paper somewhere.  I found two different paper pads, one with soft, subdued pastel prints and the other with bright, wild prints.  I opted to go with the bright prints and paired them with Bazzill solid cardstock.

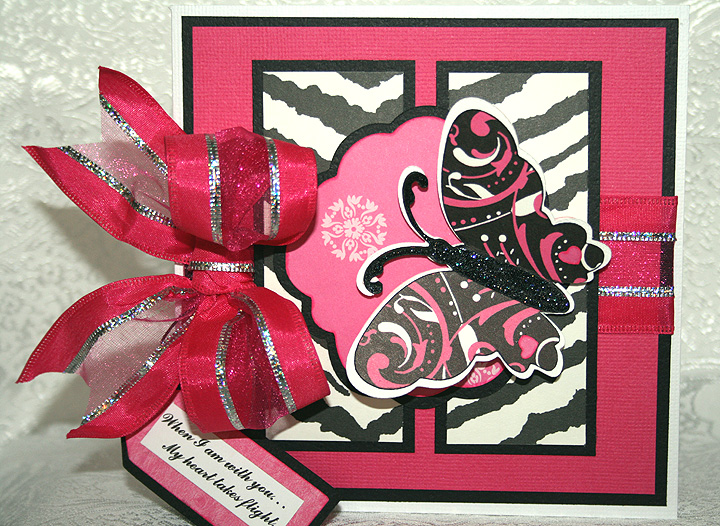
My card is 5.5″ square and all cuts are from Wall Decor & More, with the exception of the tag.  The tag is cut from Don Juan.  The sentiment is computer generated and says, “When I am with you….My heart takes flight.”

I cut several layers for the butterfly and pop-dotted him on the front of the card.  I used Stickles for the butterfly’s body.  The ribbon is from Michaels — I got it on clearance at 70% off.  I attached the tag to the bow using a cell phone charm strap.

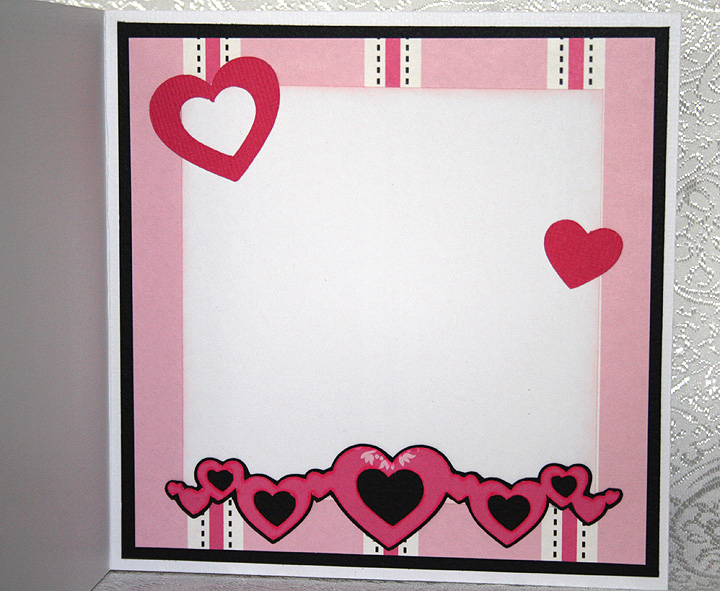
The inside of the card features more Anna Griffin paper and  hearts cut using Wall Decor & More.

  • Anna Griffin cardstock — Peyton Collection
  • Bazzill cardstock
  • Cricut cartridges:  Wall Decor & More, Don Juan
  • Stickles
  • Ribbon from Michaels
  • Cell phone charm strap

Speedy Turtle – Fantabulous Cricut Challenge Blog – Challenge #36 Achoo!

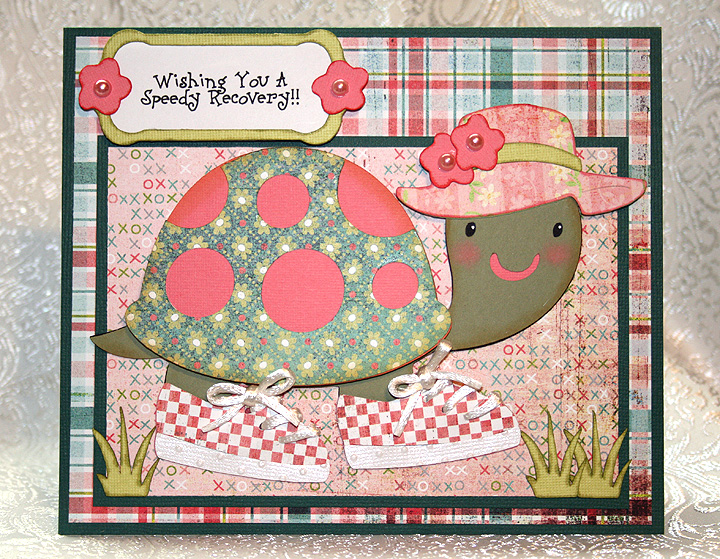
Here is my card for the current challenge at the Fantabulous Cricut Challenge Blog, which is to make a project that has something to do with being sick.  I don’t know why, but this challenge stumped me.  I couldn’t think of anything exciting that I wanted to make.  I started several different projects before the light bulb finally went off and I had a clear vision of what I wanted to make.

The card base is Bazzill cardstock, the patterned paper is Basic Grey, and the solid that the turtle is cut from is Stampin’ Up.  I cut the turtle using my Cricut and the Create a Critter cartridge.  Since I am wishing the recipient a speedy recovery, I figured I needed to give my turtle some running shoes so she could speed things up a bit.  I cut the shoes from My Community and laced them up with some white cording that I found in my stash.  I used the Cuttlebug embossing folder Swiss Dots to emboss the bottom edge of her shoes.  I also gave her a hat, which I cut from Paper Doll Dress Up.  The label that the sentiment is printed on is from a Lite cartridge, Lacy Labels.  I used Create a Critter for the flowers and the tufts of grass.  I added pearls to the centers of the  flowers. 

The flowers on the inside of the card are also from Create a Critter. 

  • Bazzill cardstock
  • Stampin’ Up cardstock
  • Basic Grey designer paper
  • Cricut cartridges:  Create a Critter, Lacy Labels (Lite), My Community, Paper Doll Dress Up
  • Cuttlebug Swiss Dots embossing folder
  • Pearls
  • Cording from my stash

Snow Owl ~ Winter Wonderland

It has been quite a while since I made a card.  Erin, my darling daughter and the other half of this blog, came out to visit from Taiwan for a month.  We spent a lot of time at Disneyland and had lots of fun.  And we did a lot of shopping.  We went to Michaels so many times — even hit three different stores in one day.  On one of our last shopping trips, we both bought a Cricut Gypsy.  Thanks to so many online tutorials, I am slowly learning how to use it. 

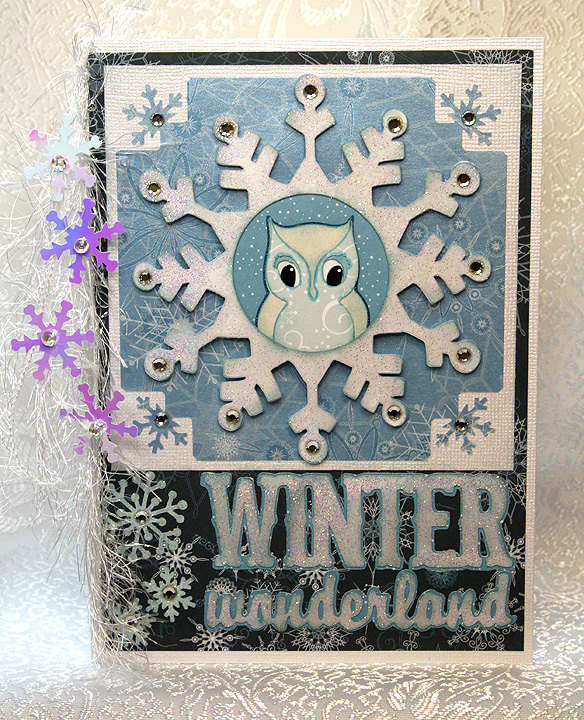
For this card I used my favorite Cricut owl cut, which is from the Disney Happily Ever After cartridge.  I decided to make him a snow owl and wanted the card to be all sparkly and pretty.  The solid cardstock for the card base is Bazzill Bling and the patterned paper is from Heidi Grace, the Frost Blvd collection.   

I cut a snowflake from When It’s Cold Outside and cut a circle in the middle of it so the little owl can look out.  The sentiment is cut from Winter Woodland.  I heat embossed both cuts all over using a Versamark Dazzle stamp pad and Ranger holographic embossing powder. 

I used a Martha Stewart corner punch from the Snowfall Punch Around the Page combo for the snowflakes on the corners of the light blue square.  I used two other Martha Stewart snowflake punches to add some extra snowflakes by the sentiment and on the inside of the card.  And I added a lot of rhinestones.

The final embellishment I did was to wrap some yarn around the fold of the card.  I love mini albums and the ribbon and charms that hang from the binding, so I attempted to duplicate that look.   After wrapping the yarn around the card, I threaded some snowflake sequins and beads on thread and attached the thread to the yarn. 

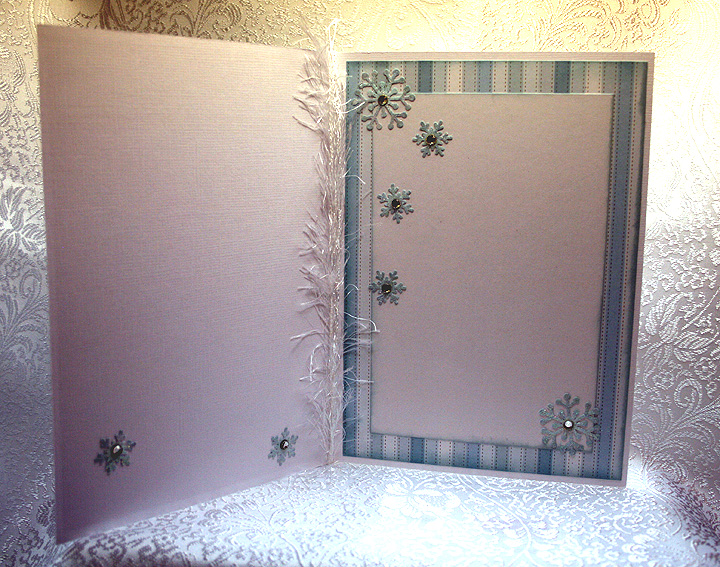
For the inside of the card, I sprinkled snowflakes on both sides and added more rhinestones.

I am going to enter this card in two challenges.  The first is Jitterbuggin’s Wise Guys challenge and this week the sketch is optional.  The only requirements are to use a circle and a square, include an owl and a Cricut cut.

The second challenge is Fantabulous Cricut’s Challenge Me Monday #34, Bird Bonanza.  For this challenge you have to create a project that has something to do with a bird. 

  • Bazzill Bling cardstock
  • Heidi Grace patterned paper, Frost Blvd collection
  • Cricut cartridges:  When It’s Cold Outside, Happily Ever After and Winter Woodland
  • Versamark Dazzle stamp pad
  • Ranger holographic embossing powder
  • Rhinestones, snowflake sequins and yarn from my stash