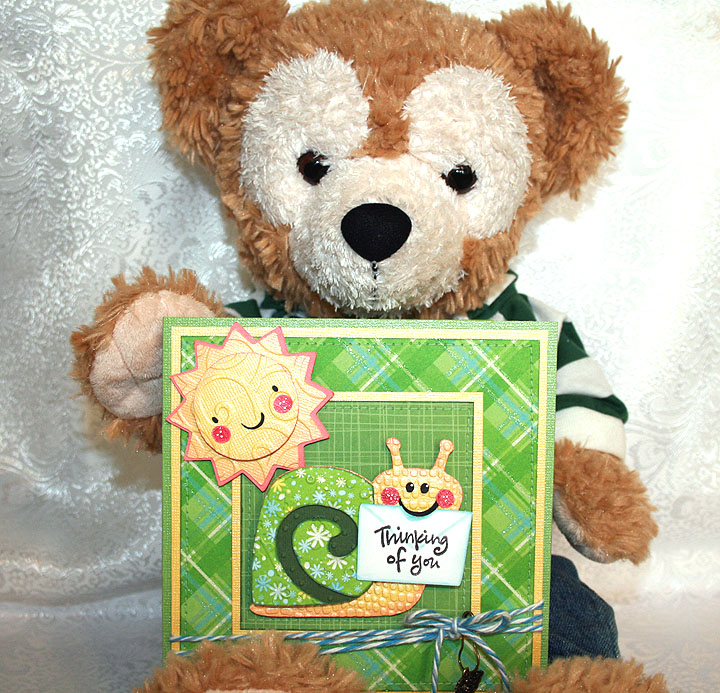
Sunny Snail is Thinking of You!!


Erin is back in Taiwan after a lengthy visit here in the US.  I had lots of fun while she was staying with us.  We attended CHA every day and even managed to get in a scrapbook expo in Anaheim right before she left.  Once she got home to Taipei and settled in, she wanted to do a challenge together.  So we have been busily working,and thanks to Skype, we were able to scrap together.

A member of the Cricut Circle recently had surgery and I wanted to send her a card to wish her a speedy recovery and let her know I am thinking of her.  I thought doing a challenge would be a perfect way to accomplish this.  And here is a little Duffy “spokesbear” model to present my card:

The base of the card is green Bazzill bling cardstock.  The glittery print cardstock is from two different DCWV paper stacks, Blossoms & Butterflies and The Glitter Stack.  I used a yellow bling cardstock from Bazzill for the contrast, sun and snail body. 

I laid out my card in Design Studio and I cut the sun, snail and flowers with my Cricut.  I used Create a Critter for the sun, Birthday Bash for the snail and the Bloom Lite cartridge for the flowers.  I used my Cuttlebug to emboss the sun and the snail.  I embossed the snail with four different embossing folders, Swiss Dots, D’Vine Swirl, Plum Blossom and Mesh Texture.  I inked the edges of all the pieces to give them some depth.  I used Stickles on the center of the flowers and an atyou Spica glitter pen for the cheeks on both the sun and snail.  The sentiment on the envelope the snail has in his mouth is from a $1 clear stamp I purchased at Michaels.  I used lots of pop-dots on the sun and snail, popping up layers and also the completed pieces. 
I am loving all the baker’s twine that is so popular right now, but  I have not purchased any yet.  When I was in Michaels a couple of weeks ago, I found some Lily Sugar ‘n Cream Twists string/thread in the yarn department that reminded me of the twine.  It was on sale so I bought a few different colors to see how it would work.  I wrapped some of the blue around the bottom of this card and I think it looks pretty good.  I attached a charm to the twine with a little hanger that is from Making Memories.  I think they are called garment pins. 

For the inside of the card I added a couple of flowers that I cut out twice so I could layer them together for some dimension.  I used Stickles for the bling on the center of the flowers.

This was a fun card to create and I am happy to say that my card qualifies for the following challenges:

Fantabulous Cricut Challenge Blog – Challenge #51 “Hip to be Square” -green & gold

Cooking With Cricut – It’s A GREEN  SCENE!

The Cuttlebug Spot –  All Tied Up: twine challenge

The Cuttlebug Spot –  Oh so Charming

  • Bazzill bling cardstock
  • Die Cuts With a View paper stacks
  • Cricut cartridges:  Birthday Bash, Bloom (Lite), Create a Critter
  • Cricut Design Studio
  • Cuttlebug Embossing Folders:  D’Vine Swirl, Plum Blossom, Swiss Dots
  • Twine:  Lily Sugar ‘n Cream Twists
  • Making Memories garment pins
  • Charm from my stash
  • Stickles
  • atyou Spica glitter pen
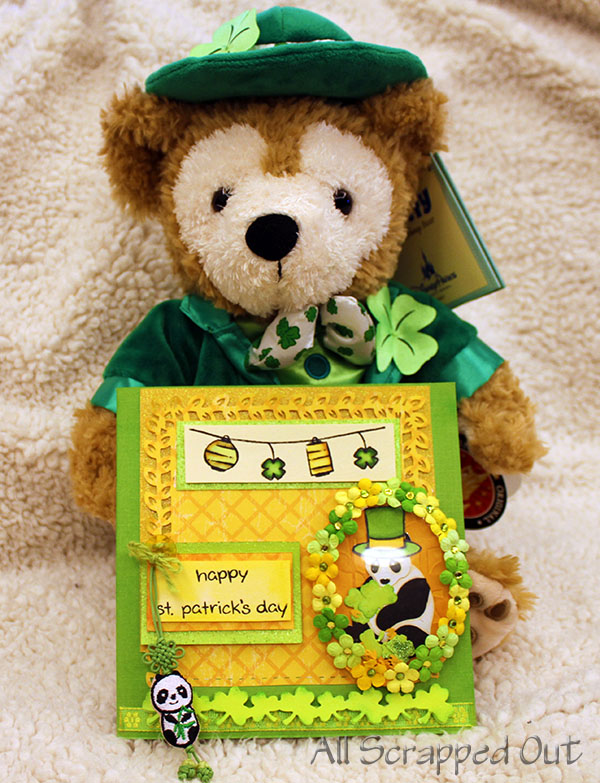
Asian Inspired Panda St. Patrick’s Day Card

After months of travel and procrastination on cleaning my office/craft room, I finally had time to sit down this week and wanted to make a card.  Since this would be only the fourth card I’ve ever made to date, participating in some of the fun blog challenges out there might give me some design direction.

I’m now back in Taiwan and one of the ways I keep connected with Mom back in the U.S. is to craft together! She picked a few of her favorite challenges and we each came up with our own unique take on the required elements.  For this card, a few of the elements include green & gold, square card, use of a charm, twine, along with Cuttlebug and Cricut cuts.
To pay homage to both my Irish roots and my current life in Asia, I decided to combine the both and do an Asian inspired St Patrick’s Day card using a few of the new supplies exclusively available here in Asia.
Asian inspired St. Patrick's Day Card

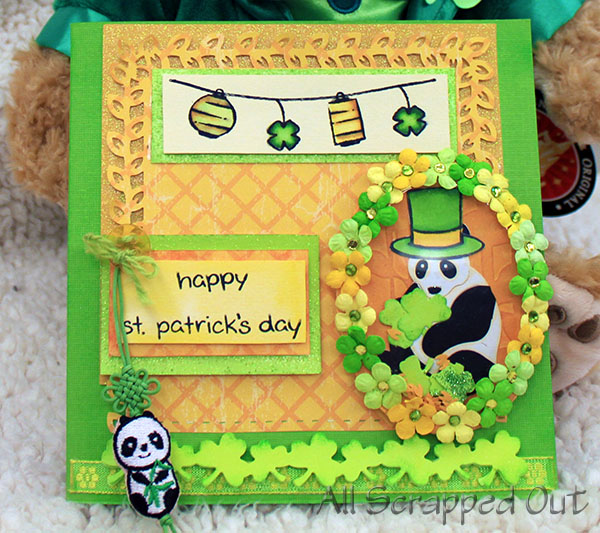
Close up of St. Patrick's Day card

The card is 6 x 6 and uses a variety of papers I had laying around (not entirely sure which stacks they are all from – sorry!).

The large square paper cuts on the background and the oval on the panda were made with Cricut using Plantin Schoolbook.  (Took the circle shape and just made it an oval).  The yellow printed paper’s three sided border was made with Martha Stewart’s Punch Around the Page punches.

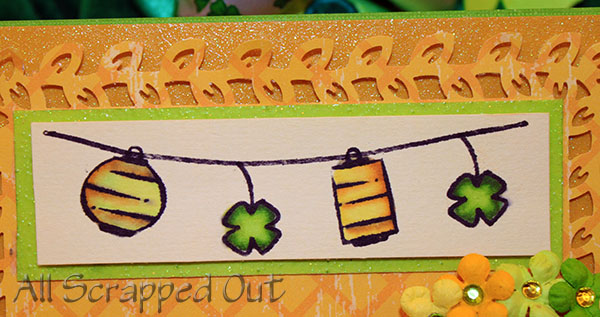
The stamped string of lanterns up top are some of my favorite new photo-polymer stamps from Lawn Fawn.  The string and Chinese lanterns are from their Lunar Lights collection and I used the shamrock in the Hats Off To You collection and just turned it upside down to “hang” them as well.  I colored them with Copics, and popped them up on some glitter green cardstock.

Lawn Fawn stamps used to make shamrock & Chinese lanterns

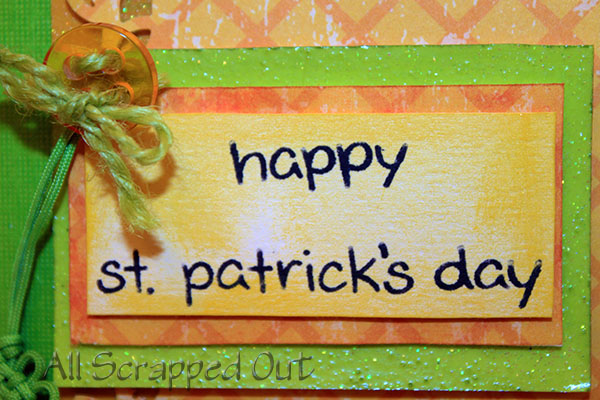
The Happy St. Patrick’s Day sentiment is also Hats Off To You stamp collection. I took a dark yellow ink pad & rubbed the paper with a makeup pad to give it a more yellow appearance.  It’s also popped up several times using the green glittery cardstock and a scrap of the yellow paper.

Sentiment also uses Lawn Fawn stamps

On the bottom I used a $1.00 ribbon find from Michaels that has green and yellow flowers.  The border of shamrocks is a local Taiwan-made die.  I just bought this last week, which was my first weekend back in town since leaving in January.  It’s so cute and the main reason I wanted to make a St. Patrick’s Day card for these challenges.  I used Marigold Glimmer Mist and then took a dark green ink pad to shade the edges.

Border die is from local Taiwan scrapbook and stamp store

Shamrock border die

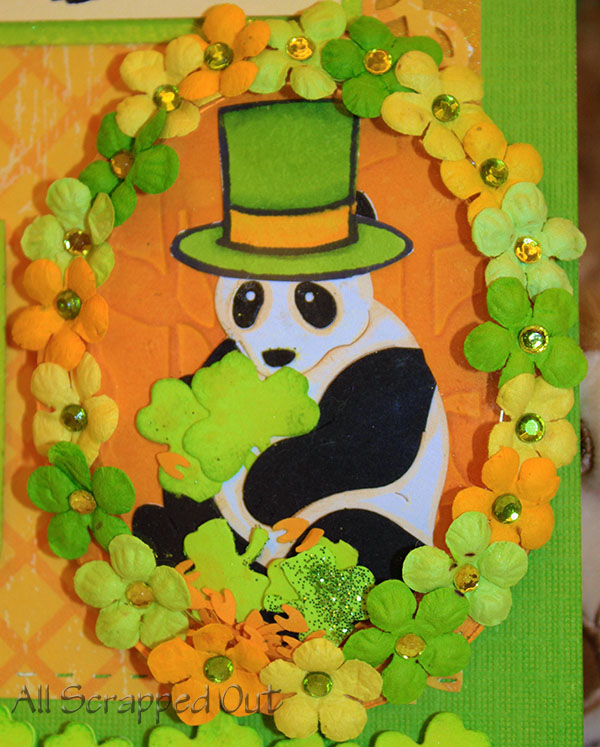
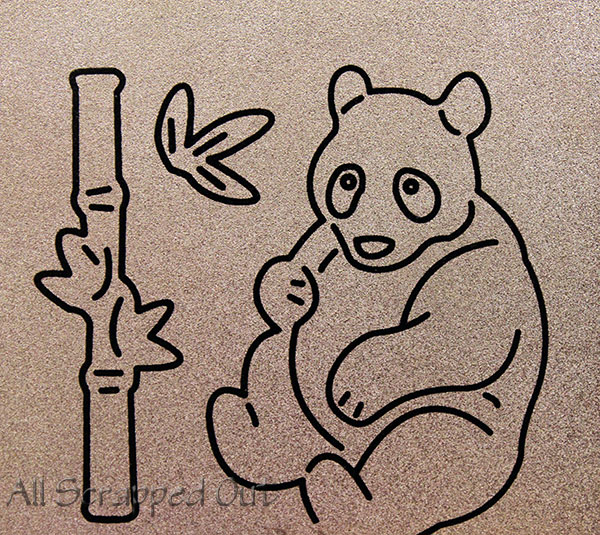
I was a bit overzealous and decided to try a shaker and after hours of unsuccessful attempts of cutting a frame border that fit the perimeter of the shaker, I ended up going in a different direction.  The panda in the shaker was cut using a Cuttlebug style die purchased from a local store here in Taiwan.  The locally made die comes with the panda and a bamboo stalk as well.

Panda shaker element

Panda die from Taiwan

The panda’s hat is part of the Lawn Fawn Hats Off To You collection.  I cut it out and colored it with Copics.  The shamrocks in the panda’s hand were cut from the border design die and I used three smaller ones along with the tiny pieces left from the Martha Stewart punches to create the “shaker” elements. They reminded me of little hearts and provided an easy addition to the shaker.

Since I couldn’t manage to cut the right size frame for the shaker oval, I used small prima flowers all around the edges.  These are Summer Fun and Limeade “Iced Got Flowers” jars.  The centers on the flowers are jewels in the Imaginisce set for the I-rock tool.

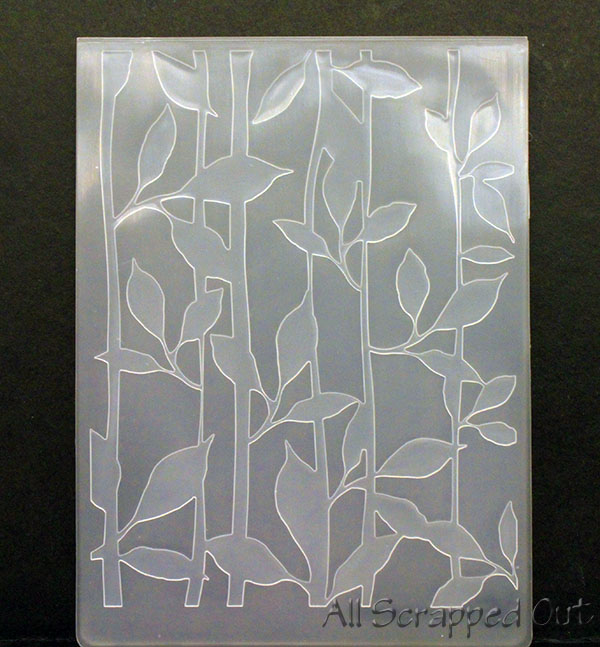
The background paper on the panda is embossed with a bamboo stalk folder only available in Taiwan as well and matches the panda die.  Although supplies here are anything but inexpensive, I love picking up these great designs that I’ve never seen produced elsewhere (yet).  I used a dark orange ink pad to give some dimension to the bamboo stalks and then sprayed the paper with marigold glimmer mist again.

Bamboo embossing folder from Taiwan

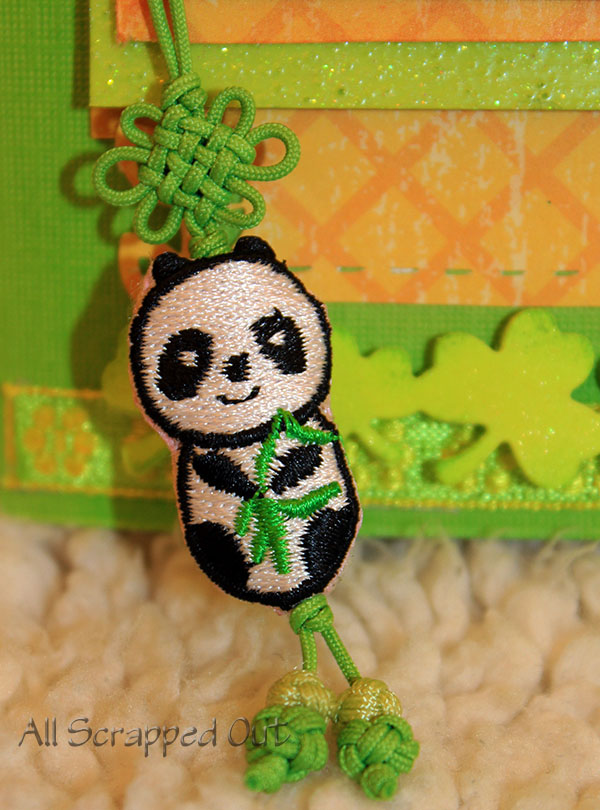
The panda charm and twine are both items I picked up in my Taiwan scrapbook shopping travels as well.

Close up of panda charm

On the inside of the card, I went very simple and just used a Plantin Schoolbook square cut paper embossed with the Provo Craft Bamboo folder.  Again, I used some ink to give the bamboo stalks and the inside card edges some shading.

The challenges we are entering include:

The Cuttlebug Spot: All Tied Up: twine challenge

The Cuttlebug Spot: Oh so charming

Fantabulous Cricut: Hip to be Square -Green & Gold

Cooking with Cricut: Challenge 21: It’s a GREEN SCENE!

CHA 2011: Die Cuts With A View 12″ x 24″ Paper Stacks

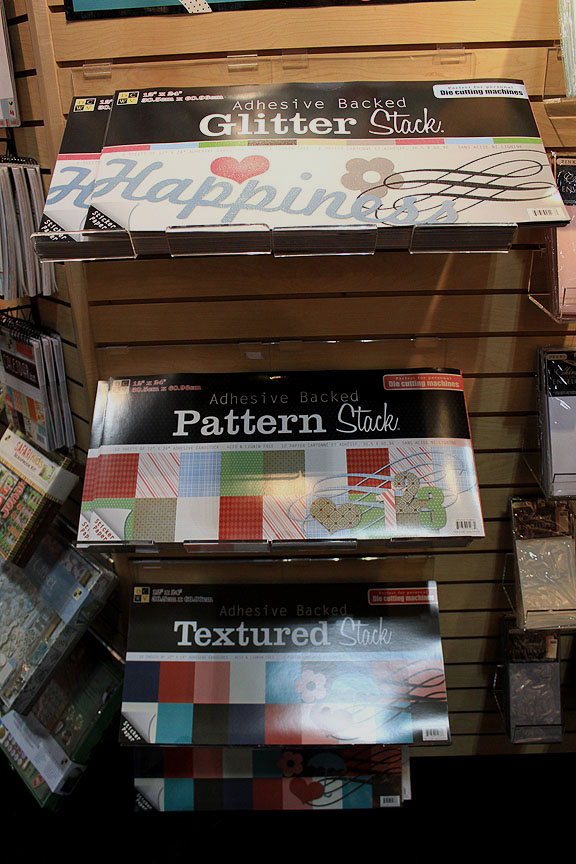
Many Cricut crafters have been asking for more cardstock that is 12″ x 24″ so they can use it in their Cricut Expressions with the larger mats.  I spotted these three new packs of paper in the DCWV booth during CHA. 

All three stacks are adhesive backed.  The glitter pack has 6 sheets of paper, while the pattern and textured stack both have 12 sheets.

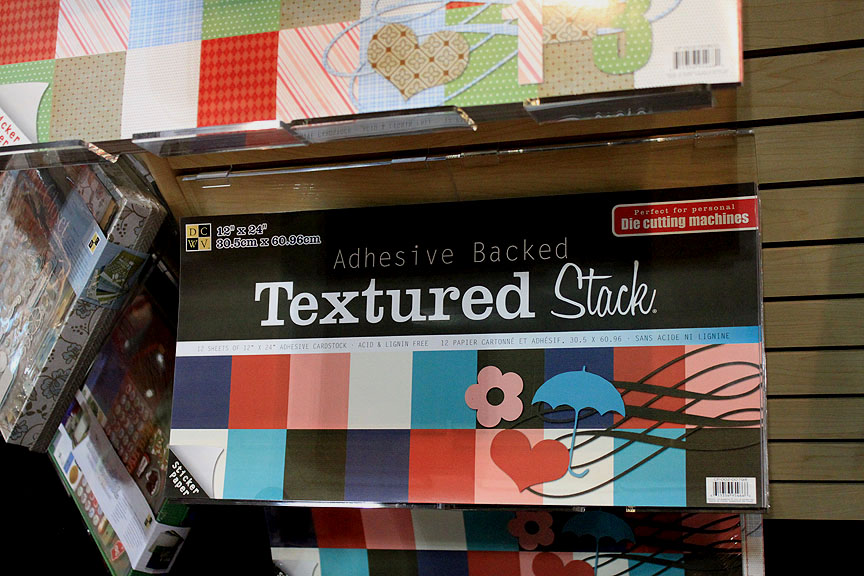
Here is a close-up of the textured stack.


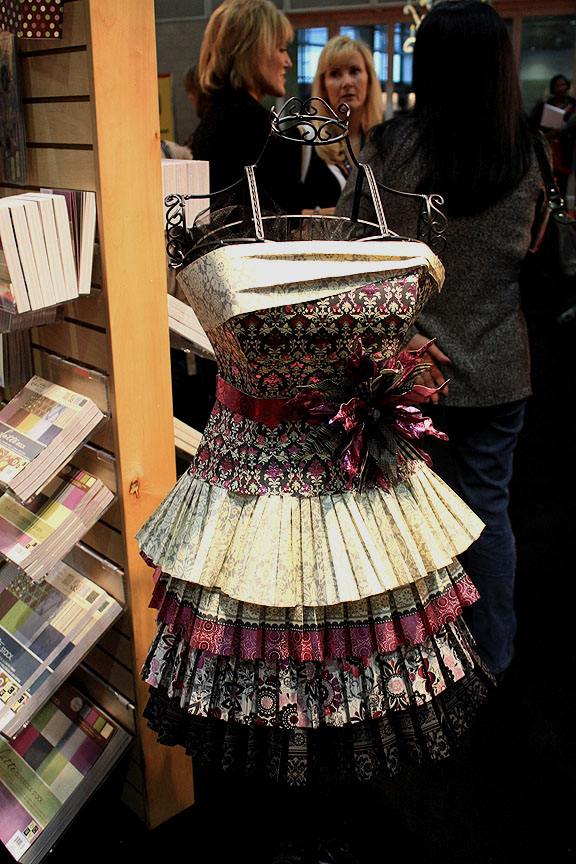
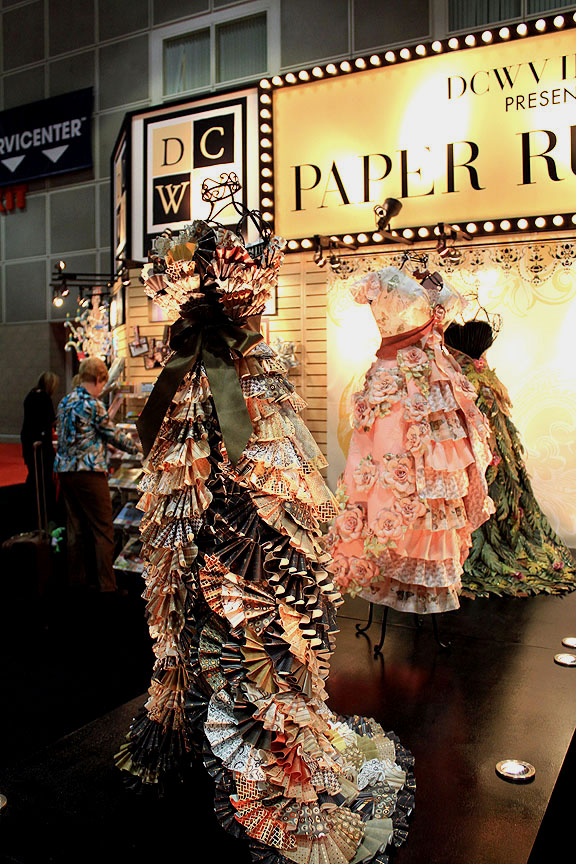
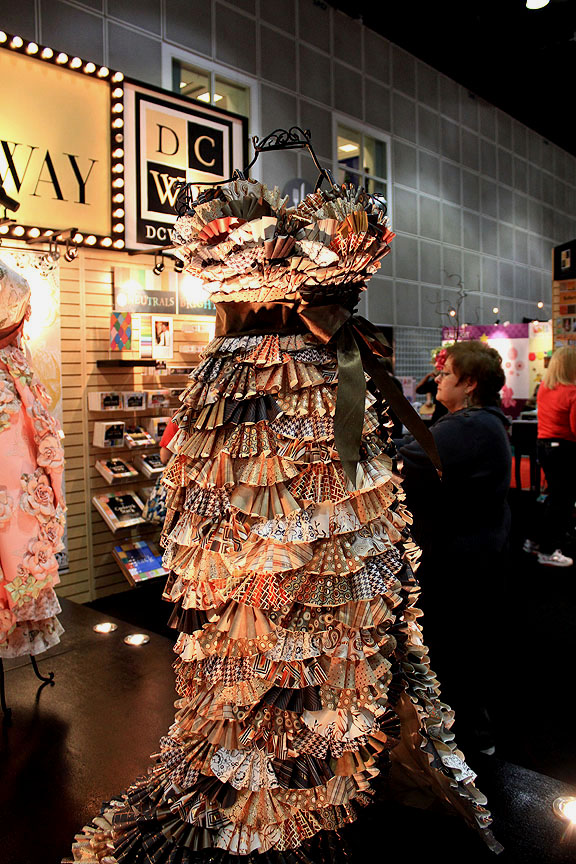
CHA 2011: Die Cuts With A View Paper Dresses

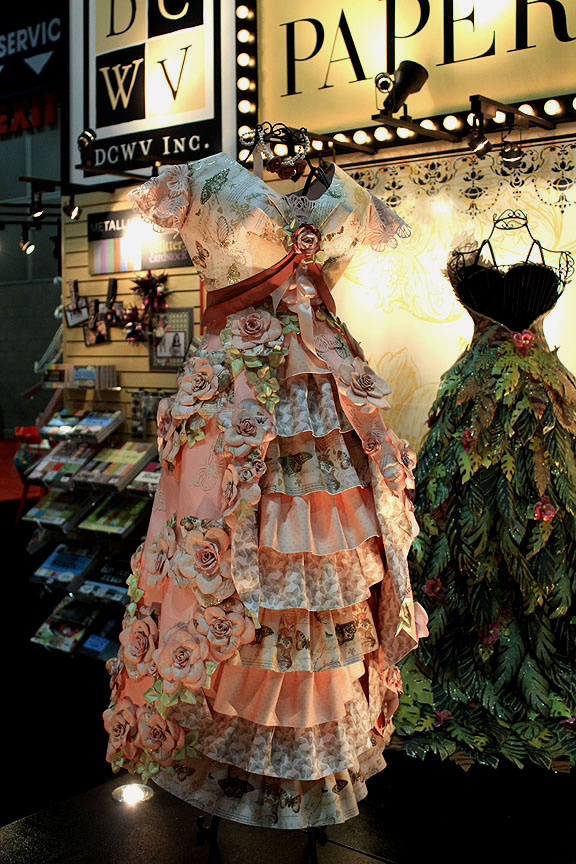
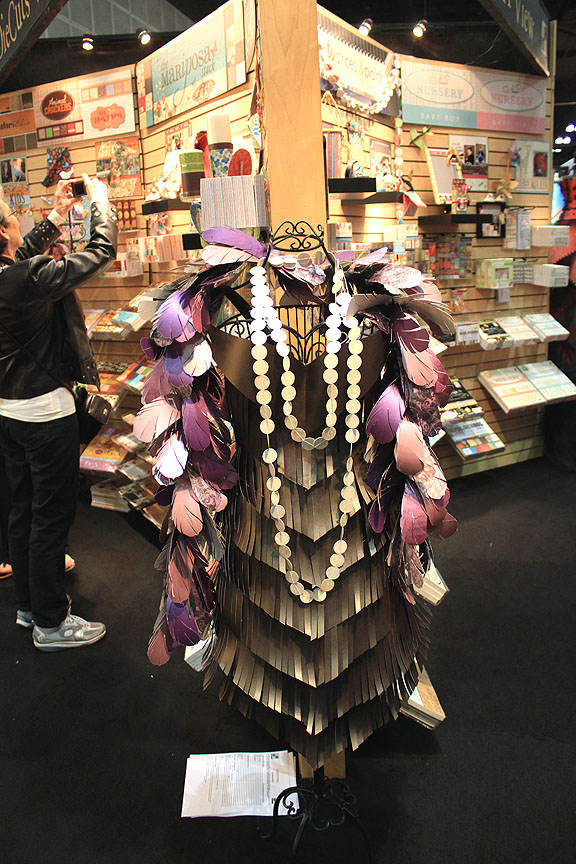
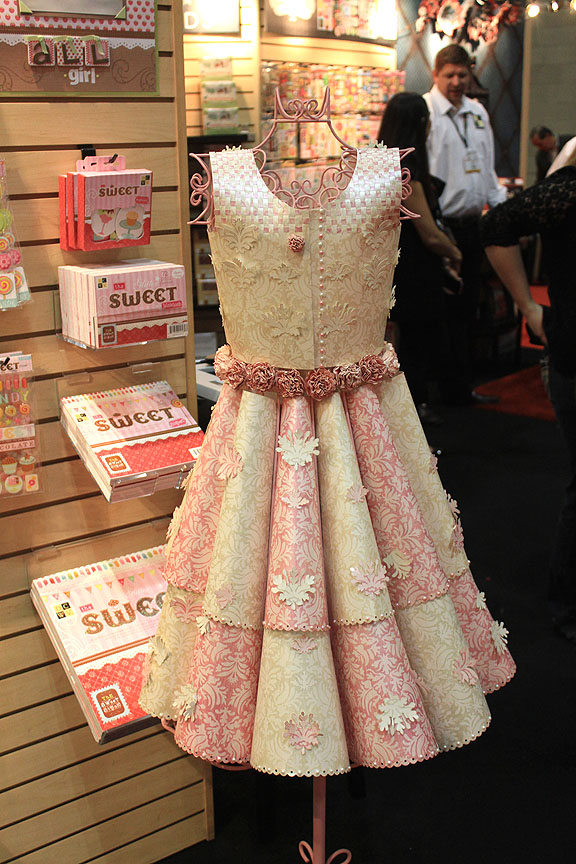
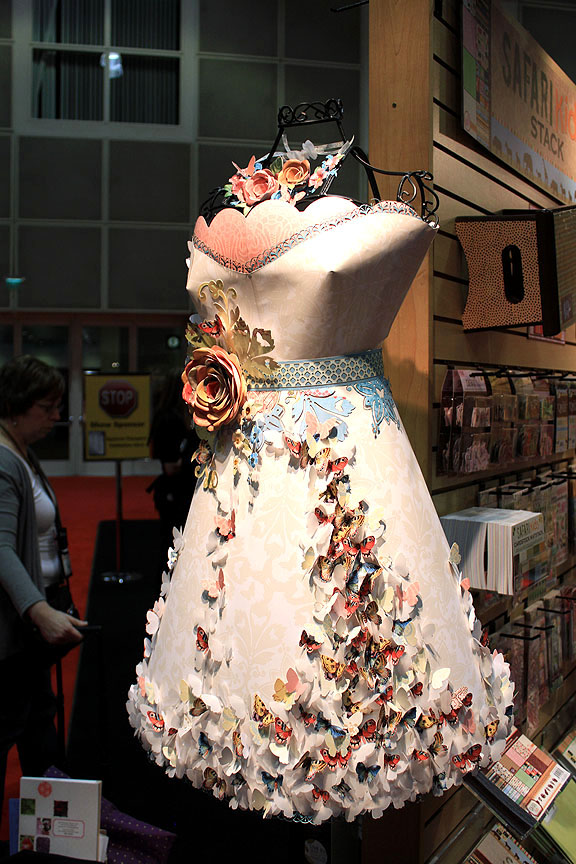
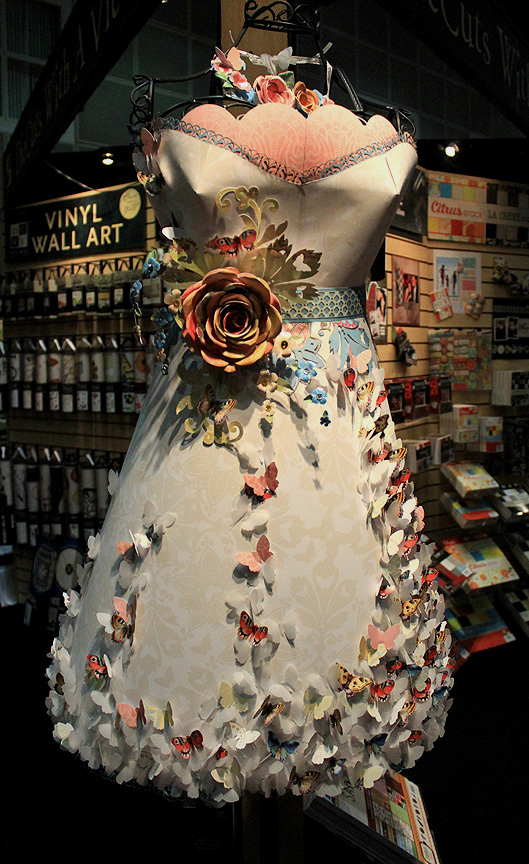
I think my favorite booth at the show this year is Die Cuts With A View.  Their display is absolutely stunning.   In the center of the booth is a runway featuring life-size dresses made from their paper stacks.  There are also other paper dresses scattered throughout the booth, as well as two themed rooms.

I visited the booth each of the four days of the show just to look at those dresses.  They are absolutley amazing.  While talking to various reps over that period, I found out that their designers started creating the dresses last October.  When they received the challenge to do the dresses, the designers got a dress form and worked on them at home.  Some worked individually, while others collaborated on a design.

The staff at DCWV did not see the dresses until about a week before the show, when the designers started bringing them in.  One rep told me they were blown away when they saw them.

I asked how the dresses were transported to CHA and was told that they were wrapped, loaded in a truck standing up, and driven to the show.  Let me share some now.

This is a shot of the runway, which featured three dresses.

The first dress is made from the Natural Paper Stack.  I was able to peek inside and see that it has a base made from muslin, and the paper is affixed to that.

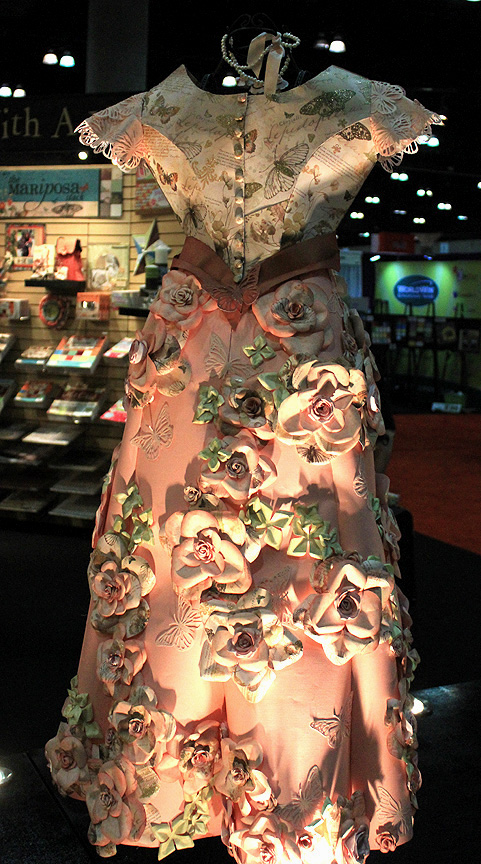
This dress is made from the Mariposa stack. 

Notice the detail on the back of this dress, especially the buttons and all those gorgeous flowers.

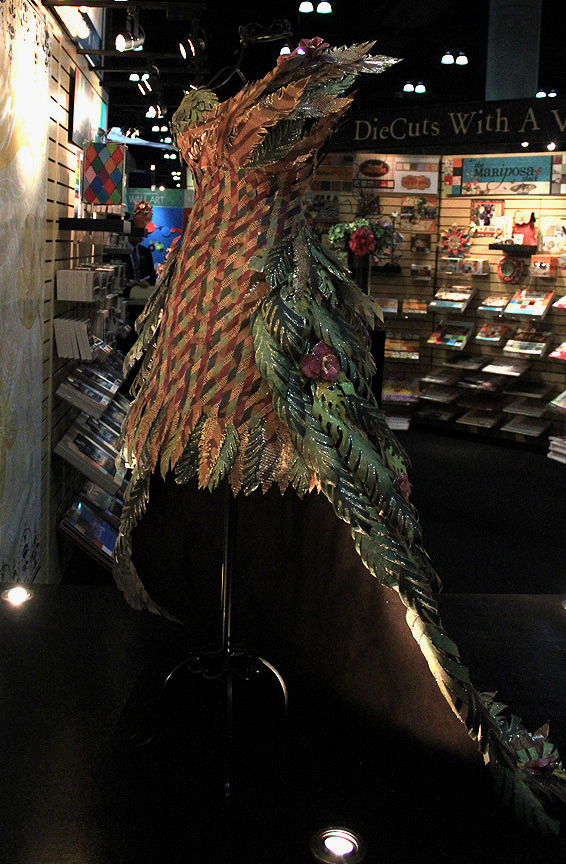
The third dress is made from the Gone Wild stack, which I believe is exclusive to Michaels.  The front of this dress is made with strips of paper that are woven together.

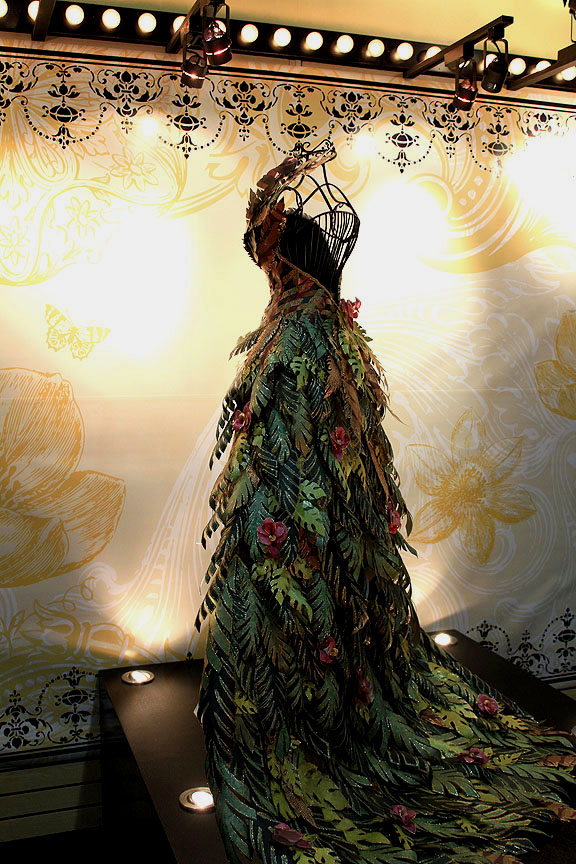
The back features a train made of paper leaves and flowers.

This dress is made from the Immortal Love Paper Stack.

This is from the Shimmer Paper Stack.

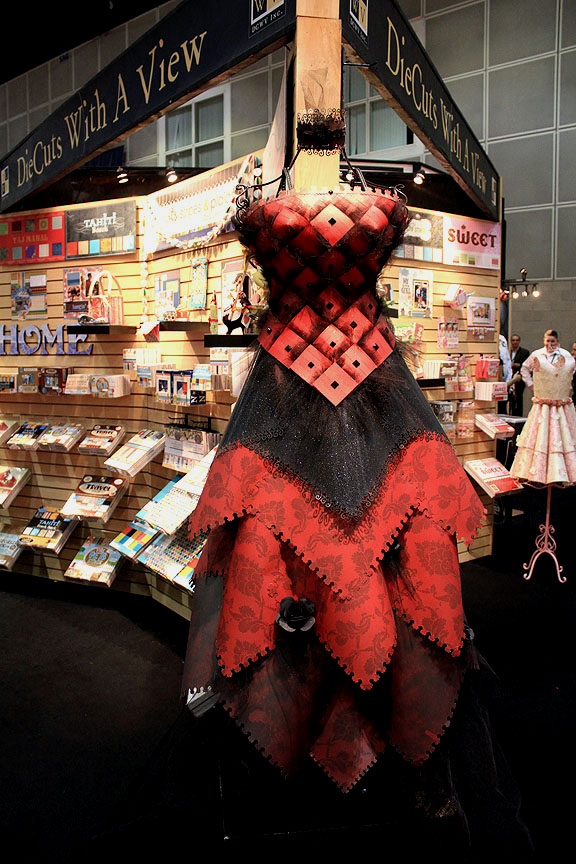
I’m not sure which paper this dress is from, but I think it is the Luxury stack.

From the Ciao Bella collection. 

And here is the last dress, made from the Black Currant stack.

CHA 2011: New Craft Supershows


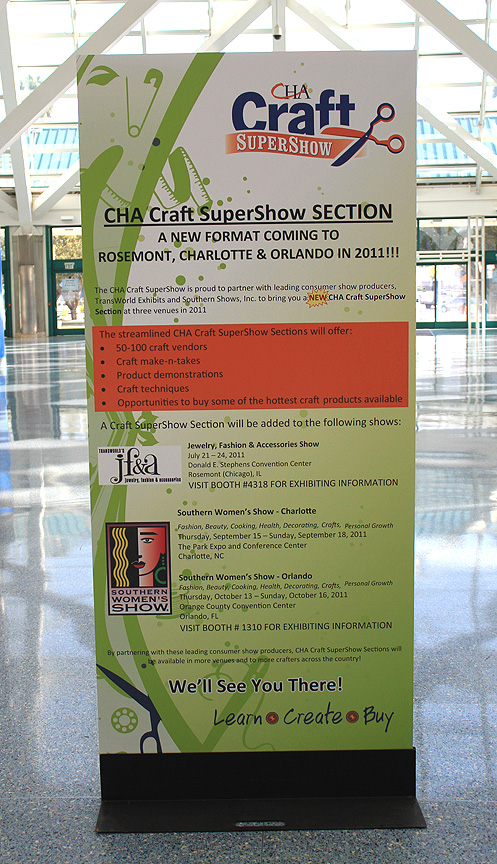
I spotted this poster while eating lunch one day at CHA and asked Erin to take a picture so I can share it here.  It looks like there are going to be three shows in 2011, one at Rosemont (Chicago), IL, another at Charlotte, NC and the third one at Orlando, FL.  It says the shows have new producers. 

The shows are being added to other shows, which range from jewelry and fashion shows to women’s shows.  It says the “streamlined” supershows will offer:  

  • 50-100 craft vendors
  • Make-n-takes
  • Demonstrations
  • Techniques
  • Product for sale

I am curious to know how the “streamlined” shows will compare to previous shows.  I read on another site, valleynewslive.com,  that the new format means the new shows will be a section within another show rather than being a show in itself.  It also said that instead of having separate classes, teaching will now take place within the booths.

CHA 2011

Erin and I just finished up day 2 of the show and we are both so tired.  We spent the first day wandering all over, but today we started walking the show at one wall and are working our way towards the opposite side of the hall. 

Of course we began the first day at Provo Craft’s booth, and judging by the crowds in their booth, it is one of the more popular spots.  Provo Craft is doing a raffle at 3 p.m. each day and they are handing out tickets that have to be validated in order to be entered in the drawing.  To validate your ticket, you have to do fun things — like participate in a Make & Take, attend three of the many demonstations in their booth, or participate in a  survey.

When you receive your tickets for the raffle, Provo Craft is also giving away a cute stuffed Cricut.  They have a contest to see where you take Cricut and to enter this one, you need to take a picture of Cricut somewhere in L.A.  Today they announced three winners of the photo contest and each received a new Expression!  I loved one of the photos — the woman held her Cricut alongside a police car, capturing Cricut and the LAPD logo on the side of the car. 

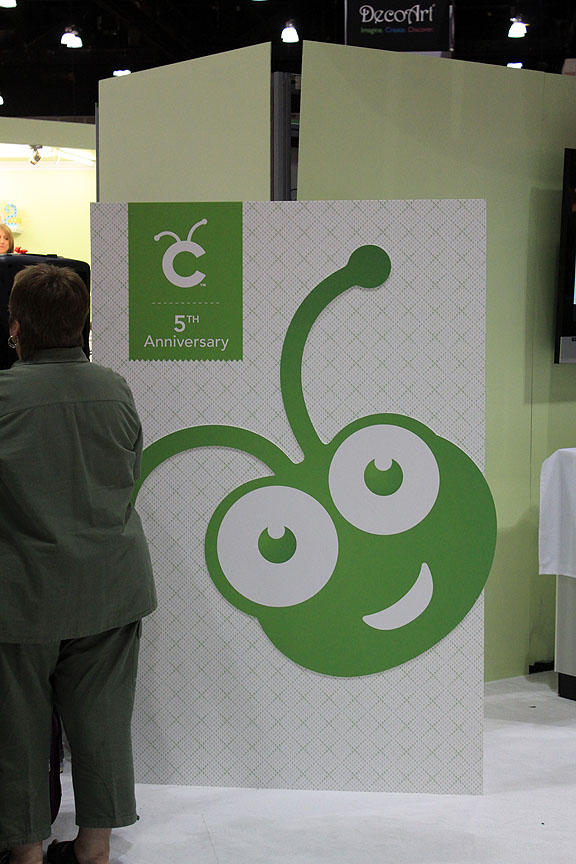
Erin took lots of pictures the first day of the show.  Here are some from Provo Craft’s booth.  I’ll begin with a shot of the new Cricut logo:

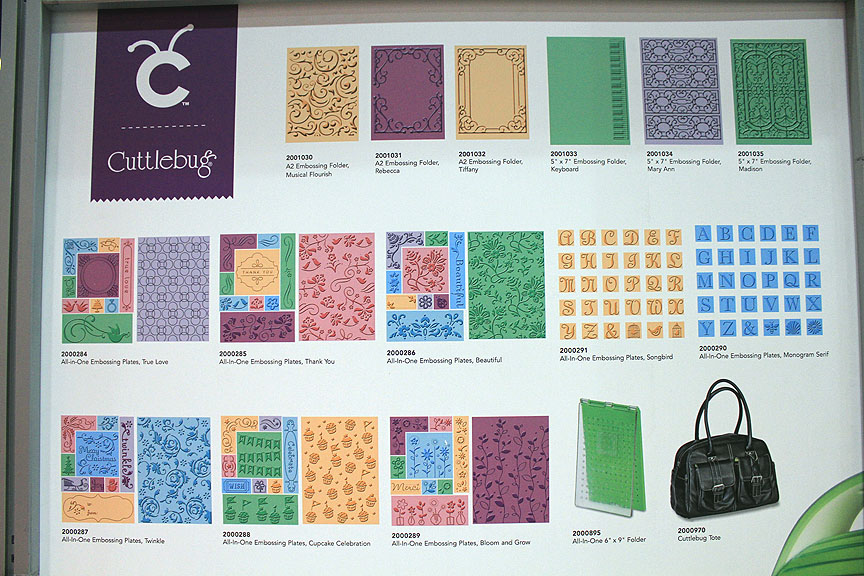
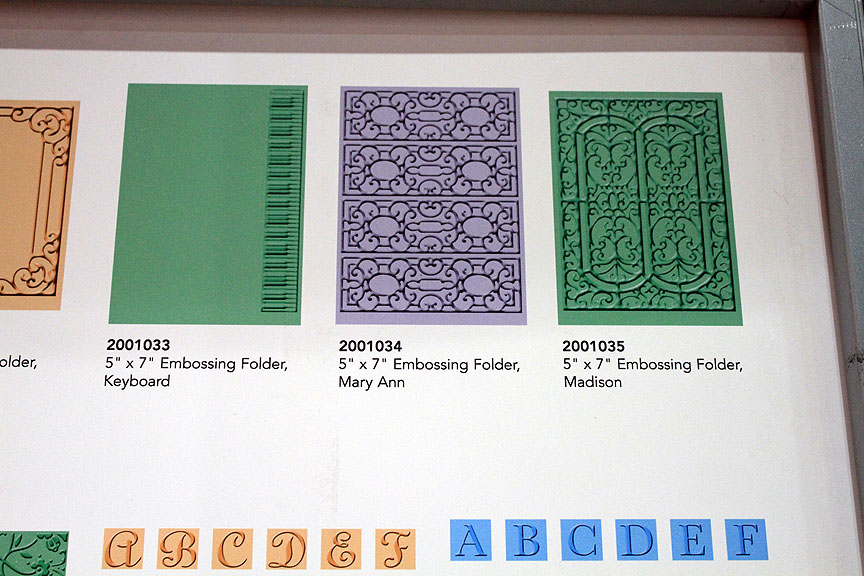
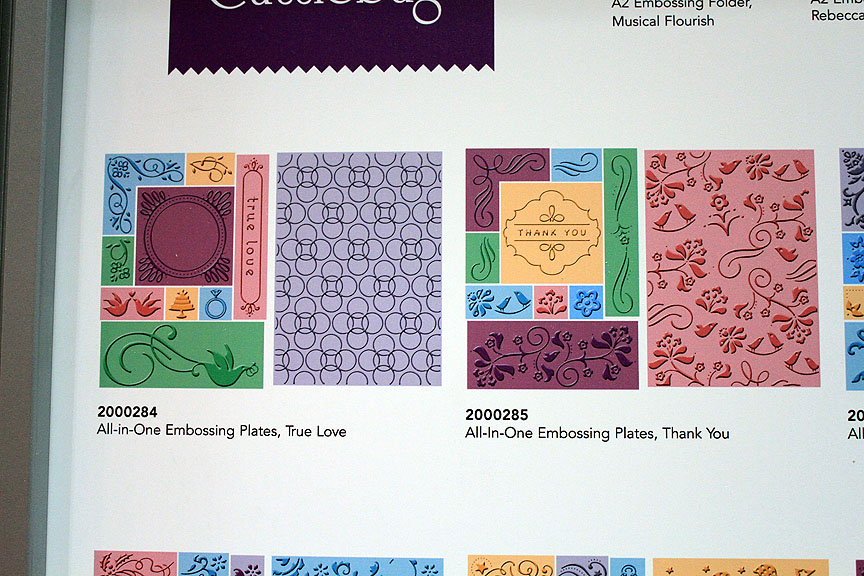
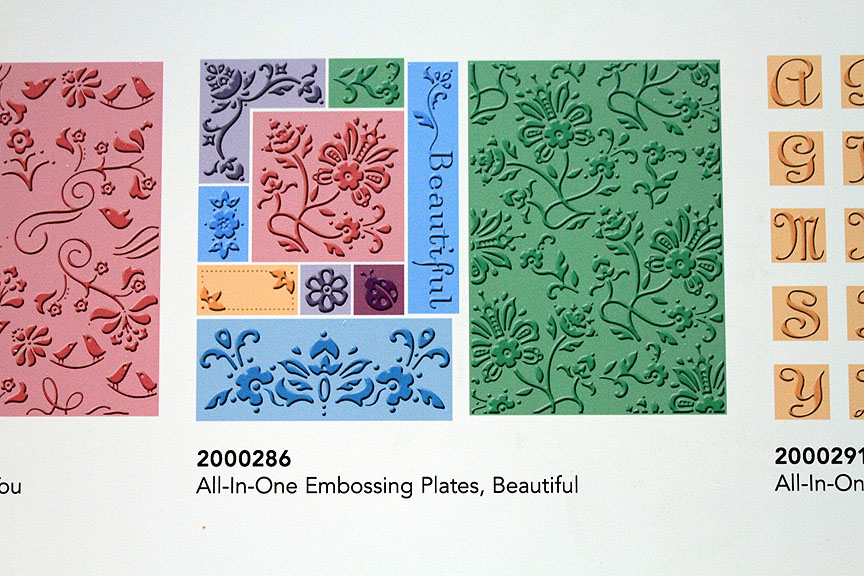
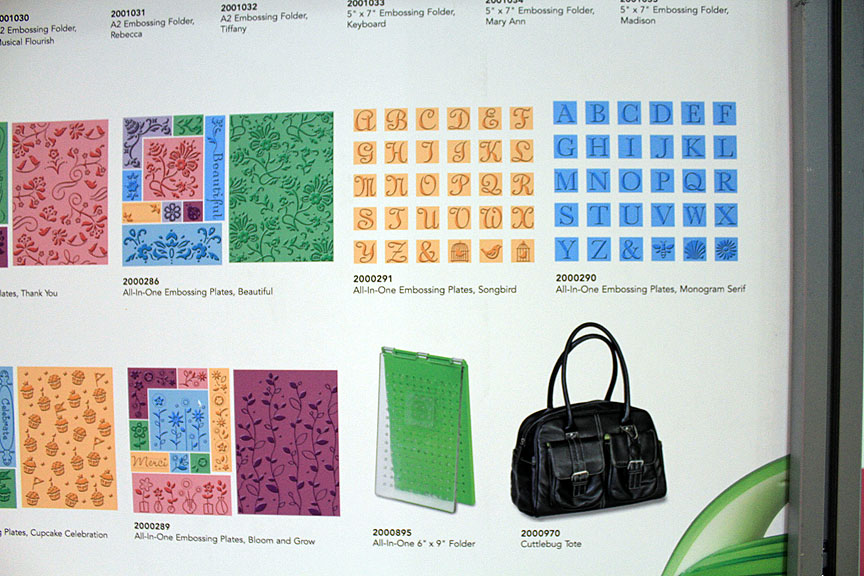
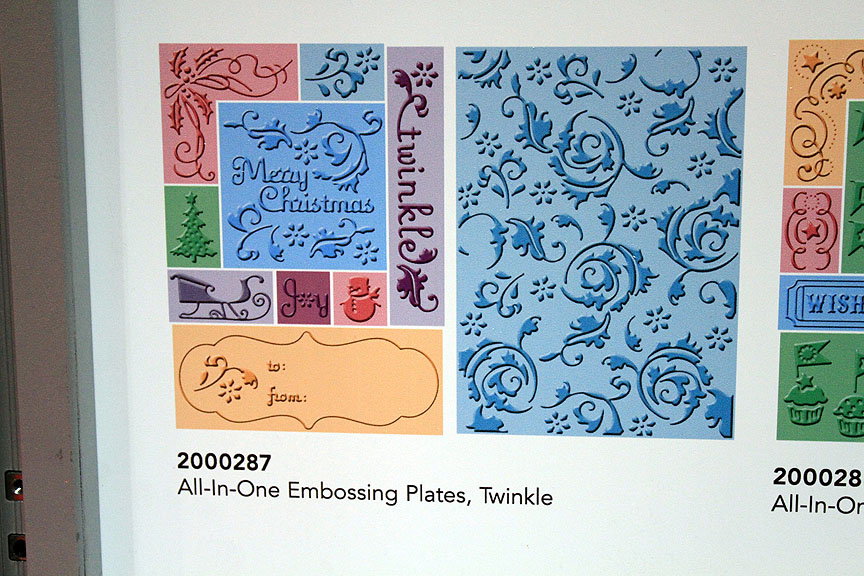
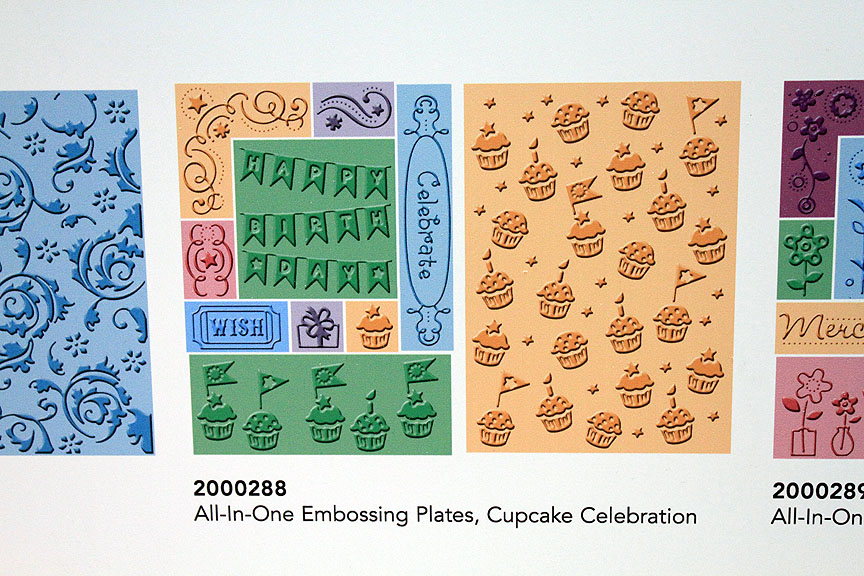
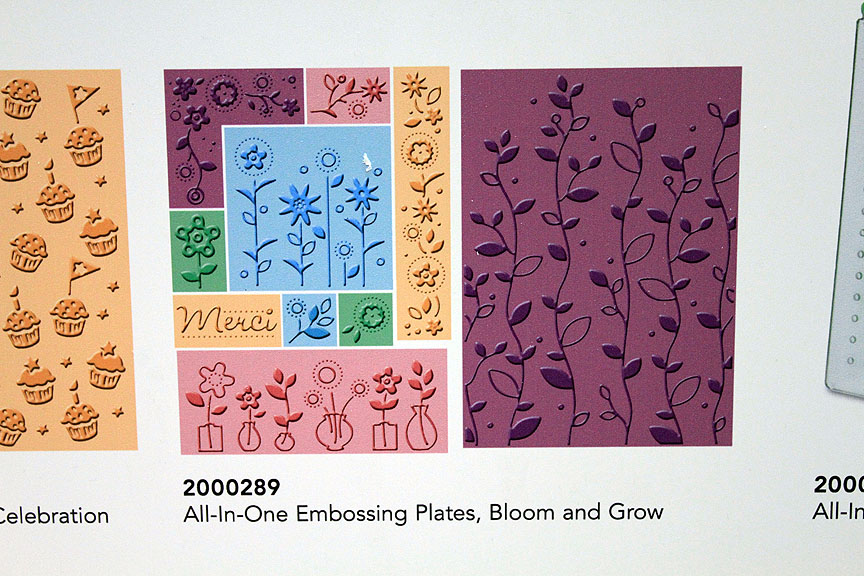
Here are some pictures of new Cuttlebug folders coming soon.   They are bringing out some fun new ones called All-In-One Embossing plates.  I was able to give them a try today at one of the demo stations.  You begin with the All-In-One 6″ x 9″ folder.  There are several different plate sets that you arrange on the folder to make your own custom embossing folders.  You can pick and use the pieces you want, or each set comes with an overall embossing plate too.  Because the All-In-One 6″ x 9″ folder has a thicker base, you just need to use the two “B” plates on top of it when running it through the Cuttlebug.

Close-up shots of the new Cuttlebug products:

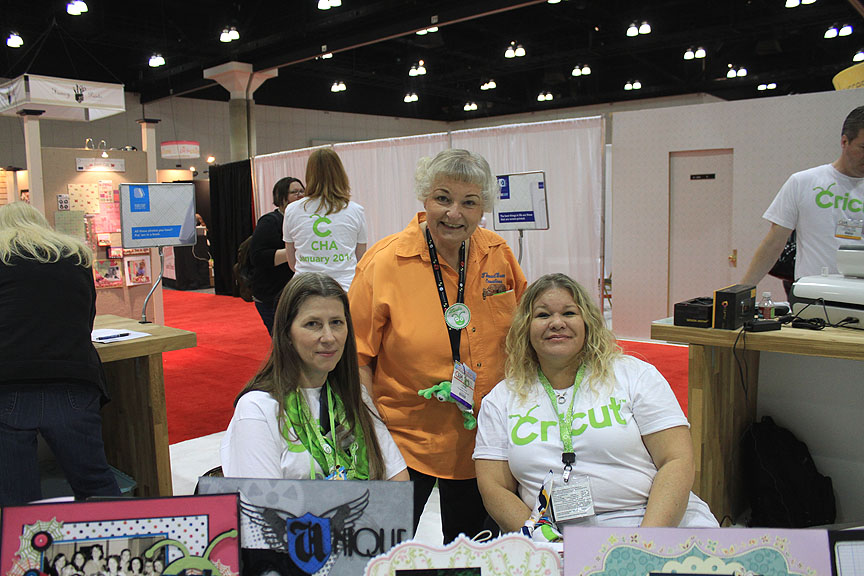
I got to meet two of the Cricut Circle Design Team members today, Shantaie Fowler and Cindy Royal. 

On April 27, the new Cricut Expression 2 will debut on HSN.  This machine has some cool new features.  It uses both regular Cricut cartridges and also the Imagine cartridges.  It will be able to cut the images and layers from the Imagine cartridges, but obviously it will not print. 

It has a new touch-screen feature that will eliminate using the overlays.  It also will also have Wi-Fi capability.  The “shoulders” on the machine (the colored end pieces) will be interchangeable so you can switch colors. 

The Provo rep we talked to yesterday told us the new Expression 2 will initially be available on HSN and then may move into other markets, but the anniversary release will be a limited edition machine. 

I asked today if we will be able to use the Gypsy and Jukebox with the new Expression2 and was told yes, it will be compatible with both products.  Check out the light by the blade on this new machine.

Another new exciting product is called Cricut CraftRoom, which will be an online site where you can design.  The rep said it will be compatible with both PC and MAC.  And the best part, it’s free!  I was able to sit and play with a Beta version for quite a while on Sunday.  While I was working in CraftRoom, the rep told me they are working on a shadow feature where you will be able to automatically add a shadow to any of your cuts.

Ok, so while exploring CraftRoom I looked at the list of cartridges and noticed some names that are not familiar to me.  I was able to look at some of the images on the screen, so I am wondering if these are going to be some new cartridges.  Here are the names:

American Alphabet

Beep Beep

Bump in the Night

Crocs Rule

Damask Decor

Elegant Edges

Happy Graduation

Love You a Latte

Luau

Martha Stewart Nature

Recess

Spring Fever Holiday

Spring Fever Seasonal

Storks Delivery

Summer Bliss Holiday

Summer Bliss Seasonal

Sweet Shop

Ultimate Creativity

Winter in the Air Holiday

Winter in the Air Seasonal

Yee Haw

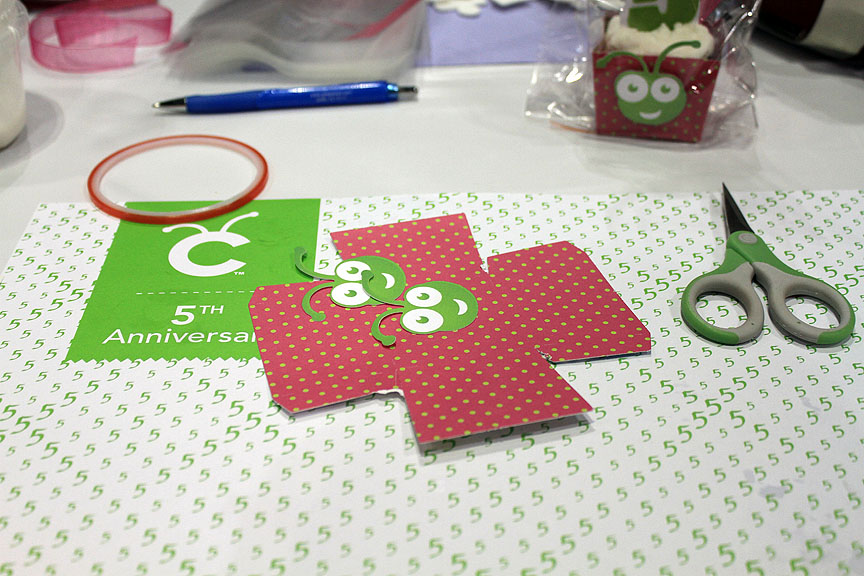
There are two Make & Take stations set up in Provo Craft’s booth and the projects change daily.  Yesterday we made a pirates wood frame and a cupcake holder, complete with a yummy cupcake.  This is from the cupcake station.

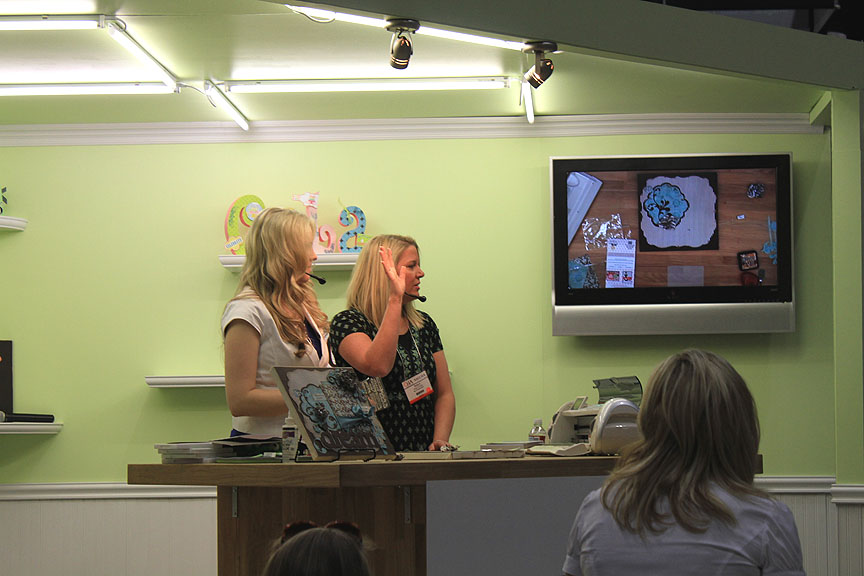
Provo Craft offers several classes daily, but you have to arrive early to sign up.  The classes fill up fast.  Erin and I arrived at the show around 10:30 a.m. this morning and the classes were already gone.  We are going to try and get there at opening tomorrow and see if we can get a class.  This picture is from a class Jinger and Robyn (My Pink Stamper) were conducting on Sunday afternoon.

As I stated above, Provo Craft is doing a daily raffle in their booth at 3 p.m.  These are pictures from the first day’s raffle.  Jinger drew a ticket and the winner came onstage.  Then the fun began — the winner could chose to take a cartridge (Birthday Bash) or spin the Cricut wheel, where prizes ranged from an Imagine to a high-five from the Cricut himself. 

The first name drawn was Erin’s, which was such a surprise because she says she never wins anything.  Since she already has Birthday Bash, she chose to spin the wheel.  Round and round it when until it landed on the Your Story Photo Machine. 

Everyone chose to spin the wheel and most were lucky — one won the new Yudu Cardmaking Machine, another won a Circle membership, but only one lady did not win.  Well, she won a high-five from Cricut himself, but as she was walking off, Jinger handed her the Birthday Bash cartridge.  So everyone was a winner!

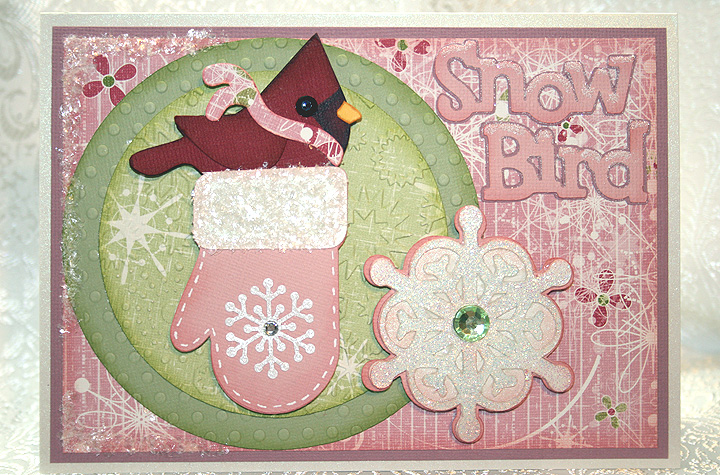
Snow Bird


Here’s another card that I made for several challenges and I had a lot of fun making it.  Unfortunately it will be my last card for a while.  The next couple of weeks are going to be filled with embroidery and trade shows.  CHA is coming up at the end of the month and Erin is flying home from Taiwan to attend with me. 

There’s lots of sparkle on this card as the little snow bird makes his winter home in a warm mitten.  The solid cardstock is from Bazzill and the patterned paper is called Snowflake Waltz and is from Daisy Bucket Designs.

I wanted to do a cardinal for my bird, but I wanted a chubby little guy and I couldn’t find one on any of my Cricut cartridges.  I found a cute bird on Straight from the Nest and decided to use him.  As I was laying out the card in Design Studio, I kept trying to figure out how to make the bird into a cardinal shape.  My solution was to use a lower case “v” from the Mickey Font cartridge.  I turned it upside down and welded it to the top of the bird’s head.  I used Copic markers to color the dark spot on his face.  I’m pleased with how he came out.

The circles are cut from the George and Basic Shapes cartridge and I used my Cuttlebug to emboss both of them.  The mitten is from Simply Charmed, the large snowflake is from Joys of the Season, “Snow Bird” is from Straight from the Nest, and the bird’s scarf is from 3 Birds on Parade. 

I added lots of bling to this card.  I heat embossed the large snowflake on the front using holographic embossing powder.  I put some fine snow on the sentiment using Martha Stewart glitter.  The coarser snow is also from Martha Stewart.  The small snowflake on the mitten is a Martha Stewart punch.  I added rhinestones to the centers of the snowflakes.

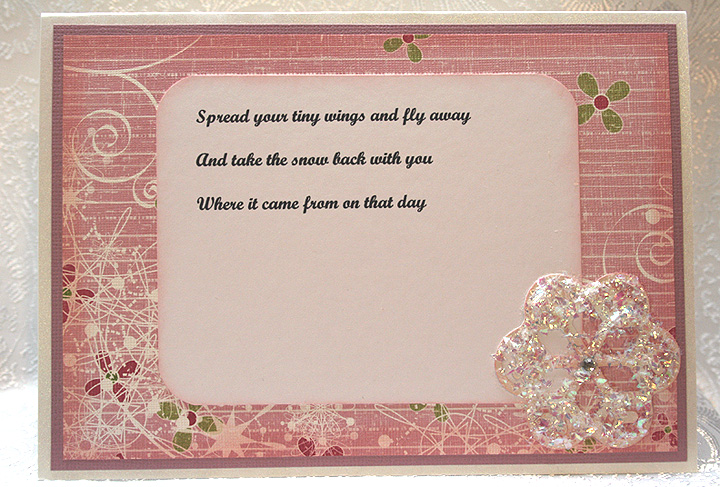
While I was working on this card, the song “Snowbird” by Anne Murray kept running through my head.  I printed part of the chorus and put it on the inside of the card.   The snowflake on the inside is from Joys of the Season.

 Here are the challenges I am entering and the requirements for each:

Jitterbuggin – For the Birds Challenge – follow the sketch, add a Cricut bird and use something pink.

Fantabulous Cricut – Challenge #42 Winter Warmies – create a project using some type of winter clothing or accessory.

Cooking With Cricut – Glittermania! – glitz up your project.

The Cuttlebug Spot – Inspired by a Song – find inspiration for your project in a song.

  • Bazzill cardstock
  • Designer paper – Snowflake Waltz from Daisy Bucket Designs
  • Cricut cartridges:  3 Birds on Parade, George and Basic Shapes, Joys of the Season, Mickey Font, Simply Charmed, and Straight from the Nest.
  • Cricut Design Studio
  • Cuttlebug
  • Copic markers
  • Ranger holographic embossing powder
  • Martha Stewart punch
  • Martha Stewart glitter
  • Rhinestones from stash


Provo Craft Card Making Contest

Provo Craft is going to be announcing a new product on HSN on January 20, 2011.   Anna Griffin is also going to be introducing a new product on the same day.  Provo Craft is sponsoring a card making contest and the winners will receive both new products.  After each airing on HSN, two winners will be posted on Jinger Adam’s Facebook Page.

The requirements for the contest are that you create a card using at least one Anna Griffin product and one or more of these Cricut cartridges:  Don Juan, Wall Decor & More, and Winter Lace.  Entries have to arrive at Provo Craft offices no later than Tuesday, January 18, 2011.

I just mailed my card today, January 13, and I am hoping it arrives it time.  I sent it priority mail and it just has to go from CA to UT, but with this being a holiday weekend I am going to be holding my breath.

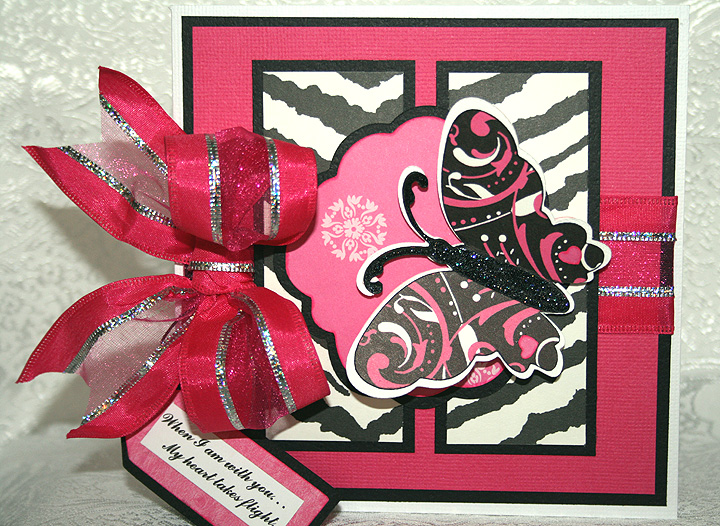
I went searching through my stockpile of cardstock because I was pretty sure I had some Anna Griffin paper somewhere.  I found two different paper pads, one with soft, subdued pastel prints and the other with bright, wild prints.  I opted to go with the bright prints and paired them with Bazzill solid cardstock.

My card is 5.5″ square and all cuts are from Wall Decor & More, with the exception of the tag.  The tag is cut from Don Juan.  The sentiment is computer generated and says, “When I am with you….My heart takes flight.”

I cut several layers for the butterfly and pop-dotted him on the front of the card.  I used Stickles for the butterfly’s body.  The ribbon is from Michaels — I got it on clearance at 70% off.  I attached the tag to the bow using a cell phone charm strap.

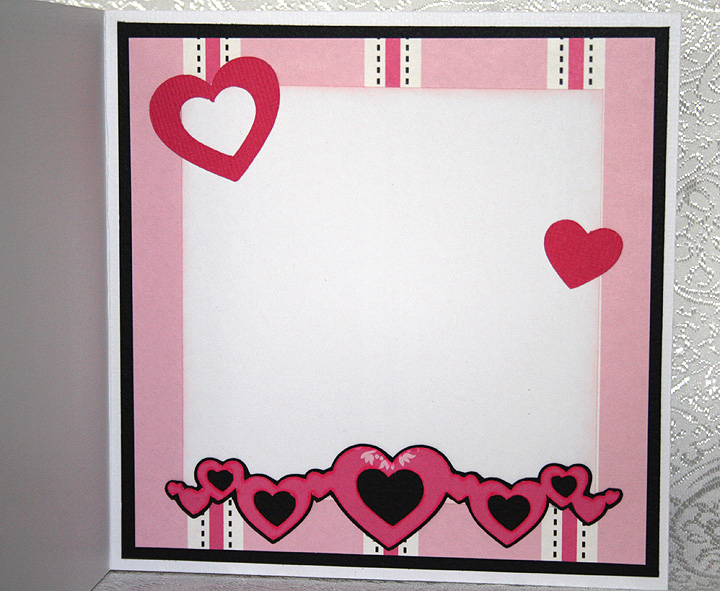
The inside of the card features more Anna Griffin paper and  hearts cut using Wall Decor & More.

  • Anna Griffin cardstock — Peyton Collection
  • Bazzill cardstock
  • Cricut cartridges:  Wall Decor & More, Don Juan
  • Stickles
  • Ribbon from Michaels
  • Cell phone charm strap

Bring It On — 1st Card of 2011!!


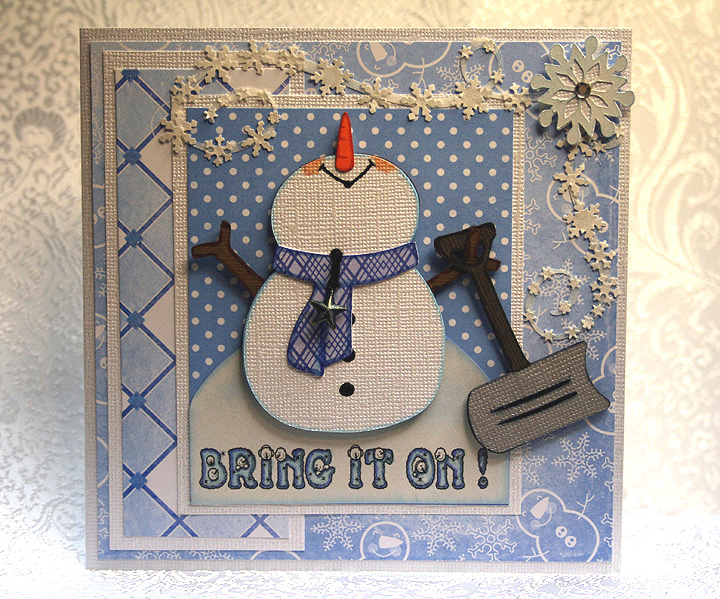
I haven’t posted in a quite a while.  I’m still busy with the business, so that is a good thing.  I decided to take a little down time and make a card.  The nice thing is that this card fits so many challenges that are starting off the new year. 

I made a whimsical snowman, who is looking up and telling Mother Nature to “bring it on!”  He is all prepared — he has his snow shovel at the ready.

The patterned paper is by Die Cuts With a View (DCWV) — from one of the holiday stacks that I picked up at Jo-Ann’s.  I cut the snowman with my Cricut using the Doodlecharms cartridge.  I used Design Studio to hide his face so I could move his nose to the top in order to have him looking up into the sky.  I sure hope this is what he looks like, and not some strange looking snowman/unicorn creature.

The snow shovel is cut from the Sesame Street Friends cartridge, the snowman’s scarf from 3 Birds on Parade, the large snowflakes from Accent Essentials, and the snow flurry swirls are from Calligraphy.  I printed the sentiment on the computer using a free font that I downloaded.  It has little snowmen faces peeking out of the letters.  I colored the letters using Copics.

I cut the flurry swirls from a transparency sheet (acetate) so they would be clear.  I then took some white paint and dabbed on them to give them a little opacity, but not too much.  I wanted them to remain in the background when I glued on all the small snowflakes, which I made using a Martha Stewart snowflake border punch.  I used the negative cuts (the part that usually gets thrown away).  Gluing those little snowflakes was a tedious job.

The finishing touches include a small metal star charm hanging from the snowman’s scarf and some rhinestones in the centers of the large snowflakes.  The charm was gold but I thought it looked too stark on the card, so I took my Copics and changed the color. 


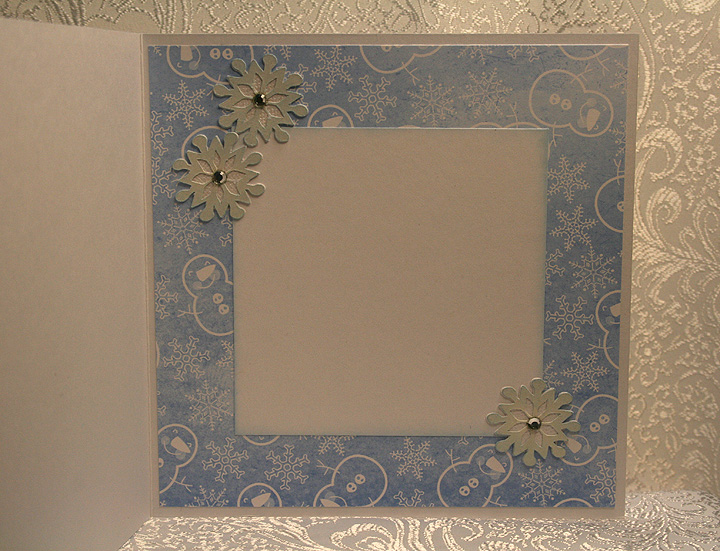
I placed three of the large snowflakes on the inside of the card:

Here are the challenges that I am entering :

Circle Blog Weekly Challenge #15:  Feeling Frosty!  The requirements are to use white paint, a snowflake and something metal.  I think I covered all of those bases with this card.

Jitterbuggin’ Challenge – Sketch 29 – Let It Snow!:  The requirements are to follow the sketch, use blue somewhere on the card, and include something snow related.

Fantabulous Cricut – Challenge Me Monday #41 – Snowy Delights:  The requirements are to create a project using snow or snowflakes.

Cooking With Cricut – Snow Fun!:  The requirement for this challenge is any project with snow or winter-time activities.

Made By Momo:  Make something with a snow theme.

My Sheri Crafts Challenge #39 – Winter:  What winter means to you. 

  • DCWV patterned paper
  • Cricut cartridges used:  Accent Essentials, 3 Birds on Parade, Calligraphy, Doodlecharms, and Sesame Street Friends
  • Clear acetate (transparency)
  • Martha Stewart snowflake border punch
  • Charm from stash
  • Rhinestones
  • Copics

Up On The Wooftop for Jitterbuggin’ Challenge – Here Comes Santa Claus!

 Ho, ho, ho!
Who wouldn’t go!
Ho, ho, ho!
Who wouldn’t go!
Up on the rooftop
Click, click, click
Down thru the chimney with
Good Saint Nick

The above chorus is the inspiration for this card.  I haven’t made a card in so long that I finally took a little time and came up with this card for this week’s challenge at Jitterbuggin.  Now I have to put all the papercrafting supplies away and get back to embroidering. 

I don’t know why, but this card seemed to take forever to make.  I’m glad I didn’t keep track of the hours I have in it — it would probably be embarrassing to admit I took that long.  

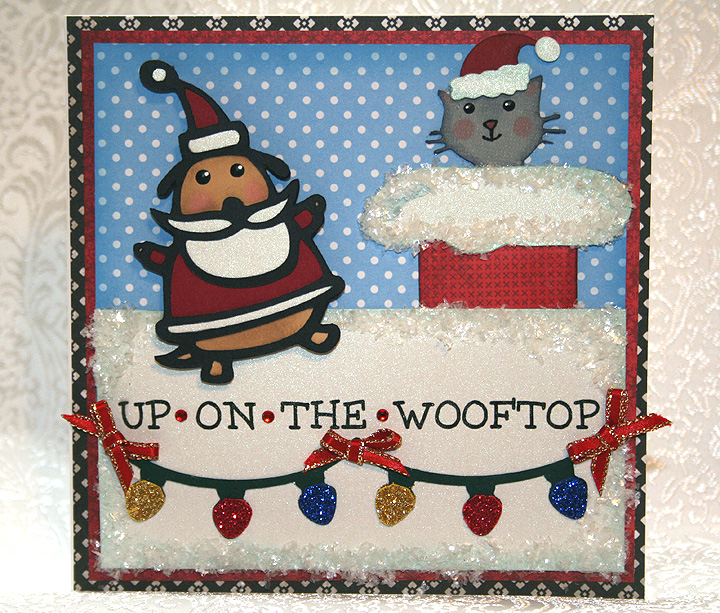
The challenge was fairly easy — no sketch to follow or any requirements other than to use a Santa on your card.  I sure hope Santa Paws counts because he is certainly busy up on the wooftop with his little kitty helper.

I laid the card out in Design Studio and used a house from the Cricut Lite cartridge Jolly Holidays for the roof.  The house is over 10″, but I laid it on the mat so that the house part was off the mat and the only part that cut was the roof.  I wanted the roof to fill the entire front of my card, which is 5.5″ square.  The house design I used has Santa’s feet hanging out of the chimney, but I trimmed them off for this card.  I also used the hide contour feature of Design Studio to hide the footprints in the snow that are on this particular house. 

The patterned paper is all from various DCWV paper stacks and the solid white cardstock on the front is Pearls from Core’dinations. 

Santa Paws is cut from Paper Pups.  The cat is from ZooBalloo and his hat is from Jolly Holidays.  I printed the sentiment directly on the Pearls cardstock, leaving an extra space between the words so I could add a small rhinestone.  The strands of lights are from Create a Critter and I glittered the bulbs.  The snow on the roof is from Martha Stewart.  I added bows from 1/8″ ribbon to give a festive look to the lights.

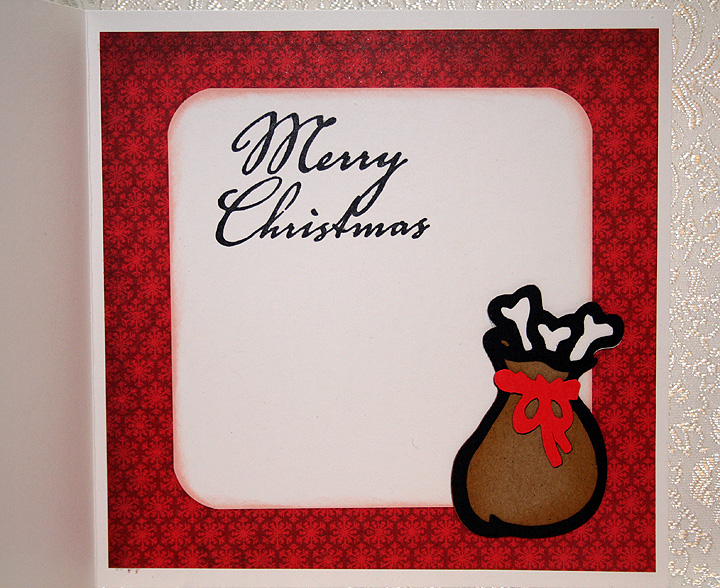
I cut Santa’s sack from Paper Pups and put it on the inside of the card.  The sentiment is a $1 stamp that I got at Michaels. 

  • Cricut Design Studio
  • Cricut cartridges:  Create a Critter, Jolly Holidays, Paper Pups, Zooballoo
  • DCWV — various paper stacks
  • Core’dinations Pearl cardstock
  • Martha Stewart Snow
  • Glitter, rhinestones, rubber stamp — all from Michaels $1 bins
  • Ribbon from stash