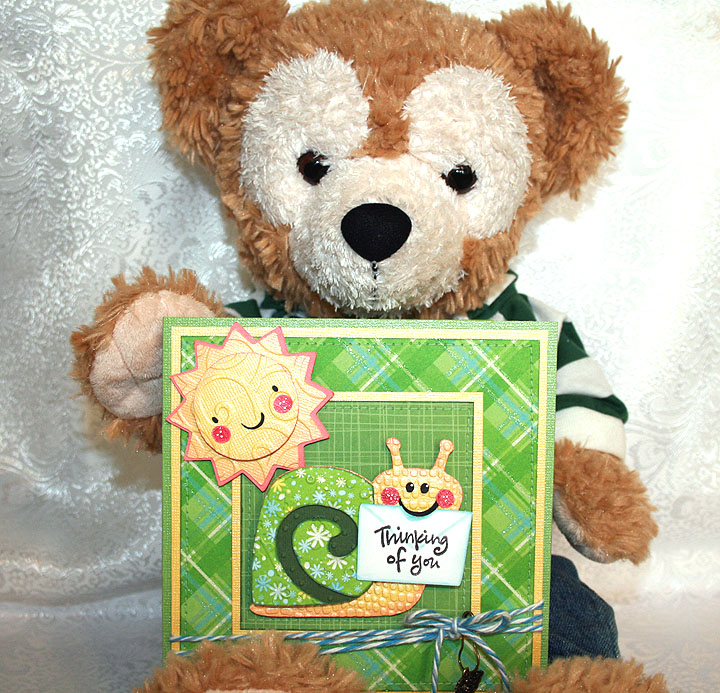
Sunny Snail is Thinking of You!!


Erin is back in Taiwan after a lengthy visit here in the US.  I had lots of fun while she was staying with us.  We attended CHA every day and even managed to get in a scrapbook expo in Anaheim right before she left.  Once she got home to Taipei and settled in, she wanted to do a challenge together.  So we have been busily working,and thanks to Skype, we were able to scrap together.

A member of the Cricut Circle recently had surgery and I wanted to send her a card to wish her a speedy recovery and let her know I am thinking of her.  I thought doing a challenge would be a perfect way to accomplish this.  And here is a little Duffy “spokesbear” model to present my card:

The base of the card is green Bazzill bling cardstock.  The glittery print cardstock is from two different DCWV paper stacks, Blossoms & Butterflies and The Glitter Stack.  I used a yellow bling cardstock from Bazzill for the contrast, sun and snail body. 

I laid out my card in Design Studio and I cut the sun, snail and flowers with my Cricut.  I used Create a Critter for the sun, Birthday Bash for the snail and the Bloom Lite cartridge for the flowers.  I used my Cuttlebug to emboss the sun and the snail.  I embossed the snail with four different embossing folders, Swiss Dots, D’Vine Swirl, Plum Blossom and Mesh Texture.  I inked the edges of all the pieces to give them some depth.  I used Stickles on the center of the flowers and an atyou Spica glitter pen for the cheeks on both the sun and snail.  The sentiment on the envelope the snail has in his mouth is from a $1 clear stamp I purchased at Michaels.  I used lots of pop-dots on the sun and snail, popping up layers and also the completed pieces. 

I am loving all the baker’s twine that is so popular right now, but  I have not purchased any yet.  When I was in Michaels a couple of weeks ago, I found some Lily Sugar ‘n Cream Twists string/thread in the yarn department that reminded me of the twine.  It was on sale so I bought a few different colors to see how it would work.  I wrapped some of the blue around the bottom of this card and I think it looks pretty good.  I attached a charm to the twine with a little hanger that is from Making Memories.  I think they are called garment pins. 

For the inside of the card I added a couple of flowers that I cut out twice so I could layer them together for some dimension.  I used Stickles for the bling on the center of the flowers.

This was a fun card to create and I am happy to say that my card qualifies for the following challenges:

Fantabulous Cricut Challenge Blog – Challenge #51 “Hip to be Square” -green & gold

Cooking With Cricut – It’s A GREEN  SCENE!

The Cuttlebug Spot –  All Tied Up: twine challenge

The Cuttlebug Spot –  Oh so Charming

  • Bazzill bling cardstock
  • Die Cuts With a View paper stacks
  • Cricut cartridges:  Birthday Bash, Bloom (Lite), Create a Critter
  • Cricut Design Studio
  • Cuttlebug Embossing Folders:  D’Vine Swirl, Plum Blossom, Swiss Dots
  • Twine:  Lily Sugar ‘n Cream Twists
  • Making Memories garment pins
  • Charm from my stash
  • Stickles
  • atyou Spica glitter pen

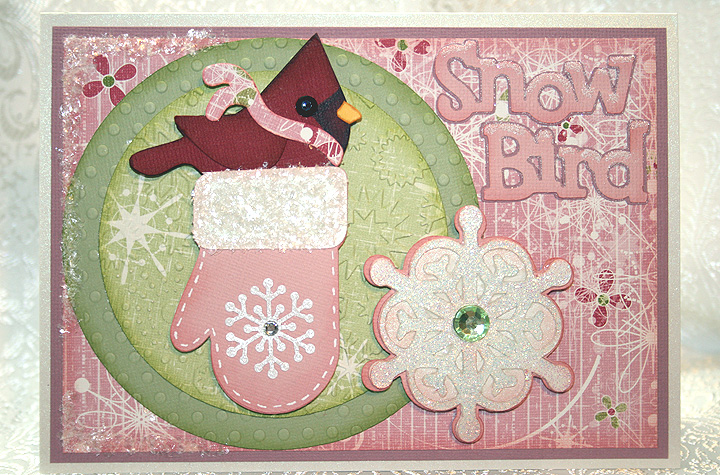
Snow Bird


Here’s another card that I made for several challenges and I had a lot of fun making it.  Unfortunately it will be my last card for a while.  The next couple of weeks are going to be filled with embroidery and trade shows.  CHA is coming up at the end of the month and Erin is flying home from Taiwan to attend with me. 

There’s lots of sparkle on this card as the little snow bird makes his winter home in a warm mitten.  The solid cardstock is from Bazzill and the patterned paper is called Snowflake Waltz and is from Daisy Bucket Designs.

I wanted to do a cardinal for my bird, but I wanted a chubby little guy and I couldn’t find one on any of my Cricut cartridges.  I found a cute bird on Straight from the Nest and decided to use him.  As I was laying out the card in Design Studio, I kept trying to figure out how to make the bird into a cardinal shape.  My solution was to use a lower case “v” from the Mickey Font cartridge.  I turned it upside down and welded it to the top of the bird’s head.  I used Copic markers to color the dark spot on his face.  I’m pleased with how he came out.

The circles are cut from the George and Basic Shapes cartridge and I used my Cuttlebug to emboss both of them.  The mitten is from Simply Charmed, the large snowflake is from Joys of the Season, “Snow Bird” is from Straight from the Nest, and the bird’s scarf is from 3 Birds on Parade. 

I added lots of bling to this card.  I heat embossed the large snowflake on the front using holographic embossing powder.  I put some fine snow on the sentiment using Martha Stewart glitter.  The coarser snow is also from Martha Stewart.  The small snowflake on the mitten is a Martha Stewart punch.  I added rhinestones to the centers of the snowflakes.

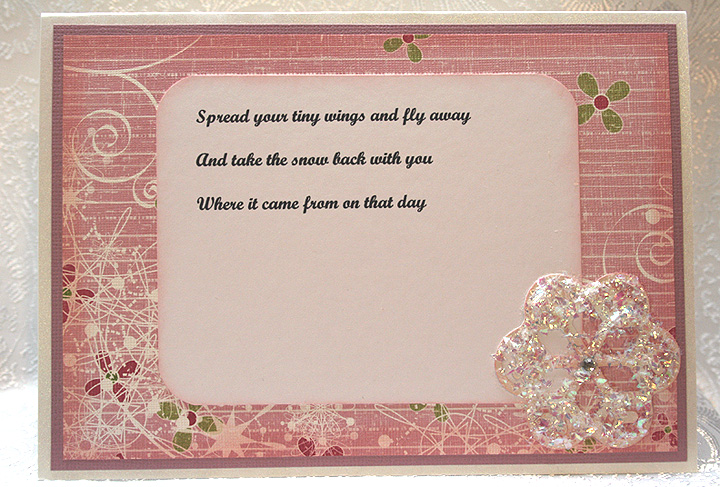
While I was working on this card, the song “Snowbird” by Anne Murray kept running through my head.  I printed part of the chorus and put it on the inside of the card.   The snowflake on the inside is from Joys of the Season.

 Here are the challenges I am entering and the requirements for each:

Jitterbuggin – For the Birds Challenge – follow the sketch, add a Cricut bird and use something pink.

Fantabulous Cricut – Challenge #42 Winter Warmies – create a project using some type of winter clothing or accessory.

Cooking With Cricut – Glittermania! – glitz up your project.

The Cuttlebug Spot – Inspired by a Song – find inspiration for your project in a song.

  • Bazzill cardstock
  • Designer paper – Snowflake Waltz from Daisy Bucket Designs
  • Cricut cartridges:  3 Birds on Parade, George and Basic Shapes, Joys of the Season, Mickey Font, Simply Charmed, and Straight from the Nest.
  • Cricut Design Studio
  • Cuttlebug
  • Copic markers
  • Ranger holographic embossing powder
  • Martha Stewart punch
  • Martha Stewart glitter
  • Rhinestones from stash


Provo Craft Card Making Contest

Provo Craft is going to be announcing a new product on HSN on January 20, 2011.   Anna Griffin is also going to be introducing a new product on the same day.  Provo Craft is sponsoring a card making contest and the winners will receive both new products.  After each airing on HSN, two winners will be posted on Jinger Adam’s Facebook Page.

The requirements for the contest are that you create a card using at least one Anna Griffin product and one or more of these Cricut cartridges:  Don Juan, Wall Decor & More, and Winter Lace.  Entries have to arrive at Provo Craft offices no later than Tuesday, January 18, 2011.

I just mailed my card today, January 13, and I am hoping it arrives it time.  I sent it priority mail and it just has to go from CA to UT, but with this being a holiday weekend I am going to be holding my breath.

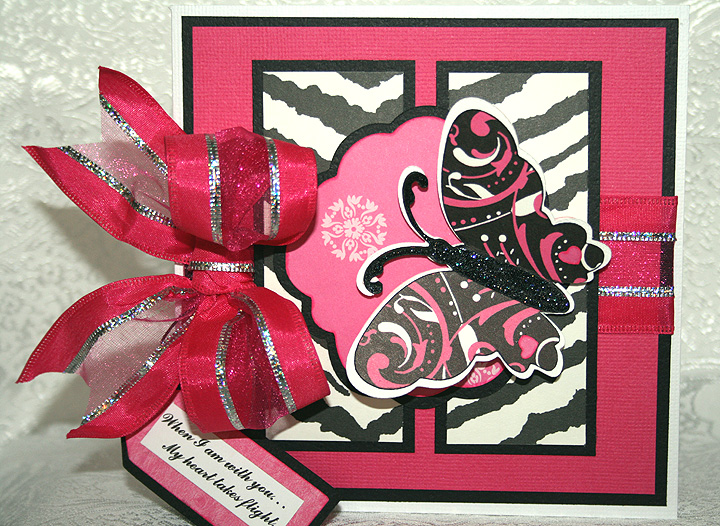
I went searching through my stockpile of cardstock because I was pretty sure I had some Anna Griffin paper somewhere.  I found two different paper pads, one with soft, subdued pastel prints and the other with bright, wild prints.  I opted to go with the bright prints and paired them with Bazzill solid cardstock.

My card is 5.5″ square and all cuts are from Wall Decor & More, with the exception of the tag.  The tag is cut from Don Juan.  The sentiment is computer generated and says, “When I am with you….My heart takes flight.”

I cut several layers for the butterfly and pop-dotted him on the front of the card.  I used Stickles for the butterfly’s body.  The ribbon is from Michaels — I got it on clearance at 70% off.  I attached the tag to the bow using a cell phone charm strap.

The inside of the card features more Anna Griffin paper and  hearts cut using Wall Decor & More.

  • Anna Griffin cardstock — Peyton Collection
  • Bazzill cardstock
  • Cricut cartridges:  Wall Decor & More, Don Juan
  • Stickles
  • Ribbon from Michaels
  • Cell phone charm strap

Bring It On — 1st Card of 2011!!


I haven’t posted in a quite a while.  I’m still busy with the business, so that is a good thing.  I decided to take a little down time and make a card.  The nice thing is that this card fits so many challenges that are starting off the new year. 

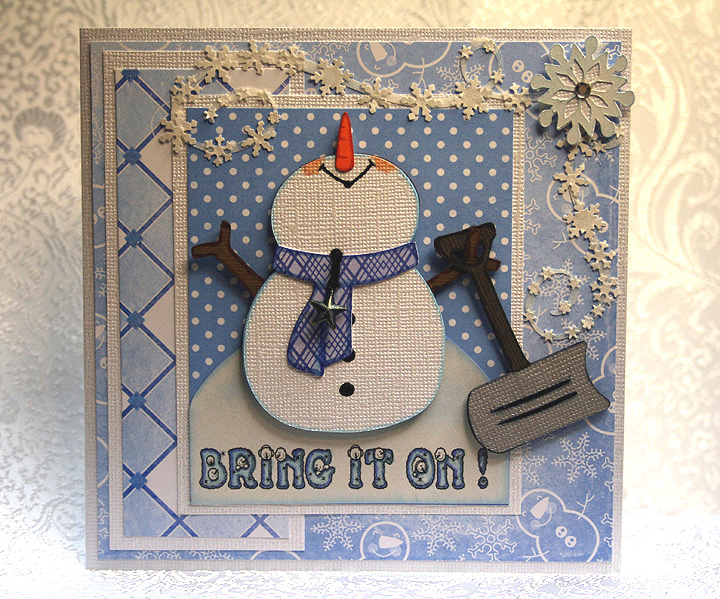
I made a whimsical snowman, who is looking up and telling Mother Nature to “bring it on!”  He is all prepared — he has his snow shovel at the ready.

The patterned paper is by Die Cuts With a View (DCWV) — from one of the holiday stacks that I picked up at Jo-Ann’s.  I cut the snowman with my Cricut using the Doodlecharms cartridge.  I used Design Studio to hide his face so I could move his nose to the top in order to have him looking up into the sky.  I sure hope this is what he looks like, and not some strange looking snowman/unicorn creature.

The snow shovel is cut from the Sesame Street Friends cartridge, the snowman’s scarf from 3 Birds on Parade, the large snowflakes from Accent Essentials, and the snow flurry swirls are from Calligraphy.  I printed the sentiment on the computer using a free font that I downloaded.  It has little snowmen faces peeking out of the letters.  I colored the letters using Copics.

I cut the flurry swirls from a transparency sheet (acetate) so they would be clear.  I then took some white paint and dabbed on them to give them a little opacity, but not too much.  I wanted them to remain in the background when I glued on all the small snowflakes, which I made using a Martha Stewart snowflake border punch.  I used the negative cuts (the part that usually gets thrown away).  Gluing those little snowflakes was a tedious job.

The finishing touches include a small metal star charm hanging from the snowman’s scarf and some rhinestones in the centers of the large snowflakes.  The charm was gold but I thought it looked too stark on the card, so I took my Copics and changed the color. 


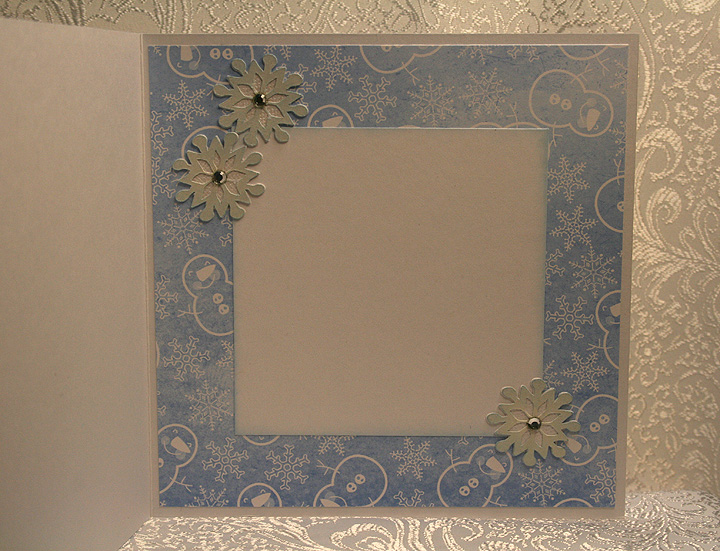
I placed three of the large snowflakes on the inside of the card:

Here are the challenges that I am entering :

Circle Blog Weekly Challenge #15:  Feeling Frosty!  The requirements are to use white paint, a snowflake and something metal.  I think I covered all of those bases with this card.

Jitterbuggin’ Challenge – Sketch 29 – Let It Snow!:  The requirements are to follow the sketch, use blue somewhere on the card, and include something snow related.

Fantabulous Cricut – Challenge Me Monday #41 – Snowy Delights:  The requirements are to create a project using snow or snowflakes.

Cooking With Cricut – Snow Fun!:  The requirement for this challenge is any project with snow or winter-time activities.

Made By Momo:  Make something with a snow theme.

My Sheri Crafts Challenge #39 – Winter:  What winter means to you. 

  • DCWV patterned paper
  • Cricut cartridges used:  Accent Essentials, 3 Birds on Parade, Calligraphy, Doodlecharms, and Sesame Street Friends
  • Clear acetate (transparency)
  • Martha Stewart snowflake border punch
  • Charm from stash
  • Rhinestones
  • Copics

Up On The Wooftop for Jitterbuggin’ Challenge – Here Comes Santa Claus!

 Ho, ho, ho!
Who wouldn’t go!
Ho, ho, ho!
Who wouldn’t go!
Up on the rooftop
Click, click, click
Down thru the chimney with
Good Saint Nick

The above chorus is the inspiration for this card.  I haven’t made a card in so long that I finally took a little time and came up with this card for this week’s challenge at Jitterbuggin.  Now I have to put all the papercrafting supplies away and get back to embroidering. 

I don’t know why, but this card seemed to take forever to make.  I’m glad I didn’t keep track of the hours I have in it — it would probably be embarrassing to admit I took that long.  

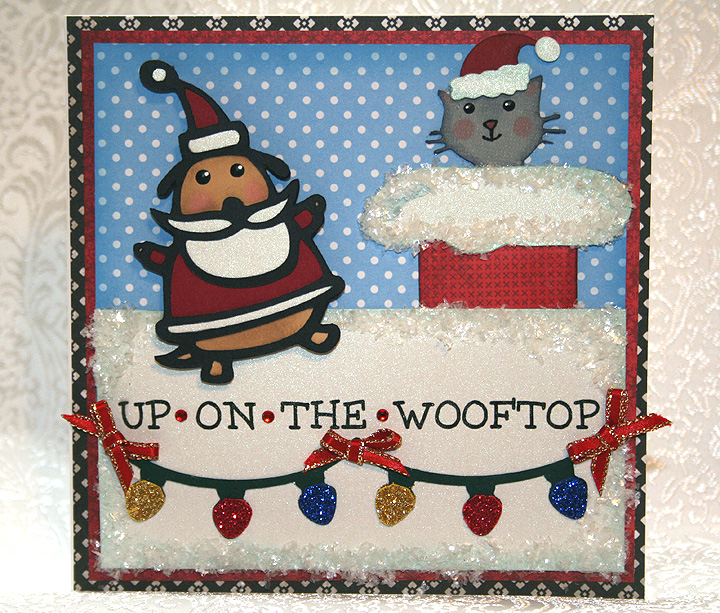
The challenge was fairly easy — no sketch to follow or any requirements other than to use a Santa on your card.  I sure hope Santa Paws counts because he is certainly busy up on the wooftop with his little kitty helper.

I laid the card out in Design Studio and used a house from the Cricut Lite cartridge Jolly Holidays for the roof.  The house is over 10″, but I laid it on the mat so that the house part was off the mat and the only part that cut was the roof.  I wanted the roof to fill the entire front of my card, which is 5.5″ square.  The house design I used has Santa’s feet hanging out of the chimney, but I trimmed them off for this card.  I also used the hide contour feature of Design Studio to hide the footprints in the snow that are on this particular house. 

The patterned paper is all from various DCWV paper stacks and the solid white cardstock on the front is Pearls from Core’dinations. 

Santa Paws is cut from Paper Pups.  The cat is from ZooBalloo and his hat is from Jolly Holidays.  I printed the sentiment directly on the Pearls cardstock, leaving an extra space between the words so I could add a small rhinestone.  The strands of lights are from Create a Critter and I glittered the bulbs.  The snow on the roof is from Martha Stewart.  I added bows from 1/8″ ribbon to give a festive look to the lights.

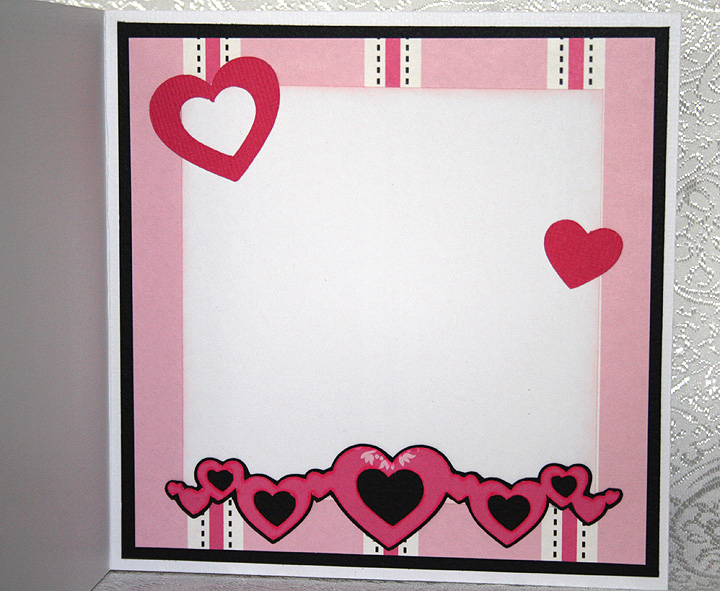
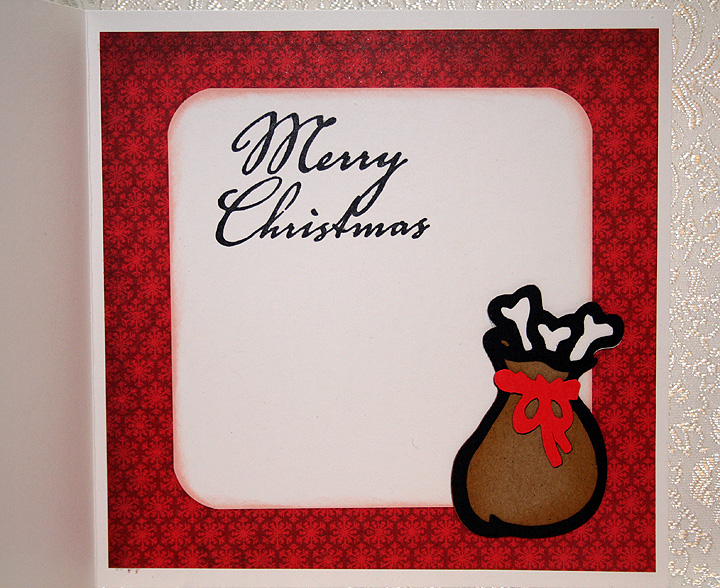
I cut Santa’s sack from Paper Pups and put it on the inside of the card.  The sentiment is a $1 stamp that I got at Michaels. 

  • Cricut Design Studio
  • Cricut cartridges:  Create a Critter, Jolly Holidays, Paper Pups, Zooballoo
  • DCWV — various paper stacks
  • Core’dinations Pearl cardstock
  • Martha Stewart Snow
  • Glitter, rhinestones, rubber stamp — all from Michaels $1 bins
  • Ribbon from stash

Jitterbuggin’ Challenge – Let’s Give Thanks! – Thanks From the Bottom of My Heart

The current challenge at Jitterbuggin’ is to follow the sketch, add a Cricut cut and emboss something. 

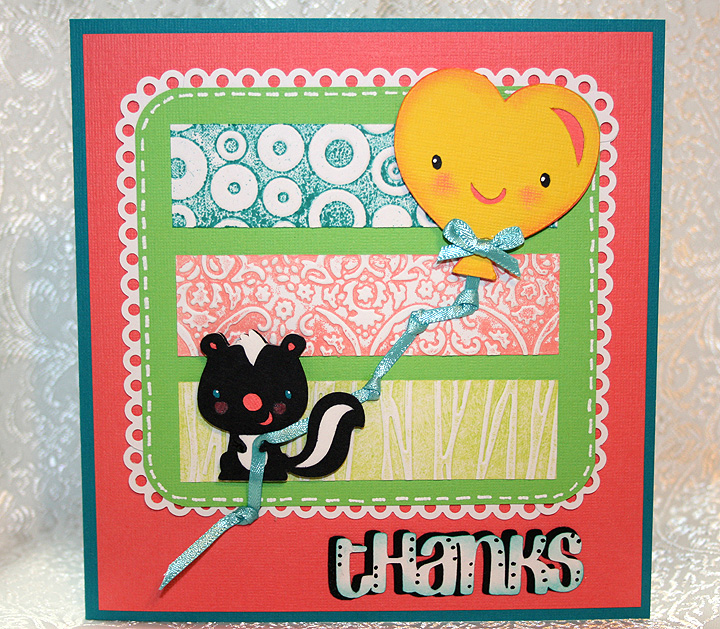
I’m not sure where my colors for this card came from — I must have been in a “bright” mood.  I recently received an order from Stampin’ Up and it was sitting in a box and I started pulling out colors.  All the colored cardstock is from Stampin Up’.

I embossed the three center sections using my Cuttlebug and the following folders:  Spots & Dots, Textile Texture and Forest Branches.  I inked each folder with a different color of ink and then ran white cardstock through the Cuttlebug.  The white scalloped trim around the center section is a Martha Stewart Punch Around the Page set called Scallop 3-Dot.  I used just the very top part of the punched piece — the top dot.  I had to piece it because my cardstock size was not the exact size to take advantage of the punch-around-the-page feature.

I used my Cricut to cut out the skunk from the Create a Critter cartridge.  I also cut the heart-shaped balloon from Create a Critter.  The “thanks” is cut from Don Juan.  I attached some ribbon to the ballon and then attached it to the skunk’s hand.  I added a bow to the ballon. 

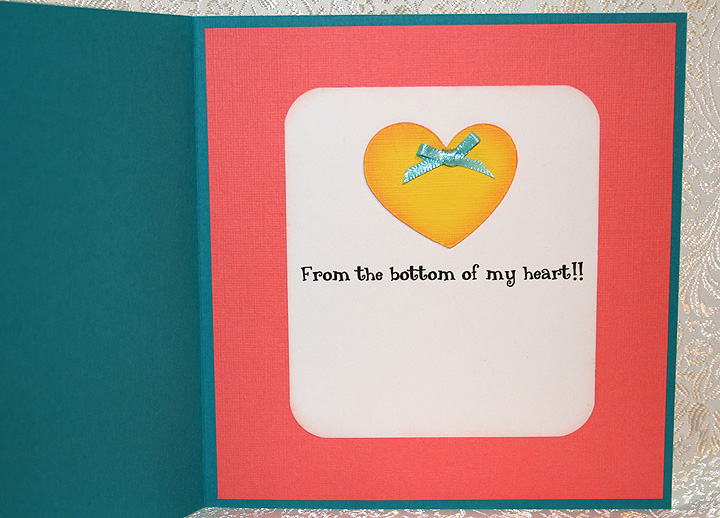
For the inside of the card, I cut another heart from Create a Critter.  I printed the sentiment on the computer.  I added another bow to the inside heart.

  • Stampin’ Up cardstock
  • Cricut cartridges:  Create a Critter and Don Juan
  • Cuttlebug folders:  Spots & Dots, Textile Texture and Forest Branches
  • Martha Stewart Scallop 3-Dot Punch Around the Page set
  • Ribbon from my stash

Cricut Circle Magazine Challenge for November – Little Deer Shaker Ornament


The first thing I have to say is how excited I am again — my penguin shaker ornament card was one of the winners at the Fantabulous Cricut Challeng Blog.  Thank you so much FCCB!!

Now on to the Cricut Circle magazine challenge, which I forgot all about when I made my penguin shaker ornament last week.  I posted my ornament card on the Cricut message board, and a fellow Circlet asked me if I was going to enter my card in the Circle magazine challenge.  She was even kind enough to give me the link.  I went to the website and reviewed the rules and saw that the project must be newly created, so I figured my penguin card would not qualify — especially since it had just won a challenge.  With time running out on the magazine challenge, I decided to create a new shaker ornament card especially for it. 

For this challenge, which is only open to Circle members, the project has to have at least four Cricut cuts and also use one other Provo Craft product — like the Cuttlebug, Yudu, etc. 

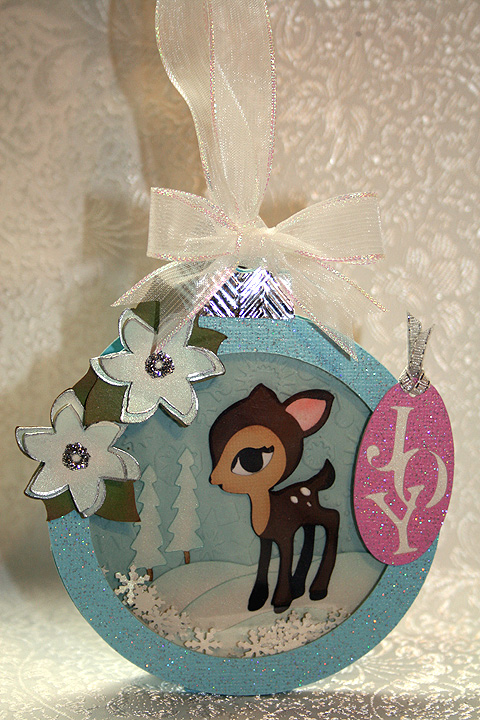
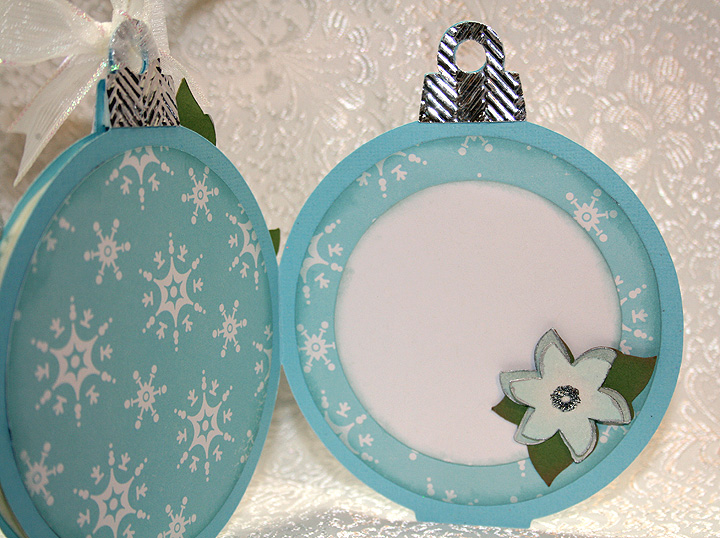
I made another shaker ornament card, only this time I put a deer inside.  I used Core’dinations Core Couture cardstock for the ornament — I like it’s glittery look.  I used the ornament from Joys of the Season cartridge.  I used Cricut Design Studio to weld two ornaments together to make the card.  I also welded a rectangle from George and Basic Shapes to the bottom so that the card can also stand alone if it is not hanging on the tree.

The deer is one of my favorite cuts and he is from the Cindy Loo cartridge.  The snowy hills are from Country Life, the trees from Christmas Cheer, the poinsettias from Winter Woodland, and the tag is from Very Merry Tags.  I cut the poinsettias from white cardstock and inked them blue.  I edged them using a Krylon Silver Leafing Pen and added silver Stickles to the centers.   

I used my Cuttlebug to emboss the background cardstock in the shaker using the Snowflakes embossing folder.  I also embossed the tops of the ornament, which I cut from silver metallic cardstock, using the Herringbone embossing folder. 

I used a Martha Stewart border punch to make the snowflakes that shake around in the card, using the negative cuts from the punch. 

As I did on the penguin ornament card, I put the silver tops on the insides and back of the card.

  • Core’dinations Core Couture cardstock
  • Cricut cartridges:  Christmas Cheer, Cindy Loo, Country Life, George and Basic Shapes Joys of the Season, Very Merry Tags and Winter Woodland
  • Cuttlebug embossing folders:  Herringbone and Snowflakes
  • Martha Stewart snowflake border punch
  • Silver Stickles
  • Krylon Silver Leafing Pen

Scrapbook Shopping in Taipei, Taiwan

When I first moved here, I was worried about being able to find any craft supplies as we do not have any stores like Michaels or Joann’s.  We have DIY areas – mostly for beading and jewelry making supplies which is big here.  As we continue to venture out into new places in town, I have been able to find some pretty cool items – especially rubber stamps and Asian style papers.

We went to the “mall” on Easter Sunday to see the Alice in Wonderland movie and as we wandered through the stores, my husband spotted a rubber stamp store and tried to convince me to head the other way.  Figuring out what was going on, I made my way around the corner and spotted it!  Sadly, stamps here are more expensive than in the States (along with many other supplies – especially from USA companies).  I’ve decided to collect unique stamps and supplies while I am living here as they are so different than much of what is available in the States.

Here are a couple photos of my latest purchases here.  I finally got a multi pack of the colored mini stamp pads for shading, but they are certainly much more expensive (nearly $30 for the set).  To give an example of how expensive things can be compared to the US, even with the bulk discount they give here – all this totaled nearly $200 US.

The multi stamp set was over $100 normally and on sale for slightly less.  Normally I would’ve probably passed right by this, but there were some adorable Chinese New Year cards made up with these.  I need to have my husband take the word ones into work and have them translated so we know what we are stamping now! 🙂

You can see the heads and bodies are separate so there are some fun things you can do with these stamps.  Much of the designs I saw appeared embossed and the individual small stamps glued onto the cards!  I would’ve taken photos, but no cameras are allowed in the malls here and they are quick to stop you if you try to take photos.

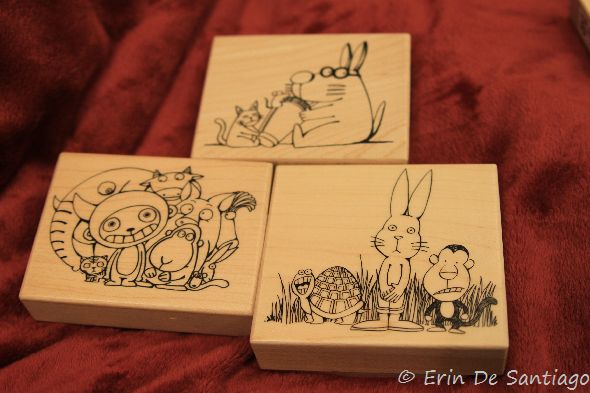
The last picture is three of my favorite ones I got.  The facial expressions and designs on these guys are hilarious – I cannot wait to start making some cards with them!  I have signed up for the Suzanne Dean Copic class and hope to start working on that soon!

-Posted by: Erin