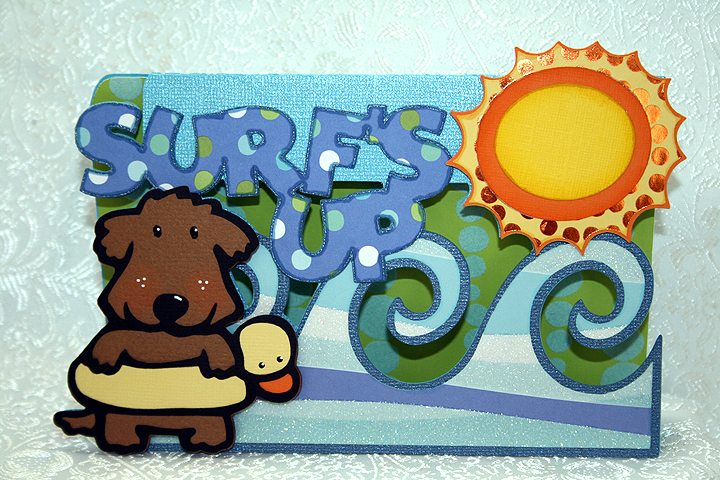
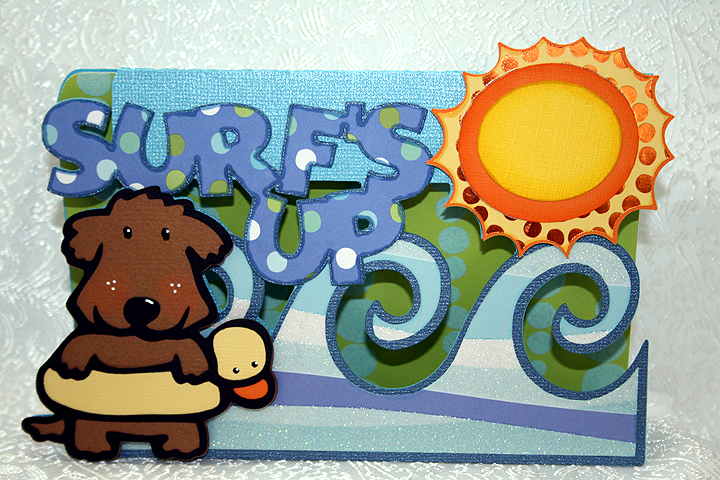
Surf’s Up Card Using Cricut Paper Pups Cartridge


This is a card I made to enter in Bitten by the Bug 2‘s Water Theme Challenge.  The Design Team made some fantastic projects that provided lots of inspiration.  Donna, a member of the Design Team, makes wonderful shaped front cards and I have always wanted to try making one myself.  When I saw her card for this challenge, I decided it was time to give it a try.

The patterned paper is from a me & my Big ideas paper pad that I picked up at their warehouse sale a few years ago.  What a fun day that was — Erin & I brought home a car load of goodies! The solid cardstock is from Bazzill.

Besides not knowing what I was doing, all the welding proved challenging.  I laid out lots of shapes in Design Studio and welded them together.  For the card front, I welded a rectangle from George and Basic Shapes cartridge with waves from Life is a Beach, a sun from Mickey & Friends, letters to spell “Surf’s Up” from Mickey Font, and finally the little dog with the duck floaty from Paper Pups.  All these shapes I then welded to a larger rectangle to form the back of the card.

I cut out lots of layers, did some inking, and then applied them using lots of pop dots.  My card doesn’t have the depth that Donna’s cards have, but I am happy with my first try.

I added a piece of pattern paper to the inside, but I have to figure out where I will write a message.  The paper I used is flocked, so it is bumpy and will not be good for writing.  I liked the paper, though, because it reminds me of air bubbles.

  • Cricut Cartridges:  George & Basic Shapes, Life is a Beach, Mickey & Friends, Mickey Font, Paper Pups
  • Cardstock:  Bazzill, me and my Big ideas
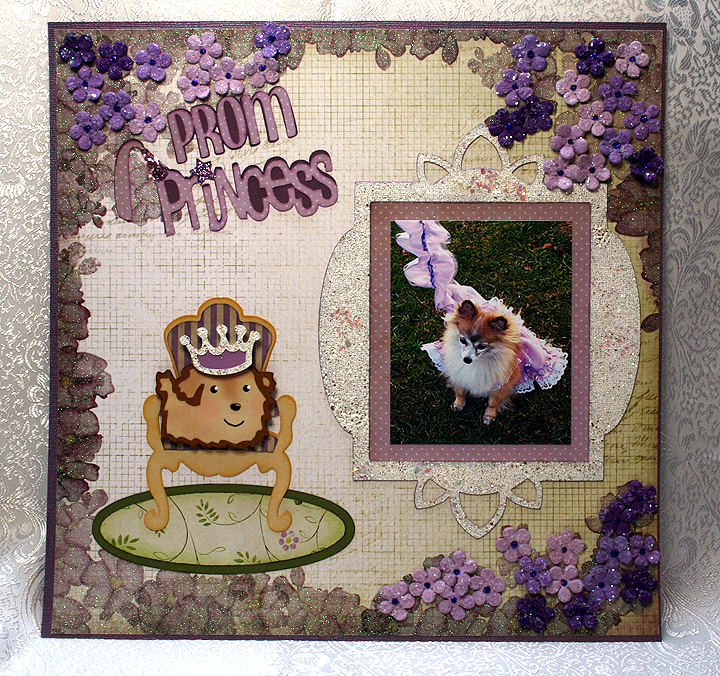
Prom Princess Scrapbook Layout

Wow, it has been so long since I posted something on our blog.  A couple of weeks ago, Bitten by the Bug 2, posted their Princess (the Word) Challenge and I decided I wanted to participate.  Of course, I waited until the last minute to finish my project.  Time is running so short, in fact, that I am going to post pictures right now so I can link my project to their blog and then come back and post the details.   I am hoping I can come back and add comments without creating a disaster — we’ll see how that works out 🙂

OK, now I will see if I can add some details.   The picture in this layout is of our dog and it was taken in 2006, shortly after we adopted her from a rescue group.  Fifi was in foster care for about a year before we got her, so we decided to keep the name she came with — even though it was not high on my hubby’s list of dog names.

Fifi also came with a few issues, the most worrisome was that she nipped.  We talked with our veterinarian about the problem and she recommended a dog trainer–Fifi likes to refer to her as her personal trainer.  Anyway, the trainer seemed to do the trick as Fifi has not nipped since getting individual and group training.

At the end of the year, the trainer had a party for the dogs.  She does this each year and always chooses a different theme.  For 2006 the theme was Prom.  The dogs all came dressed up, but once they walked for judging they got to get undressed and get down to some serious partying — which included running in the dog park and lots of doggy treats.

This was the first  (and so far only) time that Fifi has dressed up — and I wanted to make her something special to wear.  I altered a dog pattern to make her frilly dress.  I also made a matching cover for her leash.  I was surprised that Fifi did not mind wearing the dress.  After walking for the judges, Fifi was chosen as a Prom Princess and her award was a new chew toy.

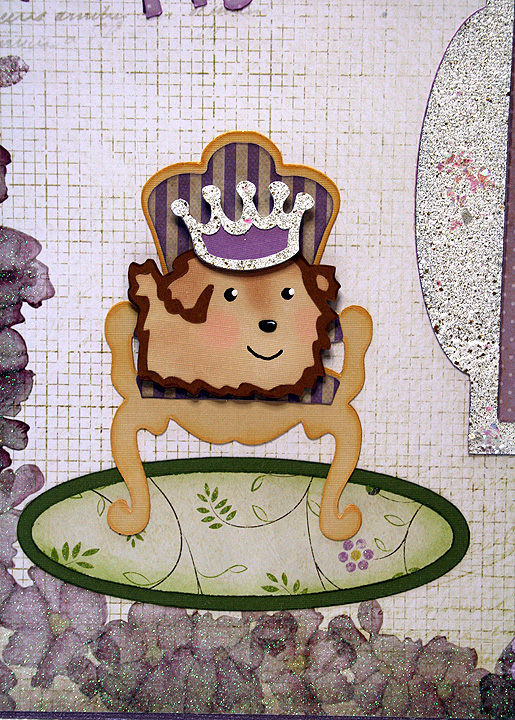
 I used a paper stack from Die Cuts With a View called The Chateau Lavender.  I laid out my design in Cricut Design Studio and I used the Once Upon a Princess cartridge for the title “Princess” cut and Don Juan for “Prom”.  The frame was cut from Elegant Edges, the throne from Formal Occasion and the dog and crown from Paper Pups.

 I did some heat embossing on the frame using some Stampendous products that I recently bought.  The embossing powder I used all over the frame is called Fran-tage Shabby White Opaque.  It is chunky and has lots of gold glitter in it.  I also added some Stampendous Shaved Ice on top of the powder before I heated it — the Shaved Ice adds chunks of bling.  My only problem was trying to keep it from blowing all over.  I heated the frame from underneath, as Stampendous recommends.

 I cut a throw rug to go underneath the throne using George and Basic Shapes.  For the white on the crown, I heat embossed it using the same Stampendous products that I used on the frame.  I did some chalking on the pup.

I used Stampendous Fran-Tage Lavender Crushed Glass Glitter on the princess hat in the title and used Stickles on the star that dots the “i”.  The last step was the small flowers, which are Recollections brand from Michaels that I recently got on clearance.  I used Stickles in the center of the flowers.

  • DCWV The Chateau Lavender
  • Cricut Cartridges:  Don Juan, Elegant Edges, Formal Occasion, Once Upon a Princess, Paper Pups
  • Stampendous Fran-tage Shabby White Opaque Embossing Powder, Lavender Crushed Glass Glitter, Shaved Ice
  • Recollections flowers
  • Stickles


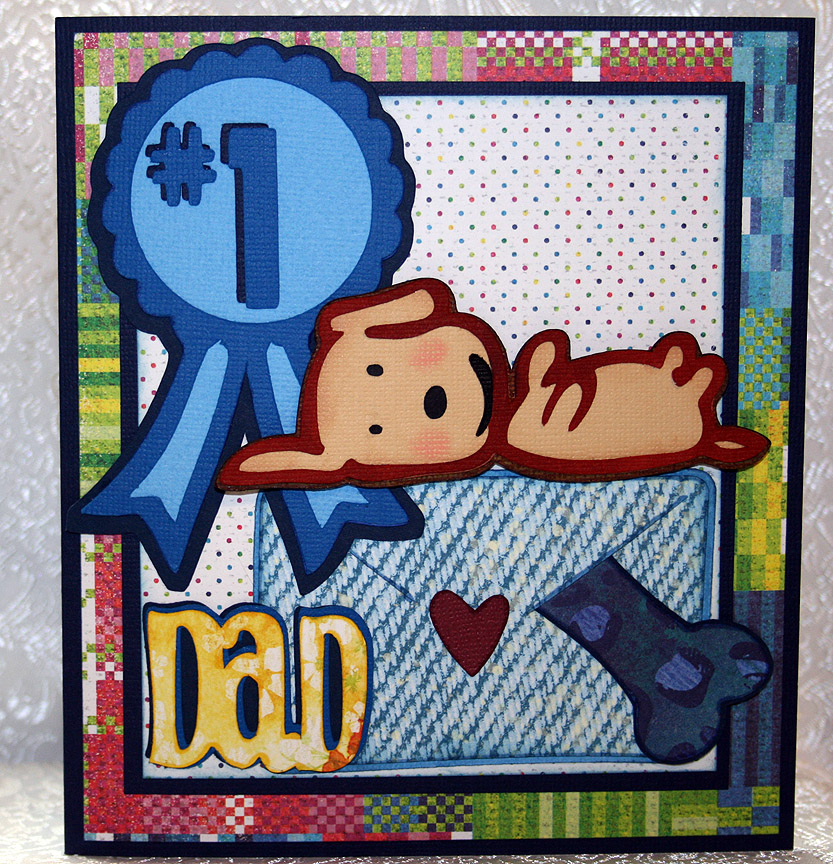
Father’s Day Card From The Smoochy Poochy


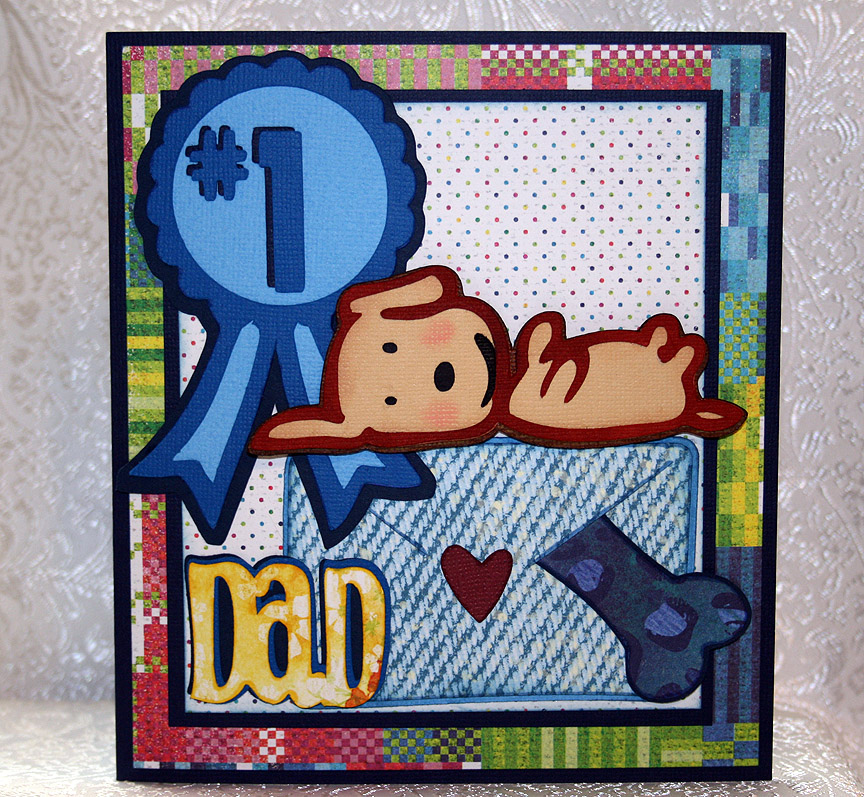
I decided to make my dear hubby a Father’s Day card from our dog.  Her name is Fifi and she is a rescue dog — part Pomeranian and part Chihuahua.  She is such a daddy’s girl that I figured he would enjoy it.

I call her our Smoochy Poochy because she loves to give kisses.  She also loves toys — her favorites are the fake fur bones with squeakers inside.  She has an assortment of them in all different types of prints — from giraffe to leopard prints. 

I made this card to enter into two challenges.  The weekly challenge at the Cricut Circle Blog is a sketch challenge, so I followed that for the layout of my card. 

The latest challenge at Cooking With Cricut is a Father’s Day related project that includes a Cricut cut.  I used several Cricut cuts on this card.

I couldn’t find a dog that looked like Fifi, so I opted for this cutie on the Paper Pups cartridge.  I chose this one because the dog is on its back and Fifi has a tendency to go “belly up” while she is sleeping.  The dog is lying on an envelope that she has so thoughtfully placed one of her squeaky bones inside for Dad.  The ribbon and bones are from Paper Pups also.

I used Doodlecharms for the envelope, Beyond Birthdays for “Dad” and Sans Serif for “#1”. 

The solid cardstock is Bazzill and the printed paper is all from Basic Grey — their Lauderdale collection.

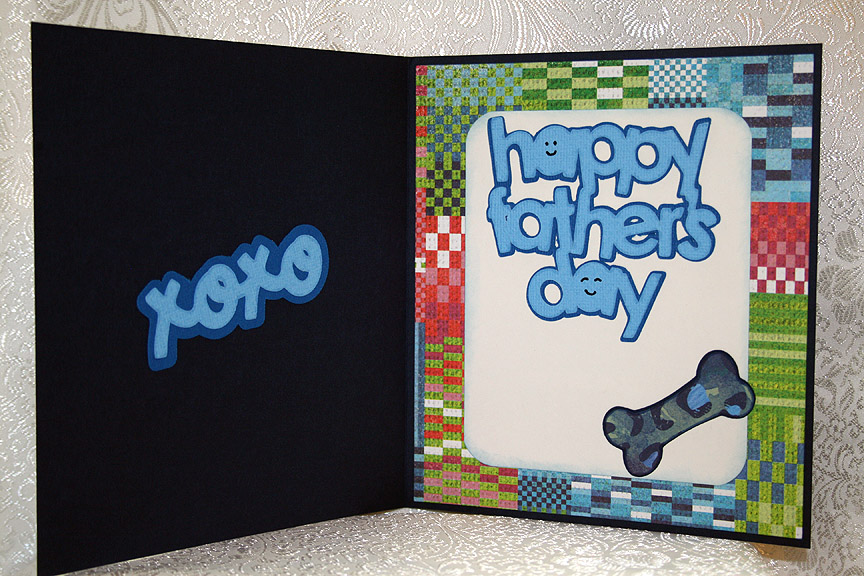
For the inside of the card, I used Paisley for the “xoxo” and Simply Charmed for the “Happy Father’s Day” sentiment.  I added another bone inside.

  • Cricut cartridges used:  Beyond Birthdays, Doodlecharms, Paisley, Paper Pups, Sans Serif, Simply Charmed
  • Bazzill cardstock
  • Basic Grey — Lauderdale collection

Up On The Wooftop for Jitterbuggin’ Challenge – Here Comes Santa Claus!

 Ho, ho, ho!
Who wouldn’t go!
Ho, ho, ho!
Who wouldn’t go!
Up on the rooftop
Click, click, click
Down thru the chimney with
Good Saint Nick

The above chorus is the inspiration for this card.  I haven’t made a card in so long that I finally took a little time and came up with this card for this week’s challenge at Jitterbuggin.  Now I have to put all the papercrafting supplies away and get back to embroidering. 

I don’t know why, but this card seemed to take forever to make.  I’m glad I didn’t keep track of the hours I have in it — it would probably be embarrassing to admit I took that long.  

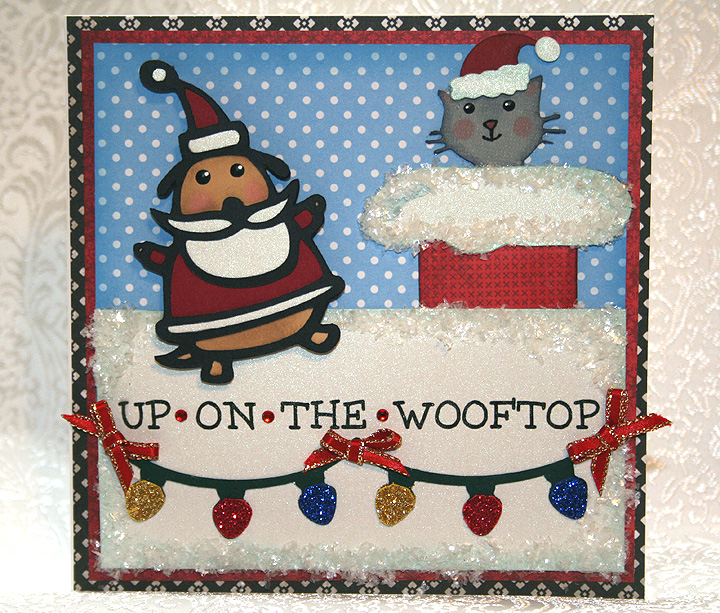
The challenge was fairly easy — no sketch to follow or any requirements other than to use a Santa on your card.  I sure hope Santa Paws counts because he is certainly busy up on the wooftop with his little kitty helper.

I laid the card out in Design Studio and used a house from the Cricut Lite cartridge Jolly Holidays for the roof.  The house is over 10″, but I laid it on the mat so that the house part was off the mat and the only part that cut was the roof.  I wanted the roof to fill the entire front of my card, which is 5.5″ square.  The house design I used has Santa’s feet hanging out of the chimney, but I trimmed them off for this card.  I also used the hide contour feature of Design Studio to hide the footprints in the snow that are on this particular house. 

The patterned paper is all from various DCWV paper stacks and the solid white cardstock on the front is Pearls from Core’dinations. 

Santa Paws is cut from Paper Pups.  The cat is from ZooBalloo and his hat is from Jolly Holidays.  I printed the sentiment directly on the Pearls cardstock, leaving an extra space between the words so I could add a small rhinestone.  The strands of lights are from Create a Critter and I glittered the bulbs.  The snow on the roof is from Martha Stewart.  I added bows from 1/8″ ribbon to give a festive look to the lights.

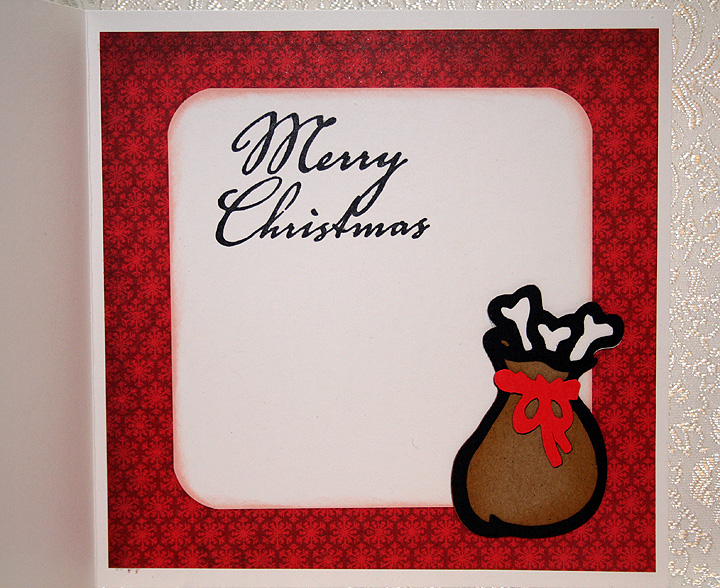
I cut Santa’s sack from Paper Pups and put it on the inside of the card.  The sentiment is a $1 stamp that I got at Michaels. 

  • Cricut Design Studio
  • Cricut cartridges:  Create a Critter, Jolly Holidays, Paper Pups, Zooballoo
  • DCWV — various paper stacks
  • Core’dinations Pearl cardstock
  • Martha Stewart Snow
  • Glitter, rhinestones, rubber stamp — all from Michaels $1 bins
  • Ribbon from stash