Welcome Spring — Cricut Campin’ Critters

This little card is for the Spring is in the Air weekly challenge at Bitten by the Bug 2.   The seasons may be more subtle here in California than in other states, but I always look forward to spring.  I love seeing all the birds and listening as they fill the air with chirping.  Right now we have mockingbirds building nests in the trees outside our kitchen door.   And yesterday I watched a hummingbird in our orange tree as I sat at the dining table.

My card is whimsical — a little fox doing some bird watching on a beautiful spring day.  I printed the papers using my Imagine and the Nursery Tails cartridge.  I love that you can print to fit whatever you are making, as in the background.  I printed this at 5″.

Front2

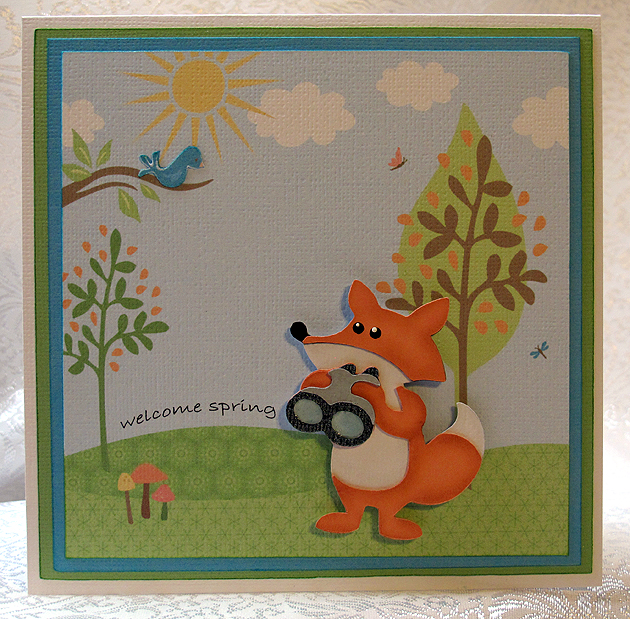
I made the  “welcome spring” sentiment for the card using Photoshop.  I took the text and put it on an arc.  I printed it out on a piece of plain paper and put the background piece over top.  I held both up to a light so I could see where the sentiment was going to be and when I got it where I wanted it, I held it in place with a few pieces of the blue painter’s tape.  I just lightly pressed the tape down — I didn’t want it sticking too much and removing any of the color.  Then I ran both pieces through the printer.

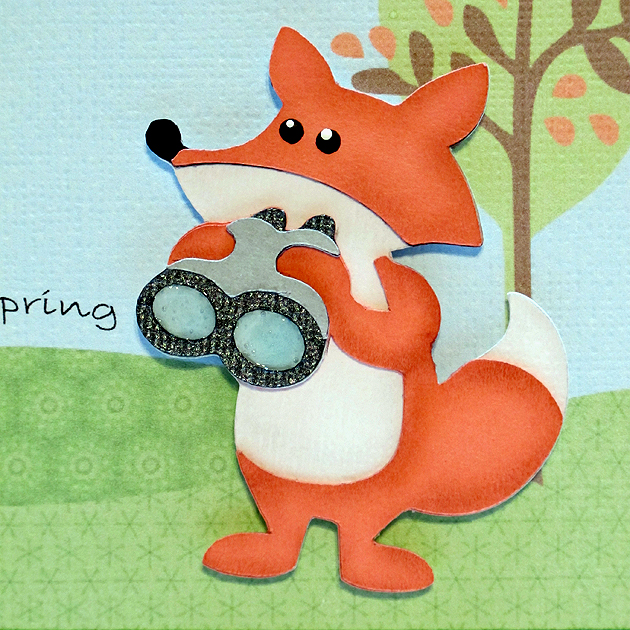
The fox is from Campin’ Critters and cut at 2.5″.  I used chalk to give his body some definition and used pop-dots to attach him to the front.  I added Glossy Accents to the lenses in his binoculars.

Fox2

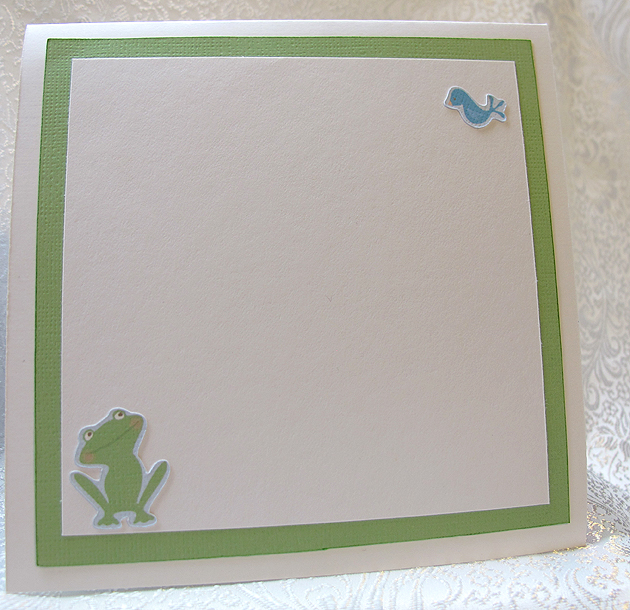
I cut an extra bird and layered it on the front.  For the inside I added another bird and a frog, also from Nursery Tails.

Inside

I hope you enjoy my spring card.

  • Cricut cartridges – Campin’ Critters, Imagine Nursery Tails
  • White cardstock – American Crafts
  • Chalk
  • Ranger Glossy Accents

Cricut Candy Corn Box and Totes


My goal this weekend was to make a candy corn box, but then I had an idea and soon had candy corn boxes all over my craft room.  I wanted to participate in two challenges, the 3D Halloween Treat Container challenge at Bitten by the Bug 2, and the 3D Treats challenge at Cooking with Cricut.

I have seen several versions of Cricut candy corn boxes using a cake box cut on the internet.  Using Cricut Craft Room, I chose the triangle box cut from Sweet Tooths cartridge.  I liked that it is a 2-piece box, with a separate top and bottom.  The paper is Michael’s Recollection brand.

I cut the bottom at 6″, from orange cardstock and cut the top from white cardstock.  Using George and Basic Shapes, I put a triangle on my mat and sized it to match the triangle on the top of the box.  I then cut that from white cardstock.

I laid out two more triangles in CCR, one in yellow and one in orange.  Using ovals from George and Basic Shapes to intersect the triangles, I got the shapes I wanted for the corresponding pieces.  I then glued the orange and yellow layers onto the white triangle.

Using my Cuttlebug and the spider web folder, I embossed the entire front piece after it was glued together.  I then adhered the piece onto the top of my box.

I sometimes forget about all the dies I have for my Cuttlebug, opting to cut with my Cricut instead.  But this time I remembered I had some cute Halloween dies and that is what I used for my spider and the tiny candy corns on the front of the box.  I used the 3″x3″ Cuttlebug Halloween die.

I painted the eyes on the spider and colored the candy corns using Copics.  Then then applied Glossy Accents on the candy corn to give them some shine.  I added pop-dots to the spider and candy corns and attached them on the top of the box.

The tags I used on all my candy corn boxes is a free printable I found on a website called HelloCuteness.com.  The printable is from their old website, but you can get to their new site with the link I am sharing.

I hand cut around the tags, glued them onto some orange cardstock and again hand cut around the orange cardstock. For the cake box candy corn, I tied some twine through the hole on the tag and pop-dotted it onto the top.

While I was working on the cake box version, I got an idea to create a different type of candy corn box —  one that is more like a tote.  Using CCR and George and Basic Shapes, I started laying out triangles and rectangles to get what I wanted.  It took a little time and several attempts, but I finally got it worked out.

Here is my final version, along with two of my better attempts.  They look pretty much the same — the main difference is in the tabs where they attach together and how I assembled them.  The base shape is cut from orange cardstock and then there is a yellow and white piece that attaches to the front and back.

I used a Peachy Keen face stamp, stamping just one side.  I thought about stamping both sides of the tote but decided I didn’t want any two-faced candy corns!  I used a black pen to add the stitch marks to the fronts and backs.

For the first tote, I put it all together and then realized it would be much easier to attach the white & yellow pieces, stamp the face, and punch the holes for the ribbon handle if the tote was still flat.  The next two totes were done flat and it was a lot easier.  I used Terrifically Tacky Tape to assemble the totes.

I used a Crop-A-Dile to punch the holes in the side and 12″ of ribbon for the handle.  After threading the ribbon through the hole, I tied a knot and used some hot glue to glue the ends down inside.  The tags are hung using 1/8″ ribbon and I threaded it through the same hole as the handle before using the hot glue.  Again, I did this on the first tote after it was assembled.  For the next totes I added the ribbon before assembling the them.

  • Cricut Craft Room
  • Cricut cartrideges:  George and Basic Shapes, Sweet Tooth Boxes
  • Copics
  • Glossy Accents
  • Ribbon

Spooky Halloween Pumpkin Card


This is a Halloween card I made for a couple of challenges.  The first one is Cooking With Cricut, and their challenge is to make a project using a pumpkin and circles or dots.  The second one is Fantabulous Cricut Challenge Blog, and their challenge is to make a Halloween project using the colors black and orange.

My card fits in a #10 business envelope — it’s approximately 9″ x 4″. The pattern paper is from a DCWV stack from a year or so ago.  I laid the design out in Cricut Craft Room and used my Expression to cut everything.

I used the Happy Hauntings cartridge for the sentiment and cut it at 1.75″.   The pumpkin is from Autumn Celebrations, cut at 2″.  The bats are from Holiday Cakes and were cut on shadow feature at 1″.  I bent their wings up and glued down just the bodies.

And here is the inside of the card.

The little bear posing with my card is my newest Disney Duffy Bear, the Halloween 2012 bear.  He is so cute with his little treat bag that is shaped like a Duffy bear.

  • Cricut Craft Room
  • Cricut cartridges:  Autumn Celebrations, Happy Hauntings, Holiday Cakes
  • DCWV holiday stack

Happy Thanksgiving Pumpkin Card


I made this card for the latest challenge at Cooking With Cricut.  The challenge was to make a Thanksgiving card for the I Feel the Love Project (IFTL).  Each month they select a different person, organization or group to receive handmade projects.  This month the cards are going to Surrey Place Care Center, a 60-bed skilled nursing facility.

I am getting my card in just under the wire.  In fact, I had better go link my card before time runs out.  Well, I got my card linked to Cooking With Cricut’s page, but for some reason the photo is not showing up.

I made my card in Cricut Craft Room.  I used the pumpkin card feature on Autumn Celebrations, cutting it at 5.75″. The solid color cardstock is from Core’dinations.  The patterned papers are from a paper pad I picked up at Joann’s called Cocoa Mint by Cloud 9 Design.

The leaves are cut at 3″ using two shades of green.  The sentiment is from the Thanksgiving cartridge and is cut at 1.35″.  I used orange vinyl for the sentiment .  I like using vinyl for smaller, more intricate cuts because it cuts so well and you don’t have to put adhesive on it.

The flower was made using my Cuttlebug and the Daisy quilling kit.  It is my first flower made using this kit and I am happy with the result.  I inked the edges of the petals before rolling them up.  I used some Glossy Accents and Martha Stewart crystal glitter on the flower petals.  I attached the leaves to the card using pop dots.

 The inside of the card is simple, mainly because I ran out of time.

Here is another picture where I was able to lighten it up and kill some of the glare so you can see the sentiment better.  I didn’t realize the first pic was so dark.

  • Cricut Craft Room
  • Cricut cartridges:  Autumn Celebrations, Thanksgiving
  • Cuttlebug Daisy quilling kit
  • Core’dinations cardstock
  • Orange vinyl
  • Glitter – crystal

Cricut Art Nouveau Hummingbird Birthday Card


I wanted to make a card to enter in a couple of challenges and this is what I came up with.  The first challenge is Things that Fly in Nature over at Bitten by the Bug 2. The second challenge is Texture at Cooking with Cricut.

I made a 5″ x 5″ card and the patterned paper was all printed on the Imagine using the Country Carnival cartridge.  I love the paper selection on this cartridge and have been wanting to use the design that is on the background of my card for some time.  The reason I bought this cartridge is because of the paper — and the very cool font that it has.

 I cut the hummingbird (at 3″) from watercolor paper using the Art Nouveau cartridge and colored him with Copics.  This is only my second time trying to color with Copics, and I have lots to learn.  I discovered I don’t have enough green markers — I didn’t have enough in the same color group to do any blending.

After I colored the hummingbird, I used a crystal glaze (something I got years ago) to go over sections of his body to try and simulate the iridescence you see in their feathers.

Oh, dear — after looking at the close-up I’m not too sure I should be posting it.  My coloring definitely leaves a lot to be desired!  The circle behind the hummingbird was embossed using the Forest Branches folder.

I recently got the Art Philosophy cartridge, mainly because of the flowers I have seen so many crafters make with it. The roses on this card represent my first time using this cartridge.  I cut them at 2″ and 2.5″ using some Recollections paper from Michaels.  I inked the edges with Tim Holtz Fired Brick Distress Ink.  I used a quilling tool from one of my Cuttlebug quilling kits to roll up the flowers.  I was surprised at how quickly they went together.  The greenery behind the roses is also from Art Philosophy.

I wanted the sentiment to be subtle, so I stamped it in the upper right hand corner (using distress ink) trying to make it look like it is part of the print on the paper.  I added a couple of pieces of lace across two corners and used my sewing machine to stitch around the card.

For the inside of the card, the white area is a shape cut using Art Philosophy.  The corners are a 2″ square of vellum, cut diagonally, embossed with the Swiss Dots folder, and trimmed with lace sewn across the top edges.  I then secured them to the card by stitching around the entire piece.

I originally planned on using the vellum corners on the front of the card, but when I laid everything out, I thought they hid too much of the paper on the front.  So they got moved inside, which worked out fine because I had no plans yet for the inside of the card.

  • Cricut cartridges:  Art Nouveau, Art Philosophy, Imagine Country Carnival
  • Cuttlebug embossing folders:  Forest Branches, Swiss Dots
  • Copics
  • Vellum, scraps of lace

Cricut Create a Critter 2 Owl Witch Card


I was able to use my new Create a Critter 2 cartridge last night to make a card to participate in the latest challenge at Cooking With Cricut,  their Card Outreach Challenge.  The challenge is to make fun Halloween cards (no scary ones) for the I Feel the Love Project.

The “I Feel the Love” Project for September is to make Halloween Cards to be given to the kids who live at Casa Pacifica.   Casa Pacifica serves abused and neglected children and adolescents, and those with severe emotional, social, behavioral, and mental health challenges on California’s Central Coast.  Each year the facility has an amazing Halloween party for the kids. It is IFTL’s goal to send a card to each of the 70 children who reside there. (For more information about Casa Pacifica please visit their website.)
I laid out my card in Cricut Craft Room, cutting the owl at 3″.  The owl’s body was printed and cut on my Imagine, using the Bubblegum Stripes cartridge for the small purple stripes.  I did not use CCR for this step, as it still is not compatible with the Imagine.  I embossed the small tummy piece with the Cuttlebug Swiss Dots embossing folder.
For the owl’s eye, I hid the cut that forms the pupil in CCR.  On the mat in CCR, the circles look perfectly round.  But when I cut the eyes with my Expression, they did not come out round.   I had what looked like a cross-eyed owl.  So I took black paint  and a stylus (you can also use the round end of a paintbrush), dipped the stylus into the paint and then formed black circles on the white part of the eye.  Once the paint dried, I put a white highlight on the black dot.
I added a moon behind the owl, which is a circle that I also cut at 3″.  I embossed the moon with a new Cuttlebug folder I recently got, the bat folder from the Midnight Hauntings set.  The phrase was cut at 1″.  Because of the small size of the phrase, I cut it out of vinyl.  The Cricut easily cuts vinyl.  Vinyl is great for small pieces because it already has adhesive, so you don’t have to fuss trying to put glue on them.
I added Stickles to the band and buckle on the hat.
For the inside of the card, I lined it with a couple of pieces of patterned paper.  I cut the pumpkin treat bag and candy piece, also from Create a Critter 2, at 1.5″.  I cut the shadow layer from cardstock and the black and orange layers from vinyl.
The background paper and print paper inside my card are from a K & Company Halloween collection that came out a year or so ago.  I picked it up on sale and don’t remember exactly when I bought it.
  • Cricut cartridges:  Create a Critter 2, Imagine Bubblegum Stripes
  • Cuttlebug:  Midnight Hauntings embossing folder set
  • K & Company Halloween paper pad
  • Stickles

Wee Wee Wee!! Pig With Pinwheels Shaped Card

I wanted to make a birthday card for my sister-in-law and I wanted to create one that was very whimsical — and I hope I succeeded.  I enjoy making shaped cards and when I found the All Shaped Up Challenge on Bitten by the Bug 2, the idea for my card was hatched.

I love the pig with the pinwheels in the Geico commercials.  You can’t help but smile when one comes on TV, and I have been wanting to do something along those lines for while now.   I decided to make my pig a girly girl and give her a fancy party dress, complete with a birthday party hat.

I started laying out my design in Cricut Craft Room.  Unfortunately, the program still has issues and I ran into some of them while creating this card — and ended up wasting time.  I find CCR so frustrating at times that bad words will just start popping out of my mouth.

When I got ready to cut my card, Cricut Craft Room was down and I could not log in.  I kept getting a message that the program couldn’t connect to the internet.   I kept trying and after an hour or so, I was able to log in and cut my layers.

All the solid color cardstock is from Bazzill, except for the glitter cardstock on the hat — that is from Core’dinations. The patterned paper I printed on the Imagine using the Blast Off cartridge.

I used Create a Critter for the pig and pinwheels and B is for Boy, a Lite cartridge, for the “wee” words.  I welded them all together to form the base of the card.  I used the Swiss Dots folder and my Cuttlebug to emboss the words.  I found some eyelash-type yarn at Joann’s that I used for her dress, layering it so it looks like a fringe dress — reminds me of a flapper dress.  I added some pearls at the neckline and a bow on both the dress and hat.  I used Stickles on the center of the pinwheels.

The inside of the card features a computer-generated sentiment.

I hope this little piggy card brings a smile to my sister-in-law’s face.  I need to make an envelope so I can get it in the mail.  Since it is a over-sized card, I will probably send it in a padded envelope.

I am also entering this card into the following challenges:

Cricut Chirp Challenge #6 – Create a Critter Craft:  use any animal Cricut cut on your project

Scrappy Moms Stamps – Terrific Tuesday Challenge – Shape Up:  create a shape project

  • Cricut cartridges:   B is for Boy Lite, Blast Off (Imagine), Create a Critter
  • Cuttlebug:  Swiss Dots embossing folder
  • Bazzill cardstock
  • Stickles
  • Yarn, pearls, ribbon

Wild About You Onesie Gift Set Using Cricut Create a Critter 2


One of the more popular Cricut cartridges surely must be Create a Critter.  Provo Craft is giving users of Cricut Craft Room a sneak peak of one of their newest cartridges by making five cuts from Create a Critter 2 available for free. There is also a contest, which ends on September 5,  where you can enter your projects using these latest designs through the Cricut Project Center.

My project is a onesie gift set that includes a black onesie decorated with the lion and phrase designs from Create a Critter 2.  All were cut from heat transfer vinyl.  I constructed a box from Sweet Tooth Boxes and made a small gift card using the bird that is on the Icon tab of the lion feature on Create a Critter 2.

When using heat transfer vinyl, it is important to remember that you must mirror (flip) your images in Craft Room because you are cutting the back of the vinyl.  Then when you iron it on your garment everything is facing the correct way and you can read your phrases.

“Wild about U”  is cut from a holographic vinyl that I picked up years ago at a trade show — long before I knew what a Cricut was.   I fell in love with the sparkly rainbow colors and brought a roll home with me.  Unfortunately the vinyl did not come with application instructions, so I did some test runs before applying it on the onesie.  My first attempt at ironing it on produced negative results as I was getting it too hot.  I didn’t realize it and started increasing the time I was pressing, getting even worse results.  I finally dialed back on the heat and the time to get proper application.

The lion is cut from a vinyl that can be peeled hot or cold.  Because he has four layers, I applied him first.  I put down the first layer and pressed for only 4 seconds, immediately peeling off the backing.  I let that layer cool and then added the next.  Again, I pressed for 4 seconds and peeled.  I did this until all four layers were down.

When doing layers, you have to remember to cover up the vinyl that has already been applied and is no longer protected by the clear film.  I use a teflon sheet to cover my design before pressing each layer.

After the lion and the “about” from the phrase were in place, I then added the holographic phrase and applied it.

The gift box is from Sweet Tooth Boxes.  I cut the box that begins on page 10 of the handbook, using just the bottom and lid.  I hid the cut-out area in the lid and then added the shadow feature of the lion — so my box has a lion window to tie in with the theme of the onesie.

I printed the zebra paper for the box lid using my Imagine.  I used a bright purplish cardstock and printed the stripes using the Teresa Collin’s Black & White cartridge.  This put a lot of black ink on the paper, so I used a blow dryer on it and then I let it dry for over an hour.  When I rubbed my fingers on it, the black was still smudging, so I gave it a coat of clear matte spray.

Because Cricut Craft Room does not work with the Imagine, I used my Imagine only to print the paper.  I then transferred the paper to my Expression and cut the lid.  I scored all the lines on the box and lid and assembled them, adding a layer of clear acrylic to form the window of the box.

A gift card was created using the shadow feature and welding two shapes together at the top of the head.  I used two Cuttlebug folders on the bird, Charles (a chevron design) and Swiss Dots.   I did the layers on both the front and back of the card, as I wasn’t sure which way I wanted him facing.

I added a white layer to the inside of the card so there would be a place to write a message.

To finish off the box, I dyed some seam binding using Tattered Angels Glimmer Mist and Adirondak Color Wash.  I scrunched it up while it was wet and let it dry.  Then I tied a bow and made a couple of ribbon roses to add in the middle.

  • Cricut Craft Room:  Create a Critter 2, Sweet Tooth Boxes
  • Cricut Imagine:  Teresa Collin’s Black & White cartridge
  • Cricut Expression
  • Cuttlebug:  Charles and Swiss Dots
  • Tattered Angels Glimmer Mist
  • Adirondak Color Wash

Showering Thanks Elephant Card


This week I was able to make a card to enter into two challenges.  The first is over at Bitten by the Bug 2 for their Elephantly Speaking challenge. The requirement is to use an elephant from any Cricut cartridge — we can chose any theme we want.

The second challenge is at Cooking With Cricut, and this week it’s pretty special because they are celebrating their 100th challenge.  They are doing a surprise thank you for their leader, Melin, and ask that you submit a thank you card to enter the challenge.

My card is approximately 4″ x 9″, made to fit inside a #10 envelope.  All the paper and images for this card were printed and cut on the Imagine, using the Hey Diddle Diddle cartridge.  The only piece I did not cut on the Imagine is the scalloped border across the top, which I cut on my Expression.  I laid that piece out in Design Studio, welding together three scalloped pieces from Accent Essentials to form the border.

My card features an elephant from Everyday Paper Dolls cartridge.  I colored all the detail on my elephant with Copics. The eye is actually printed and then I hand cut it out.  I got the free file for the eyes from My Scrap Chick and was able to resize it small enough to fit.

The title is what lead to the inspiration for this card.  I found it on the Everyday Pop-Up cartridge and when I saw it, I thought of an elephant spraying water.  The style of the lettering reminded me of a circus-type font, so I thought it went well with my little pachyderm.

The spray of water is from the Cake Basics cartridge and the individual drops of water and the water splat are from Everyday Paper Dolls.  I added some Stickles to the water.  I kept the inside of the card simple, using some more water for accents.

  • Cricut cartridges:  Accent Essentials, Cake Basics, Everyday Paper Dolls, Everyday Pop-Up
  • Cricut Imagine:  Hey Diddle Diddle
  • Copics
  • Stickles

Pull the Udder One, You’re How Old?

What a stressful weekend — and we found out the hard way that stress can have an adverse effect on dogs too.  About two weeks ago we found an abandoned kitten in our backyard, and it had a cold.  We started feeding it and even got antibiotics from the vet to give it.  We also started contacting every cat rescue organization in our area and always got the same answer — they could not take in any more cats.

Yesterday around noon we took Fifi, our 10 year old rescue Pomeranian/Chihuahua mix, outside.  She does not like cats but we thought she had been tolerating the kitten being in the yard.  The kitten was becoming tame and yesterday it came up to Fifi and started wrapping itself around her.  I could instantly see that Fifi was stressing out.

We knew something was amiss because Fifi had been having some digestive issues.  Seeing her reaction to the cat, I was sure it was coming from stress.  After that incident, Fifi refused to go back in the backyard.  She would only go out in the front yard, which requires us taking her out on a leash.

When it came time for Fifi to eat, she did not finish her dinner.  We started keeping a close eye on her.  About an hour later she threw up.  Around 1 a.m. we knew something was seriously wrong so we took her to an emergency animal clinic.  Fifi had intestinal bleeding and a temperature of 105 (normal for dogs can be up to 102).   They started her on an IV, antibiotics and gave her some medication for her stomach.

The dr. said it is not uncommon for small dogs to get so stressed out that it causes intestinal bleeding.  We were able to talk to our regular vet today (even though it is Sunday) and she suggested we have the cat out of the yard when Fifi comes home.  We are hoping we get to bring her home around 7 p.m. tonight.

Luckily the animal shelter is open today and we planned on loading up the poor kitten and taking it in.  Steve called a rescue lady that he had talked with yesterday (before Fifi got so bad) and when she found out we were taking it to a shelter she came over and picked up the kitten.

So the kitten stressor is gone and we hope Fifi will come home and be able to recover completely.  I will be taking her to see her own vet tomorrow and hopefully gain some insight to keep this from happening again.  This has been such a huge ordeal on the whole family — we were trying so hard to find the kitten a home.  I had no idea we were harming our dog in the process.  I so wish everyone would spay and neuter their pets.

OK, now on to my card.  I was able to put this together but wasn’t sure I would get it posted in time for the challenge I am entering it in.  Luckily I made it with a few hours to spare.

I made this birthday card for the On the Farm Challenge at Bitten by the Bug 2, which requires you to use any farm animal cut from any Cricut cartridge.  I selected the girl milking the cow from the Country Life cartridge.   My main reason for choosing this cut was that I had a sentiment stamp that I thought would be perfect with it.  The sentiment is from a set by Elzybell, who sadly is no longer making them.

I printed the checked background paper on my Imagine, using the Best Friends cartridge.  The fence and sun are from Pooh & Friends.  I printed the wood design on the fence, again with my Imagine, using the Snapshot: Nature cartridge. The girl milking the cow and the sunflowers are from the Country Life cartridge.  The thought balloon with the sentiment is from Cuttin’ Up.  All cuts, with the exception of those printed on the Imagine, were made using scrap cardstock. The girl and cow, sentiment and the flowers are popped up using foam dots.

And to show I learned something from this challenge, let me tell you about my cow.  She is a Brown Swiss.  The breed originated in the mountains of northeast Switzerland and was declared a dairy breed in the United States in 1906.  I’m not sure that the dark brown marking on her back is accurate, but if not then my Brown Swiss has a dark chocolate beauty mark on her.

After seeing the card assembled, it makes me wonder if there are many women working around cows who wear pink boots!  Well, my milk maid likes her stylish pink boots.

For the inside of the card, I printed another square of checked paper on my Imagine and added some sunflowers to the lower corner.

  • Cricut cartridges:  Best Friends (Imagine), Country Life, Cuttin’ Up, Pooh & Friends, Snapshot: Nature (Imagine)
  • Elzybells stamps