Birthday Shaker Card & Nugget Box

It took me about a year to break my Zing cutter out of its box and give it a try — and now I am kicking myself for waiting so long!  I love it — it is cutting paper that I had trouble cutting with my Expression.  The paper that gave me problems was usually textured.  I had some Bazzill that the Expression would refuse to cut — it looked like it tried to gum its way through.  So far the Zing has cut everything I’ve thrown at it.

What I am really loving is cutting svg files.  svgcuttingfiles.com has some of the cutest designs and I love that jadedblossom.com has coordinating stamps for many of the cut files.  For this project I used two cutting files and two different sets of stamps.

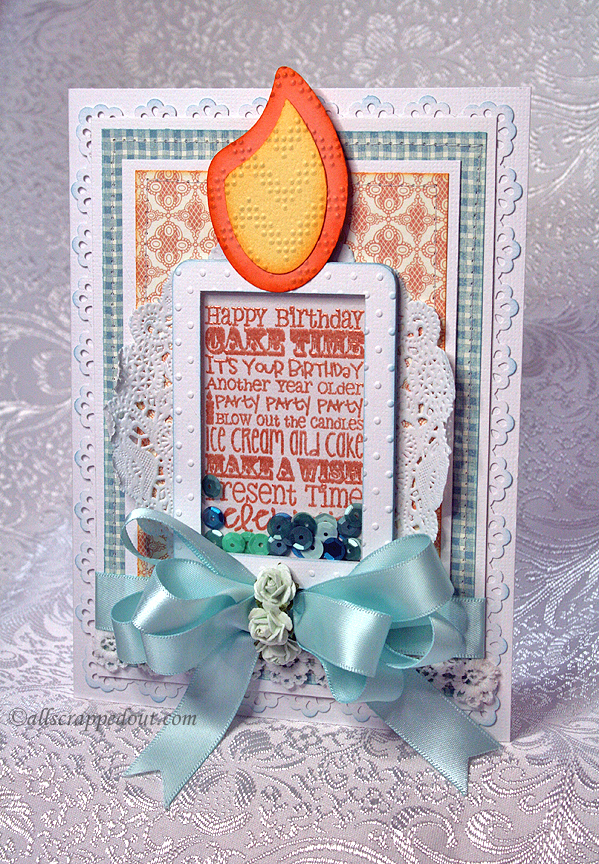
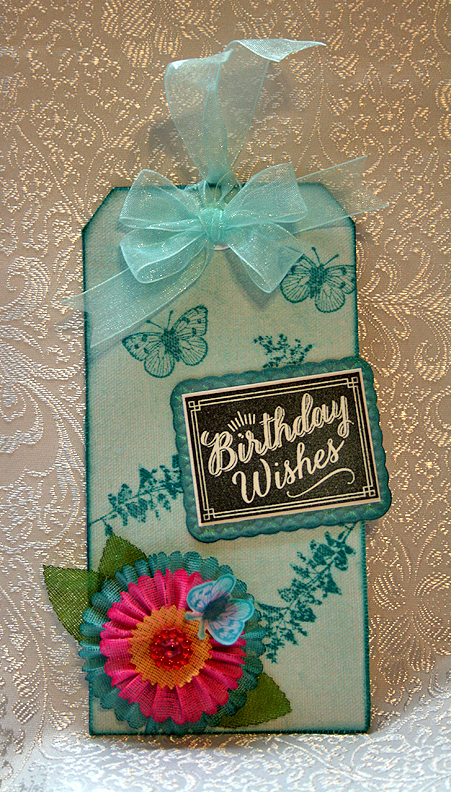
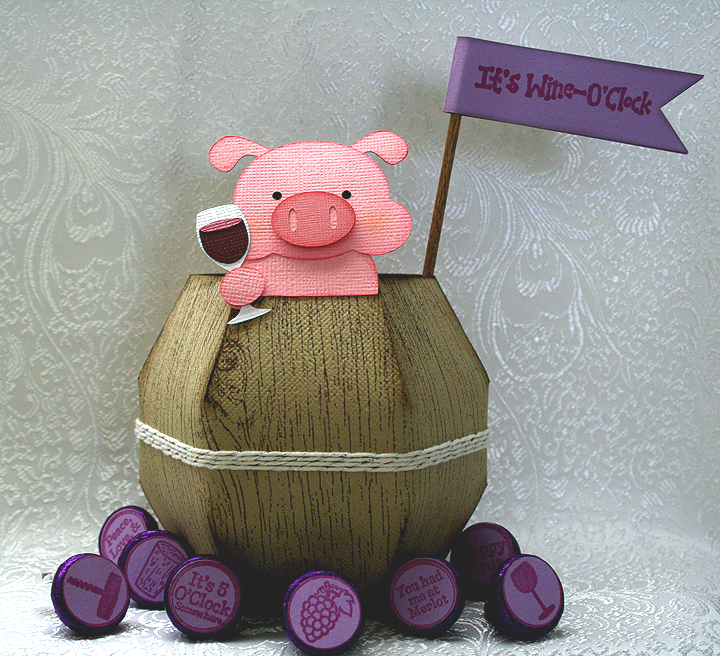
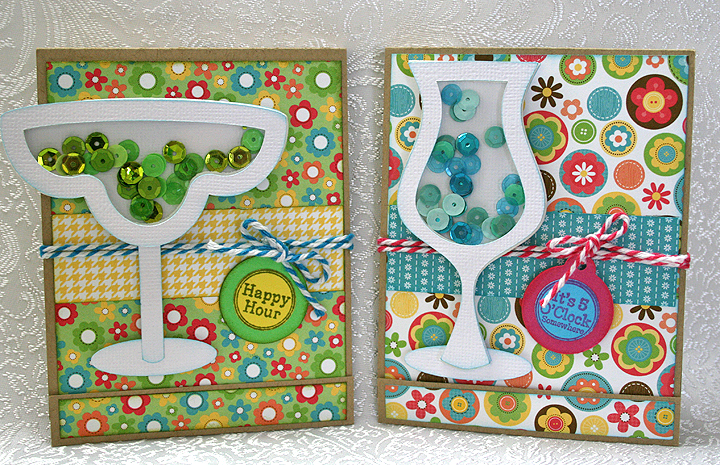
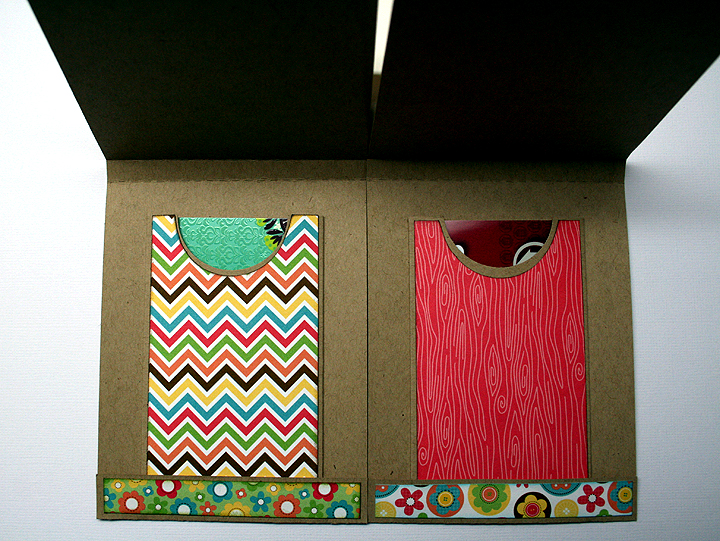
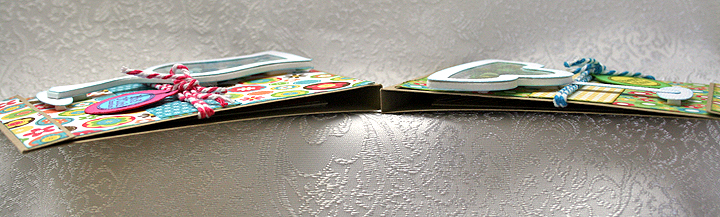
I made this birthday card and matching box that holds little Nugget candy bars for my niece.   I love shaker cards and when I saw the Party Shaker Tag file, I had to buy it.   I made the candle card — there are three other shakers in this set.  I used the Birthday Treat Tags stamps to heat emboss the design in the shaker.  Of course I used my favorite embossing powder, from Lindy’s Stamp Gang.   I think the color I used was Cleopatra’s Copper.

CardCandy6

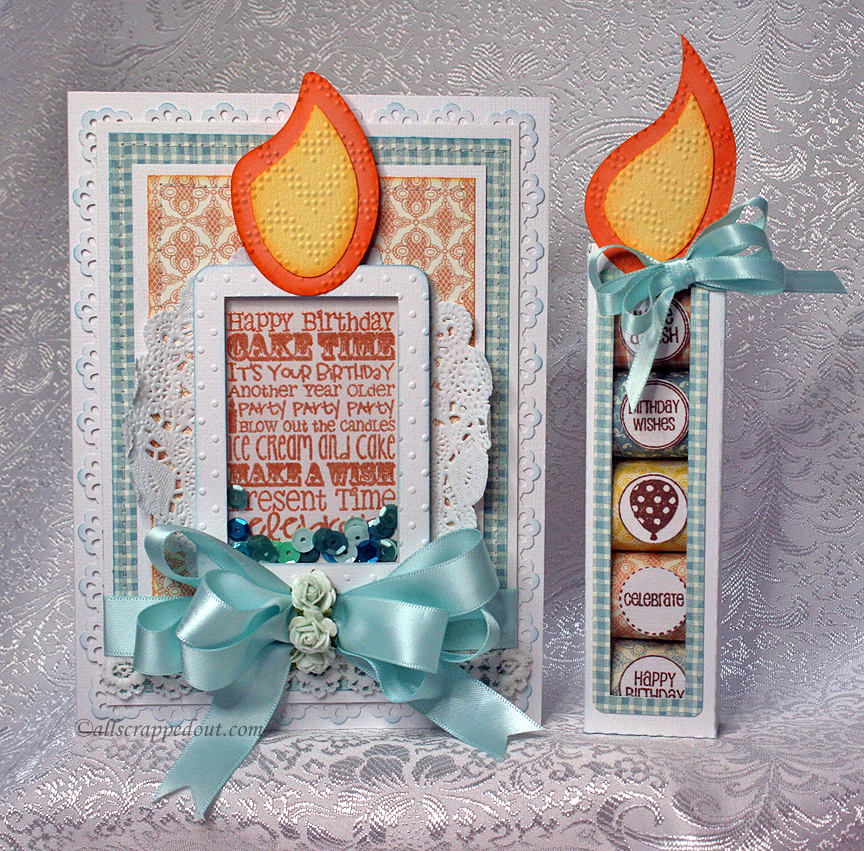
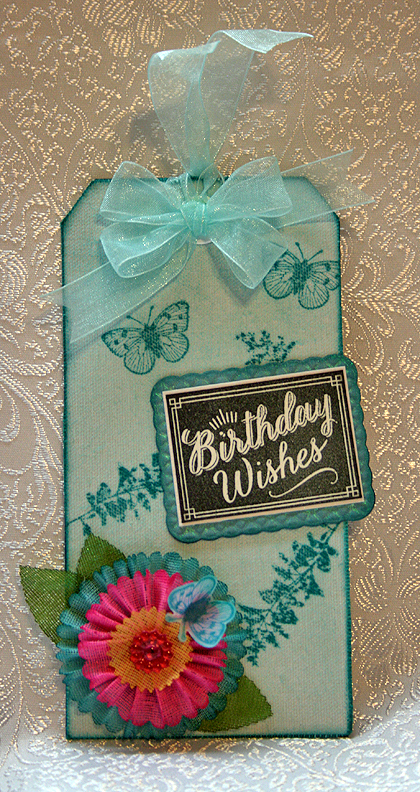
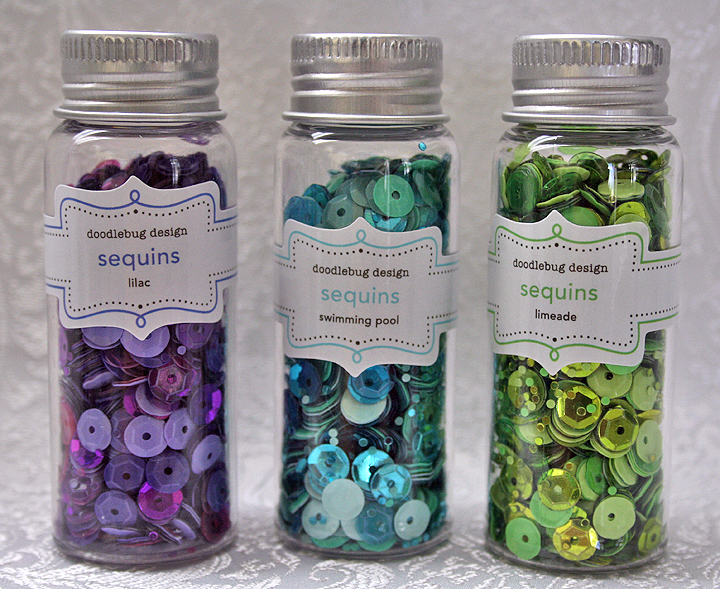
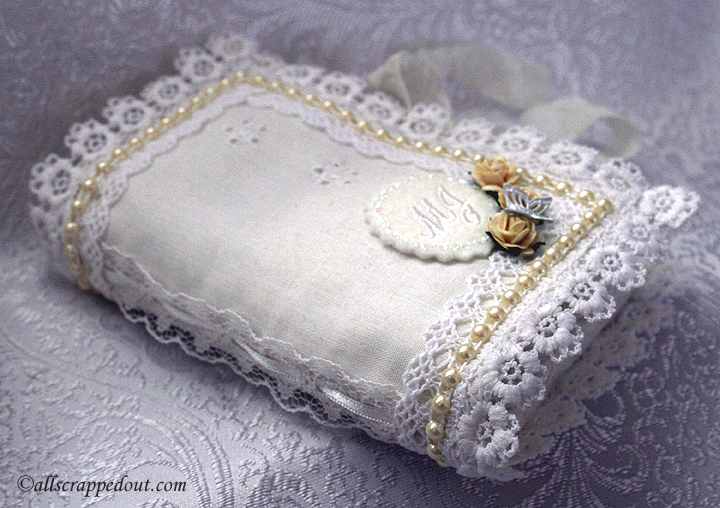
The patterned paper is from the Secret Garden collection by Graphic 45.  I used a Martha Stewart punch around the page set called Vintage Floral.  I stitched around a couple of the mats, added some lace trim at the bottom, along with a satin bow made using one of my favorite tools, the Zutter Bow-it-All.  The roses are from Wild Orchid Crafts and the sequins in the shaker from Doodlebug Designs.

I used two Cuttlebug folders, Dotted Swiss and Charles (for the flames).

Card1

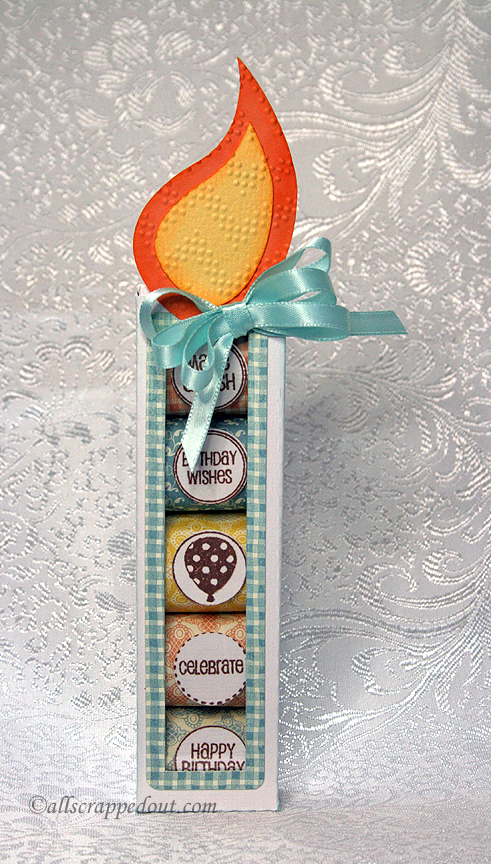
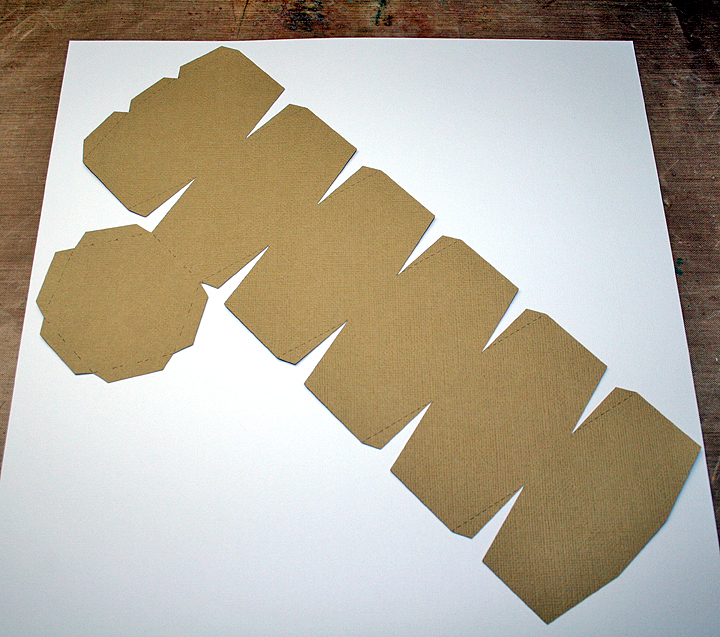
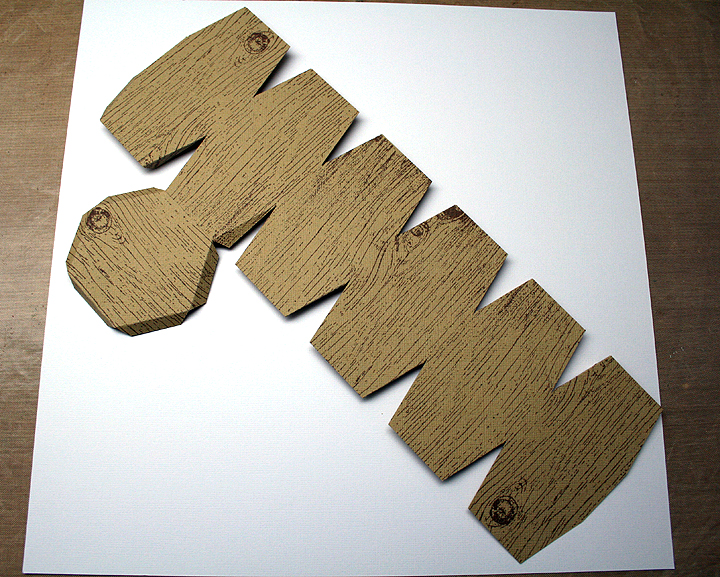
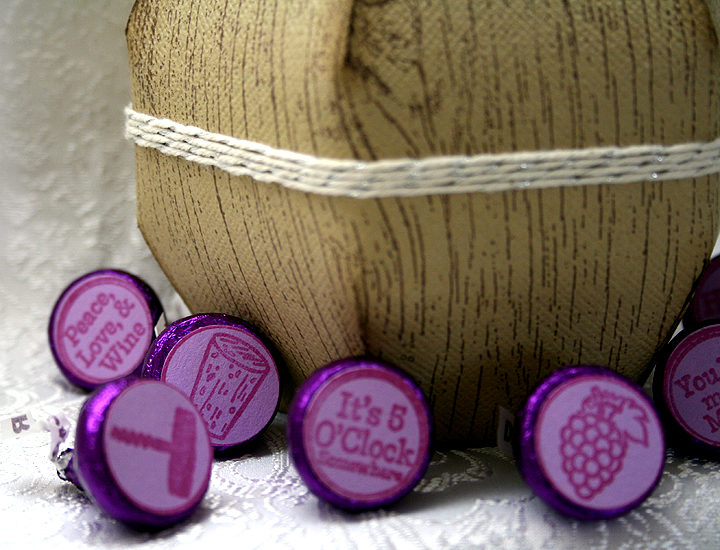
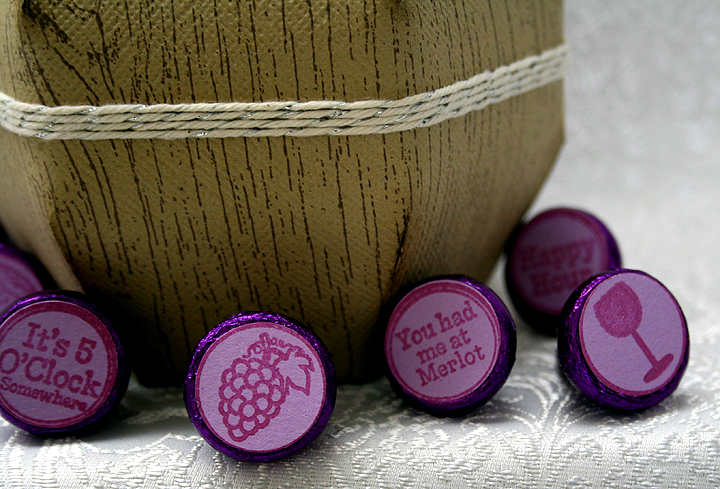
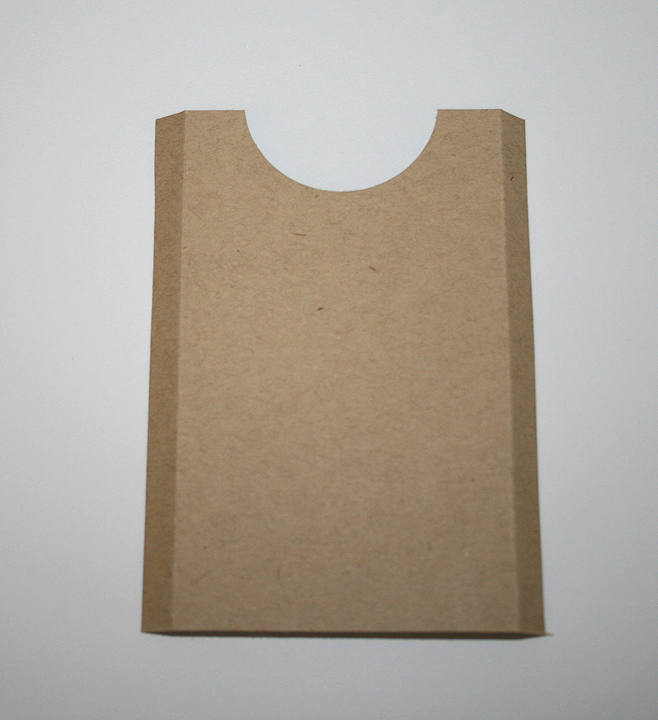
For the box, I used the Candle Nugget Box svg.  I wrapped each nugget and then topped it with a circle sentiment from the Birthday Candies stamp set.

Candy1This set was so much fun to make.

Circleville NSD 2014 — Winner Announced

2014

I just had hubby draw a name  — and the winner of the $20 gift card from Michaels is……

Nadia (WithGlitteringEyes.blogspot.com)

Congratulations, Nadia!!

Please contact me so I can get your gift card in the mail.

And a big thank you to all who took the time to leave a comment.  I really appreciate it.

Linda


Birthday Tag — NSD 2014 Challenges

Since time is running out to enter the challenges on the Cricut Circle Message Board, I made this tag to enter into two different categories.  Actually, I think it qualifies for three.  The first is the XO Three in a Row, the second one is Everything’s Coming Up Rosettes, and the third is All Mixed Up.

For Maria’s XO Three in a Row challenge, you have to pick three items from a Tic Tac Toe board and incorporate them into your project. I chose the bottom row, which is Flower, Ribbon (or Twine), and Stamp.

For Colleen’s Everything’s Coming Up Rosettes, you have to make a project and use a rosette on it.

For Di’s All Mixed Up challenge, you need to use a piece of fabric on your project.

3

I covered the tag with sticky back canvas and then inked it using Peacock Feathers Distress Ink.  I stamped the images on the canvas using the same ink.

I used this tutorial from Tammy Tutterow for my tag, because I wanted to make the flower out of crinoline and she has step-by-step instructions.  I used a Tim Holtz rosette die to cut the crinoline and then sprayed them with Lindy’s Stamp Gang’s Starburst Sprays to get the beautiful colors.   The leaves are from a Spellbinders die, also cut from crinoline.  I stamped a butterfly on vellum and added it to the flower.

2

All that was left was the sentiment and bow, which I made using my Bow-it-All.

  • Ranger Sticky Back Canvas
  • Tim Holtz rosette die
  • Crinoline (from Jo-Ann’s)
  • Distress Ink
  • Lindy’s Stamp Gang Starburst Spray

Two Tickets to Paradise – NSD 2014 Challenge

I was finally able to finish my first project for NSD.  I started working on this layout on Saturday.  By the evening I was not feeling well — I had caught a cold/flu.  My head was so screwed up that I couldn’t focus on anything until Wednesday, when I was at last starting to feel human again.

I made this for the Two Tickets to Paradise challenge, where you are to make a project that represents what paradise is to you.  I had these pictures that Erin took during her trip to Palau last year and I figured this has to be as close to paradise as anywhere.  Erin not only documents her own travels, but she always has some Disney Duffy bears with her and documents their travels as well.

I had not even heard of Palau until Erin mentioned that it was on her bucket list of places to visit.  It is in Micronesia and is famous for its diving.  As you can see from the pics, the bears obviously enjoyed their trip.

LOd

I think this is my first two-page layout — and it took me a while to figure out where I wanted everything to go.  The die cuts are all from Treasure Box Designs — the file is called Two Tickets to Paradise.

The background paper is from the Tahiti stack byDCWV.  Most of the solid cardstock is from Bazzill.

1b

I added some Mickey heads to the luggage and put Duffy’s and Shellie May’s names on the tags.  I also made sure the bears had round-trip tickets 🙂

2c


  • Treasure Box Designs svg cut file
  • DCWV Tahiti Stack
  • Bazzill cardstock

Circleville National Scrapbook Day 2014: Happy Hour – It’s 5 O’Clock Somewhere

Erin recently took and passed the exam to become a Certified Specialist of Wine.  I am very proud of her — she studied so hard for the exam.  Because of that, I have recently begun collecting some cute wine stamps.  And then I found an svg file that I fell in love with, so my projects for National Scrapbook Day are about wine — and drinks in general.

My first project features an svg file from svgcuttingfiles.com.  I fell in love with the pig in the barrel.  Although their pig is in a beer barrel and holds a beer mug, it wasn’t hard to change the theme to wine.  I simply replaced the mug with one of the wine glasses in the Kawaii Wine Glasses file.

My hubby wanted to know if my little piggy is a swino.  No, this guy drinks responsibly.

Actually, this is the little piggy who had roast beef, but what is unknown to most is that he enjoyed his roast beef with a glass of red wine.

3

The barrel cuts in one piece and looks like this after coming off the mat.

Barrel

I didn’t have any paper with a wood grain, but I did have this Heidi Swapp stamp that I recently picked up at Michaels.

Stamp

The stamp is wide enough that I could stamp two barrel sections at a time.  I masked off the other sections using blue painters tape and scrap paper.  As I finished each section, I had to re-mask in order to not stamp over the image I had just stamped.  It looked like this when I was through.  I used Memento Rich Cocoa ink.

Barrel2

I glued the barrel together using Scotch Quick-Dry Adhesivie.  I tied twine around the middle of the barrel.

The stamps for the flag and the bottoms of the purple Hershey kisses are from jadedblossom.com.  This was my first time using their stamps — and I really like them.  There are  more kisses inside the barrel.

Candy

I thought the purple kisses went well with my wine theme.

Candy2

My husband had to get in one more pun about my pig in a wine barrel, remembering the memorable advertisement from a few years ago.  In his best Orson Welles impression, he said, “We will sell no swine before its time.”  Yep, I have been putting up with him for over 47 years now!

2

My next project also features a cut file from svgcuttingfiles.com.  This is the Drink Shaker Matchbook set.  I love shaker cards and these were fun to make.  The patterned paper is from Doodlebug Designs.  They look so festive.

2

I decided to add a pocket to the inside so that they can hold a gift card.  I made the pocket by cutting a piece of cardstock 3″ wide by 4″ tall.  I scored 1/4″ on each side of the long edge and used a 1 1/2″ circle punch to cut an opening in the pocket.  I folded the sides under, ran adhesive down each side (using my ATG) and attached them to the inside of the card.

Pocket

The gift cards fit nicely into the pockets.

Inside

I used 1/8″ Scor-Tape on the small bottom flap, right where the fold is.  That was enough to keep the flap up and keep the top cover tucked in.

This is a side view, so you can see the matchbook shape — and also the layers of the shakers.

Side

I used Doodlebug Designs sequins inside the shaker sections.  I like that you get different shades of sequins in each bottle.

Sequins

I used the candy stamps from Jaded Blossom on the charms for the card fronts, hanging them with twine.

2

Thank you for checking out my projects for National Scrapbook Day.  If you will leave me a comment, I am going to have a random drawing on May 11 at 8 PM (EDT) for a $20  gift card to Michaels.  All comments are welcome, but only one per person will go into the drawing.

Here is a list of some of my crafty friends who are also doing special projects for National Scrapbook Day.  Be sure and check them out and join in the fun.


A Day in the Life of Horsebunny – http://www.horsebunny.blogspot.com/

www.scrappycol.blogspot.com

Cowgirl1hh.wordpress.com/

http://creatingislikebreathing.blogspot.ca/

Croation Crafter – http://www.croatiancrafter.blogspot.com/

Multi Crafter Amy – http://multicrafter-amy.blogspot.com/

Paper, Craft, & Scissors – http://papercraftscissors.com/

Sara Andrews – http://sarawandrews.com/

Scrapping for More Fun – http://scrappingformorefun.blogspot.com/

www.singingshell.blogspot.com

With Glittering Eyes – http://www.withglitteringeyes.blogspot.com/


  • svgcuttingfiles.com:  Pig in a Barrel, Drink Shaker Set, Kawaii Wine Glasses
  • jadedblossom.com stamps:  Wine O’ Clock, Happy Hour Candies
  • Doodlebug Design:  patterned paper and sequins
  • Heidi Swapp woodgrain stamp
  • Twine

Circleville National Scrapbook Day 2014 – It’s Almost Time

2014

Tomorrow, May 3, marks the beginning of the Circleville National Scrapbook Day event on the Cricut Circle message board.  Many are posting on their blogs, in addition to posting on the message board.  Be sure you check out these very talented crafters and have a fun-filled weekend.

A Day in the Life of Horsebunny – http://www.horsebunny.blogspot.com/

 Cowgirl1hh.wordpress.com/

 Croation Crafter – http://www.croatiancrafter.blogspot.com/

 Multi Crafter Amy – http://multicrafter-amy.blogspot.com/

 Paper, Craft, & Scissors – http://papercraftscissors.com/

 Sara Andrews – http://sarawandrews.com/

 Scrapping for More Fun – http://scrappingformorefun.blogspot.com/

 With Glittering Eyes – http://www.withglitteringeyes.blogspot.com/

Stick Pins and Stick Pin Book

I made 10 stick pins for the swap on the Cricut Circle Message Board.  It was my first time altering a paper mache box and also my first time making stick pins.  I wanted my pins to fit inside the book, so I went searching on the web for some type of pin holder.  I found some tutorials on vintage needle books, small books that hold sewing needles.  I figured one of these books would hold my stick pins just fine.

1

These are very easy to make, requiring very little sewing.  Most everything is glued together.  This is the tutorial that I followed to make my book.

The fabric, wool felt, and lace are all from my stash.  The pearl trim and small roses are from Wild Orchid Crafts.   I used Fabri-Tac by Beacon Adhesives to hold everything together.

I machine embroidered my partner’s initials on a piece of wool felt and cut the design out with a Tim Holtz bottle cap die.  I added some Stickles around the edges. The book closes with seam binding ribbon.

3

This is inside, showing the first of the stick pins.

P1-2

Page 3 of the book:  You can see there is a piece of felt that separates page 3 and 4.

P3

Page 4 shows a close-up of the pins.  Those are eggs hanging from the chicken and rooster pins 🙂

P4

And the last two pages:

P5-6

Because my pins are so chunky, I couldn’t add any more to the book and have it fit inside the altered paper mache box.  So I just added some sewing pins to the final page.  Those are lace pockets at the very front of the book and the very back of it.

Here are some close-up pictures of the rest of the stick pins.

StickPins

StickPins2

The beads are from Michaels, Joann, and some vendors I found on etsy and eBay. The peeps bunny is from a shop on etsy called TreasuresInClay.  She did a special order for me where she drilled the holes in the bunnies vertically instead of horizontally.

  • Fabri-Tac adhesive
  • Wild Orchid Crafts – roses and pearl trim
  • Wool felt
  • Scraps of lace, ribbon, and trim


Altered Book Box and Stick Pin Swap

I just participated in an altered book box and stick pin swap on the Cricut Circle Message Board.  I had never altered a paper mache box before, so this was a new adventure for me.  My partner (Maria) let me know some of her likes — I knew she liked bright colors and owls.  Since I like owls too, I decided to use that for my theme.

Front9

The first thing I did was primer the book in gesso.  Then I applied two coats of Martha Stewart  Mother of Pearl paint.  I let the last coat of paint dry overnight and then I brushed on a layer of Tim Holtz Rock Candy Crackle paint on the spine and the inside edges of the book.  When that was thoroughly dry, I sponged on some blue and brown distress ink over the crackled paint.

Spine

The title was printed on the computer and adhered on the spine using Liquitex Gloss Medium & Varnish.  I added a couple coats of the gloss medium over the crackle paint on the spine and on the inside.

Spine2

I used Ranger Sticky Back Canvas for the cover of the book.  Since this was my first time using it, I wasn’t sure if it need to be primed with gesso.  I decided to go ahead and gesso it, but first I stuck the canvas to a piece of cardstock and sewed around the edges. After the gesso dried, I stamped a scene of the moon and some trees using Versamark and heat embossed it using white embossing powder.  The stamp set is by Sheena Douglass and called Lakeside Shore.

Then I sprayed the canvas with several different colors of Starburst spray by Lindy’s Stamp Gang.  As you can see, the colors are nice and bright. Since I had used gesso on the canvas, it acted as a resist to the sprays and I found they would easily wipe off.  So I let them dry and then sprayed a coat of gloss varnish (Krylon) over the canvas to seal it.  I was happy to see that I didn’t lose all the pretty shimmer when I sprayed the canvas with the sealer.

10

I purchased the crocheted owl from Tatiana, who I first found on the Cricut Message Board.  She now sells her beautiful crocheted pieces on her Facebook page, Created  By Tatiana.   I picked the colors for this owl to match the book and also ordered several other owls in different colors.

I added a branch and some leaves that I cut from white cotton crinoline using a Martha Stewart punch. The leaves were sprayed with Starburst spray. The flowers and foliage at the bottom were also cut from crinoline using Martha Stewart punches and colored with Starburst spray.

The book has a ribbon closure.

Front2

The back of the book is my attempt at humor, a pun on the Looney Tunes “That’s All Folks”.  The paper is from Doodlebug Designs and the owl is some clipart I got from the now defunct PC Crafter website. The image at the bottom is stamped and heat embossed using Lindy’s Stamp Gang’s embossing powder.

Back

The inside of the cover is also Doodlebug Design paper and I added a clipart bookplate to it.

Bookplate

This is looking inside the book, showing the fabric book that I made to hold the stick pins.  Since this post is so long, I am going to do a separate post for the stick pin holder.

Inside

I included two extra crocheted owls for my swap partner.  The cards they are on were stamped with the Button Boutique stamp set from Papertrey Ink and cut using the coordinating die.

CrochetOwls


  • Paper mache book box from Hobby Lobby
  • Doodlebug Design paper
  • Ranger Sticky Back Canvas
  • Lindy’s Stamp Gang Starburst sprays and embossing powder
  • Tim Holtz Rock Candy Distress Crackle Paint
  • Tim Holtz Distress Ink
  • Crocheted owls from Created By Tatiana on Facebook
  • Sheena Douglass Lakeside Shore stamp set
  • Button Boutique stamp and die set from Papertrey Ink
  • Martha Stewart craft paint — Mother of Pearl
  • Martha Stewart punches
  • Liquitex Gloss Medium & Varnish
  • Cotton crinoline purchased at Joann.com

Spring Card with Bunnies

I wanted to make a nice spring card to send to my book box swap partner (Maria), so I went looking at some of the cards I have pinned on Pinterest to get some inspiration.  Right away I found one I liked.  It is pinned from KittieKraft’s blog — she makes the most beautiful cards.

I have always wanted to make a wreath card and figured this was the perfect time.  While I didn’t have the dies she used to make the wreath, I did have the die to make the cute bunnies.  So I used two Martha Stewart punches to make the wreath — the branch punch and the medium frond punch and I followed Kittie’s tutorial on making the wreath.  For the flowers, I used another Martha Stewart punch — the 3-in-1 Hydrangea punch.  I used the two smaller blossoms for the flowers.

6

I have been wanting to try my new Anna Griffin Cuttlebug Lace Trimmings embossing folders and dies and thought they would make a nice background for the wreath.  I had no problem cutting the borders, but I did have a bit of a problem trying to emboss them.  The white cardstock embossed fine, but the yellow kept slipping in the folders and the embossing was all over the place.  The yellow cardstock is heavier than the white, so I thought that might be the issue.

I ended up lining the border up inside the folder and taping it (using blue painter’s tape) to the Cuttlebug plate.  I was still having a problem right at the end of the folder, where it opens.  So I turned the folder around and ran it through the Cuttlebug with the open end first and then it embossed nicely.

I cut the bunnies in white cardstock and inked them brown using Walnut Stain Distress Ink.  The flowers have Stickles in the centers and the bow was made using my Zutter Bind-it-All.  I sure love how easy it is to make bows using the Bow-it-All.

4


  • Martha Stewart punches:  Branch, Medium Frond & 3-in-1 Hydrangea
  • Anna Griffin Cuttlebug Lace Trimmings Embossing Folders & Dies
  • Zutter Bow-it-All
  • Stickles

Sympathy Card

This is a sympathy card I made for a friend who lost her mother unexpectedly. I used white cardstock and colored the background pink using Lindy’s Stamp Gang’s Starburst spray. I stamped the Dandelion Frame from Hero Arts using Versamark and then embossed it using white embossing powder.

5

The flower is a stamp from Hero Arts called 3 Dotted Flowers.  I stamped it on vellum, again heat embossing it in white.  I layered the 3 flowers together and added a pearl for the center.  The butterfly is from two Memory Box dies (Pippi & Isabella), one for the filigree layer and one for the solid layer.  The sentiment is computer generated and cut with a Spellbinders tag die.

2


  • Hero Arts stamps:  Dandelion Frame, 3 Dotted Flowers
  • Lindy’s Stamp Gang Starburst spray
  • Memory Box dies:  Pippi and Isabella
  • Spellbinders tag die