I wanted to make a birthday card for my sister-in-law and I wanted to create one that was very whimsical — and I hope I succeeded. I enjoy making shaped cards and when I found the All Shaped Up Challenge on Bitten by the Bug 2, the idea for my card was hatched.
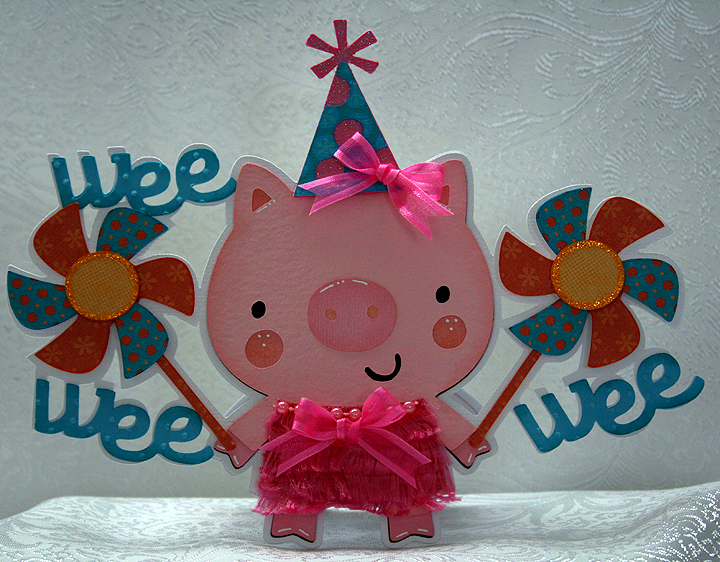
I love the pig with the pinwheels in the Geico commercials. You can’t help but smile when one comes on TV, and I have been wanting to do something along those lines for while now. I decided to make my pig a girly girl and give her a fancy party dress, complete with a birthday party hat.
I started laying out my design in Cricut Craft Room. Unfortunately, the program still has issues and I ran into some of them while creating this card — and ended up wasting time. I find CCR so frustrating at times that bad words will just start popping out of my mouth.
When I got ready to cut my card, Cricut Craft Room was down and I could not log in. I kept getting a message that the program couldn’t connect to the internet. I kept trying and after an hour or so, I was able to log in and cut my layers.
All the solid color cardstock is from Bazzill, except for the glitter cardstock on the hat — that is from Core’dinations. The patterned paper I printed on the Imagine using the Blast Off cartridge.
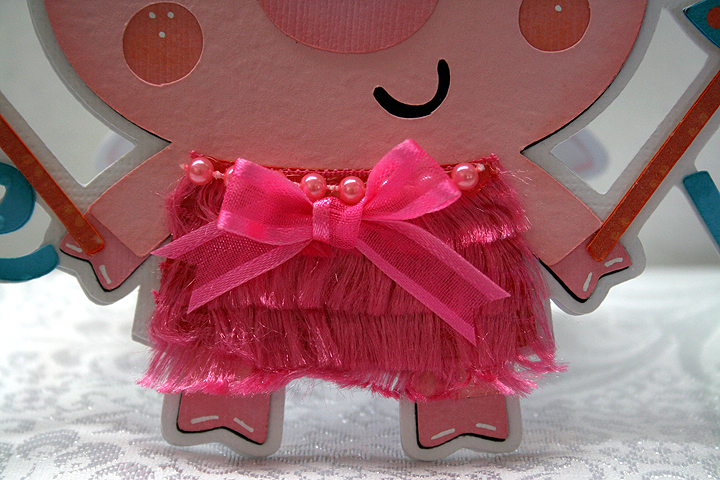
I used Create a Critter for the pig and pinwheels and B is for Boy, a Lite cartridge, for the “wee” words. I welded them all together to form the base of the card. I used the Swiss Dots folder and my Cuttlebug to emboss the words. I found some eyelash-type yarn at Joann’s that I used for her dress, layering it so it looks like a fringe dress — reminds me of a flapper dress. I added some pearls at the neckline and a bow on both the dress and hat. I used Stickles on the center of the pinwheels.
The inside of the card features a computer-generated sentiment.
I hope this little piggy card brings a smile to my sister-in-law’s face. I need to make an envelope so I can get it in the mail. Since it is a over-sized card, I will probably send it in a padded envelope.
I am also entering this card into the following challenges:
Cricut Chirp Challenge #6 – Create a Critter Craft: use any animal Cricut cut on your project
Scrappy Moms Stamps – Terrific Tuesday Challenge – Shape Up: create a shape project
- Cricut cartridges: B is for Boy Lite, Blast Off (Imagine), Create a Critter
- Cuttlebug: Swiss Dots embossing folder
- Bazzill cardstock
- Stickles
- Yarn, pearls, ribbon




Recent Comments