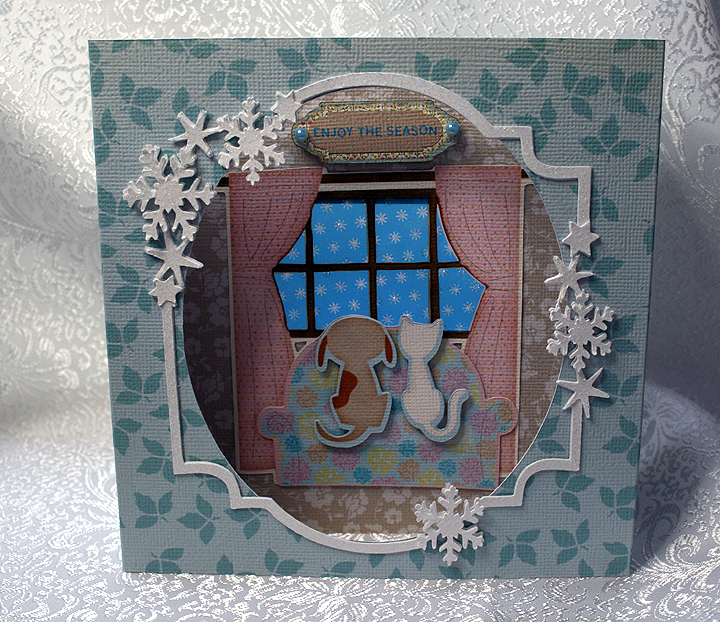
I’m not sure what to call my latest project. I like to think of it as a hybrid — a cross between a window and diorama card and a luminaria.
It all began with the Window to My World Challenge at Bitten by the Bug 2. I knew immediately what window I wanted to use for this challenge — the cute little dog and cat looking out the window at the snow on the Enjoy the Seasons Cricut Imagine cartridge. Then my brain started spinning with what I could do to make the card unique. For a couple of days that’s all that happened — my brain spun and not one good idea. Then it hit me — I wondered what it would look like if I printed the window part on vellum and lit it from the back.
That is where the diorama card comes into play, as it has sections. I used the tutorial for a diorama card posted on splitcoaststampers.com as my guide.
I altered the measurements so that a battery operated tealight candle would fit in the back section. My two print papers I used on the diorama were printed from the Elise Imagine cartridge. I wanted a print that was not necessarily holiday looking and thought the prints on Elise went well with the cat and dog image. My finished card/luminaria measures about 6″ x 6″x 2.5″.
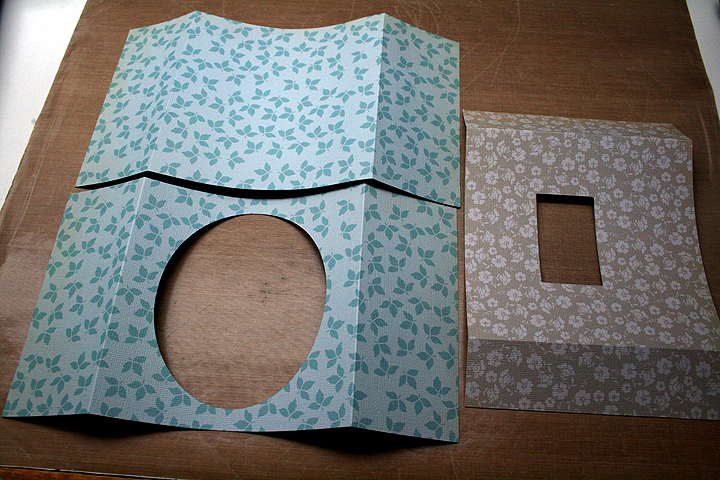
I cut my print paper so that the two blue pieces (the outside) were 11″ x 6″, cutting an oval from George & Basic Shapes out of one section for the front. I scored 2.5″ from each end and folded on those marks. Because the oval takes a huge chunk out of the front of the card, I found I had to stabilize it. I cut a piece of plain white cardstock with the oval, this time a little under 6″ wide, and glued it to the inside center to give it some strength.
The middle section was cut from the mocha print at 9″ x 6″ with a 2.5″ x 1.5″ window cut from the center. I scored each end of this piece at 1.5″ and folded. This is what my pieces looked like.
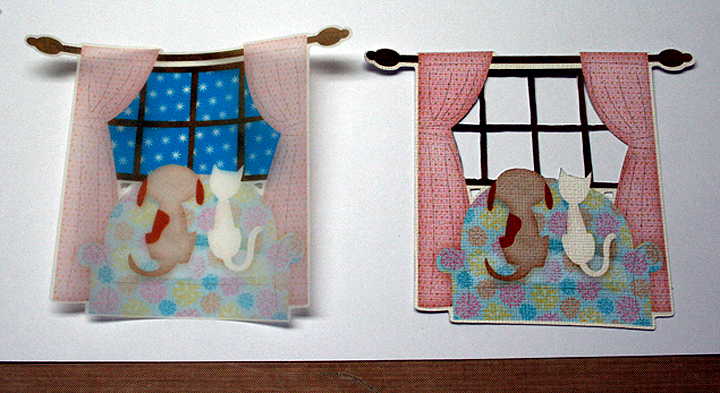
I printed the cat and dog on the Imagine at 4″, printing it on vellum and then in layers on regular white cardstock. I took my craft knife and cut out the sky between the window panes from the cardstock piece, so that the vellum sky would show through. This pictures shows both the vellum print and the piece with the sky cut out of it.
I added some Stickles to the snow on the vellum and let it dry. I trimmed the vellum and glued it on the mocha piece, lining the sky up with the cut-out rectangle. Then I attached the cardstock piece with the cut out sky over that. I did two layers of the love seat and attached it, then layered the cat and dog twice and attached them with pop-dots. I printed a little sign from Enjoy the Seasons to hang above the window and added a blue pearl on each side.
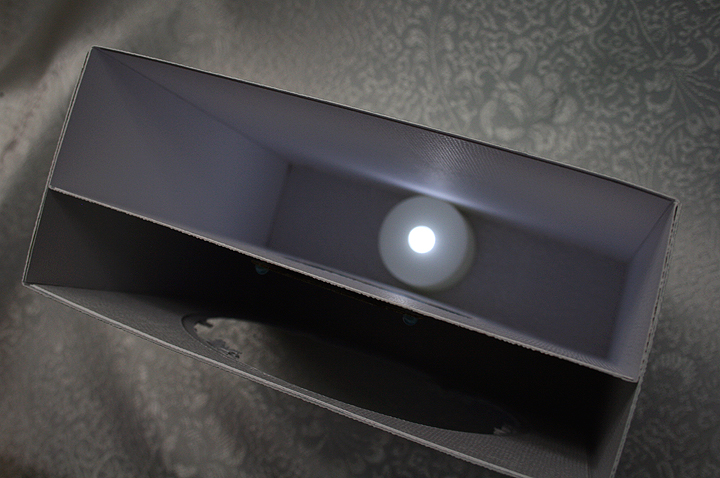
I started assembling my pieces, putting the mocha and back section together first. Before attaching the front, I cut a snowflake frame from Lacy Labels that I adjusted in Design Studio to fit the oval on the front. I cut two layers, the top layer from a glittery cardstock and attached the frame around the oval. I cut extra stars and snowflakes and popped them up on the frame. Then I attached the frame to the other sections. I used a tealight with a white LED flame, which I ordered online. All I could find at my local stores were tealights with amber flames and I didn’t want an amber cast to my snow. This picture shows the card from above, showing the different sections. The tealight sits right below the vellum window. Because there is no bottom to the card, you just have to set it over top of the tealight.
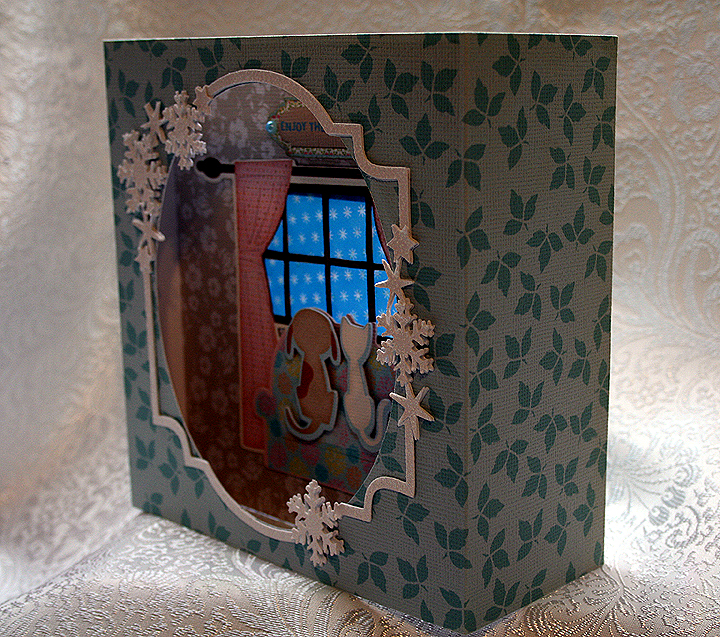
This picture shows the card from the side, so you can see how the front and back overlap each other.
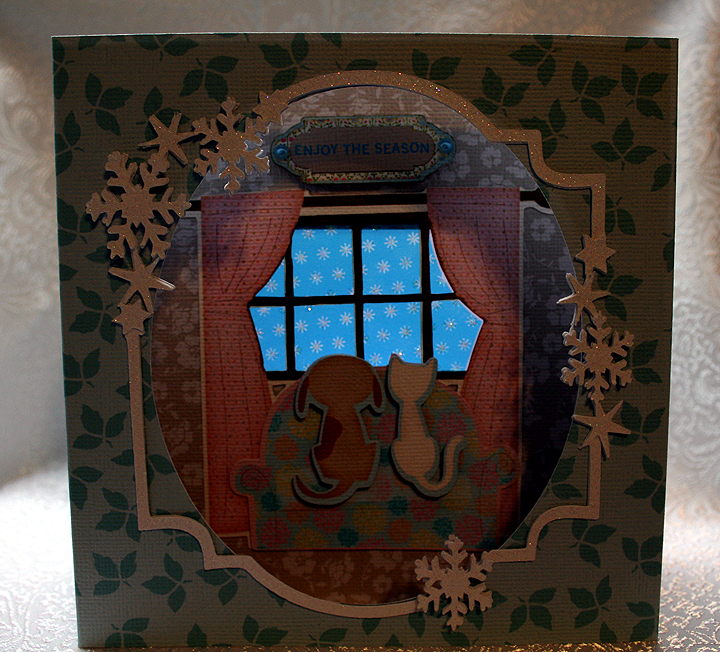
It was hard trying to take a picture showing the lit window, but I think this one gives you a good idea of what it looks like. The card will fold up, but it doesn’t go completely flat. I think I stuffed it too much. I would not send it in an envelope — it would have to hand delivered or sent in a box. But this one I plan on keeping for myself!
I had a lot of fun creating this card — it’s a little different from what I usually do. I am already thinking of other projects using this concept.
- Cricut cartridges – George & Basic Shapes, Imagine Elise, Imagine Enjoy the Seasons, Lacy Labels
- Glitter cardstock
- Stickles
- Battery operated tealight candle


Recent Comments