The Cuttlebug Spot Challenge: Sympathy Cards

This week at The Cuttlebug Spot, the challenge is to make a sympathy or thinking of you card. 

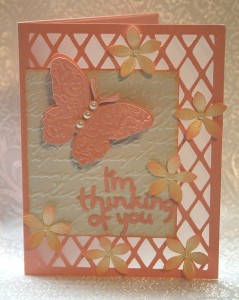
I used some new paper from Core’dinations — it’s from their Cardmaker Series and is called Pearls.  The color I used is Baby Pink Pearl, although it is more of a peach color.  The contrast piece is called Starlight Pearl.  I bought it at Joann’s and it comes in a pad of 25 sheets.  I am impressed with this paper — it cut well and has a very pretty look to it.

I used my Cricut to cut the card base — the diamond lattice design — and added a piece of vellum behind the lattice.  All the rest of the card was done with my Cuttlebug. 

I used one of the cut and emboss die combos for the butterfly.   The contrast piece is embossed with the Textured Script Cuttlebug embossing folder.  The sentiment is from another cut and emboss combo, Everyday Greetings.  The flowers are from Michael’s wedding department and I colored them using chalk ink.  The flowers and butterfly are embellished with pearls. 

Thinking of You -- Front of Card

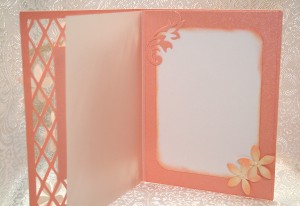
Inside of Card

This card went together rather quickly for me.  It is not uncommon for me to work longer than a day making a card, and I was able to put this one together in a couple of hours.  That really helped as the deadline for entering the card was getting close.  I managed to get it linked with about five minutes to spare!

  • Core’dinations Pearls cardstock
  • Cuttlebug Cut and Emboss Combos:  Butterflies, Everyday Greetings
  • Cuttlebug Embossing Folder — Textured Script
  • Flowers from Michael’s wedding department
  • Pearls from my stash
Jitterbuggin Weekly Challenge: Sketch 13 – Planes, Trains & Automobiles

I had fun with this week’s challenge over at Jitterbuggin.  We were to follow the sketch, use a Cricut vehicle on the card and also use a button. 

I was stumped at first and couldn’t decide which vehicle to choose.  My card started as something completely different and sort of evolved into the finished product.  I knew I wanted to do a card for breast cancer awareness, but I wasn’t quite sure how to go about it using a vehicle.    

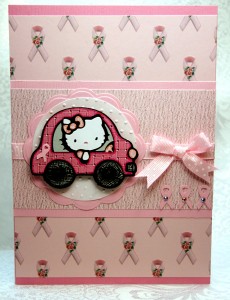
I had the idea in my head of what papers I wanted to use, only I didn’t know where I could find them.  So one evening I surfed the web and downloaded free digital scrapbooking images and printed my own paper.  The solid cardstock is Bazill, but all the other pieces I printed.  I like the light pink piece in the middle — it reminds me of fabric.  The only issue I had with the printed paper is that when I cut it with my Cricut, the edges were white.  To remedy that, I used my Copics and colored the edges of the pieces I cut for the car.  

After going back and forth on several different vehicles, I decided on a cut from the Cricut Hello Kitty Greetings cartridge.  It was a bit of a challenge just to assemble the pieces as I cut it at only 2″.  I did a lot of gluing with the aid of tweezers.  I added a button to each tire and the car is attached to the front using 3D pop dots .

I used Nestabilities by Spellbinders for the two circle cuts.  I used my Cuttlebug and the Swiss Dot embossing folder to emboss the smaller circle behind the car.  The awareness ribbons on the front and inside of the card are from Stand & Salute.  I didn’t have any pink craft rhinestones to put on the awareness ribbons, so this card got some from my stash of the good stuff — they are Swarovski crystals.

Hello Kitty Greetings Breast Cancer Awareness Card

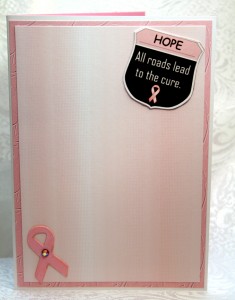
I found the road sign for the inside of the card on the web too.  I added the word “hope”,  printed it and then cut it out by hand.  I thought it was the perfect finishing touch for this card. 

Inside of Card

  • Cricut Hello Kitty Greetings and Stand & Salute cartridges
  • Cuttlebug Swiss Dots embossing folder
  • Nestabilities by Spellbinders — used in my Cuttlebug
  • Ribbon & buttons from my stash
  • Pink Swarovski crystals

Jitterbuggin’ Sketch 12 Challenge: Oh Baby!

This is my first time participating in Jitterbuggin’s weekly sketch challenge.  The challenge this week is to follow the sketch, make a baby card and add some ribbon.  Be sure and check out Jitterbuggin to see some fabulous cards.

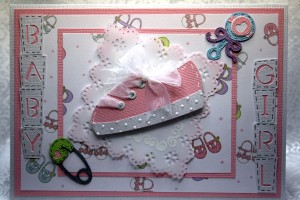
This card is 5″ x 7″ and all the solid cardstock is from Core’dinations.  The white cardstock is from their Gemstones collection.  The baby shoe print paper is from me & my BIG ideas that was purchased at Joann’s. 

I used several Cricut cartridges to get all the cuts.  The lettering in the blocks came from Simply Sweet.  I did some faux stitching around the blocks with a black pen to make them stand out.  The rattles and the safety pins came from the new Sugar & Spice Cricut Lite cartidge (available only at Wal-Mart) and each are made of several layers.

I used My Community for the baby shoe.  I cut it out several times, glued two pieces together and added three white eyelets.  Then I threaded the ribbon through the eyelets and added two more layers.  I ran the contrast piece at the bottom of the shoe through my Provo Craft Cuttlebug, using the Swiss Dots embossing folder.  The shoe is mounted on the card using 3D Pop Dots. 

For the lacy square under the shoe, I used a Martha Stewart Punch-Around-the-Page Combo.  I made two layers, the top layer being vellum.  For a little added interest, I stamped a swirly design in white ink on the wrong side of the vellum

Baby Girl Card for Jitterbuggin's Sketch 12 Challenge

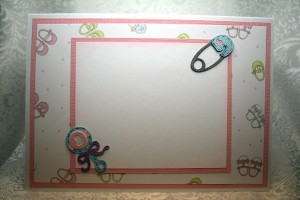
Inside of Card

The inside of the card is decorated to match the outside, again using the rattle and safety pin cuts from Sugar & Spice.

  • Core’dinations cardstock
  • me & my BIG ideas print paper
  • White vellum
  • Cricut cartridges:  Simply Sweet, My Community, and Sugar & Spice
  • Cuttlebug embossing folder, Swiss Dots
  • Martha Stewart Punch-Around-The-Page Combo
  • Eyelets, ink and black & white pens

New Basic Grey Embossing Folder Sets

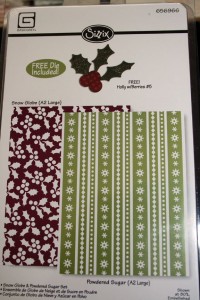
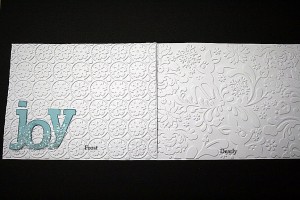
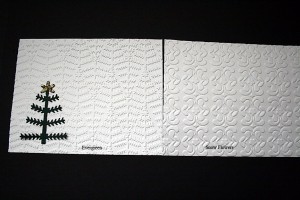
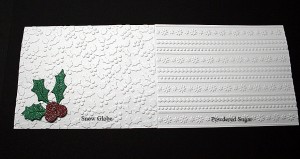
Just wanted to share  my newest find– embossing folder sets designed by Basic Grey and made by Sizzix.  I bought 4 of the sets at Joann’s.  They come packaged with two embossing folders per set –and you get a free die with each one too.  I used the folders and dies in my Provo Craft Cuttlebug and love the way they came out.  

This is how the folders come packaged.

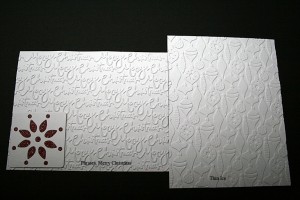
   I ran some scrap paper through my Cuttlebug and made samples of the folders and the dies.

Thin Ice & Phrases, Merry Christmas Set

Dearly & Frost Set

Evergreen & Snow Flowers Set

Snow Globe & Powdered Sugar Set

The Joann’s I visited had about 8 different sets of the embossing folders.  They also carry individual dies (larger than the free dies that come with the sets) that coordinate with the folders.  I’m looking forward to putting these new folders to work.

Um Buggin’s Cricut Cuts & Stamps: Challenge #2 – Beyond Birthdays

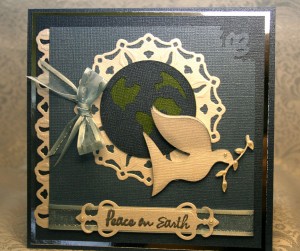
I made this card for a challenge on Um Buggin’s Cricut Cuts & Stamps.  Lillie challenged us to use the bird cut from the Beyond Birthdays cartridge and to also include a stamped image or sentiment.

Front of Card for Um Buggin's Cricut Cuts & Stamp Challenge #2


When I looked at the bird cut, it reminded me of a dove and I thought it would make a great Christmas card.  I used Bazzill cardstock throughout, with a border of silver mirror cardstock.

I cut the white pendant and border using my Cuttlebug and the Spellbinders Kaleidoscope dies.  The world in the center of the pendant was cut using my Cricut and the Going Places cartridges.  I cut three layers of the bird and inked around the edges.  To add some dimension, I did not glue the wing down on the top layer of the bird.  I mounted the bird on the card using 3-D pop dots. 

I used a Martha Stewart corner punch on the top right corner of the card.  I heat embossed the sentiment using a clear stamp and silver embossing powder.  The tag is from Spellbinders, cut using my Cuttlebug.  I used some Liquid Pearls on the leaves of the branch.

Inside of Card

For the inside of the card, I cut four of the branches that the bird is carrying.  I layered them and added Liquid Pearls for the leaves.  The corner piece is from Spellbinders Kaleidoscope pendant die.  I also inked the inside edges.

The Cuttlebug Spot Challenge: Christmas in July

This is a card I did for a challenge on The Cuttlebug Spot.  The only requirements were to make a Christmas card and use the Cuttlebug to emboss it.

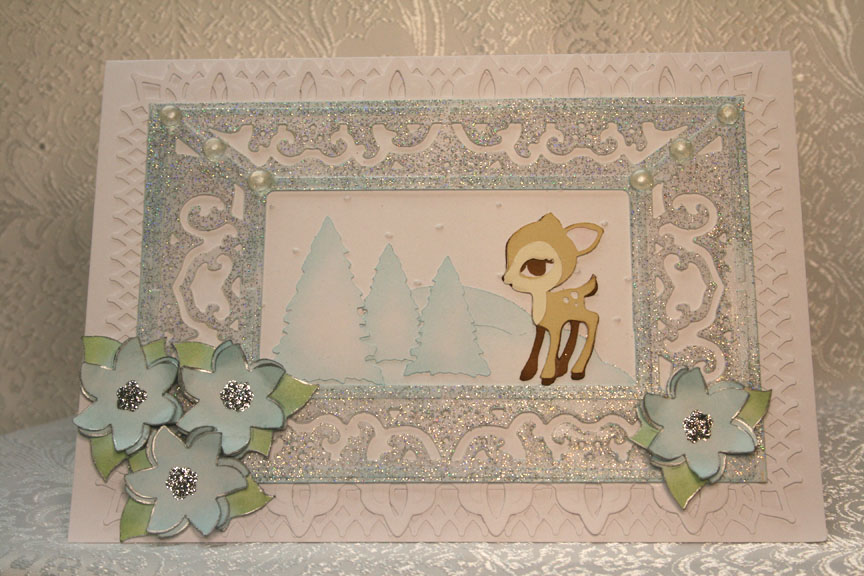
Front of the Deer Card for Christmas in July Challenge

I recently received one of the new Cuttlebug Embossing Plus folders which cuts and embosses at the same time.  I thought this would be a good time to try it out.  The one I have is called Lace Door, and I used it as a frame.

After cutting out the Lace Door, I inked the edges and heat embossed it using some sparkly embossing powder.  Behind the cut I used a Martha Stewart Punch Around the Page set called Gothic Arches.  On the top and bottom of the frame I added a border using one of Spellbinders Borderabilities, Fleur de Lis.

Inside the frame, I used a Cuttlebug embossing folder for the snow and added some cuts using my Cricut.  I cut the little deer from Cindy Loo and the trees and poinsettias are from Winter Woodland.

Everything except the deer is cut from plain white cardstock and the color is inked on.   I edged the flowers using a silver leafing pen and added Stickles for the centers.  I also added some Skittles as accents on the top corners of the frame.

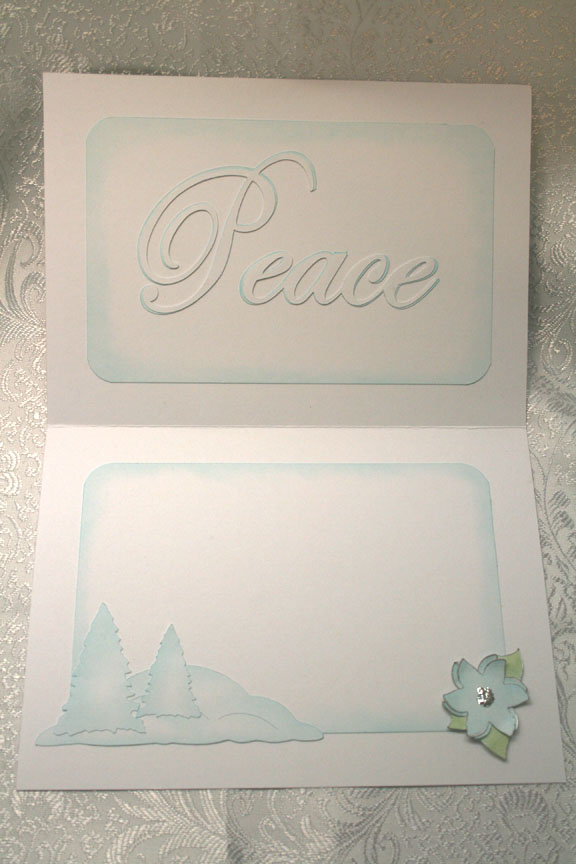
The inside sentiment is cut with my Cricut using Cindy Loo.  Again, lots of inking on the inside.

Inside of the deer card

–Posted by Linda

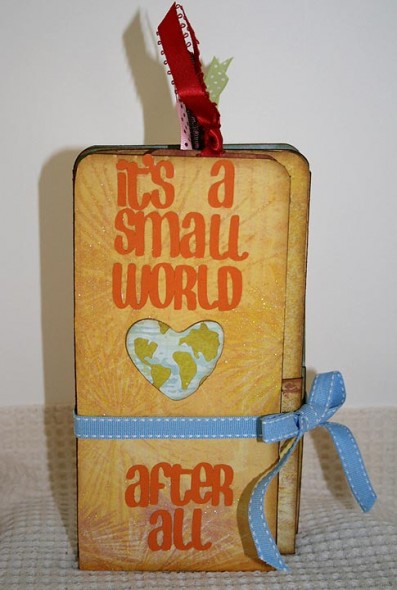
Cricut and Disney Accordion File Folder Card for MB Autism Challenge

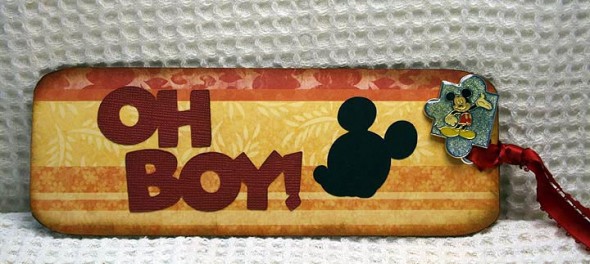
I made this card for a special challenge on the Cricut Message Board.  April is Autism Awareness month and the challenge was to make a project using the Cricut and a puzzle piece, which has come to represent autism awareness.

My card seemed to take on a life of its own.  At first I did not have a clue what I was going to make, and finally decided to do something Disney.  With that decision made, I remembered that a few years ago Disney had puzzle piece pins at Disneyland, for the pin trading craze. I started searching and was able to get a few.

Then I had to decide how to incorporate the pins in the card.  I looked on the web and found instructions to make a card out of a manila file folder, so I went with that design. It has 4 pockets inside, one for each pin.  Instructions for the card can be found here:  http://www.splitcoaststampers.com/resources/tutorials/accordionfilefolder/

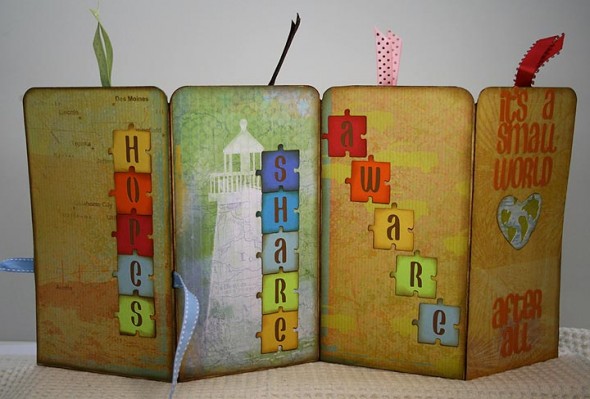
Since so many people from all over are contributing to this challenge, I went with “It’s a Small World” for the outside of the card.  I chose three words from the lryics and used them on the card, cut in the shape of puzzle pieces.

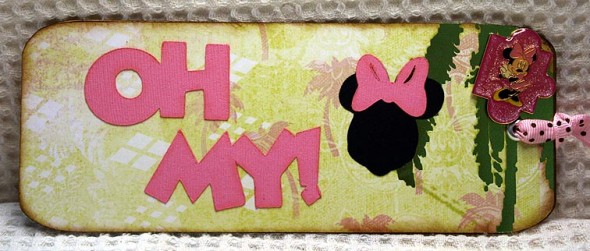
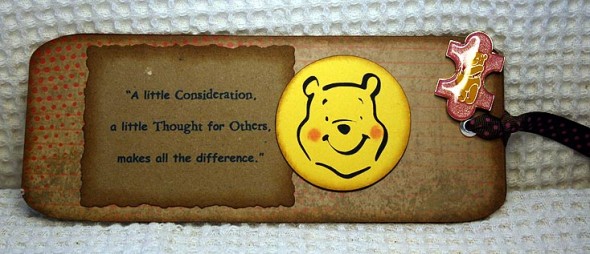
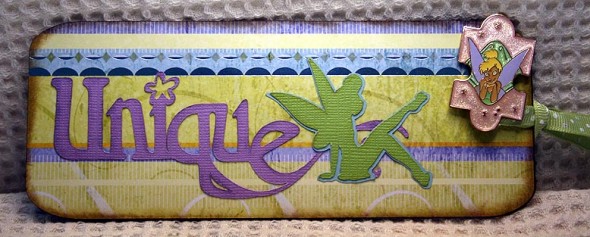
On the inside I used a phrase or word unique to the particular character and attached the matching pin.  Here is my card:

Front of the Autism card

Back of the card

Inside of the card, showing each of the tags

And here are the individual tags with their pins attached in the corner:

– Posted by Linda

Scrapbook Shopping in Taipei, Taiwan

When I first moved here, I was worried about being able to find any craft supplies as we do not have any stores like Michaels or Joann’s.  We have DIY areas – mostly for beading and jewelry making supplies which is big here.  As we continue to venture out into new places in town, I have been able to find some pretty cool items – especially rubber stamps and Asian style papers.

We went to the “mall” on Easter Sunday to see the Alice in Wonderland movie and as we wandered through the stores, my husband spotted a rubber stamp store and tried to convince me to head the other way.  Figuring out what was going on, I made my way around the corner and spotted it!  Sadly, stamps here are more expensive than in the States (along with many other supplies – especially from USA companies).  I’ve decided to collect unique stamps and supplies while I am living here as they are so different than much of what is available in the States.

Here are a couple photos of my latest purchases here.  I finally got a multi pack of the colored mini stamp pads for shading, but they are certainly much more expensive (nearly $30 for the set).  To give an example of how expensive things can be compared to the US, even with the bulk discount they give here – all this totaled nearly $200 US.

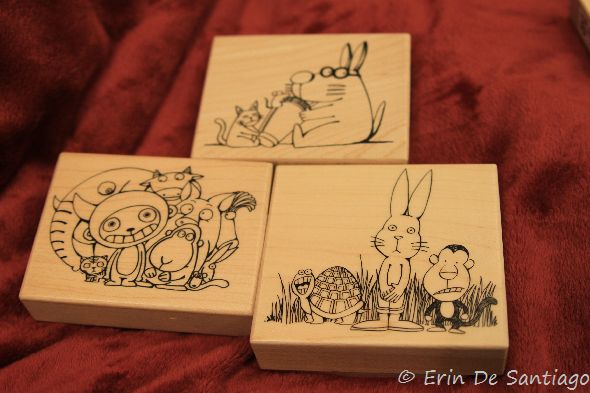
The multi stamp set was over $100 normally and on sale for slightly less.  Normally I would’ve probably passed right by this, but there were some adorable Chinese New Year cards made up with these.  I need to have my husband take the word ones into work and have them translated so we know what we are stamping now! 🙂

You can see the heads and bodies are separate so there are some fun things you can do with these stamps.  Much of the designs I saw appeared embossed and the individual small stamps glued onto the cards!  I would’ve taken photos, but no cameras are allowed in the malls here and they are quick to stop you if you try to take photos.

The last picture is three of my favorite ones I got.  The facial expressions and designs on these guys are hilarious – I cannot wait to start making some cards with them!  I have signed up for the Suzanne Dean Copic class and hope to start working on that soon!

-Posted by: Erin

My Second Cricut Card: Frog Anniversary Card from Paisley

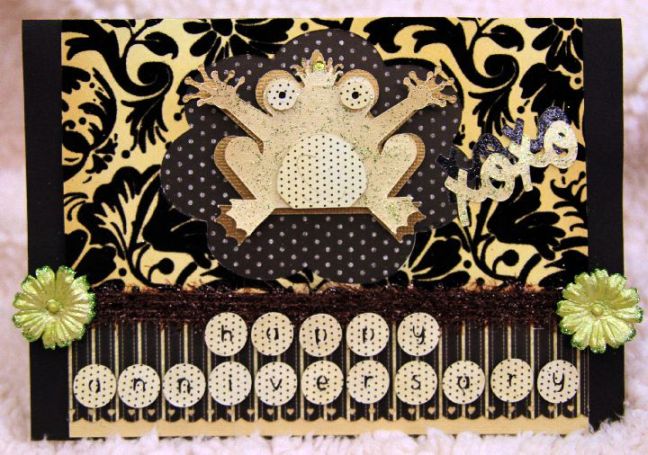
In keeping with the Paisley challenge theme for the week, I decided to make a second card with the Paisley cartridge – this time as an anniversary card for my husband to celebrate our first wedding anniversary!

  • DCWV La Creme stacks
  • MS border punch
  • Stickles
  • Misc ribbon from Michaels
  • Prima Flowers
  • Pop dots

The exterior of the card features all cuts from Paisley, except for the Happy Anniversary, which was cut from Simply Sweet. The frog is layered and up on pop dots.  Each of the letters on the Happy Anniversary were lined with small pieces of black paper and then put up on pop dots.  The solid color on the frog’s body and the cream “xoxo”  are patted with green Stickles.

Exterior of the Happy Anniversary Paisley Frog Card

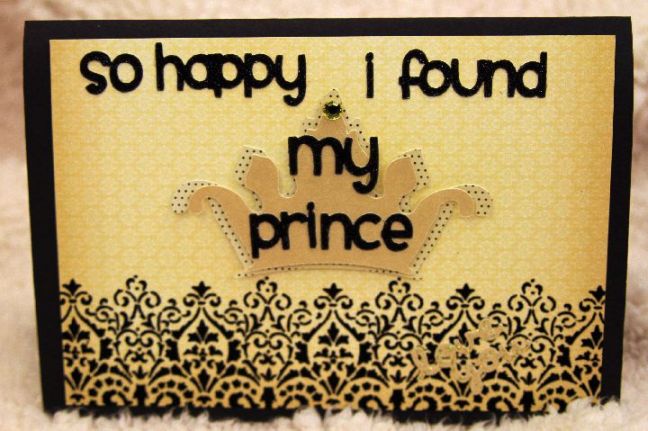
The inside of the card features all Paisley cuts, except for the words, which were again cut from Simply Sweet.

Inside of the Anniversary Card Made from Paisley

– Posted by Erin

My First Cricut Card: Zebra from Paisley

I’ve had my Cricut and accompanying scrapbook supplies for quite some time, but in between moving to Taiwan last year, traveling extensively, and then moving apartments here in the city, everything has been in boxes, simply collecting dust.  My Mom has been encouraging me to participate in one of the challenges posted on the Cricut Community Message Boards for months, so when I saw the cartridge exploration challenge for Paisley, I figured this was as good of time as any to dig in!

Although I still have quite a bit to learn about papercrafting, the features of each Cricut cartridge, not to mention learning Design Studio- I think my first attempt was not as disastrous as I expected it to be.

The object of Cynthia’s cartridge exploration challenges is to make a card with the particular cartridge, using it for all the cuts, except for any necessary font.  It is a way to get people to learn the elements of each cartridge, while challenging themselves to make something within its offerings.  I opted to go with the zebra in the car after purchasing an adorable stuffed Winnie the Pooh dressed as a Zebra earlier that weekend – he felt he should serve as the inspiration for my first card attempt!

Here are the supplies I used to make this card

  • Die Cuts With a View – All Dressed Up paper
  • Martha Stewart Punch Around the Page
  • Fuzzy zebra ribbon from Michaels Craft Stores
  • Black Martha Stewart Flock
  • Silver and Pink Martha Stewart Glitter
  • Miscellaneous beads, loose paper, flower embellishment from Michaels
  • Cuddlebug Paisley Embossing Folder
  • Prisma colored pencils
  • Stickles

To make the puff of smoke behind the car, I used one of the paisley cuts and changed the shape slightly in Design Studio.  On the burgundy shape behind the car, I embossed card stock with the Cuddlebug and then took a nail file to rub off some of the color.  The black areas of the zebra are flocked with the MS flock and the car has both pink and silver MS glitter.  The word bubble is from Paisley as well.   The pink shading around the puff of smoke was done with colored pencils.

The background paper on the inside was loose paper from Michaels.  Both shapes are cut from Paisley and the one embossed with a CB folder.  The words are cut from Lyrical Letters and dabbed with Stickles.

I still have a long way to go in learning how to do some of the amazing techniques I have seen from design teams and talented artists, but this was a pretty decent first attempt!  Hope you enjoy!

– Posted by Erin