Cricut Cardz Challenge #41

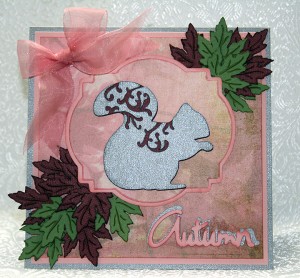
The latest challenge at Cricut Cardz Challenge is to make a fall card using any Cricut cartridge, but you cannot use brown, orange or yellow.  I found some Basic Grey paper from the Indian Summer collection in my stash and it is pink.  I think that is about as nontraditional as I can get!  I accented the paper with green and burgundy/maroon cardstock.  The squirrel is Bazzil Bling cardstock.

I used the Lacy Labels Lite cartridge for the frame on the front of the card.  The leaves are all cut from A Child’s Year, the squirrel from Give A Hoot, and the sentiment is cut from Wild Card.  I finished it off with a bow of organza ribbon. 

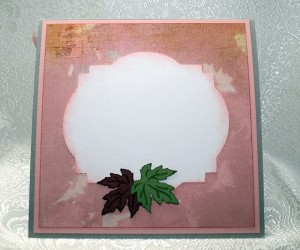
I used the same frame cut from Lacy Labels on the inside of the card that I used on the front.

  • Basic Grey paper — Indian Summer collection
  • Bazzil Bling cardstock
  • Cricut cartridges:  Lacy Labels Lite, Give A Hoot, A Child’s Year, and Wild Card
  • Ribbon from stash

Jitterbuggin’ Challenge – Sketch 17 – Going Old School

The challenge this week at Jitterbuggin’ is to follow the sketch, use primary colors (red, blue, yellow) and use the Cricut.  Sherri’s sketch shows a school theme, which we can use, or we can choose use any theme we want.  I stuck with the school theme because it goes well with primary colors.

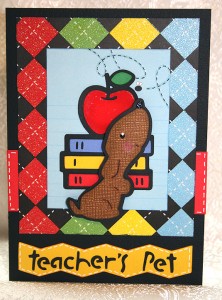
This card came to me fairly quickly.  I decided to use “teacher’s pet” as my sentiment, literally in this case.  As you can see, I chose a dog as my teacher’s pet.  The Cricut cartridges I used are Hello Kitty Greetings for the books and apple, Paper Pups for the dog, and Locker Talk for the sentiment and hall pass inside the card.  Oh, I used one more cartridge — Give A Hoot for the zig zag border that I placed the sentiment on. 

My patterned paper is DCWV’s Grade School pack and I used the glittery argyle pattern for the front of the card.  I had a scrap of blue paper from that pack that had a bee printed on it and it just fit the front of my card.  The pup is cut from Core’dinations cardstock and I popped him up using 3D foam pop dots.   I used Glossy Accents on the apple and also on the nose of the dog.  I did some faux stitching with a white Sharpie Poster-Paint marker.

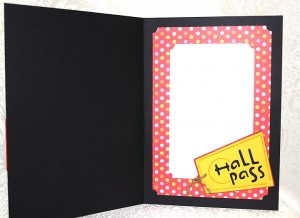
On the inside, I used a Stampin’ Up ticket corner punch.  I tied a piece of jute through the hole in the hall pass.

  • DCWV Grade School paper pack
  • Core’dinations cardstock
  • Cricut cartridges:  Hello Kitty Greetings, Paper Pups, Locker Talk, and Give A Hoot
  • Ranger Glossy Accents
  • Sharpie Poster-Paint marker
  • Stampin’ Up ticket corner punch
  • 3D foam pop dots and jute from stash

Jitterbuggin’ Challenge – Sketch 16 – My Favorite Things

The latest challenge at Jitterbuggin’ is a fun one involving favorite things.  We are to use our two favorite colors and use our favorite thing as the subject.  It can be a favorite animal, food, whatever we want.  We have to be sure and include a Cricut cut on the card.

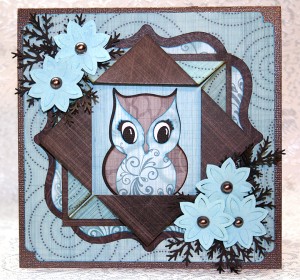
Sherri also included a link to a tutorial for a folded paper frame as a bonus.  You can find the tutorial here.  I definitely wanted to give the frame a shot and it proved fairly easy to do.  I will be using this frame again.

Picking two colors is not as easy as it sounds.  I had lots of paper that had my favorites on it, but not a lot with just two colors.  Blue is my favorite color and I remembered a paper pack I got at Joann’s a couple of weeks ago.  I dug out the paper and immediately knew I was going to use it.  The colors are blue and brown and the paper is by Cloud 9 Design.

Choosing my subject was much easier than picking colors.  I collect owls, so I knew my card was going to have an owl.  Provo Craft has a lot of cartridges with owls on them, but one of my favorite is from an older cartridge — Disney’s Happily Ever After.   I love the big eyes on this little guy.

My card is 5″ square and I made the folder paper frame the same size as in the tutorial.  The scroll frame behind the folded frame is from a Cricut Lite cartridge, Lacy Labels.  There are several layers to the owl.  I added some extra layers in order to get light and dark colors for his eyes.  The flowers are a Martha Stewart punch called Pop-Up Water Lily.  I punched the flowers out of Starlight Pearl paper by Core’dinations and inked them blue.  I added some brown pearls to the centers.  I  used a Martha Stewart Branch punch for the filler behind the flowers.    

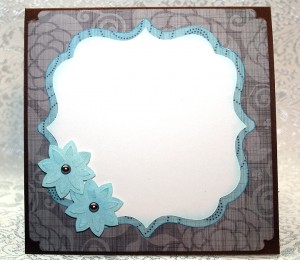
I used the same scroll frame on the inside of the card that I used behind the folded frame on the front.  I added a couple of the punched flowers in the corner.

  • Specialty cardstock by Cloud 9 Design
  • Starlight Pearl Paper by Core’dinations
  • Cricut cartridges:  Disney Happily Ever After and Lacy Labels (Lite)
  • Marvy corner punch
  • Martha Stewart punches:  Pop-Up Water Lily and Branch
  • Pearls and ink from stash

Um Buggin’s Cricut Cuts & Stamps ~ Challenge 3 ~ Back To School

The third challenge at Um Buggin’s Cricut Cuts & Stamps is to create a card or item using a school-themed Cricut cartridge that you already own.  It has to have a Cricut diecut and a stamped image somewhere on it, and also be a new creation.  Lillie made the cutest backpack and easel card — be sure and check them out.

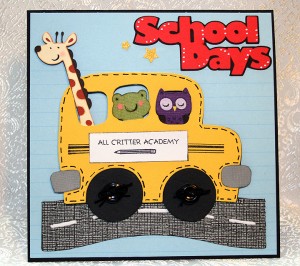
I wasted a lot of time going back and forth on what I was going to do and finally decided on a card with a school bus.  The printed paper is from Die Cuts With A View — the Grade School stack.  The bus is from the Doodlecharms cartridge.  When I was laying out the card in Design Studio, I thought it would be cute to put some type of critter in each of the windows of the bus.  I used Create A Critter for the animals.  The little patch of road is from Everday Paper Dolls and the sentiment is from 3 Birds on Parade.   I stamped the lines on the bus and also the pencil on the sign.  I did some doodling using Sharpie Poster-Paint markers.  I added buttons to the tires and Stickles to the gold stars.

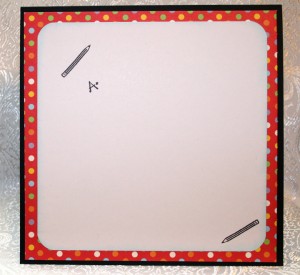
I did a little more stamping on the inside of the card, using clear stamps from Basic Grey and Studio G.


  • Cricut cartridges:  Doodlecharms, Everyday Paper Dolls, 3 Birds on Parade, Create A Critter
  • Cricut Design Studio
  • Die Cuts With A View – Grade School stack
  • Clear Stamps from Studio G and Basic Grey
  • Sharpie Poster-Paint markers
  • Stickles
  • Buttons from my stash

The Cuttlebug Spot Challenge — At the Fair

This week The Cuttlebug Spot is celebrating state and county fairs.  The design team did a fabulous job on their cards — be sure and check them out as the exisiting design team is leaving.  The Cuttlebug Spot is going to have a design team call next week.

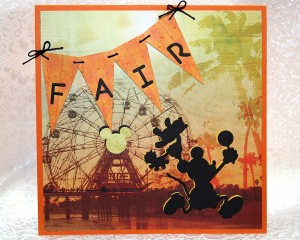
The orange card base is Stampin’ Up cardstock.  On this card I let the background paper do most of the work.  It is from DCWV’s Summer Stack.  When I saw the ferris wheel I thought it would be perfect for a “fair” card.  And the palm trees are perfect for here in So Cal.  Mickey Mouse, running with all his carnival winnings, is from a Cuttlebug die — Disney’s Wild Ride.  Once I cut Mickey out, the card reminded me of Disney’s California Adventure, so I added the Mickey head on the ferris wheel. 

The pennant is from the Calligraphy Cricut cartridge.  The letters are from the Baby-Face alphabet font die set by Cuttlebug.  I ran the pennant through the Cuttlebug using the Swiss Dots embossing folder. 

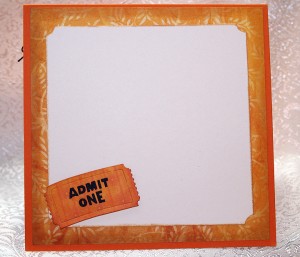
On the inside, the ticket is also cut from the Wild Ride die.  I punched the corners of the white cardstock with a Stampin’ Up ticket corner punch.   

Thanks to using printed paper, this card went together fairly fast.

  • Stampin’ Up cardstock
  • DCWV printed paper from the Summer stack
  • Disney’s Wild Ride Cuttlebug die
  • Baby-Face alpabet font die set by Cuttlebug
  • Calligraphy Cricut cartridge
  • Cuttlebug Swiss Dots embossing folder
  • Stampin’ Up ticket corner punch

Jitterbuggin Challenge – “Bee Creative” and Cricut Cardz Challenge #40

The latest challenge at Jitterbuggin is to follow the sketch and put a Cricut “B” somewhere — either a “bee” or a “b”.  Oh, we also were supposed to use up some scraps.

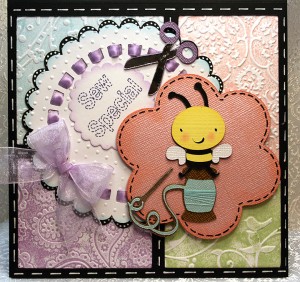
When I saw the sketch with its patchwork background, I immediately thought of a quilt.  So what better use of a bee and some scraps than a quilting bee.  I made this card for a dear friend — we have known each other for 50 years.  OMG — it has been that long!  We both love to sew, so I know this card will be perfect for her.

When I looked at my scraps, I found a huge pile of plain white cardstock.  I decided to run some of the pieces through my Cuttlebug for the background.  To add color, I inked the inside of the embossing folders before I embossed the cardstock.  I used four different folders — Plum Blossom from the Asian bundle, Birds & Swirls, Perfectly Paisley, and Textile Texture. 

The white doily-looking circle is cut on the Cricut using one of the new Lite cartridges, Lacy Labels.  This cut has slits going around the inner circle that are perfect for threading ribbon.  I ran this piece through the Cuttlebug using the Swiss Dots folder.  The pink flower-shape that the bee is on is from another Lite cartridge, Bloom. 

The cute little bee is from the Create a Critter cartridge.  Because I wanted him to sit on the spool, I added some little legs to his body using Cricut’s Design Studio.  The spool of thread and scissors are from Happily Ever After.  I bought this cartridge especially for these two cuts — and for the cuts of the mice from Cinderella, Jaq and Gus.  I’ve had the cartridge forever, but this was my first time using it.  I used shiny silver foil cardstock to cut the needle and blades of the scissors. 

I did lots of doodling on this card using some new poster-paint Sharpie pens that I recently bought.  I love the way the paint went on the cardstock.  I found the font I used for the sentiment by doing an online search.  I wanted something that looked stitched and found a free download.  I cut the scalloped circle the sentiment is on using my Cuttlebug and Nestabilites dies by Spellbinder. 

After entering my card in the Jitterbuggin challenge, I discovered it also qualifies for the Cricut Cardz Challenge, so I am really thrilled about that.  Their challenge is to make a card using scalloped circles, scalloped ovals, scalloped squares or scalloped rectangles, and any cartridges or colors you’d like.  It is my first time entering their challenge. 

Quilting Bee Card

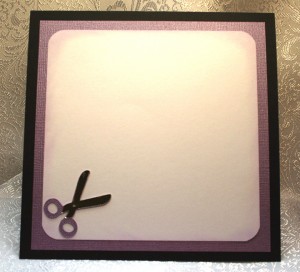
 I embellished the inside of the card with another pair of scissors cut from the Happily Ever After cartridge.

Quilting Bee -- Inside of Card

  • Provo Craft Cuttlebug embossing folders:  Plum Blossom, Birds & Swirls, Perfectly Paisley,  Textile Texture and Swiss Dots
  • Cricut Lite cartridges:  Lacy Labels and Bloom
  • Cricut cartridges:  Create a Critter and Happily Ever After
  • Cricut Design Studio
  • Spellbinders Nestabilites — Scalloped Circles
  • Sharpie poster-paint pens
  • Ink and ribbon from my stash


The Cuttlebug Spot Challenge: Oh Baby

Here’s another challenge card, and again I am getting it done just in time before the challenge ends.  This card is for this for The Cuttlebug Spot.

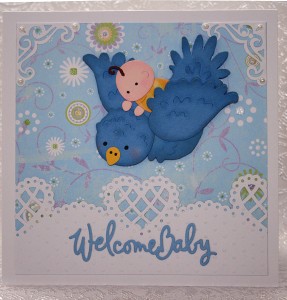
There is no Cricut on my card this time — it is all done on the Cuttlebug.  I was able to use up some scraps with this card.  The main cut, the bird and the joyriding baby, is made from a Boss Kut die.  The die is titled Joy Ride.  This was my first time using a Boss Kut die in my Cuttlebug and I was happy with how it cut — no problems at all.  I inked around the edges of the cut pieces. 

The trim at the bottom is done with the Martha Stewart Lattice Heart deep edger punch.  I ran the cardstock through the Cuttlebug using the Swiss Dot embossing folder before I cut it with the punch.  The sentiment is from Cuttlebug, the Welcome Baby Emboss Combo.  The corners are from Cuttlebug’s Vintage Die Set and I added some pearls to each one. 

This card went together pretty fast and I’m pleased with how it turned out. 

Front of Joy Ride

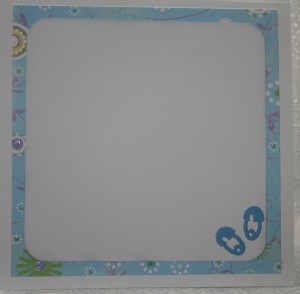
 The two small safety pins on the inside of the card with made with Cuttlebug’s Baby Die 2.

Joy Ride Inside

  • Boss Kut Joy Ride die
  • Cuttlebug Welcome Baby Emboss Combo, Vintage Die Set, and Baby Die 2 by Provo Craft
  • Cuttlebug Swiss Dot embossing folder
  • Martha Stewart Lattice Heart deep edger punch
  • Pearls and ink

Jitterbuggin Challenge: Sketch 14 — Born to Be Wild

For this week’s challenge over at Jitterbuggin, we were to follow the sketch, add a Cricut animal and use stripes somewhere on our card.  As I was looking through my Cricut cartridges to see which animal I wanted to use, I saw that on Animal Kingdom there is a bookmark cut — and I thought it might be fun making one.

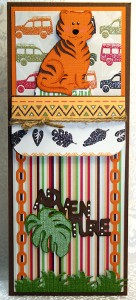
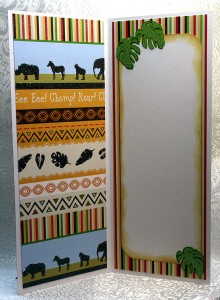
I had to figure out how to follow the sketch and where I was going to put the bookmark, so I thought I’d try adding a pocket on the front of the card.  I made the card to fit a #10 envelope — the card measures about 8 1/2″ x 3 1/2″.  The cardstock I used is a stack by DCWV called Safari Kids.  The solid cardstock is from Core’dinations.

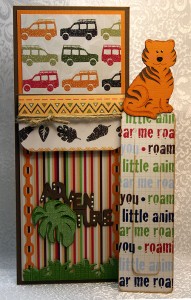
I made the pocket from striped paper and added a flap that I tied some twine around.  I cut the bookmark at 7 1/2″ and finished both sides of  it with the tiger.  I used Zooballoo for the grass and Life is a Beach for the “Adventure” title and the leaves.  Down the sides of the pocket I added some trim made from an EK Success  punch called Chain Link.  I like it because it creates a stand-alone chain. 

Front of Card With Bookmark in the Pocket

Front of Card Showing the Bookmark

I lined the inside of the card with the striped paper I used on the front and on the opposite side I used a contrasting print.  I added three leaves from Life is a Beach.

Inside of Card


  •  Cricut Animal Kingdom, Life is a Beach, and Zooballoo cartridges
  • DCWV Safari Kids paper stack
  • Core’dinations cardstock
  • EK Success Chain Link punch
  • Ink and Twine

The Cuttlebug Spot Challenge: Sympathy Cards

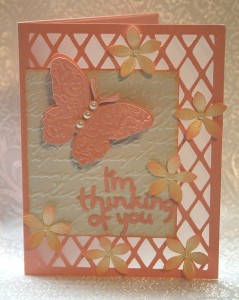
This week at The Cuttlebug Spot, the challenge is to make a sympathy or thinking of you card. 

I used some new paper from Core’dinations — it’s from their Cardmaker Series and is called Pearls.  The color I used is Baby Pink Pearl, although it is more of a peach color.  The contrast piece is called Starlight Pearl.  I bought it at Joann’s and it comes in a pad of 25 sheets.  I am impressed with this paper — it cut well and has a very pretty look to it.

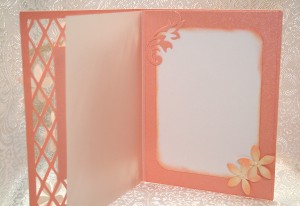
I used my Cricut to cut the card base — the diamond lattice design — and added a piece of vellum behind the lattice.  All the rest of the card was done with my Cuttlebug. 

I used one of the cut and emboss die combos for the butterfly.   The contrast piece is embossed with the Textured Script Cuttlebug embossing folder.  The sentiment is from another cut and emboss combo, Everyday Greetings.  The flowers are from Michael’s wedding department and I colored them using chalk ink.  The flowers and butterfly are embellished with pearls. 

Thinking of You -- Front of Card

Inside of Card

This card went together rather quickly for me.  It is not uncommon for me to work longer than a day making a card, and I was able to put this one together in a couple of hours.  That really helped as the deadline for entering the card was getting close.  I managed to get it linked with about five minutes to spare!

  • Core’dinations Pearls cardstock
  • Cuttlebug Cut and Emboss Combos:  Butterflies, Everyday Greetings
  • Cuttlebug Embossing Folder — Textured Script
  • Flowers from Michael’s wedding department
  • Pearls from my stash

Jitterbuggin Weekly Challenge: Sketch 13 – Planes, Trains & Automobiles

I had fun with this week’s challenge over at Jitterbuggin.  We were to follow the sketch, use a Cricut vehicle on the card and also use a button. 

I was stumped at first and couldn’t decide which vehicle to choose.  My card started as something completely different and sort of evolved into the finished product.  I knew I wanted to do a card for breast cancer awareness, but I wasn’t quite sure how to go about it using a vehicle.    

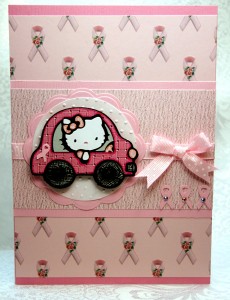
I had the idea in my head of what papers I wanted to use, only I didn’t know where I could find them.  So one evening I surfed the web and downloaded free digital scrapbooking images and printed my own paper.  The solid cardstock is Bazill, but all the other pieces I printed.  I like the light pink piece in the middle — it reminds me of fabric.  The only issue I had with the printed paper is that when I cut it with my Cricut, the edges were white.  To remedy that, I used my Copics and colored the edges of the pieces I cut for the car.  

After going back and forth on several different vehicles, I decided on a cut from the Cricut Hello Kitty Greetings cartridge.  It was a bit of a challenge just to assemble the pieces as I cut it at only 2″.  I did a lot of gluing with the aid of tweezers.  I added a button to each tire and the car is attached to the front using 3D pop dots .

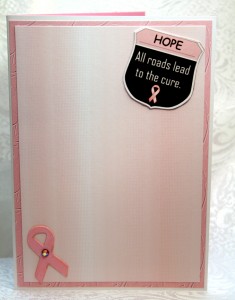
I used Nestabilities by Spellbinders for the two circle cuts.  I used my Cuttlebug and the Swiss Dot embossing folder to emboss the smaller circle behind the car.  The awareness ribbons on the front and inside of the card are from Stand & Salute.  I didn’t have any pink craft rhinestones to put on the awareness ribbons, so this card got some from my stash of the good stuff — they are Swarovski crystals.

Hello Kitty Greetings Breast Cancer Awareness Card

I found the road sign for the inside of the card on the web too.  I added the word “hope”,  printed it and then cut it out by hand.  I thought it was the perfect finishing touch for this card. 

Inside of Card

  • Cricut Hello Kitty Greetings and Stand & Salute cartridges
  • Cuttlebug Swiss Dots embossing folder
  • Nestabilities by Spellbinders — used in my Cuttlebug
  • Ribbon & buttons from my stash
  • Pink Swarovski crystals