I made 10 stick pins for the swap on the Cricut Circle Message Board. It was my first time altering a paper mache box and also my first time making stick pins. I wanted my pins to fit inside the book, so I went searching on the web for some type of pin holder. I found some tutorials on vintage needle books, small books that hold sewing needles. I figured one of these books would hold my stick pins just fine.

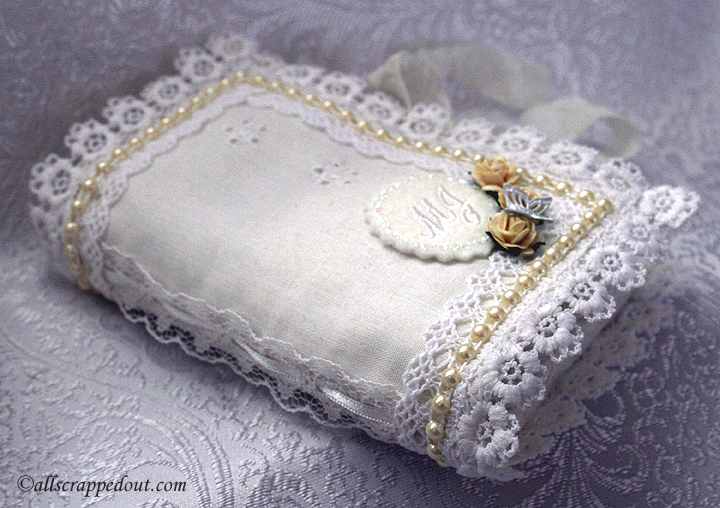
These are very easy to make, requiring very little sewing. Most everything is glued together. This is the tutorial that I followed to make my book.
The fabric, wool felt, and lace are all from my stash. The pearl trim and small roses are from Wild Orchid Crafts. I used Fabri-Tac by Beacon Adhesives to hold everything together.
I machine embroidered my partner’s initials on a piece of wool felt and cut the design out with a Tim Holtz bottle cap die. I added some Stickles around the edges. The book closes with seam binding ribbon.
This is inside, showing the first of the stick pins.
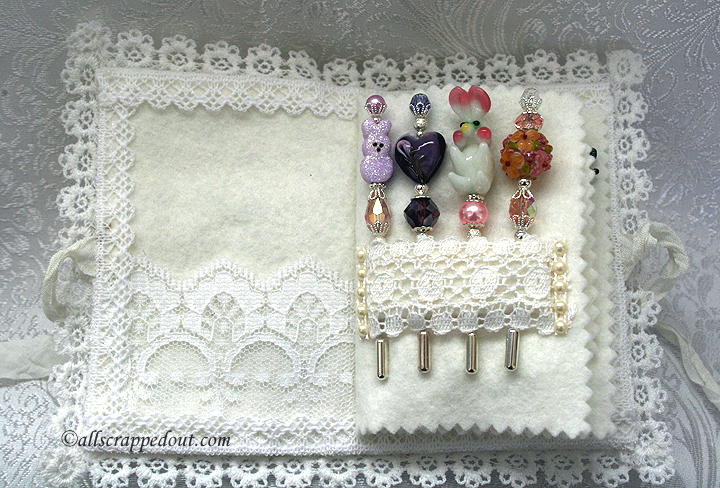
Page 3 of the book: You can see there is a piece of felt that separates page 3 and 4.
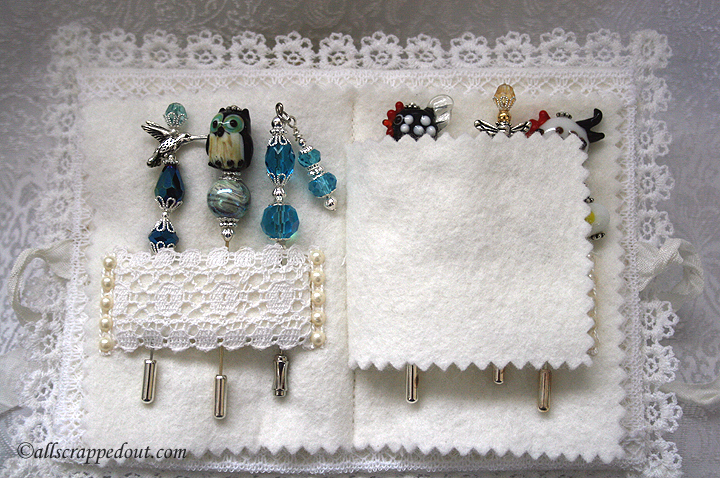
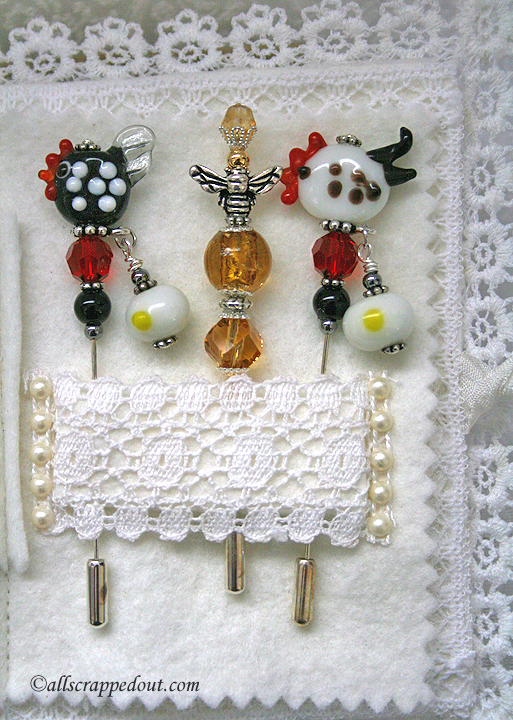
Page 4 shows a close-up of the pins. Those are eggs hanging from the chicken and rooster pins 🙂
And the last two pages:
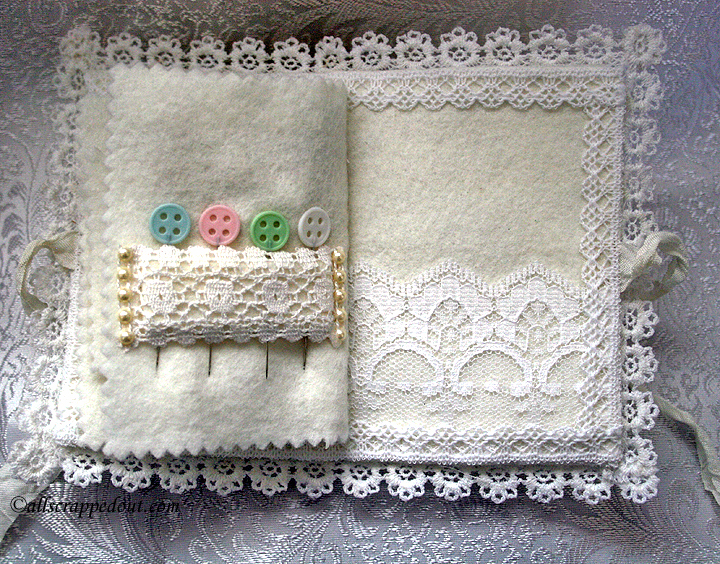
Because my pins are so chunky, I couldn’t add any more to the book and have it fit inside the altered paper mache box. So I just added some sewing pins to the final page. Those are lace pockets at the very front of the book and the very back of it.
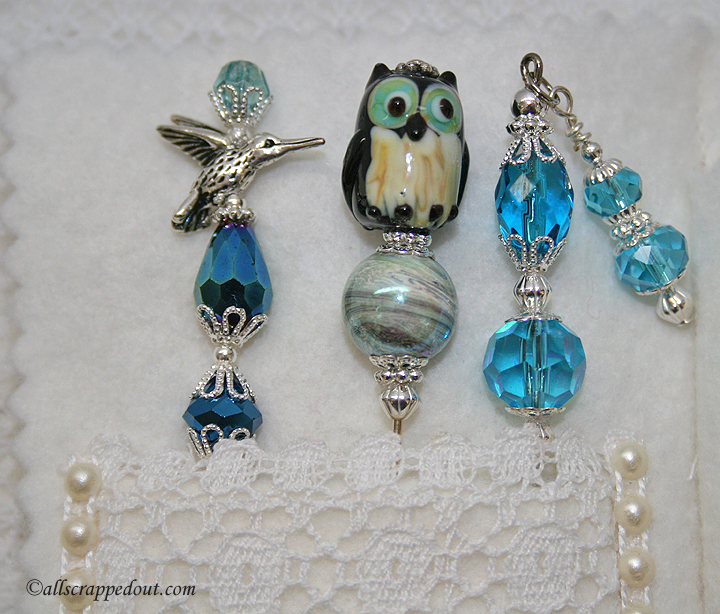
Here are some close-up pictures of the rest of the stick pins.
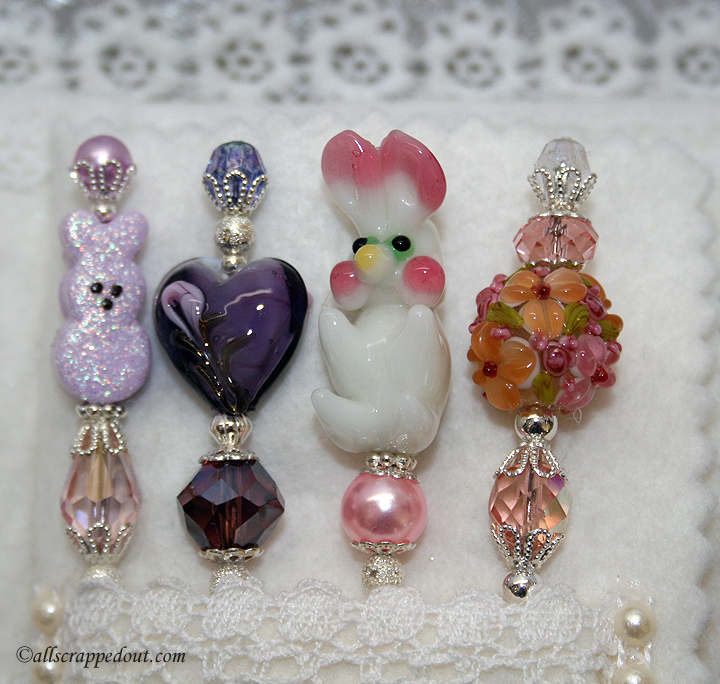
The beads are from Michaels, Joann, and some vendors I found on etsy and eBay. The peeps bunny is from a shop on etsy called TreasuresInClay. She did a special order for me where she drilled the holes in the bunnies vertically instead of horizontally.
- Fabri-Tac adhesive
- Wild Orchid Crafts – roses and pearl trim
- Wool felt
- Scraps of lace, ribbon, and trim


Recent Comments