Cricut Circle Stocking Stuffer Swap Box

For several years I have wanted to participate in the Stocking Stuffer Swap on the Cricut Circle Message Board.  Since this time of the year is usually the busiest for my embroidery business, I have never signed up.  This year I decided I was going to give it a shot and I’m so glad I did.  I had a wonderful time shopping and making gifts for my secret partner.  I will post those later.  Right now I want to show you what my wonderful partner sent me.

My partner for this swap was IrishDancer (her message board name).  It was a secret swap, so I didn’t find out her identity until it was time to open the boxes.  She was so very generous and I love everything she sent.

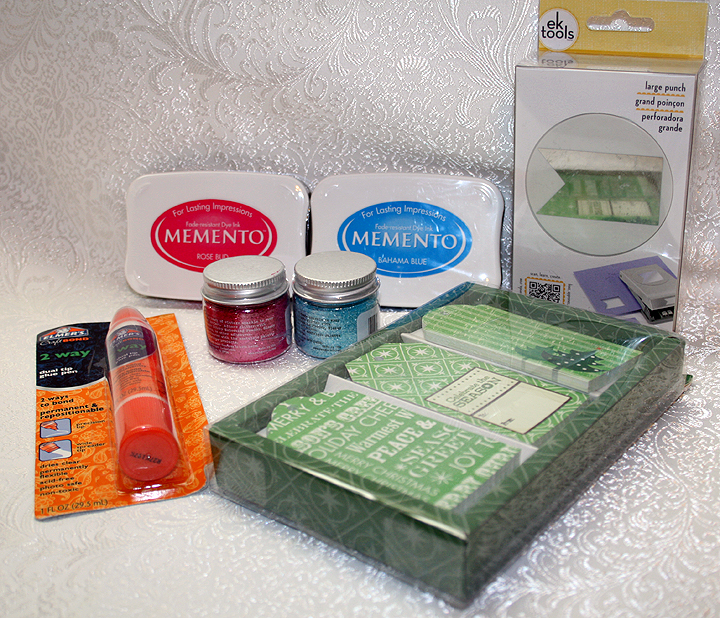
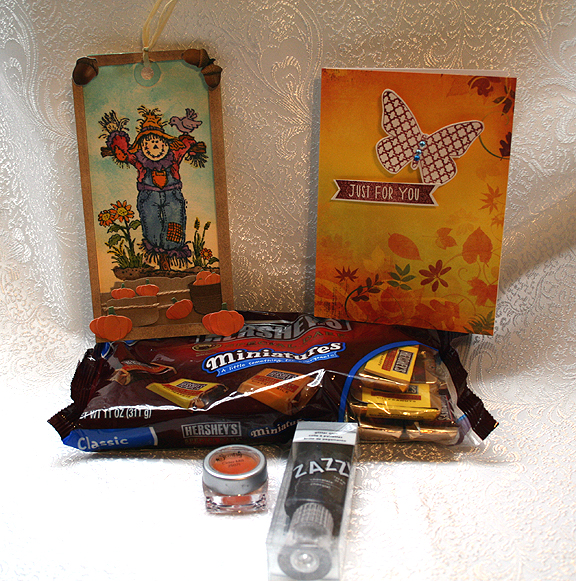
She sent me all kinds of goodies from Crate Paper’s All Bundled Up collection and from October Afternoon’s Silent Night collection.

1

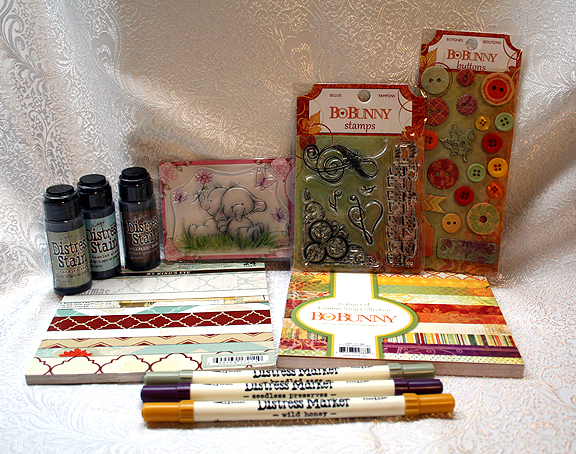
 I love the flag/pennant paper punch.  I got some Memento ink in a pretty pink and blue, a glue pen, some Tim Holtz Distress Glitter in pink and blue (so pretty) and a box of Hero Arts tags.

3

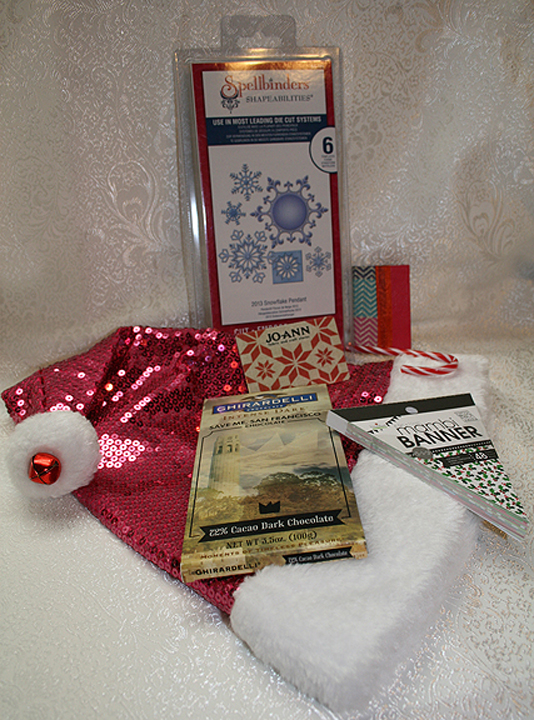
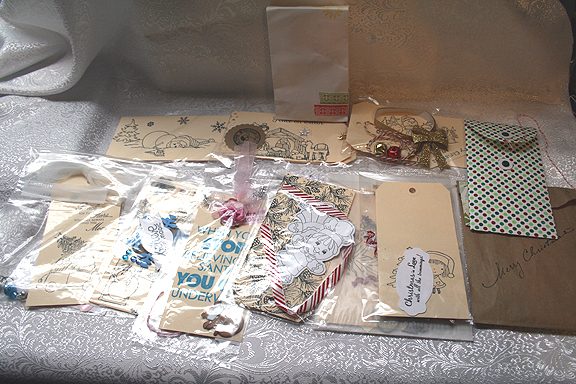
 You could send your partner a stocking or a Santa hat.  IrishDancer sent me a Santa hat that is so sparkly and pretty.  I received a Spellbinders snowflake die, a banner paper pad, a mini notebook that is covered in beautiful fabric, a candy cane pen, some yummy Ghiradelli dark chocolate, and a Jo-Ann’s gift card.  Thank you so much, IrishDancer. You really spoiled me!

2


Ornament Christmas Card


I needed a Christmas card and had very little time to create one, so I turned to my Cuttlebug and some Memory Box dies that I had just received.  This was my first time using Memory Box dies and I am very impressed with them.  I will be buying more!

I used a color scheme of aqua and red for this card.  The polka dot paper is from My Mind’s Eye Merry & Bright collection.  The card matches a project that I will be posting soon, made from the same collection.

Card3 

The white cardstock is Stardream Metallic White Gold and I used a Cuttlebug embossing folder called Snow Flurries.  I inked the edges in Tumbled Glass Distress Ink.

Three Memory Box dies were used to create the ornament — the Classic Ornament die, the Snowflake Ornament die and the Crisp Bows die.  I used glitter cardstock for the snowflake part of the ornament and for the bow.  The background of the ornament is Stardream Aquamarine cardstock.  The die cut pieces are very intricate (and delicate), so I ran them through my Xyron to adhere them.

And that’s all I did — this was a very quick card for me.  I’m entering this card in the Cricut Circle Weekly Challenge, which is to make a Christmas project using non-traditional colors.

Card5

  • Cuttlebug Snow Flurries embossing folder
  • Memory Box dies:  Classic Ornament, Snowflake Ornament, Crisp Bows
  • Stardream metallic cardstock
  • My Mind’s Eye Merry & Bright
  • Distress Ink
  • Xyron

Pac-Man Card


Erin asked me to make a birthday card for her to give to one of her friends and she requested something with an 80’s video arcade game on it, like Pac-Man.  I found a print card showing Pac-Man eating dots and heading towards a birthday cake.  So I did my version of that card using my Cricut.

I first printed a maze from the game that I found online.  I thought it would make a neat background for the card.  I designed Pac-Man in Cricut Craft Room, using the George & Basic Shapes cartridge.  I used a circle and laid a triangle over it (not using the weld feature) to make the mouth.  His eye is a black faceted stone from my stash — I think I got them at Joann’s.

Front5

The white dots are from an EK Success punch — I think it’s called Swiss Cheese. The birthday cake is from Life’s A Party and I added orange Stickles for the flames on the candles.  Pac-Man, the white dots, and the birthday cake are all popped up with foam dots.

Front

When I was laying out the card in Cricut Craft Room, I happened upon a really neat sentiment that I thought would be great with this card.  It is from a project cartridge called Space Party.  But wouldn’t you know it, it was one of the few cartridges that I didn’t have.  I looked at other fonts, but nothing grabbed me like the Space Party sentiment.

So I went on eBay, found a Space Party cartridge that wasn’t being bid too high and placed a bid.  I ended up getting it for less than $2.50 — can you believe that?  Still, I hope I use it for more than just the sentiment on this one card!

This was a pretty quick and easy card to make — and Erin was very happy with it.  I even made an envelope for it using my We R Memory Keepers Envelope Punch Board.

I am going to enter this card in the Cricut Circle Challenge, which is to use or try something new.  Since I have never used Space Party before, I figure that will satisfy the requirements.  And I used the Swiss Cheese punch, which I have owned for some time and have never used either.

  • Cricut cartridges used:  George & Basic Shapes, Life’s A Party, Space Party
  • EK Success Swiss Cheese punch
  • Stickles
  • Faceted stone from stash


My First Mini Album

Yesterday I posted the mini album I received in a swap.  Today I want to share the mini album I made for my swap partner.  I took a ton of pictures — I think because after spending so much time making the album, it was hard for me to part with it.  I felt like it was part of the family 🙂

I made several wonderful discoveries along the way while making the album.  First and foremost, I discovered some wonderful mini album tutorials on Etsy.  You can find them in Cathy’s shop, which is called SoMuchScrap.

I have been researching minis on the internet for a long time and knew I wanted to make something with interactive pages.  After finding Cathy’s tutorials, I knew this was the way to go for me.    I purchased her binding tutorial and her Je’ T’ Adore tutorial for a 6″ x 6″ mini.  All I did was change the papers to a fall theme.  The tutorials are excellently written and have step-by-step instructions as well as pictures to guide you through each page.  Another plus about purchasing from Cathy is that she readily answers any questions you might have.  So, with big thanks to Cathy, here is my mini.

Thumb

I used paper from BoBunny’s Forever Fall collection.  The solid cardstock is all from papertemptress.com.  The brown trim and ribbon are from Joann’s.  Another discovery I made was book cloth — I used imitation suede book cloth to cover the spine of the album and a glue specifically designed for bookbinding.  I was amazed at how easy it was to apply the cloth.  I picked up these supplies at Hollander’s.

Front2

The title is from two Spellbinders dies, Labels 4 and Grommet Tags.  I embossed the bottom layer with the Distressed Striped Cuttlebug embossing folder.  I added highlights with a copper ink pad and sponge.  The “Autumn Splendor” is from a Close to My Heart stamp set with the same name, heat embossed with Lindy’s Stamp Gang’s embossing powder.

That is another of my discoveries — Lindy’s Stamp Gang‘s products.  I bought their Autumn Leaves Mega Set and I can’t say enough good things about it.  I love their sprays and embossing powders — they are gorgeous.  Look at the heat embossing close up — their powder not only embosses but also adds a shimmer, which you will see in the second picture.

Title

The dragonfly is from a Martha Stewart punch and I sprayed him with Lindy’s Starburst Spray and dried him with a heat gun.  I added a chocolate pearl to each side of the tag.

TitleEmboss

The rhinestone embellishment is from Michaels, from their Recollections brand.  I made the three flowers on the front, using Spellbinders Jewel Flowers and Flourishes for the sunflower.  The two smaller flowers are cut with my Cricut using the Flower Shoppe cartridge.  I added Stickles to the centers of the small flowers and Flower Soft to the center of the sunflower.

Flowers 

Flowers2

On the spine I hung a charm on a Tim Holtz ring fastener that I made with supplies I picked up at Joann’s. This was my first time making a charm — and I love the way it turned out.

Spine

The pendant is glass and it reminded me of a leaf shape — so I figured it would go well with the album.

Charm

OK, let’s look inside the album.  Here are pages 1 and 2.

1-2

The first page has a pocket and I used a Martha Stewart border punch on it.   There is also ribbon running under the sentiment.

1

The sentiment is a graphic I got from the Internet and cut out with a EK Success punch.  I made the leaves using a Cuttlebug die.  I found this video on making leaves and they were really easy to do.  She uses the Tim Holtz Tattered Leaves die for her leaves, but I found them to be too large for what I wanted.  The Cuttlebug die leaves were just the right size.  The leaf on the right has Crackle Accents on top of it and the leaf on the left has matte medium coating it.

1Verse

I made two tags to sit inside the pocket, using Distress Ink, stamping, heat embossing , and seam binding ribbon to create them.  The ribbon is colored with Lindy’s sprays.  

1Tags

The pumpkin is from a Cuttlebug Cut and Emboss die, the sentiment is computer generated,  and there is another dragonfly from the Martha Stewart punch.  I kept the backs simple.

1TagsBack

Page 2 is an interactive page, folding up and closing with a small magnet.  I used Basic Grey magnetic snaps throughout the mini.   The Scrabble letters are from a Whimsy stamp (Spell It Out), heat embossed with Lindy’s embossing powder.  The sunflower is from a Heartfelt Creations stamp, colored with Copics and cut out.

2

This is page 2, partially open, revealing a tag inside.  The flowers are Recollection from Michaels, sprayed with Lindy’s Starburst Spray and topped with Stickles in the centers.  The pocket that holds the tag is a label shape from Spellbinders, cut in half.  The rectangle on the mat at the right is attached only at the bottom and right hand side to create a pocket to slip a photo in.

2Open1

I learned so much making this mini — like how to make tabs for tags using the We R Memory Keepers Envelope Punch Board.  I watched this video.

2Tag

I made the backs of all the tags the same — I created a little spot for journaling.  I used the Cricut cartridge Simply Charmed for the notebook paper, using colored pencils and a ruler to go over the score lines.

TagsBack

This is page 2, fully opened.  I created corners by cutting a square in half and embossing them with Darice’s Fall Leaf folder. The stamps I used throughout the album are either Close To My Heart, Inkadinkado, or from Michaels $1 bin.

2Open

Next up are pages 3 and 4.

3-4

The leaf is from a Spellbinders die and the sentiment is heat embossed.  The square the leaf is on is only glued at the bottom and left hand edge to the page — to create another pocket.  There is a mat that pulls out with a ribbon tab.

3

The mat is good sized.  This is the back, which I stamped with a Close To My Heart Stamp.  I used Memento Rich Cocoa Ink for the stamps that aren’t heat embossed.

3Mat2

Page 4 is another interactive page.   The title is from the Simply Scarecrows Cricut cartridge and sprayed with Lindy’s Starburst sprays.  The small leaves are from a Martha Stewart punch.  The ribbon opener features a brad from the BoBunny Forever Fall collection and closes with a magnet.

4

And here’s what it looks like open.

4Open

Now were moving on to pages 5 and 6.

5-6

Page 5 has a mat that pulls out of a pocket and folds over, forming the front.  It is held in place with a magnet.  I kept the front simple, adding a couple of leaves and another dragonfly.

5

This is page 5 open.  There is a tag inside.  The pumpkin on the mat is from the same Cuttlebug Cut and Emboss die that is on the tag in the pocket on page 1, with the leaf cut off.  It is attached only at the bottom and left side, so a photo can slip inside.

5Open

Two pictures of the mat, front and back.

5Mat


5Mat2

Page 6 has a waterfall feature.   The BoBunny charm sits on two Spellbinders ovals.  The brad is also from the Forever Fall collection, using dyed seam binding to wrap around it as a closure.

6

Each layer of the waterfall has an embossed trim strip at the bottom and a pocket with a tag at the top.  This is the uppermost layer.

6WF

Here is the tag, partially pulled out.

6WF2

The second layer of the waterfall.

6WF3

This is a close-up of the brad.  I again used the Martha Stewart border punch for the leaf border.

6Brad

This shows how the waterfall closes.  You will also notice two brads in the spine of my album.  Cathy’s binding tutorial shows how to add strength to your binding system by not only taping it to your spine, but by adding brads.

6Closed

We’re getting near the end.  Here are pages 7 and 8.

7-8

Page 7 has a pocket at the bottom.  The label is a Spellbinders die and the sentiment is heat embossed.  There is another pull out mat in the pocket on this page.

7Open

Page 8 features a mat that folds around to the front and is held in place with a magnet.  There is a pocket at the bottom and the curved oval shape (a Spellbinders die) is attached at the bottom to the pocket only.  The embossing is from the Cuttlebug Divine Swirls folder and is highlighted with gold metallic ink.  And there is one more of those little dragonflies on this page.

8

This picture again shows how wonderful Lindy’s Stamp Gang products are — look at all that sparkle.  I used more than one color on the dragonfly.

8Emboss

This is page 8 with the mat partially out.

8Open2

And we’re to the last of the pages, pages 9 and 10.

9-10

Page 9 is a fun interactive page.  It has a brad and seam binding closure.

9

The sentiment is attached at the lower and left edges only, forming a pocket.  The small leaves are the negative cuts from the Martha Stewart border punch, sprayed with Starburst Spray.

9Verse

Page 9 opens to reveal another tag.

9Open

The left side of the page then opens up to reveal two more spots for photos.

9Flap

Page 10 is the inside of the back cover.  It has a pocket at the right hand side with a folded photo mat tucked inside.

10

I again used some Recollection brand rhinestones on the pocket.

10Rhinestones

The photo mat features a hexagon made with the BoBunny paper using an Epiphany Crafts tool and  bubble cap.

10Mat3

How cool is that hexagon?

10Epiphany

This is the inside of the mat.

10MatInside

And, finally, we are to the back cover of the album.

Back

Thank you for taking a “tour” of my mini album.  And I want to share my last discovery — I discovered that I love to make mini albums.  I am already planning my next one.

Front


  • BoBunny Forever Fall Collection
  • Cricut cartridges:  Flower Shoppe, Simply Charmed, Simply Scarecrows
  • Cuttlebug:  Divine Swirls folder, Distressed Stripes folder,  Fall Leaves die, Cut and Emboss Pumpkin Spice
  • Spellbinders:  Labels Four, Grommet Tags, Jewel Flowers and Flourishes
  • Lindy’s Stamp Gang embossing powder and Starburst Sprays
  • We R Memory Keepers Envelope Punch Board
  • Martha Stewart punches
  • Recollections rhinestones
  • Stickles
  • Flower Soft

The Fall Mini Album I Received


I joined a Fall Mini Album Swap on the Cricut Circle Message Board.  We were to make a mini for our partner, as well as do some shopping for them.

I want to share the beautiful mini album I received, plus a lot of goodies.  My swap partner was Barb, Oswaltb on the Message Board.  The album she made is not too mini — it’s pretty good sized.  She used BoBunny’s new Autumn Song collection.  I took a lot of pictures — so I can show each page.


1


2


3


4


5


And here are a couple of pictures of the goodies Barb sent me.  She made a card and a tag, too!

CardTag

Gifts 

Thank you so much, Barb.  I love my mini and all my gifts.

It’s A Stamped Image Tag Swap 2


Sis on the Cricut Message Board held her second stamped tag swap and I was able to join in a swap for the first time.  I just received my package with all the tags and had to share all the goodness in that box.

Each participant made 12 Fall/Halloween tags and 12 Christmas/Winter tags, plus one tag for our secret swap partner.  The 24 tags were to have a stamped image and at least one embellishment.  For the secret tag we got to go all out and decorate it.

First I want to share pictures of all the stamped tags, each one bagged with the name of the sender and embellishments inside.

AllTags

AllTags2

My secret swap partner was Maria and I received two beautiful tags from her.  She said she couldn’t decide between Christmas and Halloween, so she made both.  I am sure glad she couldn’t make up her mind!  She put so much detail into both tags.

ChristmasMaria

HalloweenMaria

Thank you, Maria — I love both of my tags!!

I will take pictures of all the other tags individually and post them soon.  Right now I am working on my first mini album for another swap and need to finish it so I can get it in the mail.

Thanks to Sis for a wonderful swap — I had a lot of fun!!