Paper Mache Quilt Shop

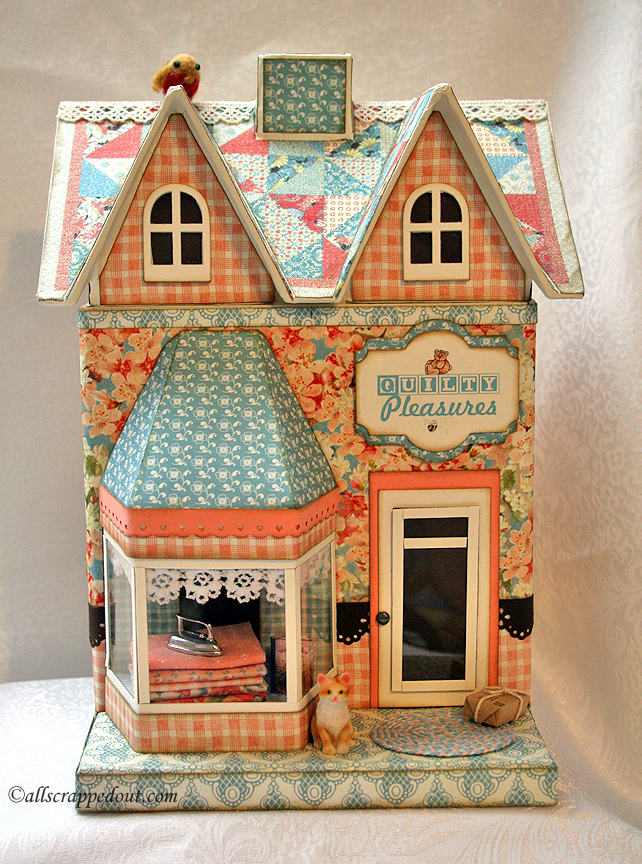
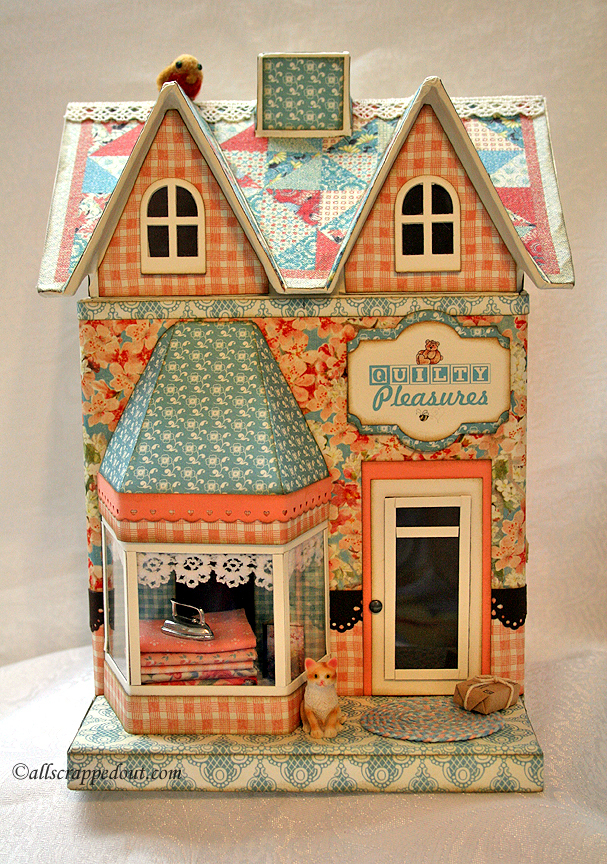
This is the quilt shop I made for a swap I participated in way back in August of 2014.  I altered a paper mache house from Hobby Lobby.  The porch and window I added in the front was made using a tutorial from Laura Denison Designs — I altered one of her Maple Street Shoppes (the Tea Shoppe) to fit my little house.

All the paper I used to cover it is from Graphic 45’s Secret Garden collection.  I used several doll house miniatures to add realism and I even added a little needle-felted robin on the roof.  I found the robin on etsy and he came all the way from Russia.

Front3

The sign is computer generated and mounted on a Spellbinders Label shape, but I don’t recall which one I used.  I named my shop Quilty Pleasures.  You can see some of the miniatures I used — the cat and package by the front door and the iron in the window. There is also a miniature quilt book in the window that I found on etsy — it even opens. In the next photo you can see the book a little better.  I made the bolts of fabric using fabric from my stash.

I used two different Martha Stewart border punches for trim on the shop.
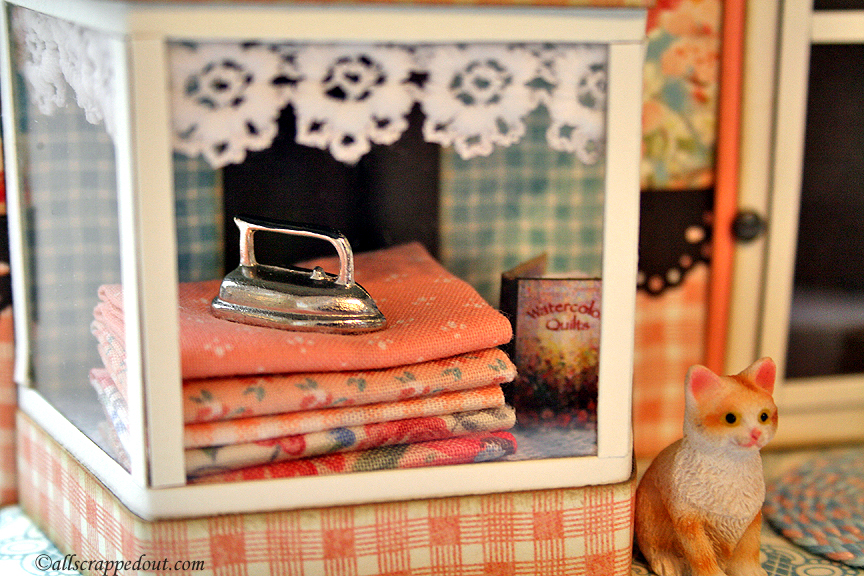
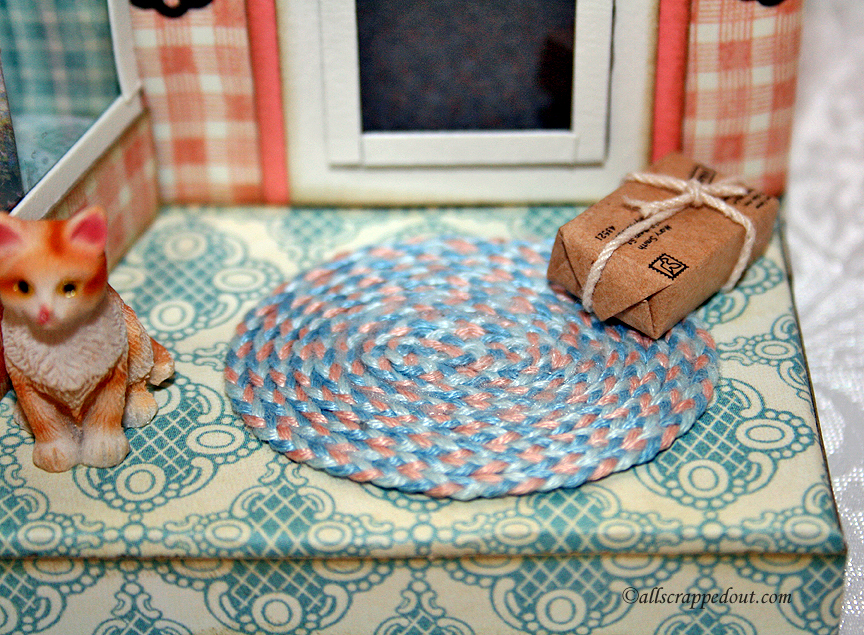
WindowCUI handmade the rug that is on the front porch – a tedious and time consuming undertaking.  I used strands of embroidery floss that I braided together.  Once I had a long strand I started forming it into the shape of the rug.  I cut an oval from cardstock and glued on the back of the rug.

Rug

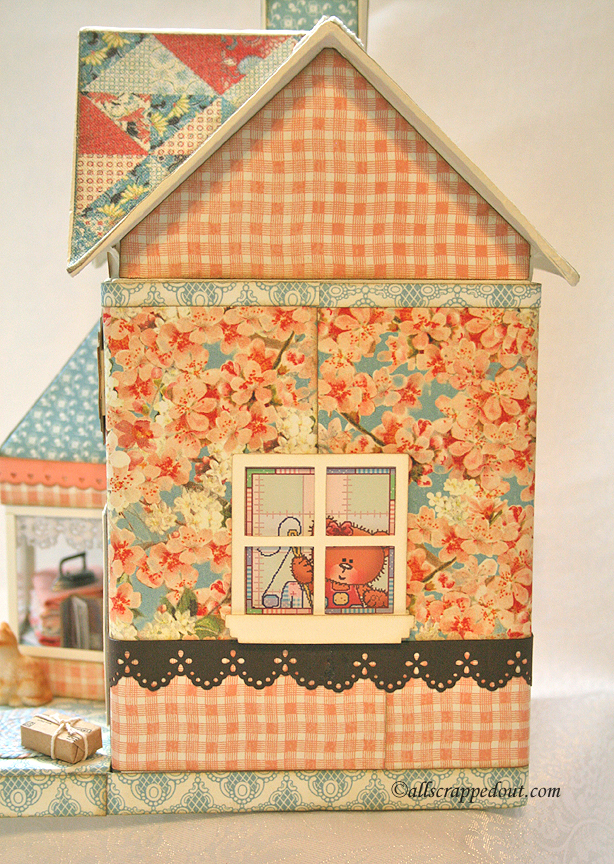
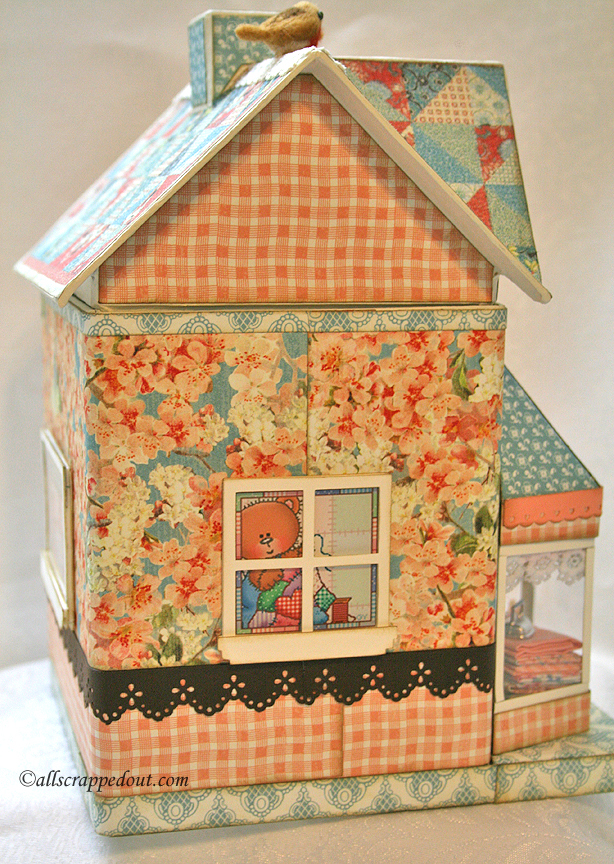
The next three pictures will be of the windows on the sides and the back of the shop.  I printed some cute bear quilting clipart I found on the internet and put them behind windows that I cut out with my Zing using a svg file.

RSide2

LSide

The roof is made from a piece of fabric that I printed a quilt design on using my Brother garment printer.

Back

The roof lifts off and I covered the inside of the house with paper – a mini album fits inside.

Inside

This was such a fun project and I love how the Secret Garden collection looks on the quilt shop.  I ended up making two mini albums, which I will post separately.

Front6

  • Paper mache house from Hobby Lobby
  • Graphic 45 Secret Garden collection
  • Laura Denison Designs Tea Shoppe pattern
  • Martha Stewart border punches
  • Spellbinders label die
  • Assorted purchased miniatures
  • Handmade braided rug
  • Scrap lace and fabric from my stash
2nd Banner Entry for Cricut Expression 2 Design Challenge


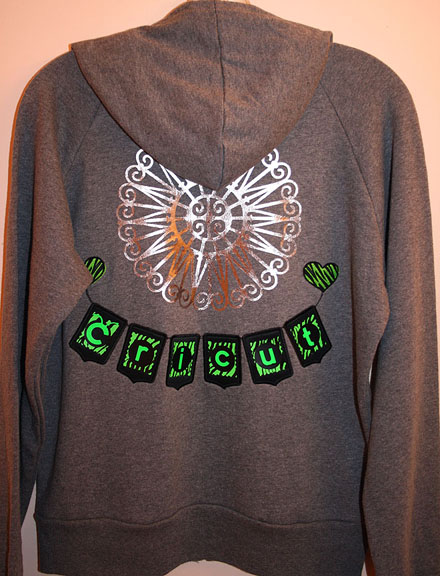
The second banner that I made for the HSN design challenge does not use any paper or cardstock — I decided to create a banner using heat transfer vinyl and applique.    I “hung” my banner on a gray Bella sweatshirt.  This was my first time cutting heat transfer vinyl and fabric with the Cricut and I was so impressed with the results.

This was a last-minute entry.  I had been working on the layout and design for a couple of days, but it got down the the weekend before the challenge ended before I was able to start cutting.  I stayed up all night to finish the sweatshirt so I could get it to the post office in time to meet the deadline.   I wish I had better pictures of it.

Back6

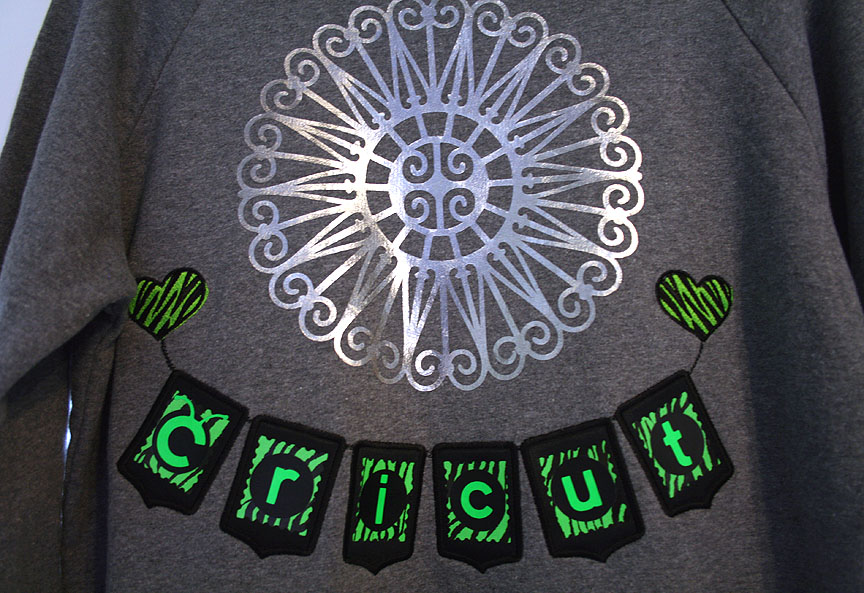
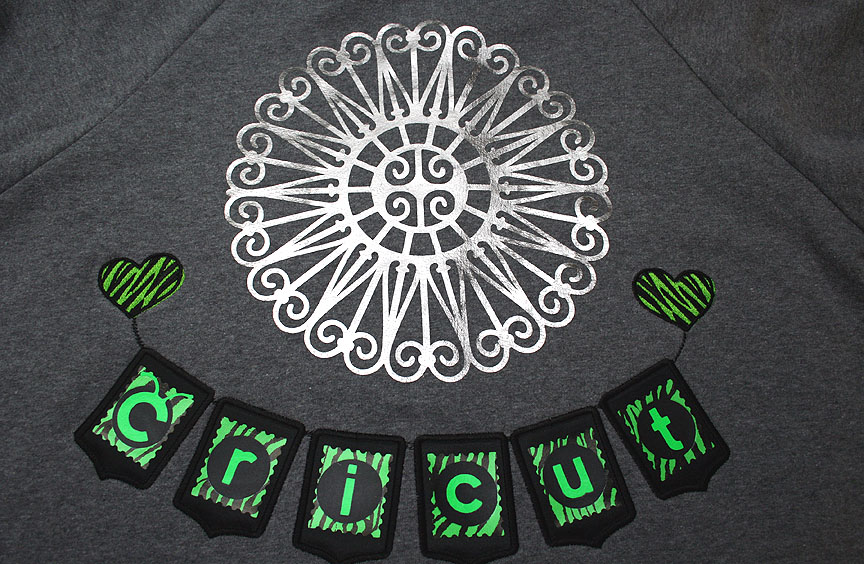
The banner is cut from black twill using the B is for Boy cartridge.  And, yes, I cut it on my Cricut!  I then cut the banner pieces from heat transfer vinyl (love the lime zebra print) and applied the pieces on my black banner base.  The Cricut lettering is from the Cricut Everyday cartridge.  From there I embroidered two hearts and some strings on my sweatshirt and then appliqued the banner pieces onto the heartstrings using a heavy satin stitch.

I also cut a large sunburst design from Ornamental Iron 2 to apply above the banner.  I used two semi-circles and welded them together in Design Studio.  I cut this design from a metallic heat transfer vinyl.  Here are two close-up pictures of the back.


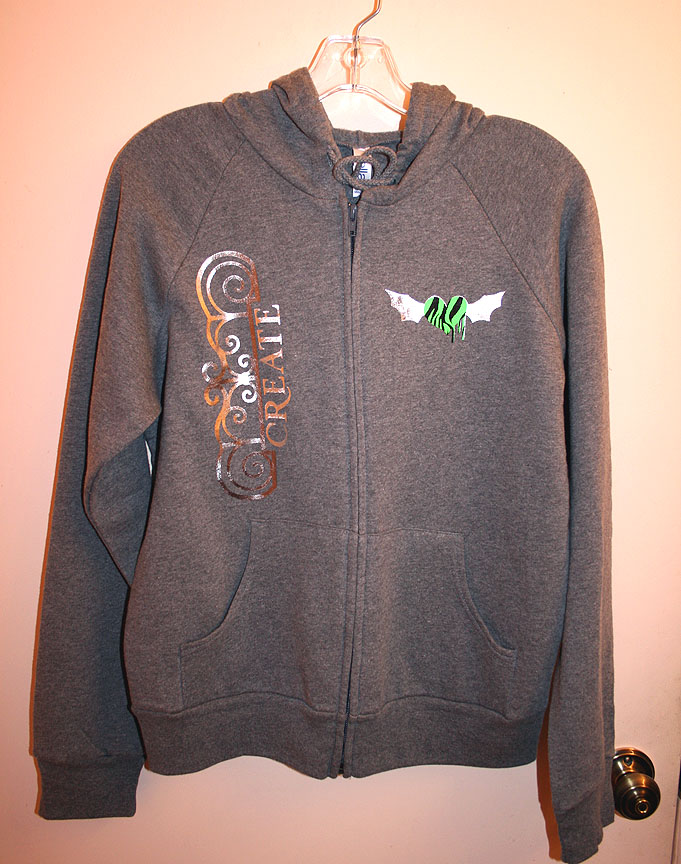
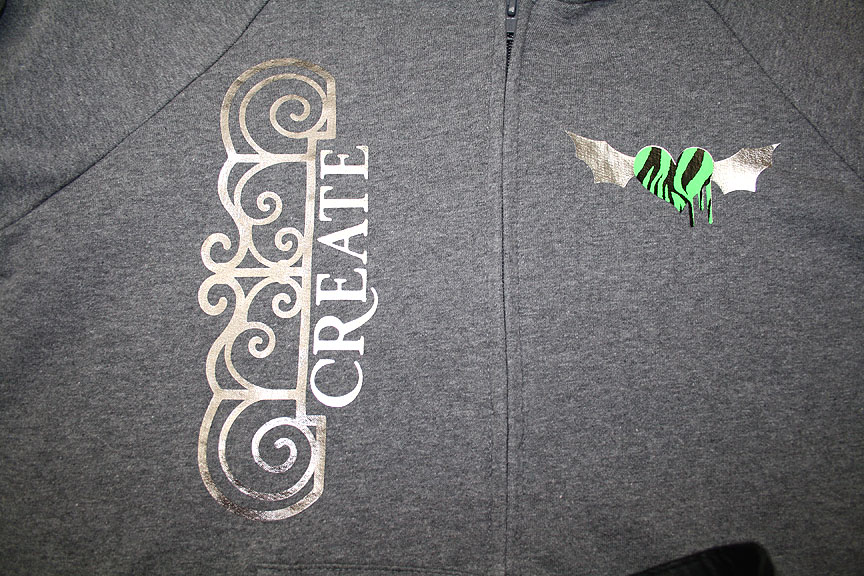
To decorate the front of the sweatshirt I again used Ornamental Iron 2.  I cut a scroll design for the right front and added the word “Create” using Paper Lace II.  They are cut from two different shades of metallic heat transfer vinyl but both look silver in the picture — probably from the flash.  I cut a winged heart design for the left front using the Rock Princess cartridge and the lime zebra print and silver metallic vinyls.

  • Cricut cartridges:  B is for Boy, Cricut Everyday, Ornamental Iron 2, Paper Lace II, Rock Princess
  • Heat transfer vinyl
  • Black twill

Jitterbuggin’ Challenge – Spring Butterfly Card

This week’s challenge over at Jitterbuggin’ is to follow the sketch, use green on your card and, of course, use your Cricut.  When I was planning this card in my head, it was going to be lavender.  But when I started picking out my paper, it suddenly became mostly green.  I wanted a card that looked like spring and when I saw this paper, I knew I wanted to go with daisies. 

I have sewn most of my life, and when Erin was young I made most of her clothes.  I loved making frilly dresses for her for Easter and dotted swiss was a favorite fabric.  The corners on my card are my papercrafting version of dotted swiss and lace. 

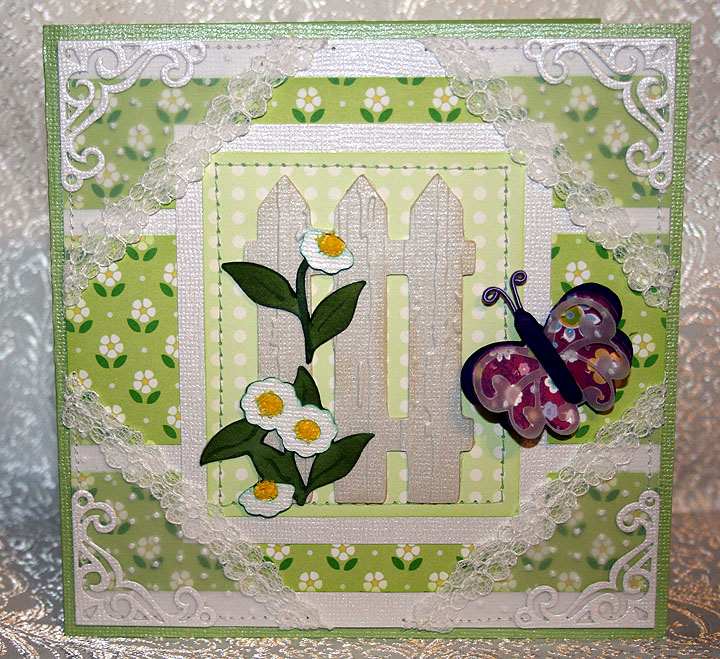
The daisy and dot print papers are from a pack by Martha Stewart that I got on clearance at Michaels some time ago.  The solid cardstock is Bazzill.  The corners are made from vellum and I ran them through my Cuttlebug using the Swiss Dots embossing folder.  I stitched some lace on the edge of the corners and then stitched the corners to the card.  I used my Cuttlebug again to cut some  fancy small corners out of white Bazzill that I glued in the uppermost part of the vellum corners.  The die I used for this is from a 4-pack called Vintage.

I used my Cricut and cut the fence and daisies from the Bloom Lite cartridge.  I cut everything out twice so I could layer them.  I ran the fence section through the Cuttlebug using the Distress Stripes folder so it would look like wood.  I inked the edges of all the cuts and used yellow Flower Soft in the center of the daisies.  The butterfly is from Graphically Speaking and I cut three layers, the top layer being vellum.  I used DMC Memory Thread for the antennae.  This was my first time using it and I love how easy it is to work with.  I pop-dotted the butterfly to the front of the card.

Close-up of front

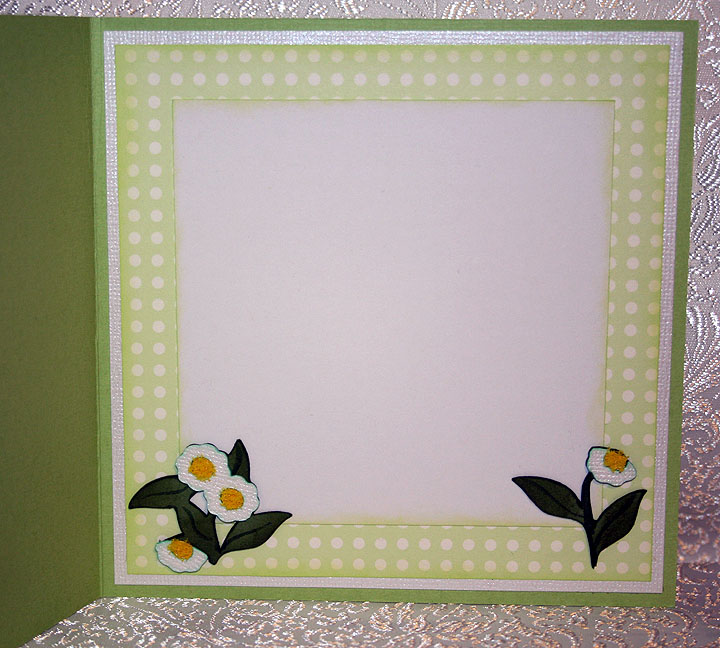
When I cut the flowers for the front of the card, I cut extras so I could use them inside. 

I found another challenge that my card qualifies for, so I am very excited.  It is always nice when you can bundle challenges together.  This newest challenge is at the Crafty Creations Challenge Blog and is called In Stitches.  Your project has to include some stitching. 

  • Bazzill cardstock
  • Martha Stewart paper
  • Vellum
  • Cricut Design Studio
  • Cricut cartridges:  Bloom Lite and Graphically Speaking
  • Cuttlebug embossing folders:  Distressed Stripes and Swiss Dots
  • Cuttlebug Vintage die
  • Flower Soft
  • DMC Memory Thread

Sunny Snail is Thinking of You!!


Erin is back in Taiwan after a lengthy visit here in the US.  I had lots of fun while she was staying with us.  We attended CHA every day and even managed to get in a scrapbook expo in Anaheim right before she left.  Once she got home to Taipei and settled in, she wanted to do a challenge together.  So we have been busily working,and thanks to Skype, we were able to scrap together.

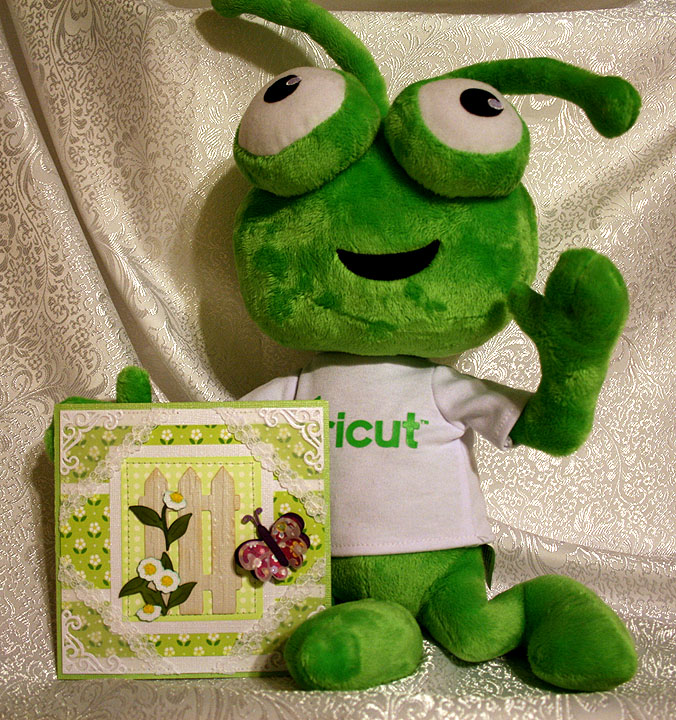
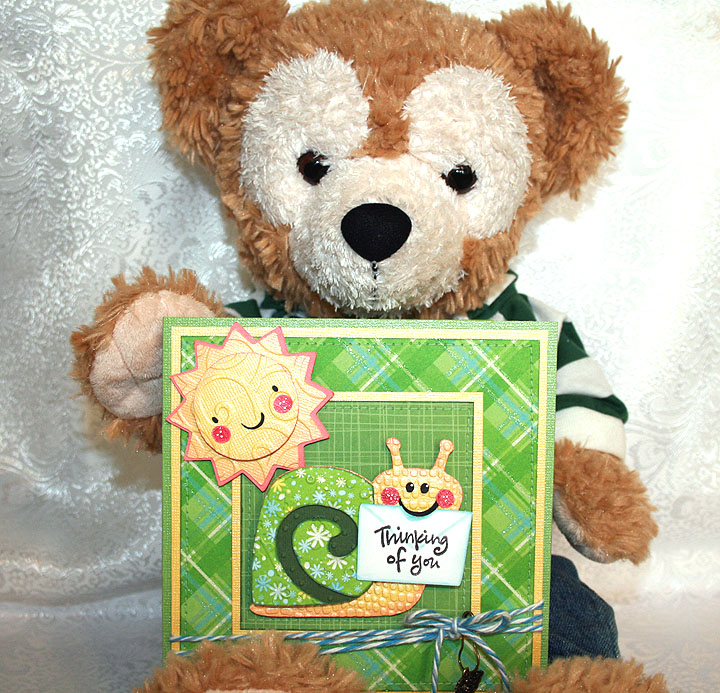
A member of the Cricut Circle recently had surgery and I wanted to send her a card to wish her a speedy recovery and let her know I am thinking of her.  I thought doing a challenge would be a perfect way to accomplish this.  And here is a little Duffy “spokesbear” model to present my card:

The base of the card is green Bazzill bling cardstock.  The glittery print cardstock is from two different DCWV paper stacks, Blossoms & Butterflies and The Glitter Stack.  I used a yellow bling cardstock from Bazzill for the contrast, sun and snail body. 

I laid out my card in Design Studio and I cut the sun, snail and flowers with my Cricut.  I used Create a Critter for the sun, Birthday Bash for the snail and the Bloom Lite cartridge for the flowers.  I used my Cuttlebug to emboss the sun and the snail.  I embossed the snail with four different embossing folders, Swiss Dots, D’Vine Swirl, Plum Blossom and Mesh Texture.  I inked the edges of all the pieces to give them some depth.  I used Stickles on the center of the flowers and an atyou Spica glitter pen for the cheeks on both the sun and snail.  The sentiment on the envelope the snail has in his mouth is from a $1 clear stamp I purchased at Michaels.  I used lots of pop-dots on the sun and snail, popping up layers and also the completed pieces. 

I am loving all the baker’s twine that is so popular right now, but  I have not purchased any yet.  When I was in Michaels a couple of weeks ago, I found some Lily Sugar ‘n Cream Twists string/thread in the yarn department that reminded me of the twine.  It was on sale so I bought a few different colors to see how it would work.  I wrapped some of the blue around the bottom of this card and I think it looks pretty good.  I attached a charm to the twine with a little hanger that is from Making Memories.  I think they are called garment pins. 

For the inside of the card I added a couple of flowers that I cut out twice so I could layer them together for some dimension.  I used Stickles for the bling on the center of the flowers.

This was a fun card to create and I am happy to say that my card qualifies for the following challenges:

Fantabulous Cricut Challenge Blog – Challenge #51 “Hip to be Square” -green & gold

Cooking With Cricut – It’s A GREEN  SCENE!

The Cuttlebug Spot –  All Tied Up: twine challenge

The Cuttlebug Spot –  Oh so Charming

  • Bazzill bling cardstock
  • Die Cuts With a View paper stacks
  • Cricut cartridges:  Birthday Bash, Bloom (Lite), Create a Critter
  • Cricut Design Studio
  • Cuttlebug Embossing Folders:  D’Vine Swirl, Plum Blossom, Swiss Dots
  • Twine:  Lily Sugar ‘n Cream Twists
  • Making Memories garment pins
  • Charm from my stash
  • Stickles
  • atyou Spica glitter pen

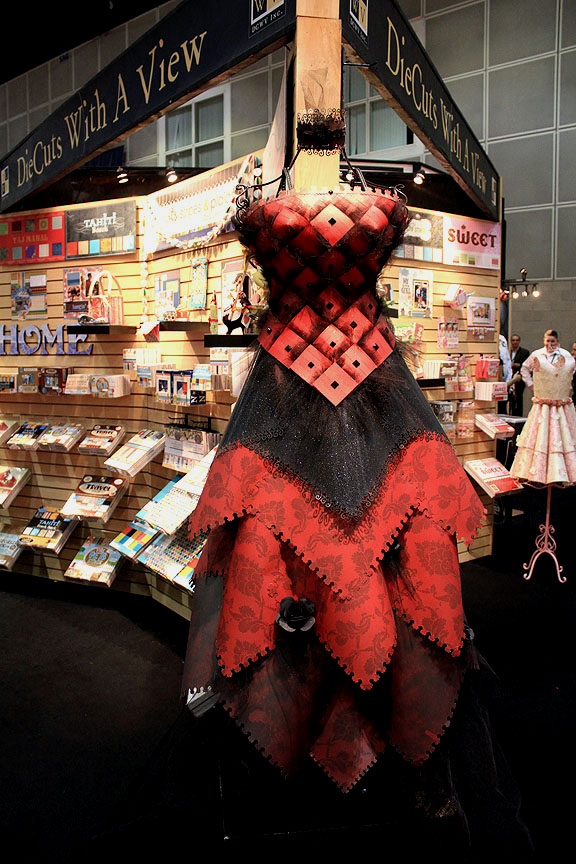
CHA 2011: Die Cuts With A View Paper Dresses

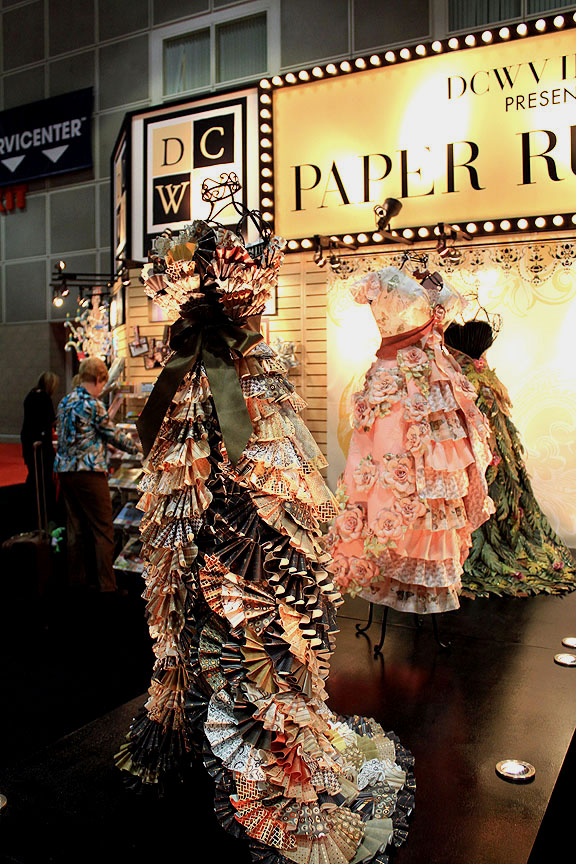
I think my favorite booth at the show this year is Die Cuts With A View.  Their display is absolutely stunning.   In the center of the booth is a runway featuring life-size dresses made from their paper stacks.  There are also other paper dresses scattered throughout the booth, as well as two themed rooms.

I visited the booth each of the four days of the show just to look at those dresses.  They are absolutley amazing.  While talking to various reps over that period, I found out that their designers started creating the dresses last October.  When they received the challenge to do the dresses, the designers got a dress form and worked on them at home.  Some worked individually, while others collaborated on a design.

The staff at DCWV did not see the dresses until about a week before the show, when the designers started bringing them in.  One rep told me they were blown away when they saw them.

I asked how the dresses were transported to CHA and was told that they were wrapped, loaded in a truck standing up, and driven to the show.  Let me share some now.

This is a shot of the runway, which featured three dresses.

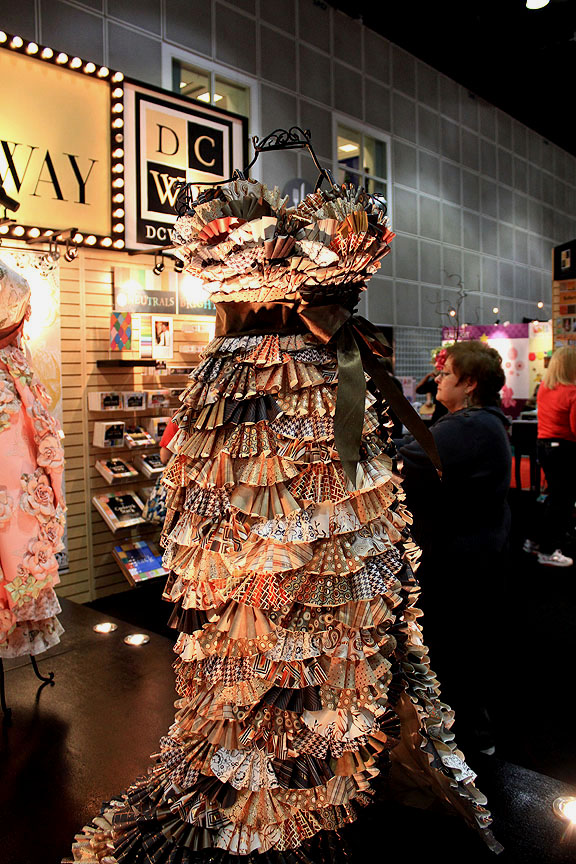
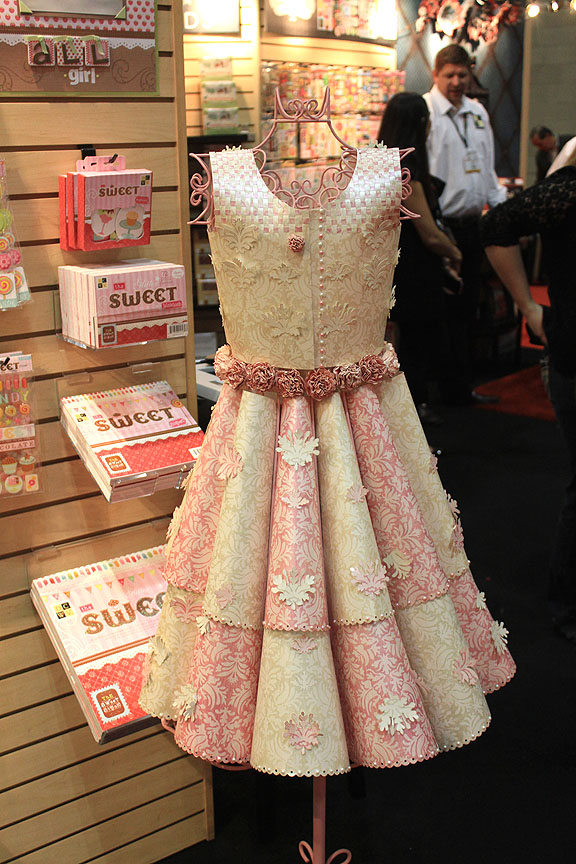
The first dress is made from the Natural Paper Stack.  I was able to peek inside and see that it has a base made from muslin, and the paper is affixed to that.

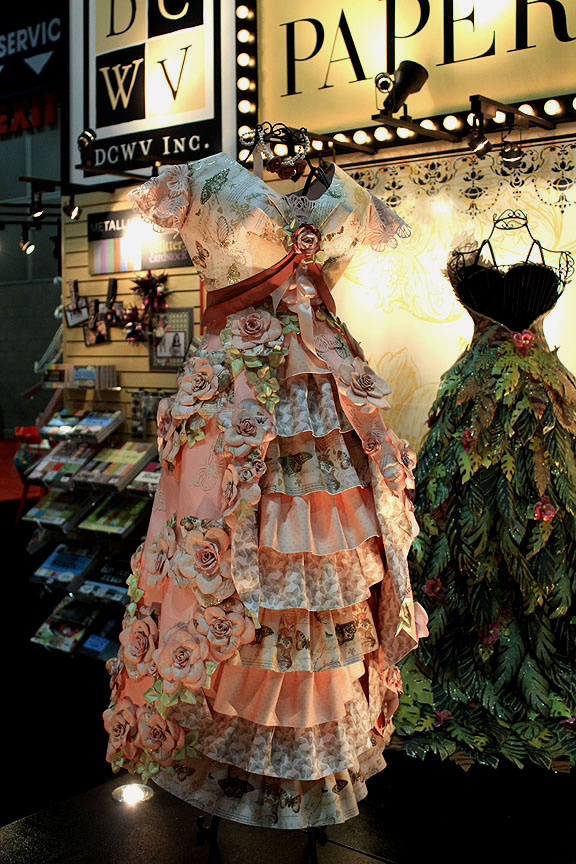
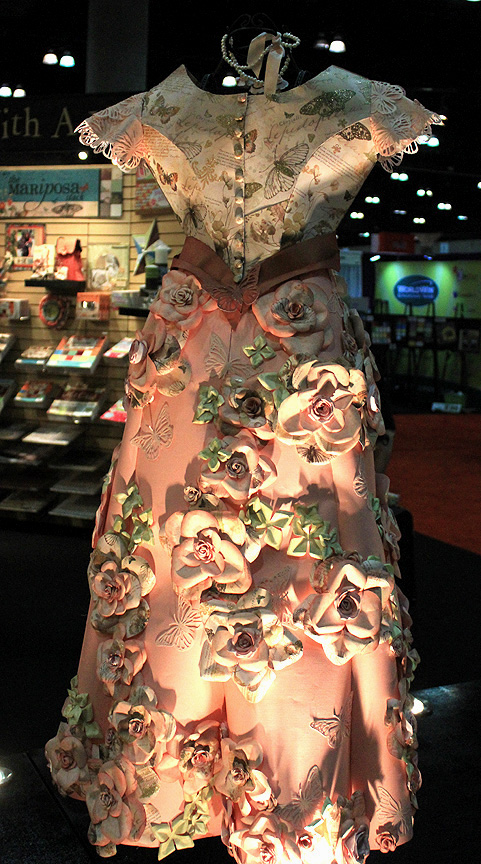
This dress is made from the Mariposa stack. 

Notice the detail on the back of this dress, especially the buttons and all those gorgeous flowers.

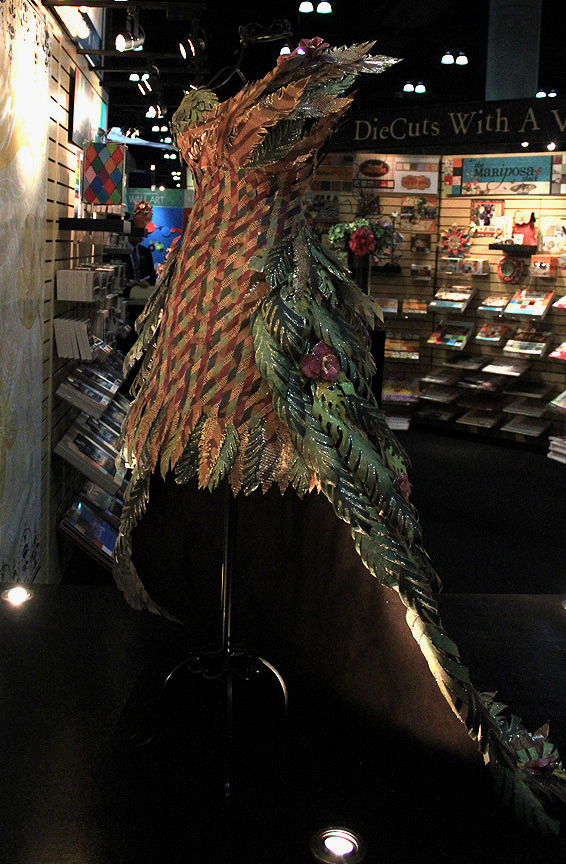
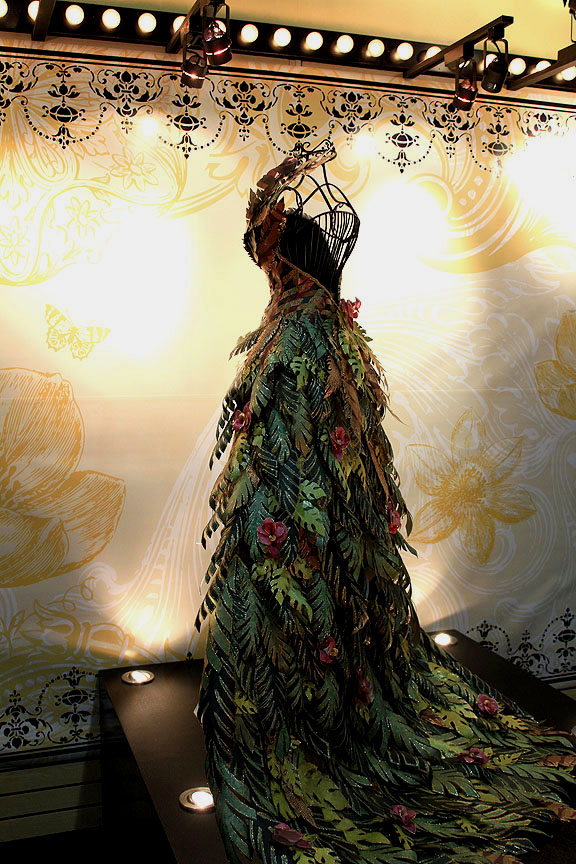
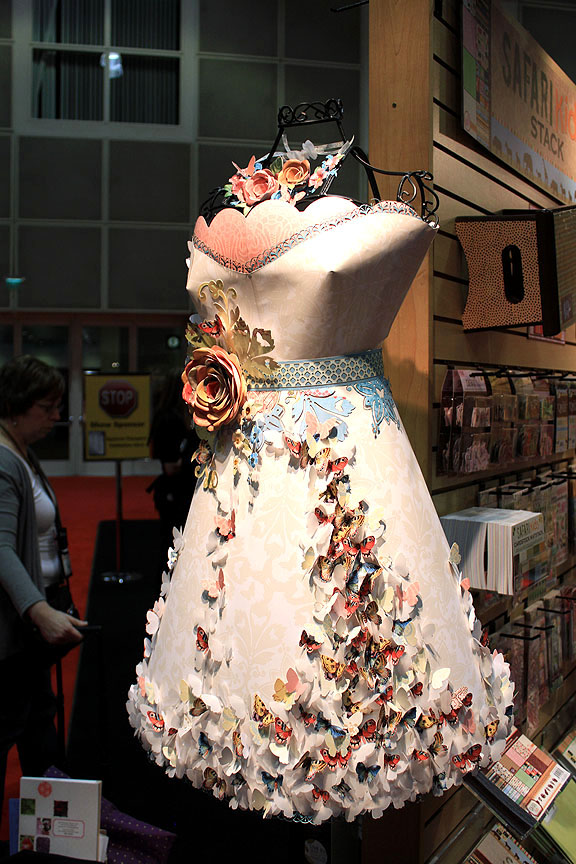
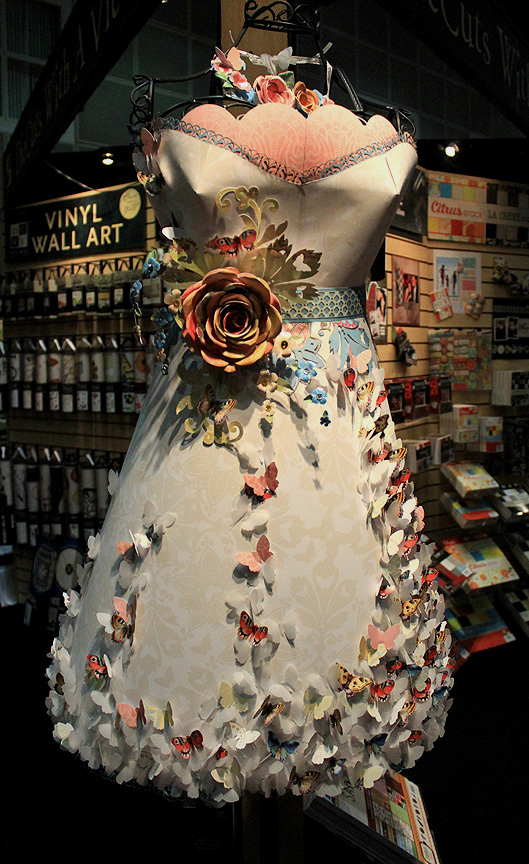
The third dress is made from the Gone Wild stack, which I believe is exclusive to Michaels.  The front of this dress is made with strips of paper that are woven together.

The back features a train made of paper leaves and flowers.

This dress is made from the Immortal Love Paper Stack.

This is from the Shimmer Paper Stack.

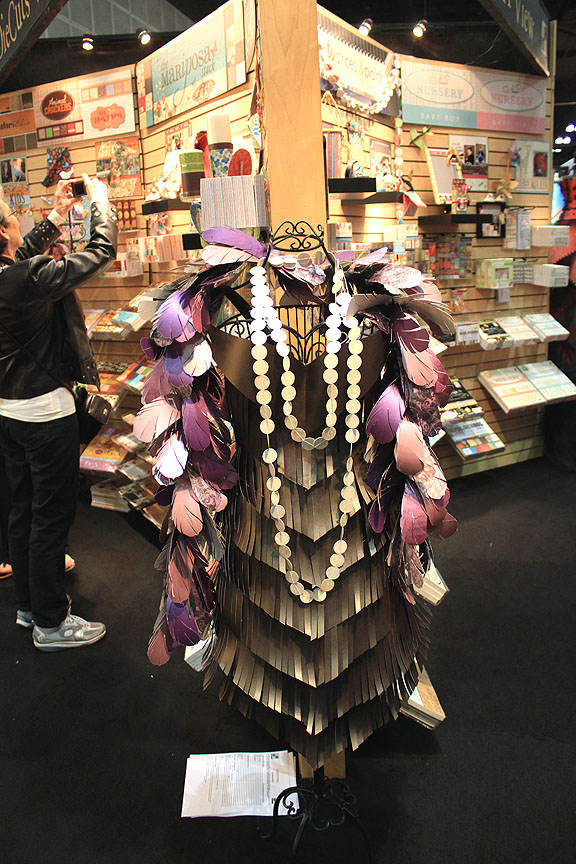
I’m not sure which paper this dress is from, but I think it is the Luxury stack.

From the Ciao Bella collection. 

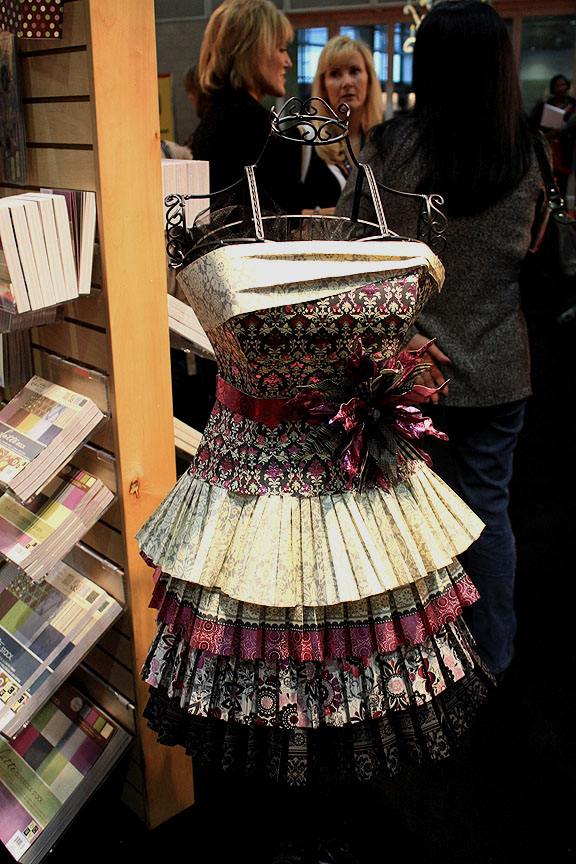
And here is the last dress, made from the Black Currant stack.

Jitterbuggin’ Challenge – Sketch 17 – Going Old School

The challenge this week at Jitterbuggin’ is to follow the sketch, use primary colors (red, blue, yellow) and use the Cricut.  Sherri’s sketch shows a school theme, which we can use, or we can choose use any theme we want.  I stuck with the school theme because it goes well with primary colors.

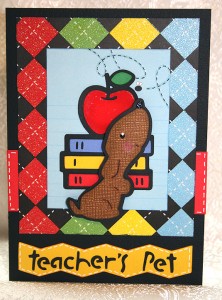
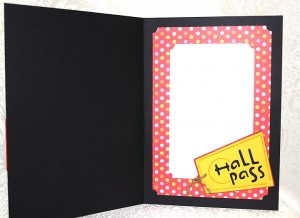
This card came to me fairly quickly.  I decided to use “teacher’s pet” as my sentiment, literally in this case.  As you can see, I chose a dog as my teacher’s pet.  The Cricut cartridges I used are Hello Kitty Greetings for the books and apple, Paper Pups for the dog, and Locker Talk for the sentiment and hall pass inside the card.  Oh, I used one more cartridge — Give A Hoot for the zig zag border that I placed the sentiment on. 

My patterned paper is DCWV’s Grade School pack and I used the glittery argyle pattern for the front of the card.  I had a scrap of blue paper from that pack that had a bee printed on it and it just fit the front of my card.  The pup is cut from Core’dinations cardstock and I popped him up using 3D foam pop dots.   I used Glossy Accents on the apple and also on the nose of the dog.  I did some faux stitching with a white Sharpie Poster-Paint marker.

On the inside, I used a Stampin’ Up ticket corner punch.  I tied a piece of jute through the hole in the hall pass.

  • DCWV Grade School paper pack
  • Core’dinations cardstock
  • Cricut cartridges:  Hello Kitty Greetings, Paper Pups, Locker Talk, and Give A Hoot
  • Ranger Glossy Accents
  • Sharpie Poster-Paint marker
  • Stampin’ Up ticket corner punch
  • 3D foam pop dots and jute from stash
New Basic Grey Embossing Folder Sets

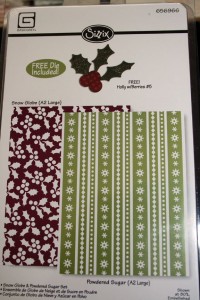
Just wanted to share  my newest find– embossing folder sets designed by Basic Grey and made by Sizzix.  I bought 4 of the sets at Joann’s.  They come packaged with two embossing folders per set –and you get a free die with each one too.  I used the folders and dies in my Provo Craft Cuttlebug and love the way they came out.  

This is how the folders come packaged.

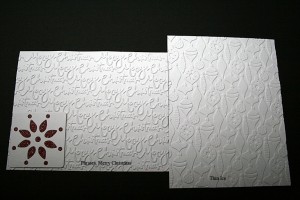
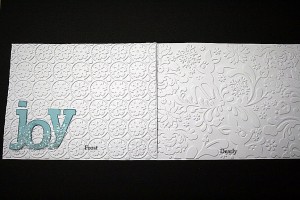
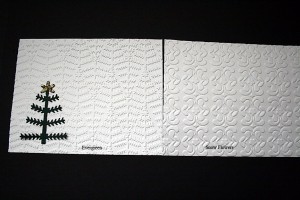
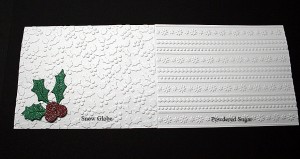
   I ran some scrap paper through my Cuttlebug and made samples of the folders and the dies.

Thin Ice & Phrases, Merry Christmas Set

Dearly & Frost Set

Evergreen & Snow Flowers Set

Snow Globe & Powdered Sugar Set

The Joann’s I visited had about 8 different sets of the embossing folders.  They also carry individual dies (larger than the free dies that come with the sets) that coordinate with the folders.  I’m looking forward to putting these new folders to work.

Finally Up and Running!

We’ve had this site parked for awhile and now we are finally getting it up and running! Look for some exciting paper crafting creations coming soon!