Circleville NSD 2013 — On Pins Challenge


I just completed this cupcake for the On Pins Challenge that was hosted by Sis.  Be sure and check out her blog to see the beautiful mini album she made for her project.

The challenge was to make a pin-inspired project.  I had no trouble deciding which pin I was going to use.  It is the one here.   I wanted to make one of the cupcakes.  Miranda has some gorgeous projects on her blog and I was lucky because she had a video on how to make the cupcake.  You can find the link to her video on her blog here.

CC2

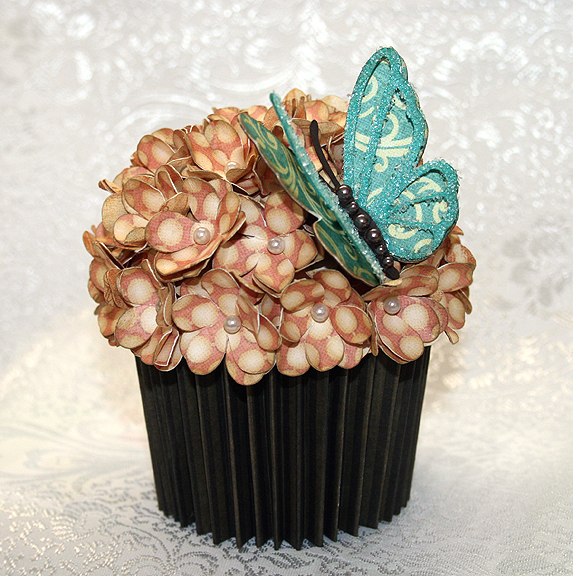
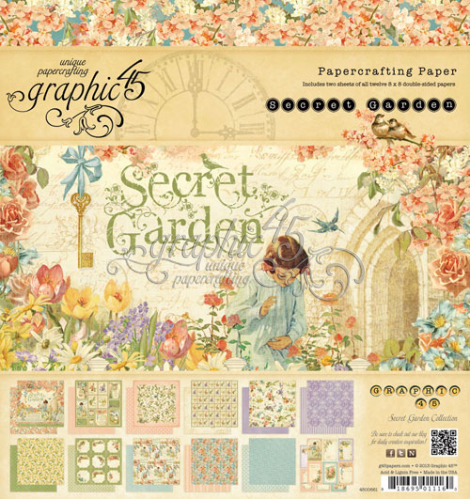
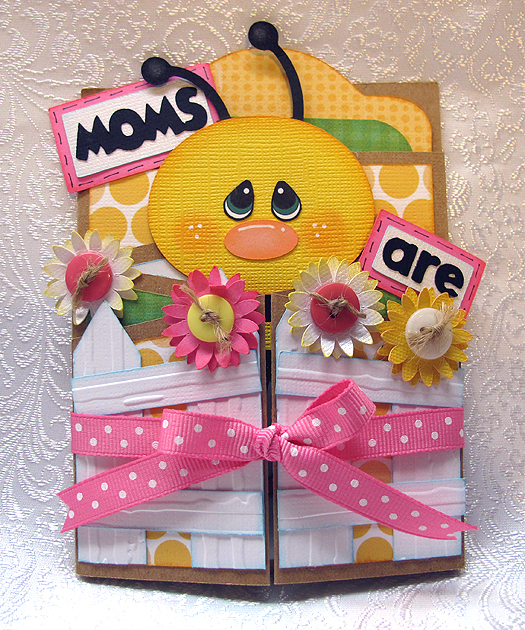
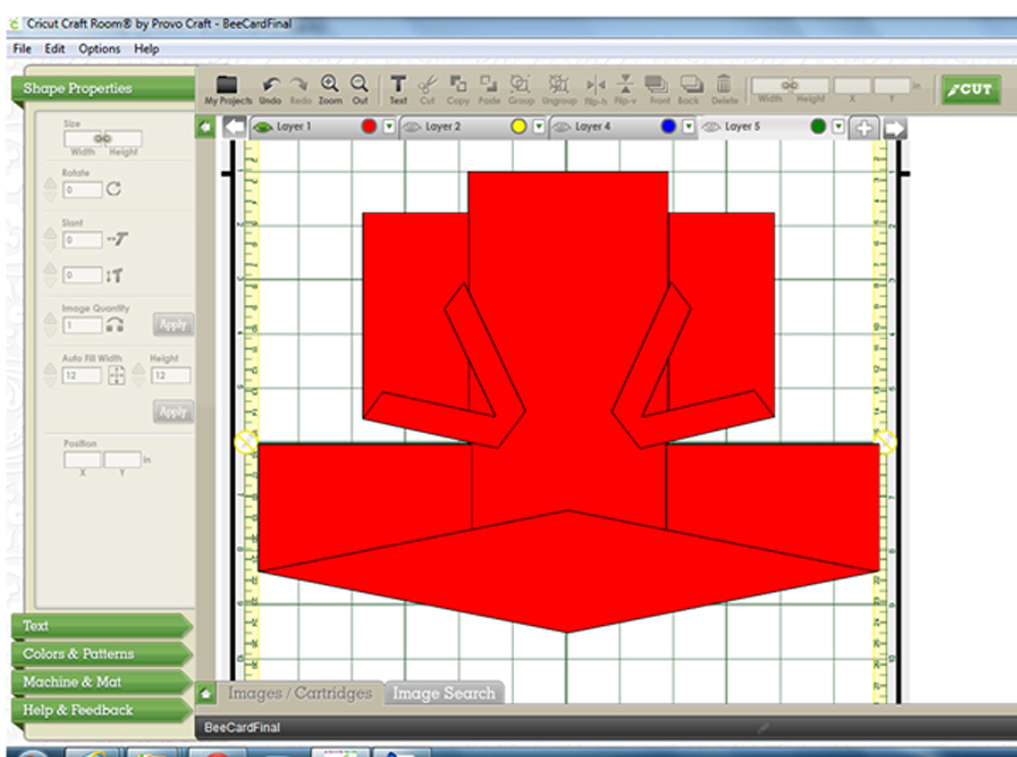
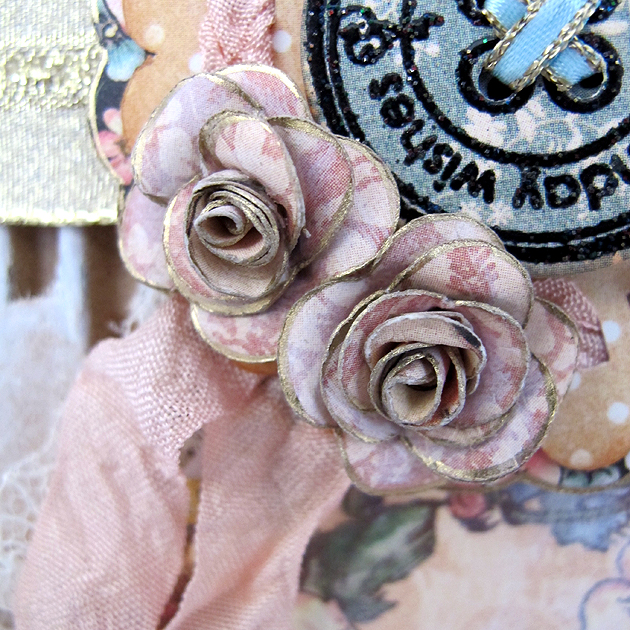
I followed Miranda’s directions, except that I cut the flower petals with my Cricut rather than using a punch.  I used George and Basic Shapes <Flower2>, cut at 1.125″ and I hid the center hole in CCR.  I ended up using more than one 12″ x 12″ sheet full of flowers.  I think I placed mine a little closer together than Miranda did.  I used pearl pins I got at Joann’s to place the pins on the stryofoam.  The paper is all from Graphic 45.

The cupcake opens and inside is a little banner that says “Happy Birthday.”

Open

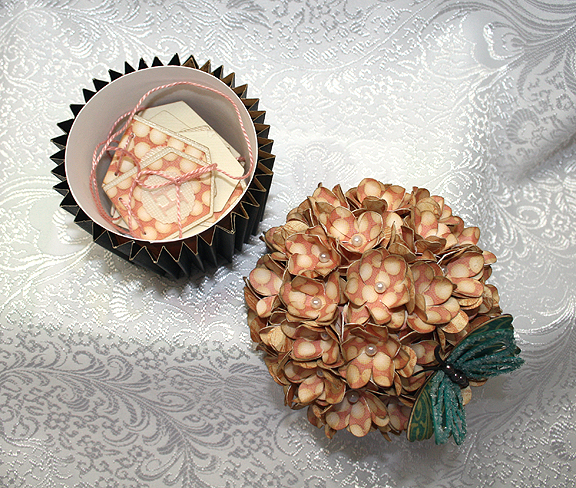
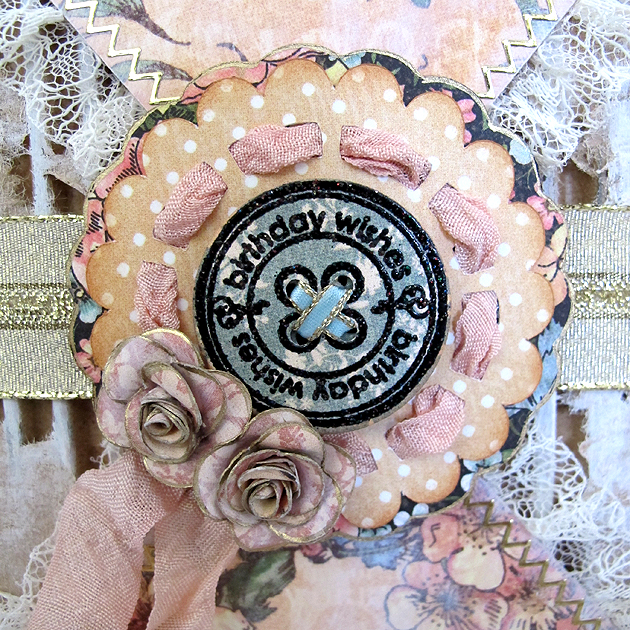
I cut the banner from Birthday Bash at 1.5″ using the print Graphic 45 paper.  I cut the shadow layer from Bazzil cardstock.  I threaded it together using some DMC pearl cotton.  The letters are from a Cuttlebug Plus Embossing folder, Monogram Seals. I inked the letters with Distress Ink.

Banner2

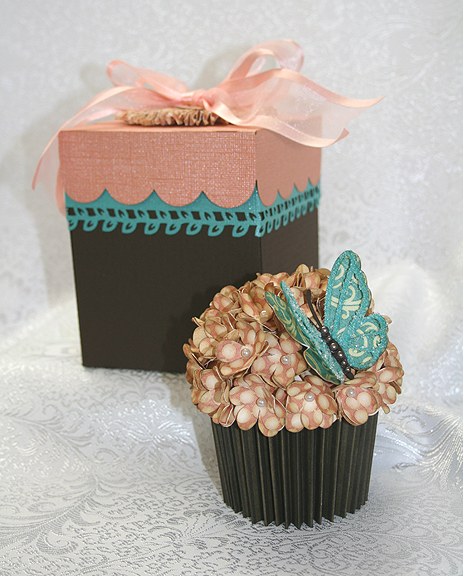
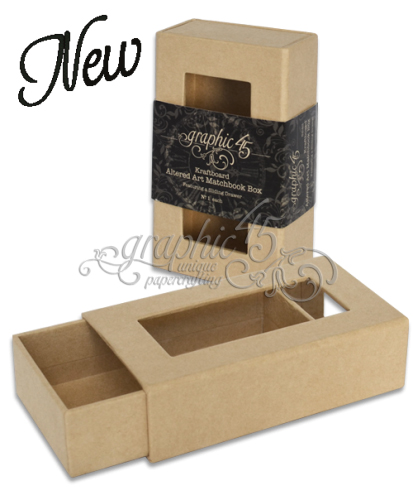
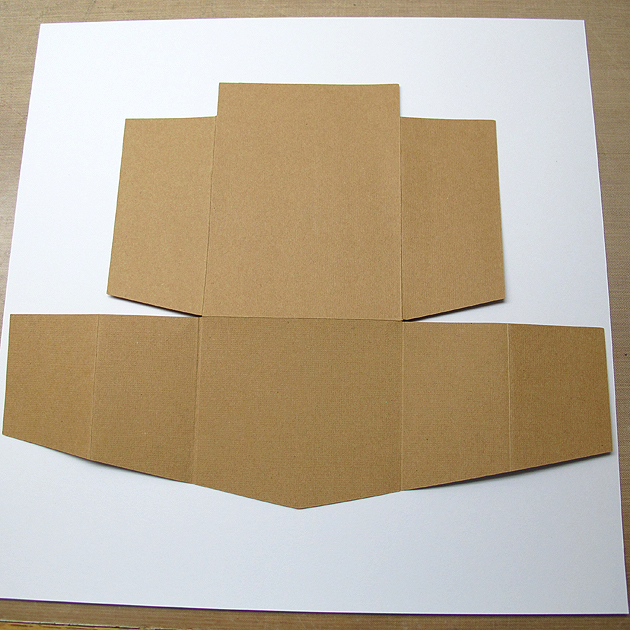
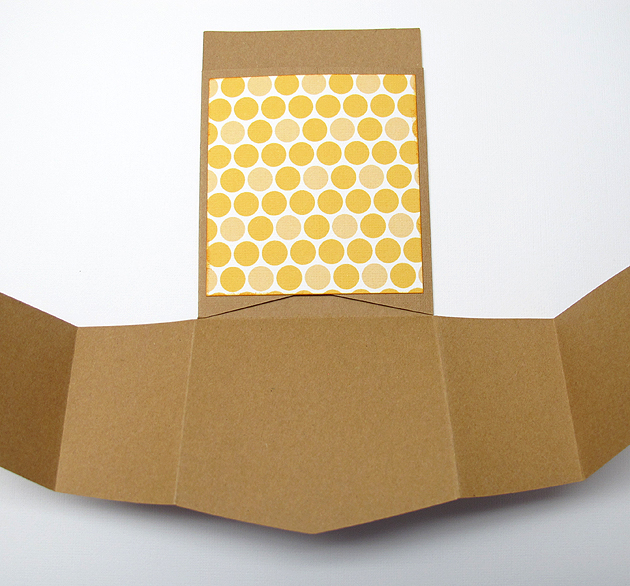
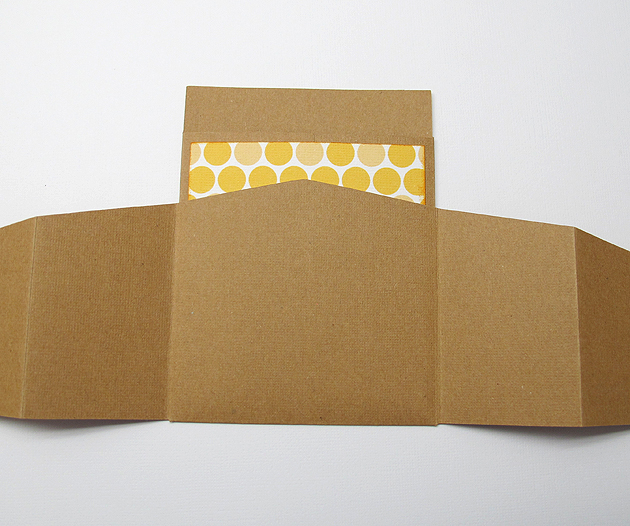
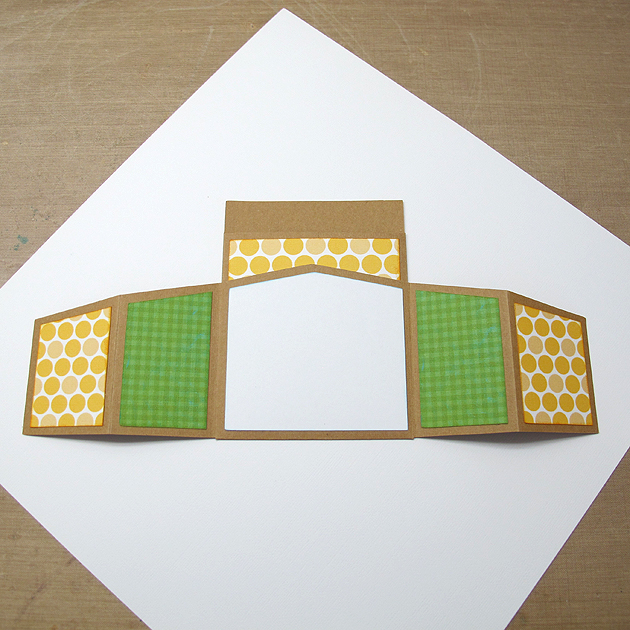
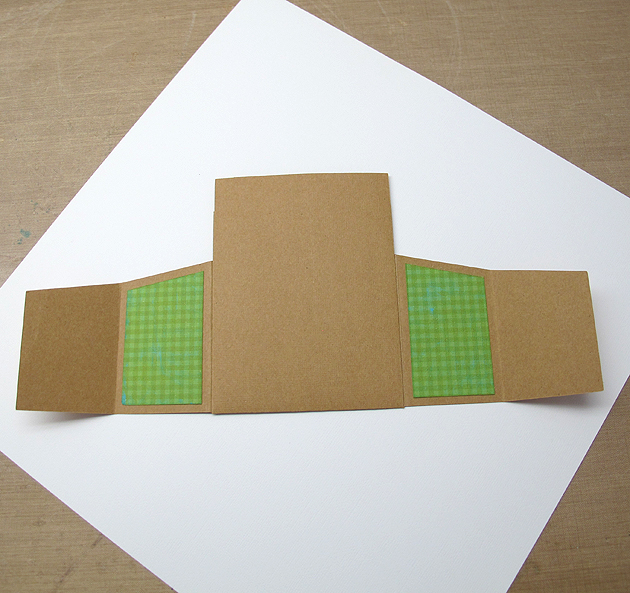
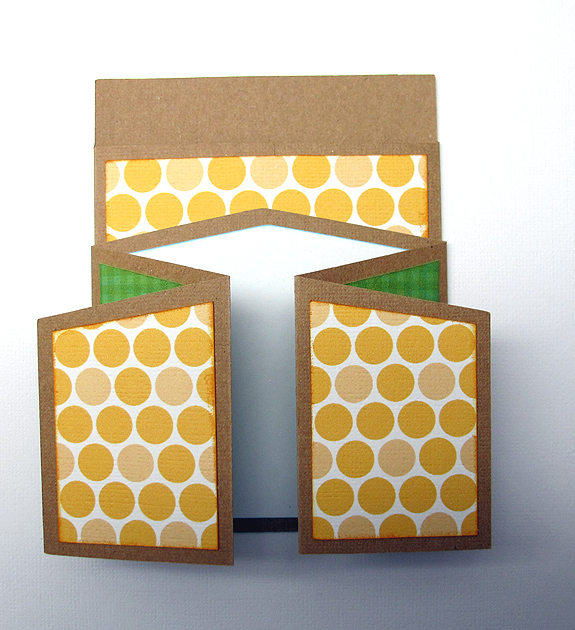
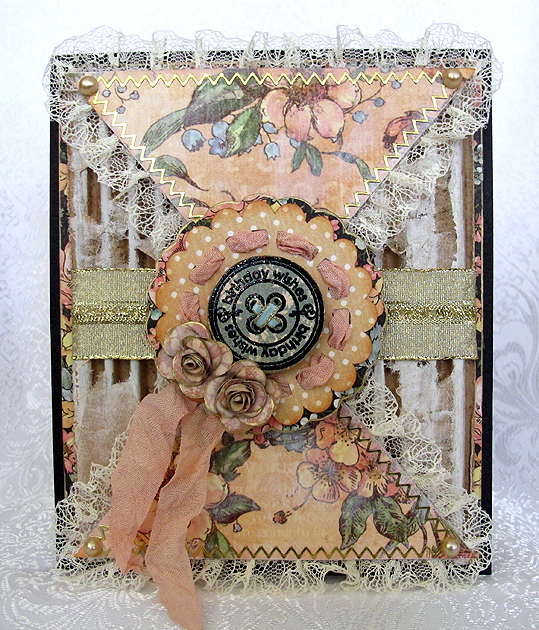
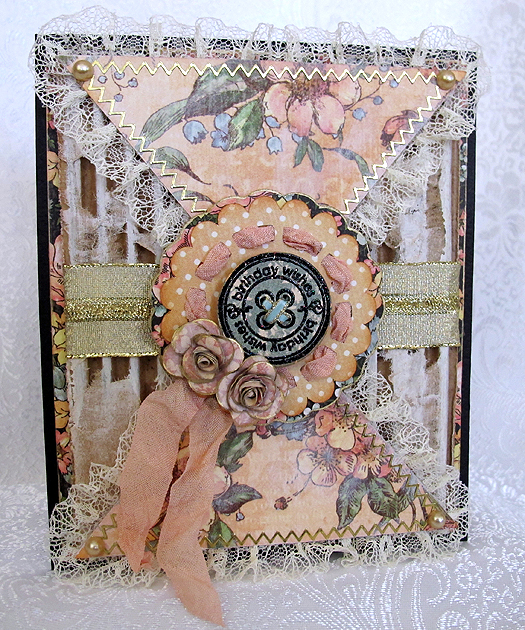
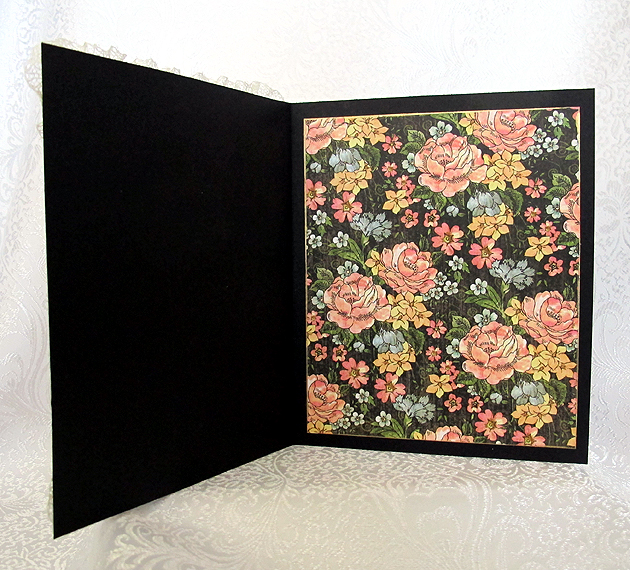
I also made a box for the cupcake for a different challenge.  I will share a picture here, but will put the details for the box in my next post.

Set

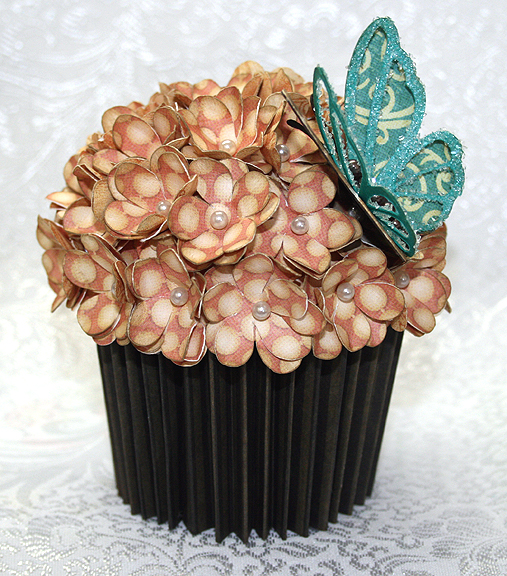
The butterfly is from Martha Stewart Elegant Cake Art and was cut at 2″ from Graphic 45 paper.  I cut several layers and on the top layer I added some coarse crystal glitter.  I put brown pearls on the body.

CC3

  • Cricut cartridges used:  Birthday Bash, George and Basic Shapes, Martha Stewart Elegant Cake Art
  • Cuttlebug Plus Monogram Seals embossing folder
  • Graphic 45 paper
  • Bazzill cardstock
  • Pearl pins
  • Coarse crystal glitter
  • Distress Ink
  • 3″ stryofoam ball
  • 9 oz paper cup
  • Brown adhesive pearls
  • DMC pearl cotton

Circleville NSD 2013: It’s All About Perspective Challenge and E-I-E-I-O Challenge


On this project, I combined challenges.  I was making a card for the E-I-E-I-O challenge, hosted by Jenny.  She wanted us to make a project using a barnyard animal.  When I took a close look at the cut pieces, a light bulb went off — I thought this would also be a good project to do for Nadia’s challenge.  She has an excellent tutorial on how to add perspective to flat die cuts.  Be sure and check it out on Nadia’s blog.  Her challenge is to make a project using some of the techniques she shows in her tutorial.

So, I would like to present to you the premiere of………………

EXTREME MAKEOVER:  FDC EDITION

A flat die cut (FDC) is just that — flat.  This case presented itself when it landed on my desk after coming off the Cricut mat.  I looked at it and said to myself “this cut could definitely benefit from Nadia’s ideas.”  Something I really enjoyed in Nadia’s tutorial was her before and after photos.  So I took a photo of my die cut (from the County Fair cartridge), without any enhancement, as it went together after coming off the mat.

Before

It’s cute, but it could be so much more.  I began with the fence, which was cut at 2.25″.  I added some grass to it by welding the shapes in Cricut Craft Room.  The grass is also from County Fair, cut at 3″.  I cut several of the same fence shapes so I could cut them apart and use only the pieces I wanted.

FencePieces

 I took extras of the upright pieces and inked them.  Two of them, the second from the left and the far right, I inked darker because I wanted them to look like they are farther away.  I adhered them to the fence.

Then I began working on the cross pieces.  I inked the edges and ran them through the Cuttlebug using the Distress Stripes folder.  Because the paper was not real thick, I doubled the layers on these boards.  I then began attaching them to the fence.  I glued one end with liquid glue and put a piece of foam on the opposite end.  Where the boards attached to the uprights that were farther away, I adhered that edge with the liquid glue.  Where the boards are supposed to be closer to the viewer, I attached that end with the foam.  I ended up with sort of a zigzag effect.  When I finished gluing the boards on,  I inked the edges of the grass and adhered the pieces to the fence.

Fence

Next up was the little chick.  

PlainChic

He is cute as is, but this little guy wanted some major work done.  I began with several layers, as I knew I would be doing some nipping and tucking.  He was very happy when he started getting inked.  I cut a separate head from one of the layers and inked it.

He wanted a  beak job done, but I recommended a little tuck instead.  I creased his beak in the middle and folded it. Then I adhered it to his face  and he ended up with some nice dimension.

The comb (his topknot) was next.  I cut two slightly larger than the original piece and cut those into separate sections.  I then adhered the three layers of the comb.  This was a microscopic procedure, done under my lighted magnifying glass because the pieces were so small.

Now we came to what was perhaps the chick’s biggest issue — his wings.  In the original cut, he has no wings.  Just sort of an outline of wings.  This little guy had more than wing envy, he had a wing obsession.  He wanted me to do wing transplants, but in my opinion that would be too drastic.  Without ruffling his feathers, I explained that wing transplants aren’t what they’re cracked up to be.  I thought wing extensions would be a better solution, especially since the little guy is still a spring chicken.

I found some feathers from Paper Doll Dress Up and cut several of those.  I inked the edges and then attached them to the chick, gluing only the top of each feather.  The only procedure left to perform was attaching his new head.  I glued the head even at the top and popped up the chin area (do chickens have chins?) with a pop dot.

As for his new look, the chick is very pleased.  In fact, he happier than a rooster in a hen house.  So let’s pull those curtains back and take a look at the results………..

Chick

I photographed the chick alongside a ruler so you can see his size.  Altering small cuts and have a big effect.  He ended up being about three layers thick.  Here’s a before and after photo of the entire cut piece.

BeforeAfter2

Since the chick now has something to crow about, I decided to use that as the sentiment on my card.  Nadia explained in her tutorial about atmospheric perspective and how you can lose the effect you create in altering your cut by putting it on a background with a lot of detail.  I decided to go with a plain background.  I thought about embossing the background but decided I didn’t want that distracting from my fence and chick.  I used a pale blue and inked the edges.

Front

The sentiment is from Just Because Cards, cut at 5″.  The sun is from Pooh and Friends, cut at 1.5″ inches.  For the sun, I used another of Nadia’s ideas.  The orange layer was very bright and I thought it was distracting.  It seemed to draw my eye to that corner.  So I cut a piece of vellum and adhered it over the orange.  Although the orange still looks bright in the picture, it is actually more subdued.

Sun

I had a lot of fun with this project and I guess I should apologize for all the chicken puns.  Thank you, Jenny, for your fun challenge!

Front3

  • Cricut cartridges — County Fair, Just Because Cards, Paper Doll Dress Up, Pooh and Friends
  • Ink
  • Foam dots
  • Vellum

Circleville 2013 NSD – Oh The Places You’ll Go! Challenge


I just completed my second project for Circleville’s NSD Challenges.  This one is hosted by Marty (Eyelet on the message board) and she gave us a sketch to follow.  I made a card.

I used my Imagine again, printing the papers from the Floral Emporium cartridge.  It was my first time using this cartridge — it has some really pretty patterns on it.  I printed both the patterned and solid paper.

Front5

Here is the sketch:

card sketch.jpg

The blue flap (don’t know what else to call it) is from Elegant Edges <Eyelt1-s>.  I stretched it some in each direction in CCR to get it to the size of the card.  I then copied that shape and stretched it a bit more to get a shadow.  The circle of flowers is from Paper Trimmings <Flower8><Circle>, cut at 3″.  The sentiment is from Sentimentals <Letter2><Layer>, cut at 2.5″. Because the letters are so thin and small, I cut them from white vinyl.

The band on the card is two strips of cardstock, one 1″ wide, the other 1.25″ wide.  I used an EK Success border punch on them, Deco Scallops.

Front3

  • Cricut cartridges — Elegant Edges, Floral Emporium (Imagine), Paper Trimmings, Sentimentals
  • EK Success Deco Scallops border punch
  • White vinyl

Circleville NSD 2013: Go Big Or Go Home! Challenge


I made this card for one of  Circleville’s NSD Challenges.  The Go Big Or Go Home Challenge was created by Sara.  She challenged us to create a layout or card  using an oversized photo or title.

I made a card, since I needed one for my younger brother’s birthday today — he turned 64.  He recently bought a wood lathe and has been having a blast making some beautiful wood projects, so I wanted to use a wood theme for his card.  I pulled out my Imagine Snapshot: Nature cartridge and printed a bark pattern for the background and a lighter wood grain pattern for the letters.

Front10

The card itself is made from kraft paper.  Happy Birthday is from Something to Celebrate and is cut at 3.5″.  I inked and chalked all the pieces before gluing them together.  This card is simple, but I really like how it turned out.  I put some money inside so my brother can go to the wood store and get something he wants.

Front9

  • Cricut cartridges – Snapshot: Nature (Imagine), Something to Celebrate
  • Chalk
  • Ink
  • Stickles

Circleville NSD 2013 — What’s It Owl About?


Thank you for stopping by my blog.  To celebrate National Scrapbook Day, some of the crafty members of the Cricut Circle are posting projects and activities on the message board all weekend long.

I created a challenge for my project and would like to share it with you.  My theme is owls — and the challenge is pretty simple, just create a project with an owl on it.  I made a layout using a cute owl family from Hoot ‘n’ Holler.

LO3

I laid out my design in Cricut Craft Room.  The patterned paper is printed on my Imagine using the Nursery Tails cartridge.  The solid cardstock is from Bazzill.  I began with Elegant Edges for the scalloped square in the background, cut at 10.5″, using <sclop2-s> and the shadow feature.  I used a white Sharpie poster paint marker to make the “stitch” lines around the square.

Scallop

Next I cut the two wood frames from Pooh & Friends at   5.5″ and 6.5″.  The frames are three layers — the basic feature and then two on the blackout feature.  For the piece cut using the printed paper, I hid the inside cut lines in CCR, so the piece was solid — it did not look like a frame.   Here is a picture of what it looks like in CCR.

FrameMat

I first assembled the basic cut and the blackout frame feature, adhering them together.  Then I prepared to glue the frame to the printed frame piece.  I wanted to leave an edge open so the picture could slide inside, so after deciding which end I wanted to leave open, I glued the frame to the mat on three sides only.  I used a liquid glue, but for the photo I laid some papers on the frame to show you were I put the glue. I did this to both frames.

FrameToMat

You can see in this photo how the pictures will slide into the frames.  I used a piece of scrap cardstock for demonstration purposes.

FramePic

Next was adhering the frames to the layout.  Since I wanted to hide tags behind the frames, I put the adhesive on the back of the frame the same way — gluing only 3 sides.  I marked the back of my frame to indicate which side was open for the photo, so I could be sure and leave the same end open for the tag.  I used the red sticky tape to adhere the frames to the layout.

FrameTape

Before attaching the frames to my background, I laid the cut pieces on it to get an idea where I wanted to place the frames.  I made light pencil marks on the background to guide me in the placement.

FramePlacement

I then checked to make sure the tags slid into the pockets behind the frames.

FramePocket


I made the tags to fit behind the frames, adjusting them in CCR to get the proper fit.  I used Tags, Bags, Boxes & More and the cut is <rndtop2>.  The large tag is 6.5″ x 3.75″ and the small one is 5.5″ x 3.125″.   The lined notebook paper is from  Simply Charmed, cut at 2.75″ x 4.5″ and 3.375″ x 5.375″, with the facial features and holes hidden.  This is a screenshot of the CCR file for the tags.

Tags


I used a punch to round the corners and a ruler and colored pencils to go over the score marks on the paper to make it look like actual notebook paper.  I just lightly held the pencils to the paper.

ColorPencils

I adhered the notebook paper to the tags.

Tags3

Next up was the owl family.  They were cut at 5″ using Hoot ‘n’ Holler.  After I cut all the pieces, I used chalk and ink to shade them.  I went over all the edges with chalk first, using a pom pom and chalk applicator.  Then I inked the edges using Distress Ink.

Chalk

 I assembled each owl first and then glued them onto the branch.  I bought a mustache punch a couple of weeks ago, so I had to try it out on Papa owl.  I think he looks pretty dapper with it.  The bow on Momma owl’s head is from Simply Charmed.  I attached the leaves next.

Owls

After adhering all the owls and leaves onto the branch, I attached the branch to my layout.  The owl cut did not include the flowers.  I used Cricut Essentials, cutting Flower 4 at 1″.  I cut three for the branch and four for the tags.  I used Distress Ink (Squeezed Lemonade) to ink the edges of the flowers and Stickles for the centers.

OwlsCU

 The title is from Hoot ‘n’ Holler, cut at 3″.  The scallop oval is from Francy Frames and the cut is <fram13lr>.  I hid the inside cut so I ended up with a solid piece.  I resized the oval to fit the title and it measures roughly 5.625″ x 3.75″.

TitleCU

Here is a picture of the completed layout with the tags pulled partially out.  Hiding journaling tags behind your photo mats is easy to do.

LoTags

LO7

To top off the fun,  I am offering a prize for comments here on my blog.  All you have to do is leave a comment, but only one per person will go into the drawing.  I will leave it open for a week, until May 12 at 8 p.m. (EDT), when I will randomly draw a name.  I am giving away some Graphic 45 goodies — an 8″ x 8″ Secret Garden paper pad and a small matchbook box.

SecretGardenCover copy

SmMatchbook copy

I am sharing a list of some of the talented members of Circleville who have joined together for the weekend festivities and invite you to visit their blogs and see their wonderful projects:

NSD1_edited-200


Cricut cartridges used:  Elegant Edges, Fancy Frames, Hoot ‘n’ Holler, Nursery Tails (Imagine), Pooh and Friends, Simply Charmed, Tags, Bags, Boxes & More

  • Bazzill cardstock
  • Distress Ink
  • Chalk
  • Stickles


Cricut Circle Weekend Challenge Card


This is a quick card I did for a weekend challenge on the Cricut Circle message board.  Di challenged us to create a project using several tones of the same color.

I decided to go the easy route and went to my Imagine library for my papers, since it would have taken me hours to dig through my paper collection trying to decide what I wanted to use.  I used the Hey Diddle Diddle cartridge and printed out several different pink prints.

Front

The sentiment was cut from the Lacy Labels Lite cartridge at 2″.  The white letters at that size are very intricate, so I cut that layer from white vinyl.  I like using vinyl for intricate cuts because it is like making a sticker – I don’t have to apply any glue to the cut.  At that small a size, I would smear glue all over.  I do take a little stickiness off the transfer tape by sticking it a couple of times to a piece of cloth before applying it to the vinyl.  That way it doesn’t stick too tightly to my paper piece when I apply the vinyl.

Front4

I added some ribbon to two of the layers and then a bow to the top layer.  I also put three small pearls in the upper left corner.

The inside is another piece of the pink print paper with a white piece on top for writing.

Inside

  • Cricut cartridges used:  Hey Diddle Diddle Imagine and Lacy Labels lite
  • American Craft cardstock
  • White vinyl
  • Pearls
  • Ribbon

Cute Bee Card Created in Cricut Craft Room


I spent most of this weekend creating this card in Cricut Craft Room.  I found a cute paper piecing card from Treasure Box Designs and fell in love with it.  When I saw the card, I wondered if I could create it in Cricut Craft Room.  I thought the cute bee on the Create a Critter cartridge would be perfect for it.

When a challenge was posted on the Cricut Circle message board to create a project in conjunction with Circle Mania that was going on in Atlanta, I decided to get cutting.  I was so happy that my design for the base of the card worked the first time I cut it.  I’m not sure how to describe this card, maybe a gate-fold card with a pocket for a tag in the back.

Card

Open

I cut the card base from kraft cardstock.  This is what the piece looked like after cutting and scoring.  And maybe you can see why it took me so long to design this card — I was doing a lot of figuring!  I used George and Basic Shapes and Cricut Craft Room Basics to design the card base.

ScoredPiece

 After scoring, the first step was folding the edges of the pocket towards the center.

FoldPocket

 I printed all the patterned paper for this card on my Imagine.  I love that I can print the exact paper that I want when creating a project.  I used three cartridges for the paper, Bubble Gum Stripes for the gold circles, Blast Off for the green checks, and Hopscotch for the gold print on the tag.

I adhered the piece over the pocket, being careful to not glue the bottom.  I applied glue to the top and side edges only.

GluePaperPocket

Next I folded the bottom piece up towards the top.  I glued the center section of the bottom piece and attached it to the pocket.  Again, I only glued three sides — the top and two sides.  I did not glue the bottom.

FoldUpBottom

The next step was attaching the patterned paper to the panels on the card.  I cut two of the gold circles for the very front pieces and four of the green checked paper.  I attached a white piece of paper to the center panel.  It then looked like this.

GluePaperFront

I adhered two green checked pieces to the back of the panels, as they show on the front when the card is folded.  This is a view of the back of the card, showing the two panels.

GluePaperBackSide

And here is what it looks like from the front, with the panels folded up.

GluePaperNoTag

The tag was cut from Tags, Bags, Boxes & More.  The dimensions of the tag are roughly 3 3/8″ x 5 3/8″.  I adhered the white panel to the tag.  I also cut a piece of green checked paper for the top and rounded the upper corners with a punch.  I adhered that to the white panel on the tag, so the white didn’t show when the tag is in the pocket.

Tag

The fence posts are also from Tags, Bags, Boxes & More.  They are the pointed tag, just made skinny and with the hole hidden.  I cut four of the posts, with two of them being slightly taller.  Those I adhered to the center front of the card.  I ran the fence posts through the Cuttlebug using the Distressed Stripes folder before gluing them down.

GlueFence2

Next, I assembled the bee, flowers and letters.  The flowers were cut at 1″ using Flower Shoppe, using two layers for each flower.  I inked the edges and curled up the petals on the top layers.  I ran some twine through buttons and glued them to the center of the flowers.

The bee was cut at 4″ using Create a Critter.  I hid the facial features and used an oval that I made using Cricut Craft Room Basics (I squashed a circle until I got the shape I wanted) for his nose.  For his eyes, I printed out a free cut file I got at The Beary Scrap.  I don’t quite feel confident enough to try and paint my own eyes.  I did think about adding eyelashes but decided not to because I cut the bee’s face from textured cardstock.  I know my pen marks would have been all over heck and I would not have been happy.

The lettering was done using Craft Room Basics and Mickey Font.

BeeFlowers

All that was left was to adhere these pieces to the card.  I attached the bee first.   After he was adhered to the card, I glued the sentiment on and then the flowers.  My card looked like this.

GluingFlowers

To keep the front of the card closed, I tied a ribbon around it.

Card2

I’ll add a few more pictures, showing the card open and the tag part way out.  I am very happy with how it turned out — made me feel all the work was worth it.  I will cut this card base again — I can picture many uses for it.  And I will also make the bee again, but with a different sentiment.  My mom is no longer living and this is the first Mother’s Day card I have made since she passed away.  I will probably give it to a friend or relative.

GluingInside

TagPartOut

Card3

  • Cricut Craft Room
  • Cricut cartridges used:  Cricut Craft Room Basics, George and Basic Shapes, Create a Critter, Flower Shoppe, Mickey Font, Tags, Bags, Boxes & More
  • Cricut Imagine cartridges used:  Blast Off, Bubblegum Stripes, Hopscotch
  • Cuttlebug — Distressed Stripes folder
  • Ink
  • Chalk
  • Buttons
  • Ribbon

I’m going to add one last phot photo, which is a screen shot of my CCR file, to show what shapes I used to create the card base.  I hope this will help others wanting to re-create it.

ScreenShot

Graphic 45 A Ladies’ Diary Birthday Card


I wanted to make a special birthday card and only knew that I wanted to use some of my beautiful Graphic 45 paper (that I seem to be hoarding) to make it.  I went looking on the web for some inspiration and it didn’t take long for me to decide on my design.

I found a card sketch on Stuck On U Sketches that I liked and got out my paper.  All the printed paper is from A Ladies’ Diary collection.  The base of the card, the solid black cardstock, is from Bazzill.

Front6

The background is a piece of corrugated cardboard — I removed one of the layers so you can see the ribs.  Then I took some gesso and dry brushed it on.  I wrapped a piece of gold ribbon from my stash around the middle.

I cut the triangle pieces in Cricut Craft Room using George & Basic Shapes.  I dry brushed some gesso on the triangles and glued lace trim around the edges using Farbri-Tac glue.  The gold trim around the edges is stickers.  I attached pearls at the corners.

Front5

The scallop circle is from Cricut Alphabet, <Doily12>, and it is cut at 2.5″.  I used a Krylon 18kt. Gold Leafing pen to go around the edges of the shadow scallop.  I dyed some seam binding using Tattered Angels Glimmer Mist and threaded it through the holes in the doily, leaving the tails to hang down.

ScallopCircle

The birthday button in the center of the scallop is a new stamp and die set that I just got from Whimsy Stamps.  I heat embossed the sentiment using Stampendous Stardust embossing powder.

Button

The two small roses were made following this tutorial, from Scraps of Life’s blog.  I used a flower shape from Paisley, Layer1 + <Shoes1>, cut at 4.5″.  I dry brushed the layers with gesso and used the gold leafing pen on the edges of the petals before I assembled the flowers.    I love how tiny they are — they are under 1″ across.

Roses

The scallop layer and the button are attached to the card using foam pop dots.

On the inside of the card, I edged the black floral layer with the gold leafing pen.  I still have to do my sentiment layer.  I think I will write it first before attaching it.  If I make a mistake, then I can just redo it rather than having my blunder permanently attached to the card.

Inside

  • Graphic 45 A Ladies’ Diary collection
  • Bazzill cardstock
  • Cricut Craft Room
  • Cricut cartridges:  Cricut Alphabet, George & Basic Shapes, Paisley
  • piece of corrugated cardboard
  • ribbon from my stash
  • seam binding
  • Tattered Angels Glimmer Mist
  • Stampendous Stardust embossing powder
  • gold border stickers
  • self-adhesive pearls
  • Gesso
  • Krylon 18kt Gold Leafing Pen
  • Whimsy Stamps — Everyday Button Sentiments and Button Die
  • Fabri-Tac adhesive


My First Mixed Media Canvas — Cricut Southwest Contest

I have been wanting to try my hand at creating a mixed media canvas for a while now.  Cricut’s latest contest for their new Southwest cartridge gave me the push to get started.  The inspiration for my project was a picture I pinned on Pinterest of a gorgeous white dream catcher.

I watched a lot of videos online trying to gather facts on what supplies I needed and how I wanted to proceed.  I made a run to Michaels for supplies before I started.  I needed a canvas and gesso, and I also picked up a few fun items to try.  I think my favorite was the modeling paste.

3


4

I laid my design out in Cricut Craft Room.  The first step was to paint the 8″ x 10″ canvas with gesso.  After it was dry, I cut out the dream catcher  at 7″ and border strips at .85″ from scrap cardstock so I could gauge where I wanted them on the canvas.  I lightly traced around the cuts with a pencil.

StepCanvasLayout

Then I added some cheesecloth to the canvas using a gloss medium.  When that was dry, I gave everything another coat of gesso.  Then I used two shades of Martha Stewart metallic craft paint to cover it.

StepCanvasPaint

For my borders, I cut the design using repositionable vinyl and made stencils.  I used the negative images for my stencils.  The stencils are the polka dot material in the pictures.  It is some vinyl I picked up on clearance.  Using the first stencil, I laid down some gunmetal metallic paint.  I would skip this step next time because I ended up covering that part of the design with some leather lacing.  I didn’t like the dark paint — it was too much of a contrast.

StepBorderDk1

In this picture you will notice the canvas looks different than the finished project. I had stamped some images on it that I decided to delete by covering with gesso and adding some more cheesecloth. I then painted the area to blend in with the background.

I laid down the turquoise color with the second stencil.  I put a layer of gesso first and then added two layers of color.  The final layer was a coat of Martha Stewart glitter paint.

StepBorderBlue

The third stencil is where I got to try the modeling paste.  I mixed some copper color into the paste and used a craft stick to smooth it over the stencil.

StepModelPaste1

I was so happy with how it turned out — the design is raised and after it dried it reminded me of pottery.

StepModelPaste


Before doing the last layer of the borders, I cut a stencil of the shadow of the dream catcher and stuck it on the canvas.  I mixed some glass bead gel with some glitter paint and spread it over the canvas.  This layer was pretty wet and it had to dry overnight.

StepGlassBeads


You can see the glass beads behind the web part of the dream catcher.  They give a really neat effect.

DCCloseup2


The final border stencil was a little tricky.  My first issue was weeding the correct vinyl — I kept pulling off the wrong areas.  The I had trouble getting it to stick on top of the modeling pasted.  It wanted to lift up, so I opted to add just a coat of copper glitter paint for the final coat, rather than changing colors completely.  I was afraid the paint would bleed and be noticeable if I went for a contrast.

StepBorderTopLayer


I was very pleased with the finished border.  The last layer added a subtle glitter design on the modeling paste.

BorderCloseup2

At this point I decided I did not like the stamped images I placed on the canvas earlier.  I painted over them with gesso and then added some more cheesecloth.  I went over the entire area with the metallic paint and blended the areas into the background.   I also glued some leather lacing along the edges of the border, covering the dark painted layer I had first stenciled on.  I was much happier with this look.

StepCheesecloth2

I used several layers to make the dream catcher.  I trimmed one layer so all I had was a circle and used that to tie on the trim and beads.  The top layer is also just the circle and I heat embossed it using a Fran-tage powder from Stampendous.  The web part is also heat embossed using a holographic powder.  I glued some small seed beads to it.  I added several layers of feathers and sketched in some lines using a marker.

StepDCLayers


This is what it looks like all put together.


DCCloseup

The flowers were cut at two sizes, 1.5″ and 1.25″.  I inked the edges and curled the petals under.  The flower centers are glass glitter from Stampendous.  I glued some feathers behind the flowers.  The owl was cut at 2″ and heat embossed with copper embossing powder.

Owl

The saying was printed using various fonts and cut apart into rectangles.  I inked the edges and glued them on the canvas.  It is actually a song lyric from Dream a Little Dream of Me, sung by Cass Elliott of the Mamas & Papas.

Here is a side view of the canvas, to give you an idea of all the texture and dimension it has.

SideView

While this project was very time consuming, I do want to try doing a canvas again.  With all the supplies I now own, I don’t have an excuse not to.

1

  •  Cricut Southwest cartridge
  • 8″ x 10″ canvas
  • Liquitex Gesso
  • Liquitex Modeling Paste
  • Liquitex Glass Beads
  • Golden Acrylic Glazing Liquid (used to blend background paints)
  • Martha Stewart acrylic craft paints:  Light Gold Metallic, Pale Bronze Metallic, Aquarium Pearl, Turquoise Glitter, Brownstone Glitter, Sunstone Glitter
  • Cheesecloth
  • Stampendous Fran-tage embossing powder
  • Stampendous Glass Glitter
  • Yarn
  • Beads
  • Feathers
  • Leather lacing (from Michaels)

Window Card Using Cricut Creative Cards

There is going to be a new Cricut cartridge available on February 21, 2013 and it is called Creative Cards.   For one week only, from February 14-20, there are seven cards and envelopes from this cartridge available to use for free in Cricut Craft Room.  I was  happy I found time to try one of these cuts — I chose to make the window card.

I really like this card, so much so that I will surely purchase Creative Cards.  I think the window card is called a tri-fold card.  I like this because the inside of the card, where I will write my greeting, is not visible through the window.

A

I made my card using spring colors and the first thing I did was decide what paper was going to show through the window.  I wanted something that looked like wallpaper, so it would look like the inside of a house.  I looked through my Imagine cartridges and found a striped print I liked on the Blossom cartridge.  After picking out my wallpaper, I decided my card would be blue.  All the small pieces were cut from scraps.

The card is cut at 5″ and the finished size is about 3.5″ x 5″.  I cut an extra front panel and ran it through the Cuttlebug using the Distressed Stripes embossing folder so that it would look like siding on a house.  I cut a piece of clear acetate and adhered it between the two front pieces to give the appearance of glass.

The curtain is a piece of vellum run through the Cuttlebug using the Swiss Dots folder, backed by a piece of white cardstock.  The outside window and flower box are white.  I cut an extra window in a darker blue and used it on the inside because I wanted a finished look in there too.

Inside2

The bird and butterflies are from Creative Cards and both were cut at 2.5″.  The only other cartridge I used was A Child’s Year to cut the silhouette of the cat, which was cut at 2″.  I inked and chalked all the pieces before assembling the card.  I used Stickles for the centers of the flowers.

Card6

The sentiment below the flower box is from Whimsy Stamps and it is from their Celebration Circle Pennants set.  I cut it out using the matching die.  This was my first time using both the stamps and die, and I am very happy with how it turned out.

On the inside of the card, I added a white mat to write on.   It is the inside of the window from the card cut — I just hid the outline for the card and cut only the window.  I embellished it with a couple of the same flowers from the window box on the front.

Inside

The last step was making the envelope, and that turned out to be an easy task.  I simply cut the envelope at the same size I cut the card, which was 5″.  I scored along the two side flaps and then at both the top and bottom.  I folded at the score marks and then inked all the edges.  I glued the bottom to the side flaps and the envelope was done.  I’ll seal the top flap when I send the card.

Envelope


  • Cricut cartridges:  Creative Cards, Imagine Blossom, A Child’s Year
  • Ink & Chalk
  • Whimsy Stamps
  • Stickles