Bee Towing Banner Thank You Card


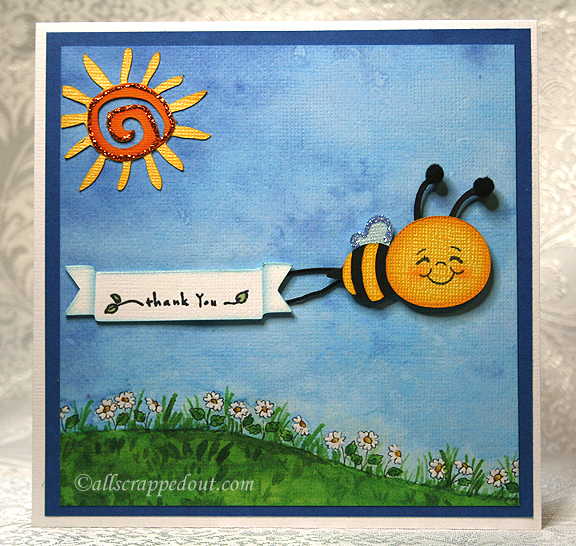
I made this whimsical card for the weekend challenge on the Cricut Circle Message Board.  The challenge is to make a project using a sun.

The card measures 6″ x 6″ and the background is printed from a graphic I purchased when I was a member of the PC Hug Club.   Unfortunately, that site no longer exists — I wish it did because they had some really cute clipart.

FrontSm

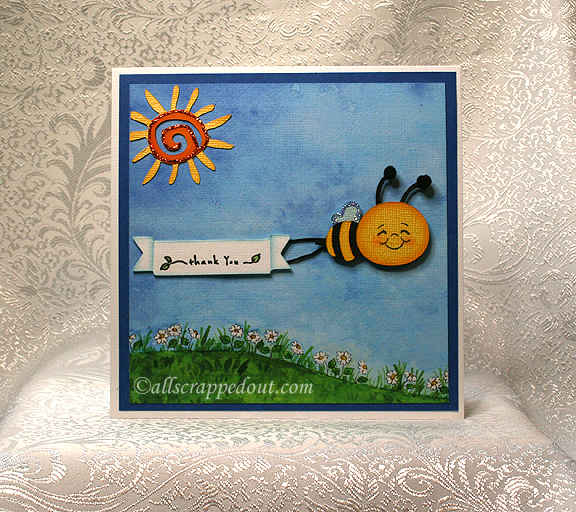
The sun is cut from Gypsy Wanderings at 2″ and embellished with some Stickles.   The bee is from Creative Critters 2 and it is cut at 1.75″.  I trimmed the hearts off the ends of the antennae and added pompoms.   I added some Stickles around the edge of the wing.  The bee’s face is a Peachy Keen stamp.   I inked and chalked the face.

The banner is cut from New Arrival (it is the banner with the plane) and it is cut at 1.5″.  I inked the banner and added a stamped sentiment from one of the many Studio G $1 stamps that are in my collection.   I used DMC Memory Thread for the banner’s tow ropes.

Front5

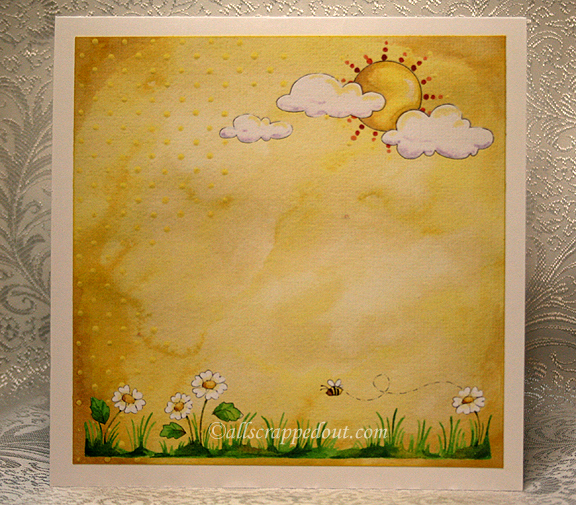
For the inside of the card, I used another graphic from my clipart collection.

Inside

  • Cricut cartridges:  Create a Critter 2, Gypsy Wanderings, New Arrival
  • Provo Craft clipart
  • American Craft cardstock
  • DMC Memory Thread
  • Stickles
  • Ink, chalk
  • Peachy Keen stamp
  • Studio G stamp
  • Pompoms

Cricut Create a Critter 2 Owl Witch Card


I was able to use my new Create a Critter 2 cartridge last night to make a card to participate in the latest challenge at Cooking With Cricut,  their Card Outreach Challenge.  The challenge is to make fun Halloween cards (no scary ones) for the I Feel the Love Project.

The “I Feel the Love” Project for September is to make Halloween Cards to be given to the kids who live at Casa Pacifica.   Casa Pacifica serves abused and neglected children and adolescents, and those with severe emotional, social, behavioral, and mental health challenges on California’s Central Coast.  Each year the facility has an amazing Halloween party for the kids. It is IFTL’s goal to send a card to each of the 70 children who reside there. (For more information about Casa Pacifica please visit their website.)
I laid out my card in Cricut Craft Room, cutting the owl at 3″.  The owl’s body was printed and cut on my Imagine, using the Bubblegum Stripes cartridge for the small purple stripes.  I did not use CCR for this step, as it still is not compatible with the Imagine.  I embossed the small tummy piece with the Cuttlebug Swiss Dots embossing folder.
For the owl’s eye, I hid the cut that forms the pupil in CCR.  On the mat in CCR, the circles look perfectly round.  But when I cut the eyes with my Expression, they did not come out round.   I had what looked like a cross-eyed owl.  So I took black paint  and a stylus (you can also use the round end of a paintbrush), dipped the stylus into the paint and then formed black circles on the white part of the eye.  Once the paint dried, I put a white highlight on the black dot.
I added a moon behind the owl, which is a circle that I also cut at 3″.  I embossed the moon with a new Cuttlebug folder I recently got, the bat folder from the Midnight Hauntings set.  The phrase was cut at 1″.  Because of the small size of the phrase, I cut it out of vinyl.  The Cricut easily cuts vinyl.  Vinyl is great for small pieces because it already has adhesive, so you don’t have to fuss trying to put glue on them.
I added Stickles to the band and buckle on the hat.
For the inside of the card, I lined it with a couple of pieces of patterned paper.  I cut the pumpkin treat bag and candy piece, also from Create a Critter 2, at 1.5″.  I cut the shadow layer from cardstock and the black and orange layers from vinyl.
The background paper and print paper inside my card are from a K & Company Halloween collection that came out a year or so ago.  I picked it up on sale and don’t remember exactly when I bought it.
  • Cricut cartridges:  Create a Critter 2, Imagine Bubblegum Stripes
  • Cuttlebug:  Midnight Hauntings embossing folder set
  • K & Company Halloween paper pad
  • Stickles

Wild About You Onesie Gift Set Using Cricut Create a Critter 2


One of the more popular Cricut cartridges surely must be Create a Critter.  Provo Craft is giving users of Cricut Craft Room a sneak peak of one of their newest cartridges by making five cuts from Create a Critter 2 available for free. There is also a contest, which ends on September 5,  where you can enter your projects using these latest designs through the Cricut Project Center.

My project is a onesie gift set that includes a black onesie decorated with the lion and phrase designs from Create a Critter 2.  All were cut from heat transfer vinyl.  I constructed a box from Sweet Tooth Boxes and made a small gift card using the bird that is on the Icon tab of the lion feature on Create a Critter 2.

When using heat transfer vinyl, it is important to remember that you must mirror (flip) your images in Craft Room because you are cutting the back of the vinyl.  Then when you iron it on your garment everything is facing the correct way and you can read your phrases.

“Wild about U”  is cut from a holographic vinyl that I picked up years ago at a trade show — long before I knew what a Cricut was.   I fell in love with the sparkly rainbow colors and brought a roll home with me.  Unfortunately the vinyl did not come with application instructions, so I did some test runs before applying it on the onesie.  My first attempt at ironing it on produced negative results as I was getting it too hot.  I didn’t realize it and started increasing the time I was pressing, getting even worse results.  I finally dialed back on the heat and the time to get proper application.

The lion is cut from a vinyl that can be peeled hot or cold.  Because he has four layers, I applied him first.  I put down the first layer and pressed for only 4 seconds, immediately peeling off the backing.  I let that layer cool and then added the next.  Again, I pressed for 4 seconds and peeled.  I did this until all four layers were down.

When doing layers, you have to remember to cover up the vinyl that has already been applied and is no longer protected by the clear film.  I use a teflon sheet to cover my design before pressing each layer.

After the lion and the “about” from the phrase were in place, I then added the holographic phrase and applied it.

The gift box is from Sweet Tooth Boxes.  I cut the box that begins on page 10 of the handbook, using just the bottom and lid.  I hid the cut-out area in the lid and then added the shadow feature of the lion — so my box has a lion window to tie in with the theme of the onesie.

I printed the zebra paper for the box lid using my Imagine.  I used a bright purplish cardstock and printed the stripes using the Teresa Collin’s Black & White cartridge.  This put a lot of black ink on the paper, so I used a blow dryer on it and then I let it dry for over an hour.  When I rubbed my fingers on it, the black was still smudging, so I gave it a coat of clear matte spray.

Because Cricut Craft Room does not work with the Imagine, I used my Imagine only to print the paper.  I then transferred the paper to my Expression and cut the lid.  I scored all the lines on the box and lid and assembled them, adding a layer of clear acrylic to form the window of the box.

A gift card was created using the shadow feature and welding two shapes together at the top of the head.  I used two Cuttlebug folders on the bird, Charles (a chevron design) and Swiss Dots.   I did the layers on both the front and back of the card, as I wasn’t sure which way I wanted him facing.

I added a white layer to the inside of the card so there would be a place to write a message.

To finish off the box, I dyed some seam binding using Tattered Angels Glimmer Mist and Adirondak Color Wash.  I scrunched it up while it was wet and let it dry.  Then I tied a bow and made a couple of ribbon roses to add in the middle.

  • Cricut Craft Room:  Create a Critter 2, Sweet Tooth Boxes
  • Cricut Imagine:  Teresa Collin’s Black & White cartridge
  • Cricut Expression
  • Cuttlebug:  Charles and Swiss Dots
  • Tattered Angels Glimmer Mist
  • Adirondak Color Wash