Valentine Mini Album and Card

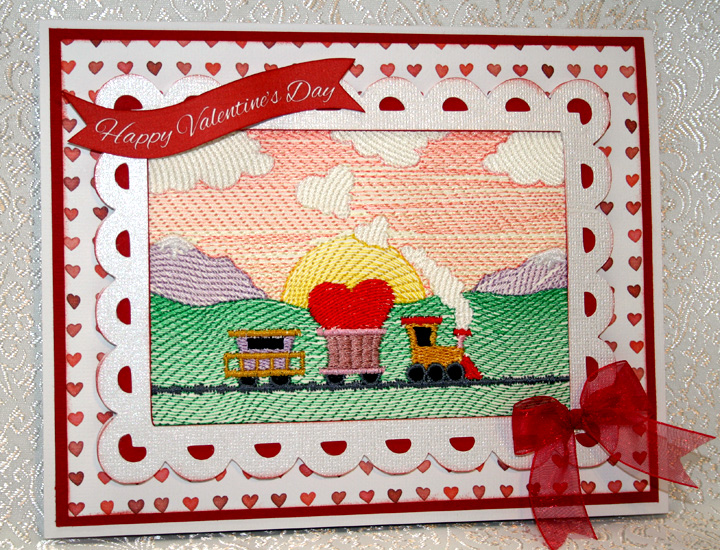
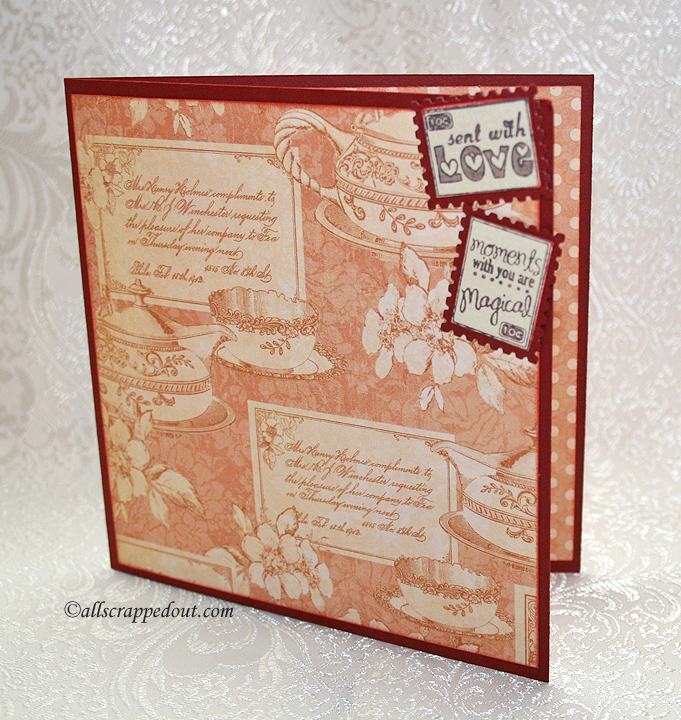
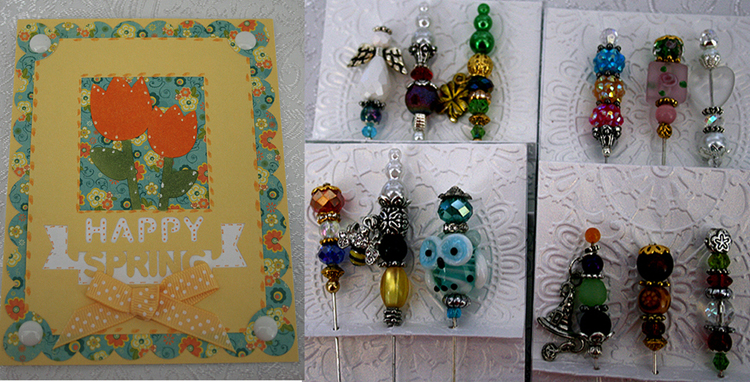
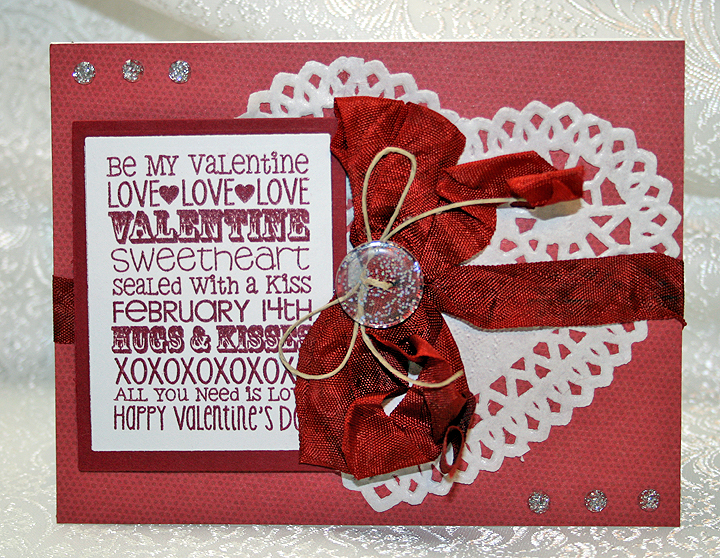
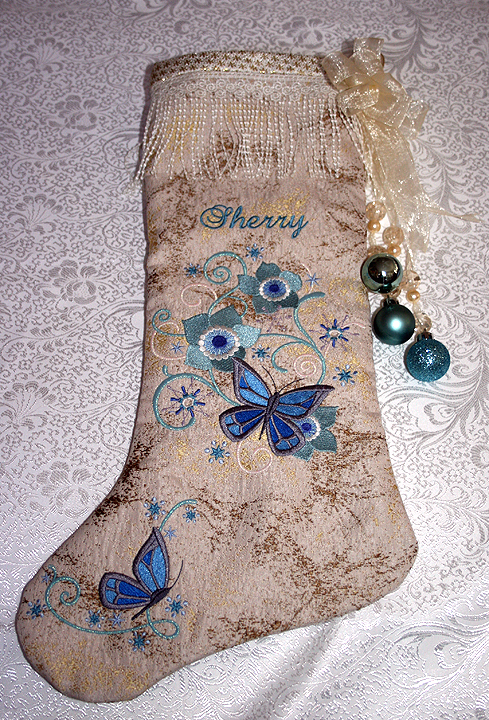
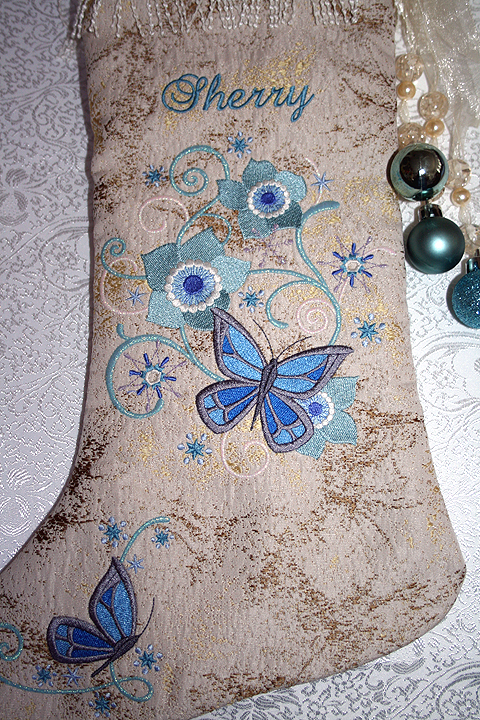
I’m finally getting around to posting pictures of the Valentine mini album and card I made for a swap I participated in on the Cricut Circle Message Board.  The card features an embroidery design I purchased from Embroidery Library that is made for cardstock.  The scalloped frame was cut with my Cricut using the Elegant Edges cartridge.

Card

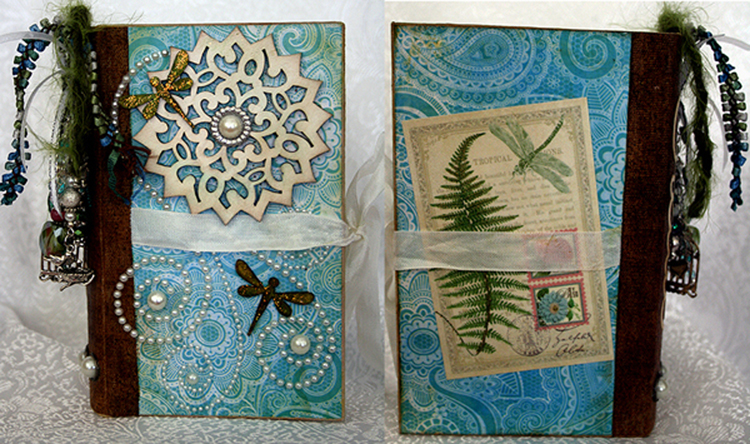
I found a mini album on Graphic 45’s blog that I really liked.  It is made by Gloria Stengel and she calls it a flip album.  And lucky for me, there is a tutorial on how to make it.  I loved the papers she used, and since I had many of them on hand, my album is almost exactly like hers.  I had to change a few of the dimensions on the album because mine was turning out to be a bit too chunky.

Front

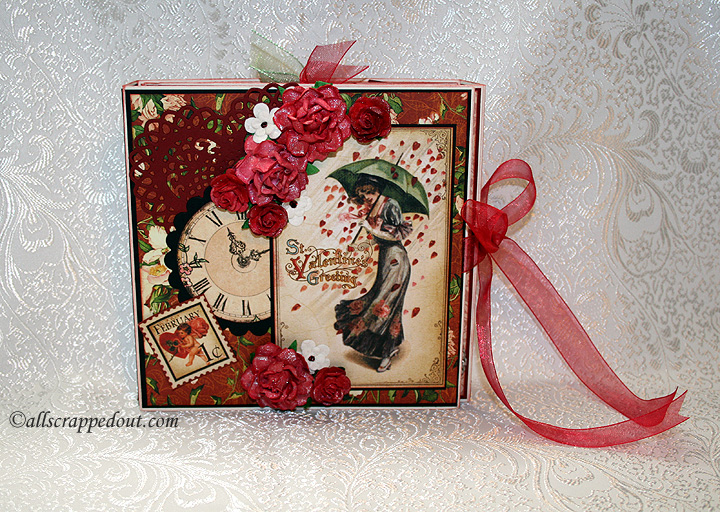
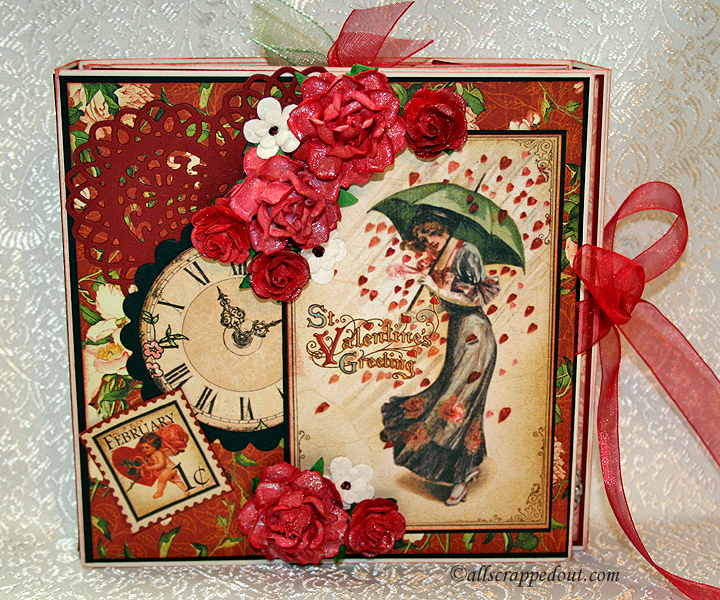
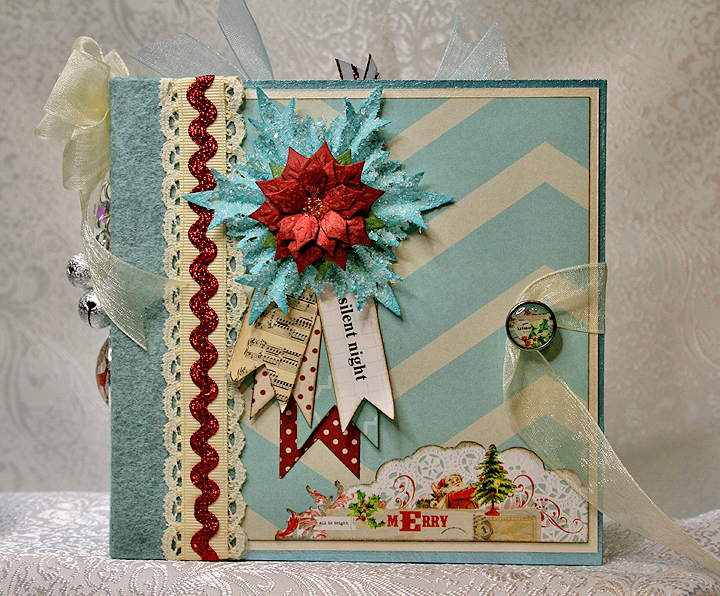
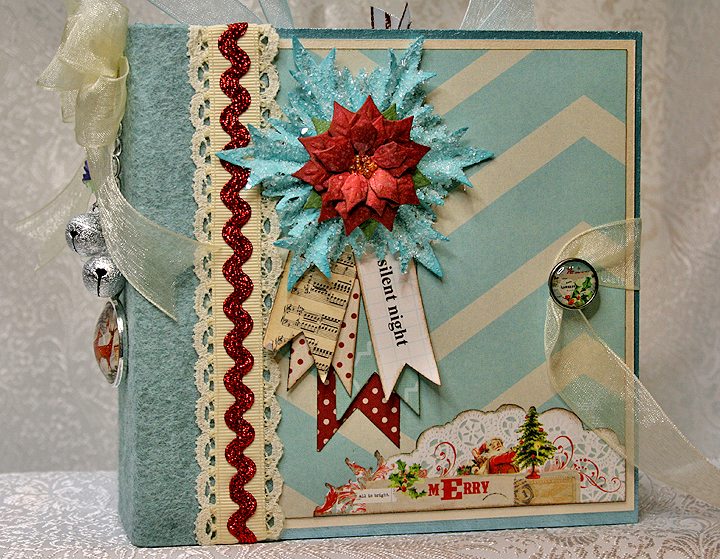
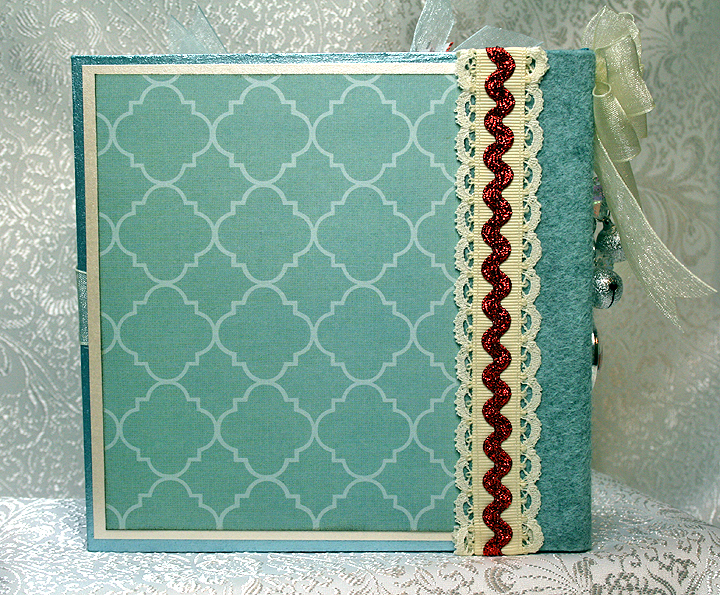
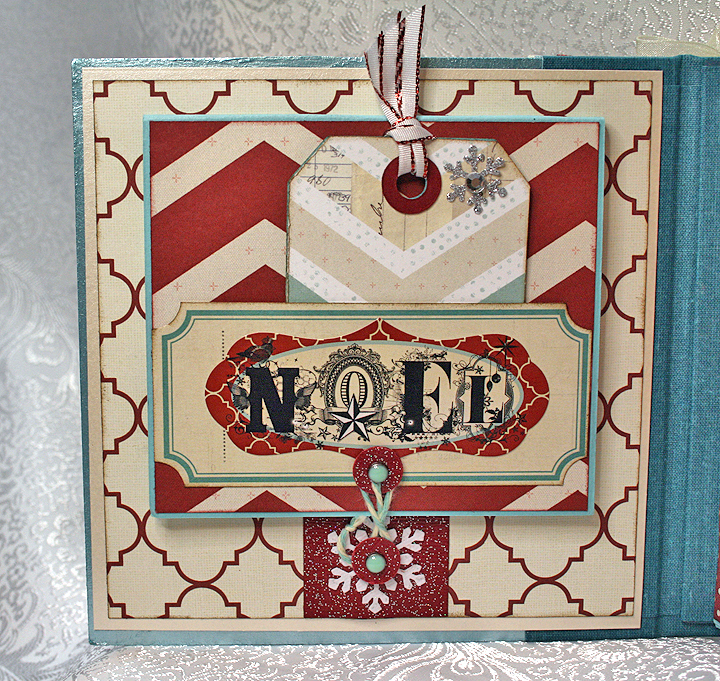
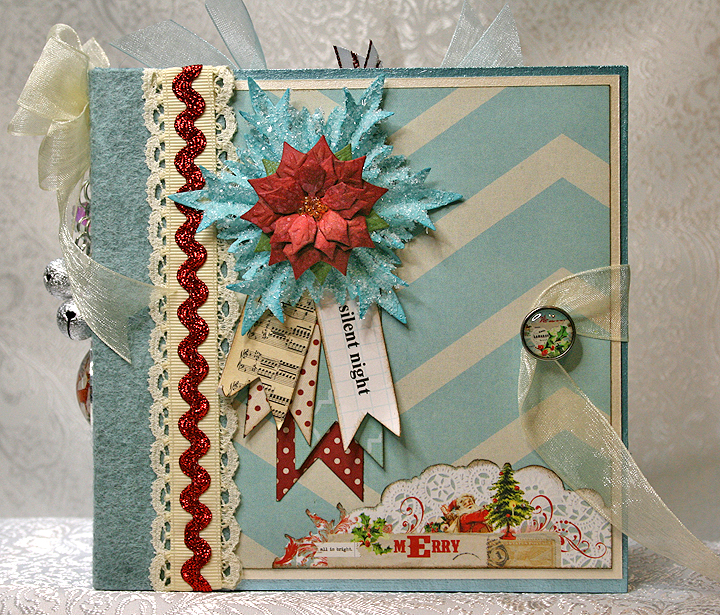
All the patterned papers are from Graphic 45, most from the Place in Time collection.  The pretty red print on the cover is from the Bird Song collection.  I love how you can combine their collections and they coordinate so well.

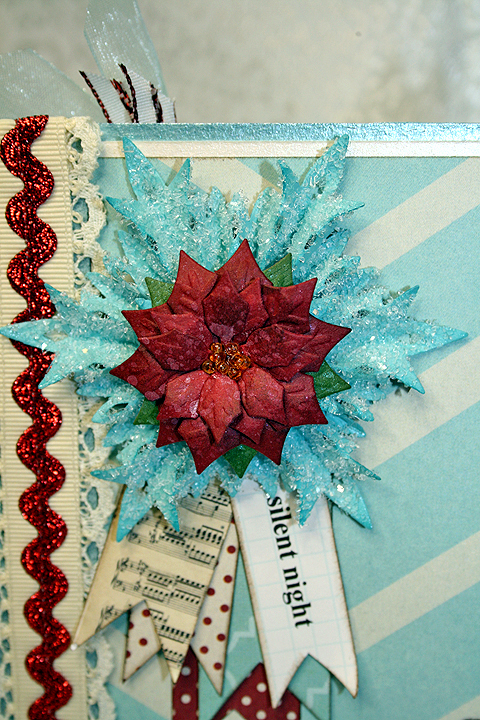
The roses were light pink and I sprayed them with Starburst spray from Lindy’s Stamp Gang to get the colors I wanted.  The shimmer shows up pretty well in the pictures.

1

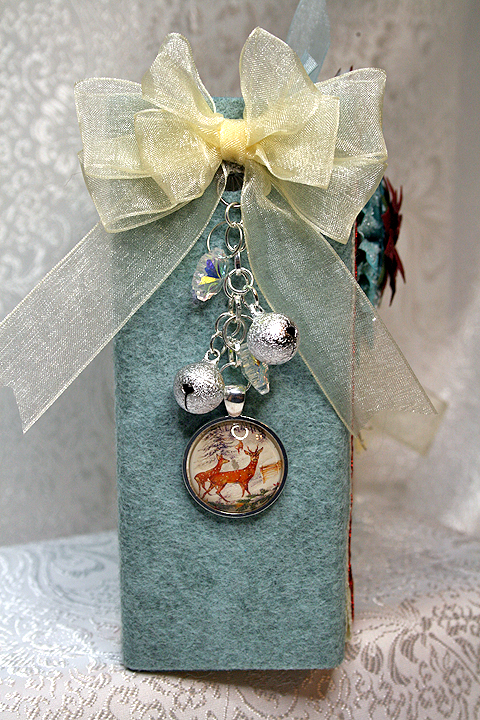
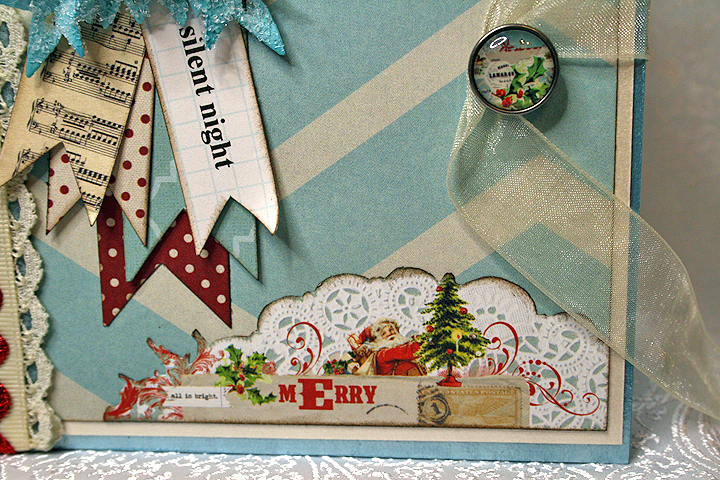
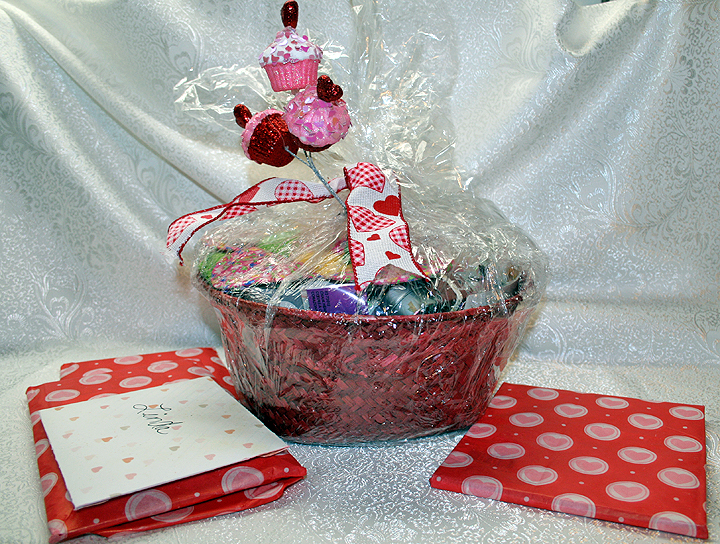
The album has an organza ribbon closure.

2

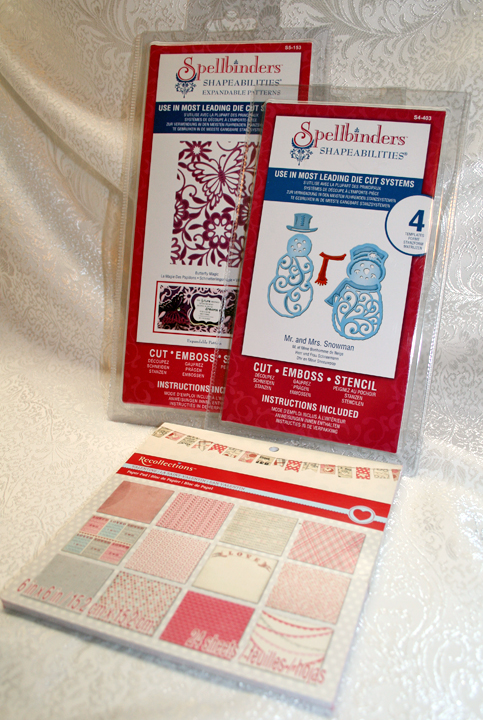
The dark red lace doily was cut from a Spellbinders heart die.  

3

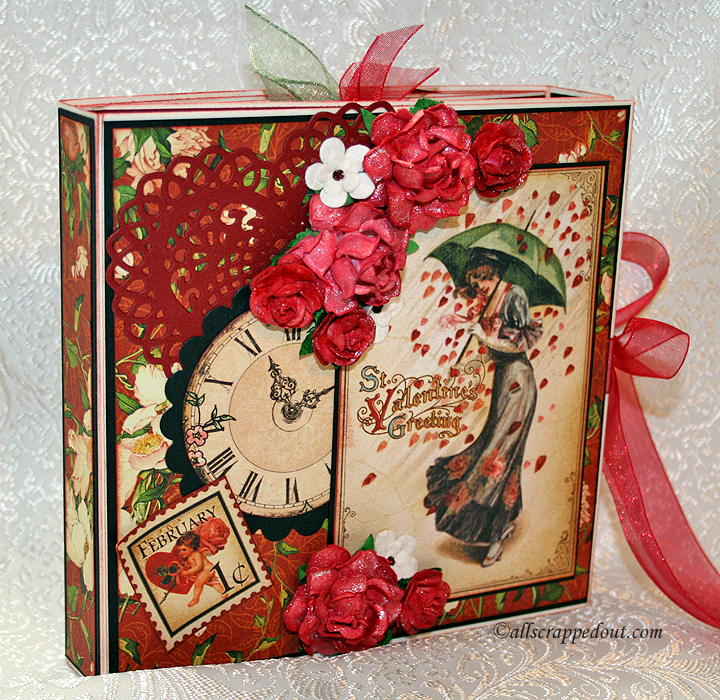
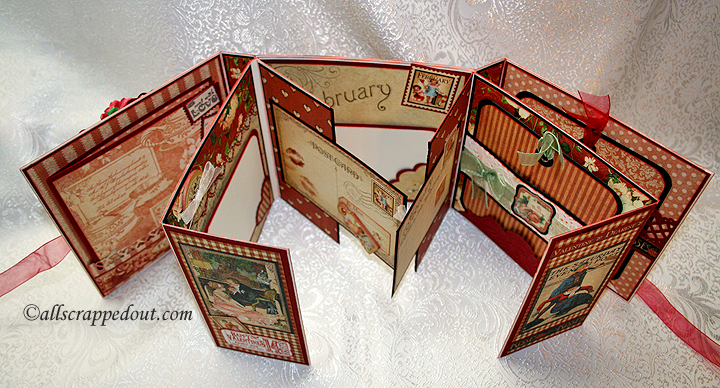
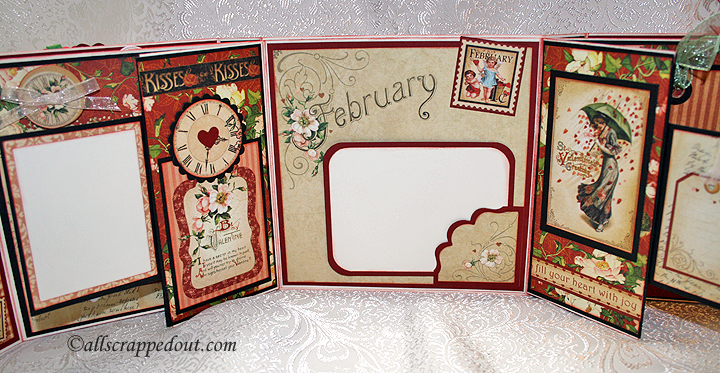
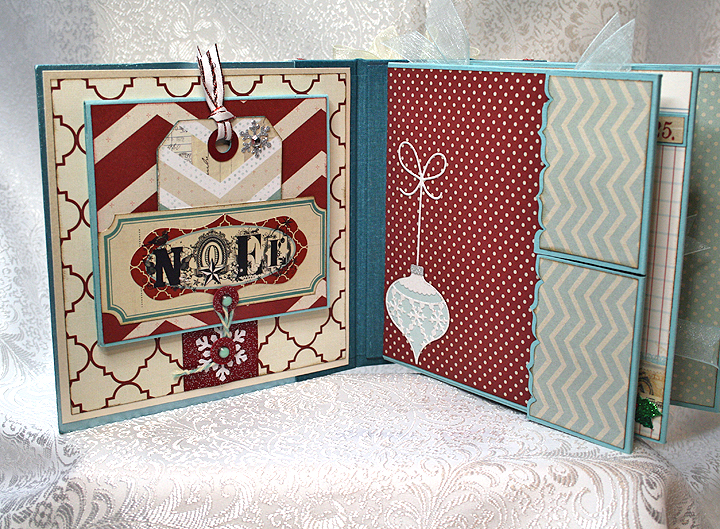
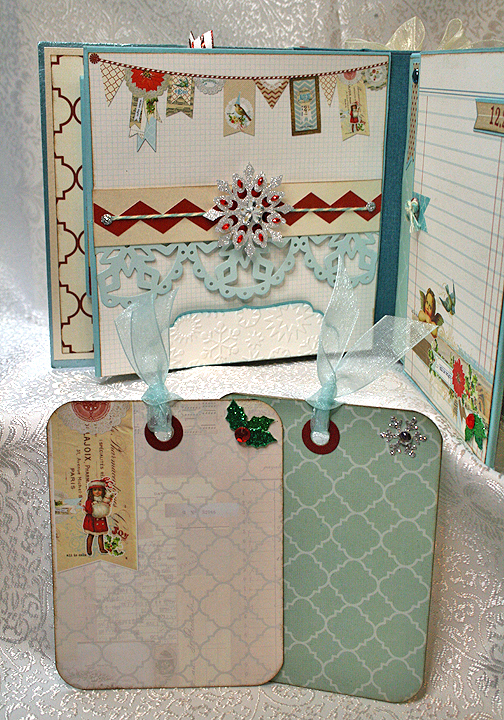
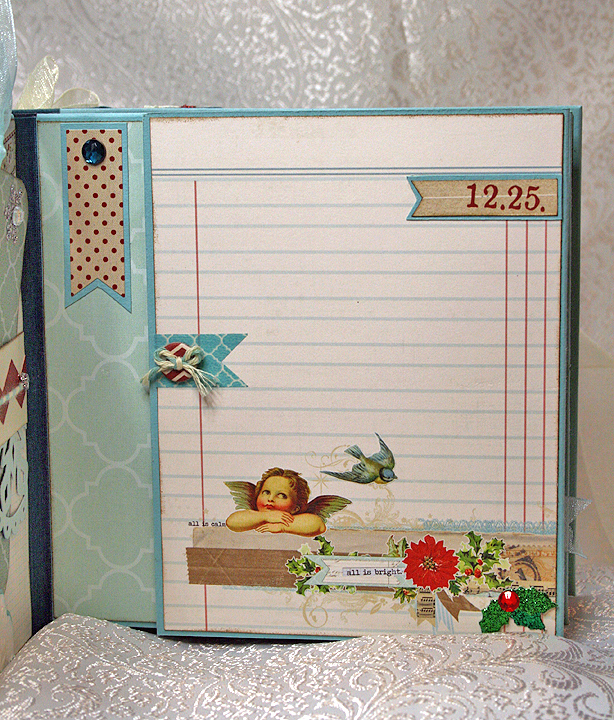
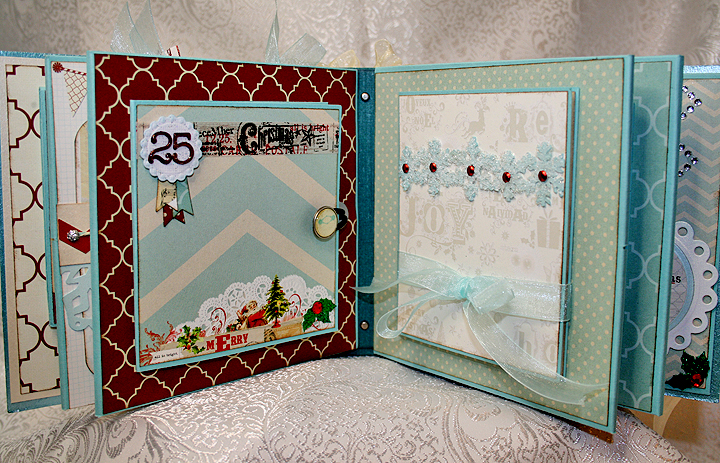
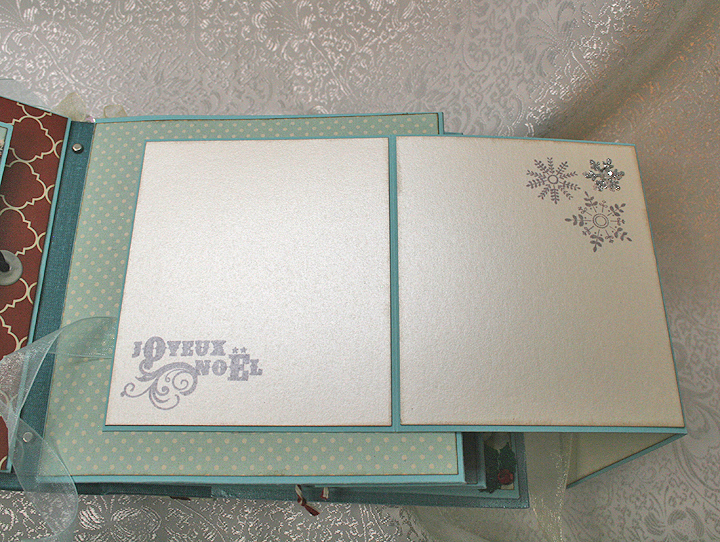
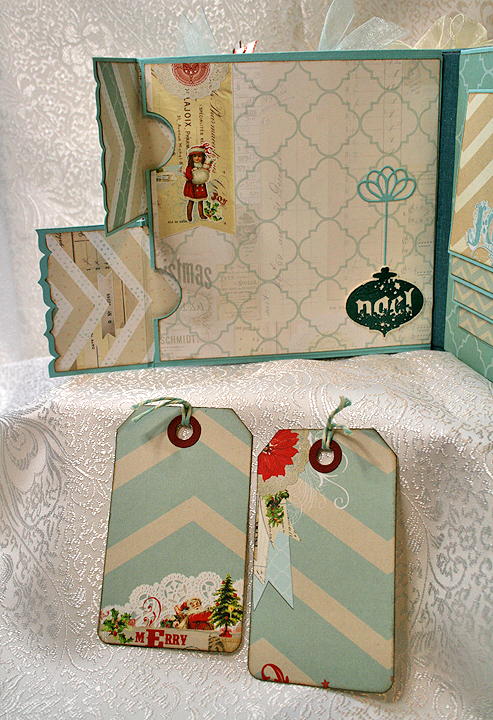
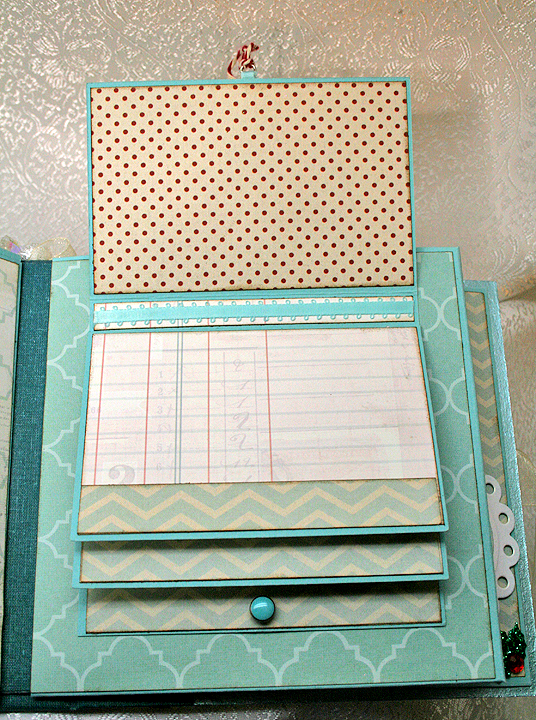
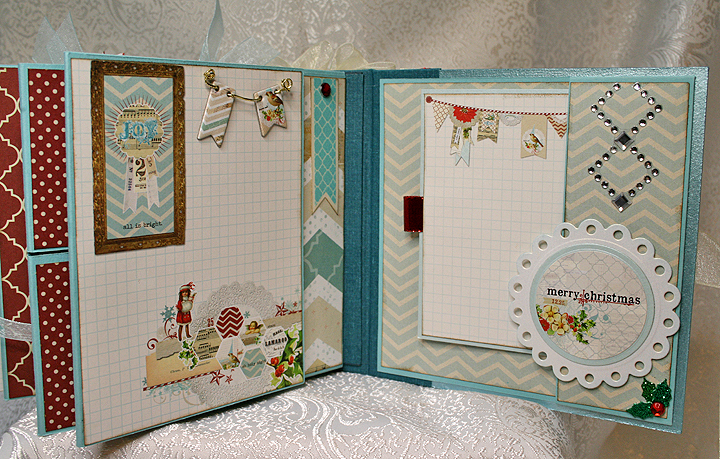
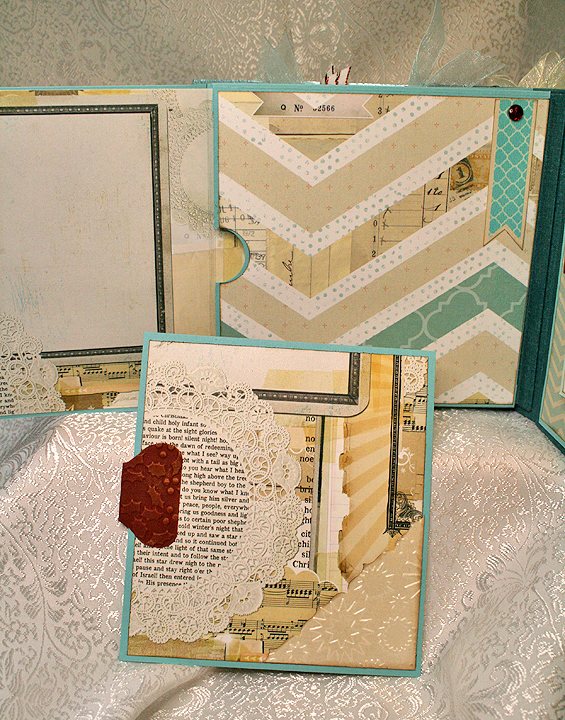
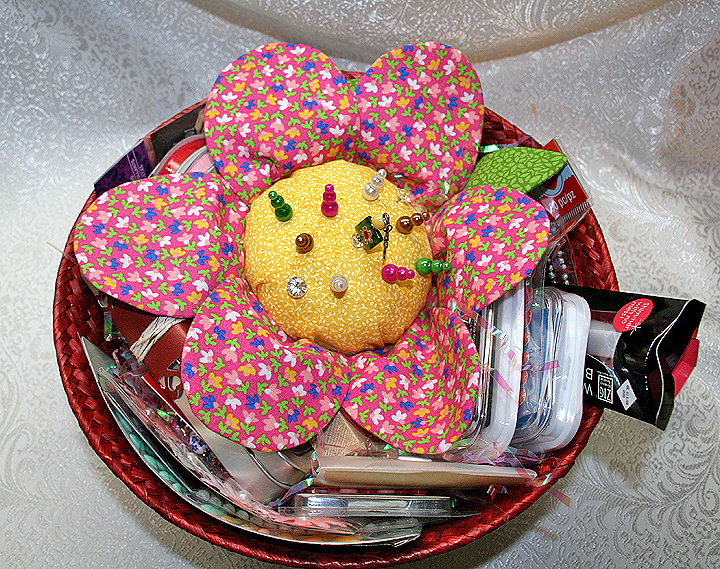
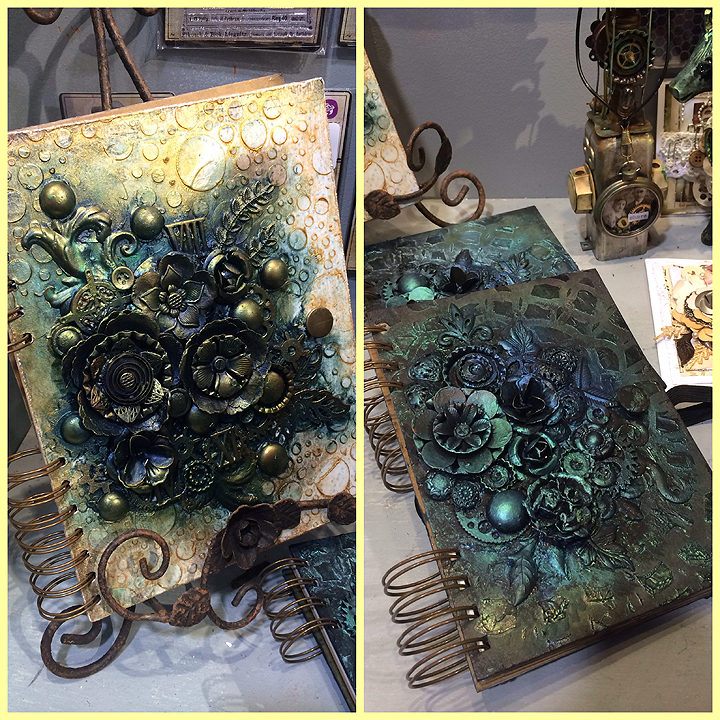
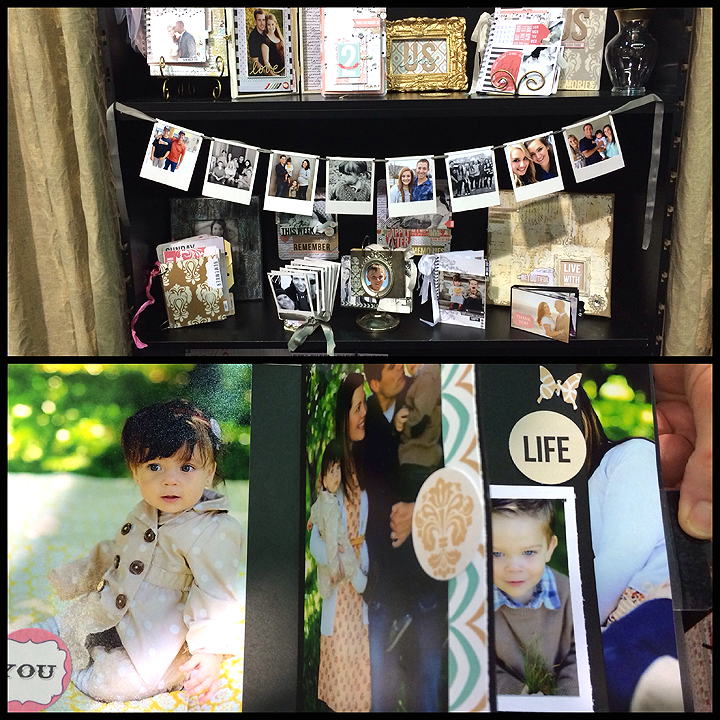
Here are two pictures that show an overview of the album.  It is an interesting album, with all its interactive pages.

Open

Open2

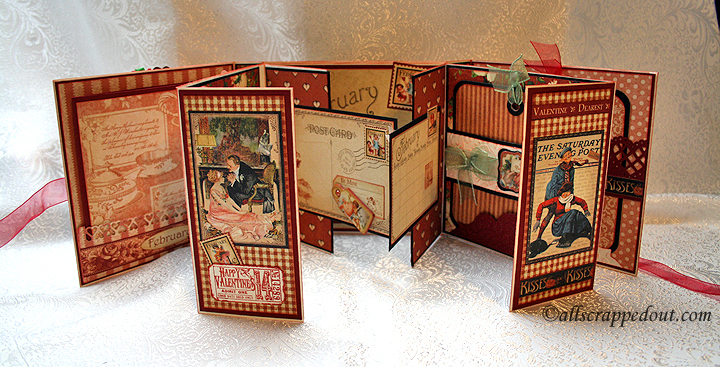
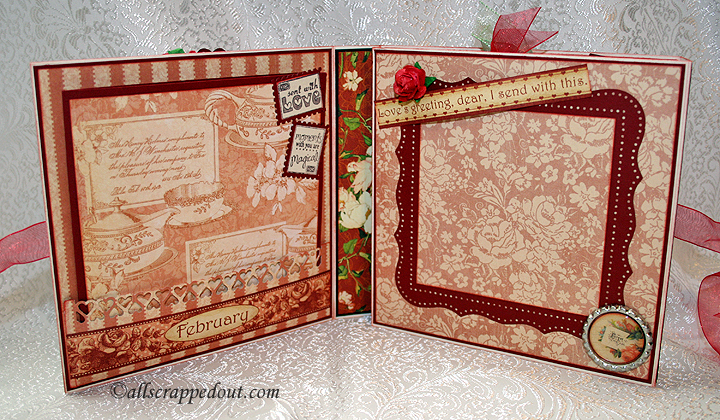
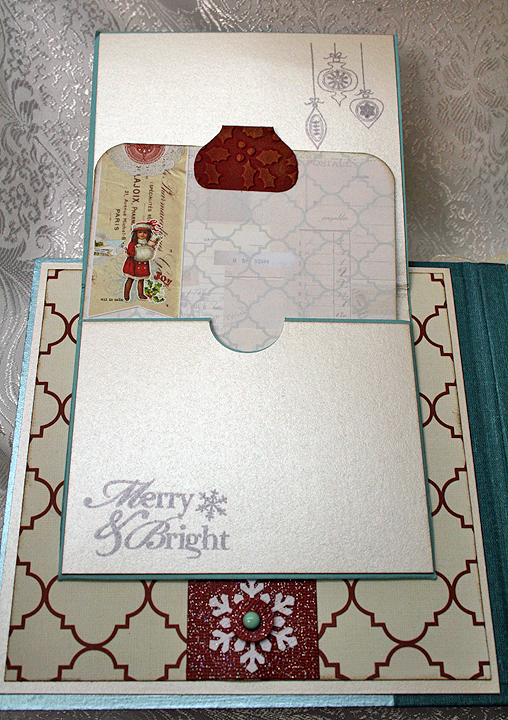
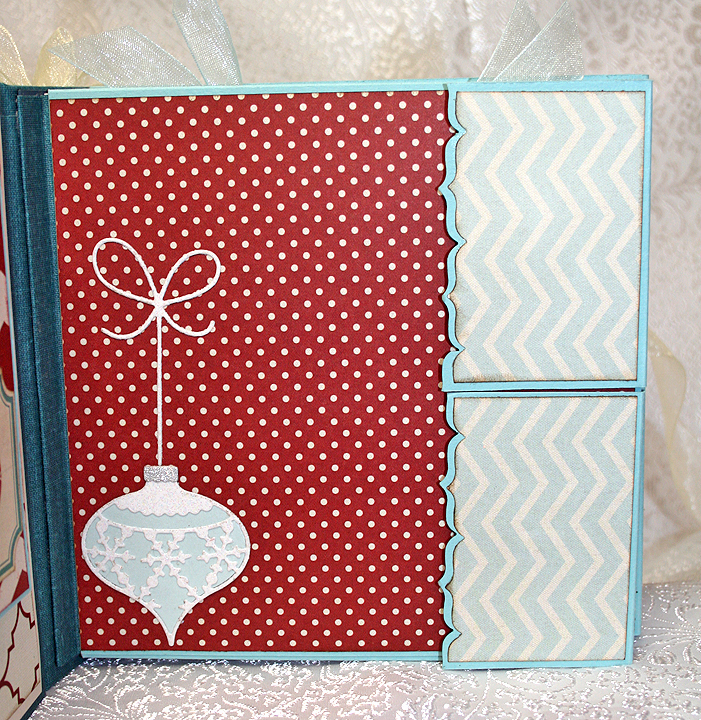
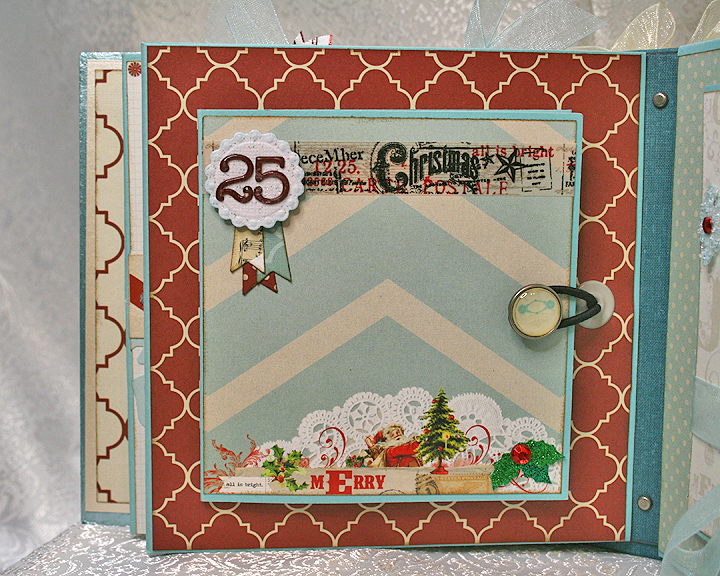
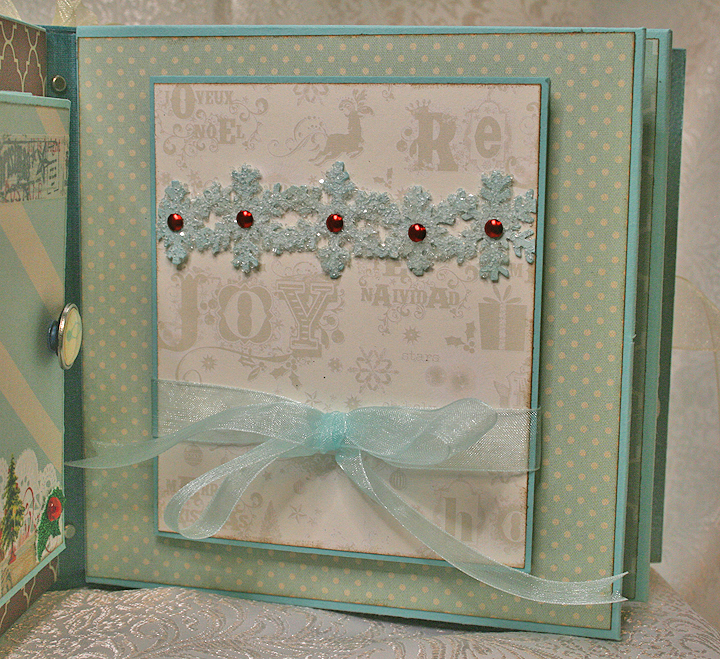
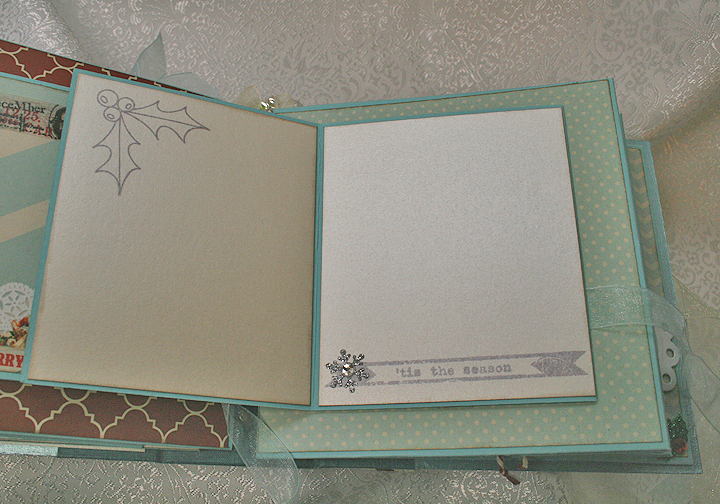
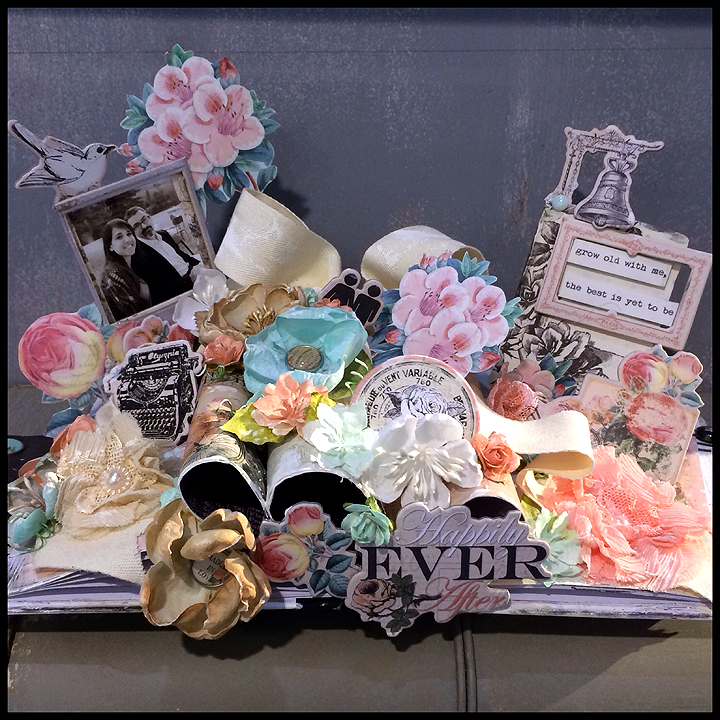
This is what it looks like when it is first opened.  The frame on the right is made with a Martha Stewart punch-around-the-page combo set.  I think it is called Cherish.  

5

The front pocket holds a photo mat.

6

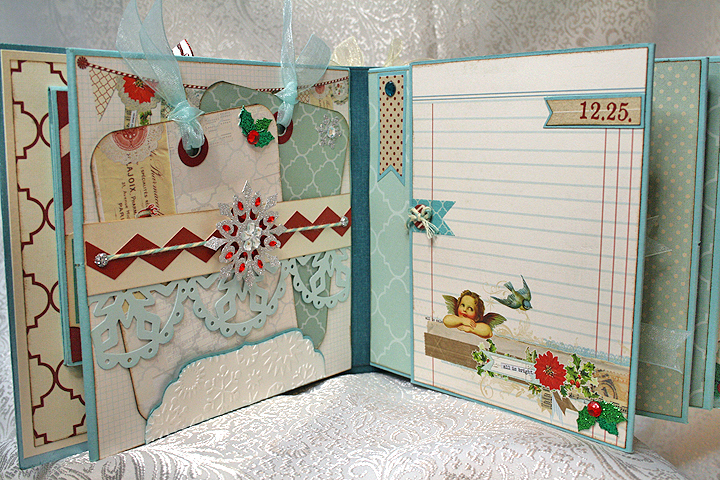
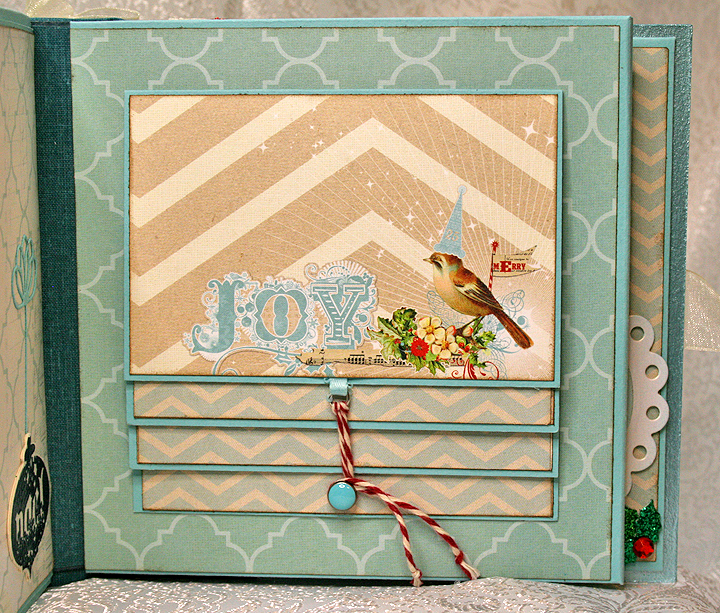
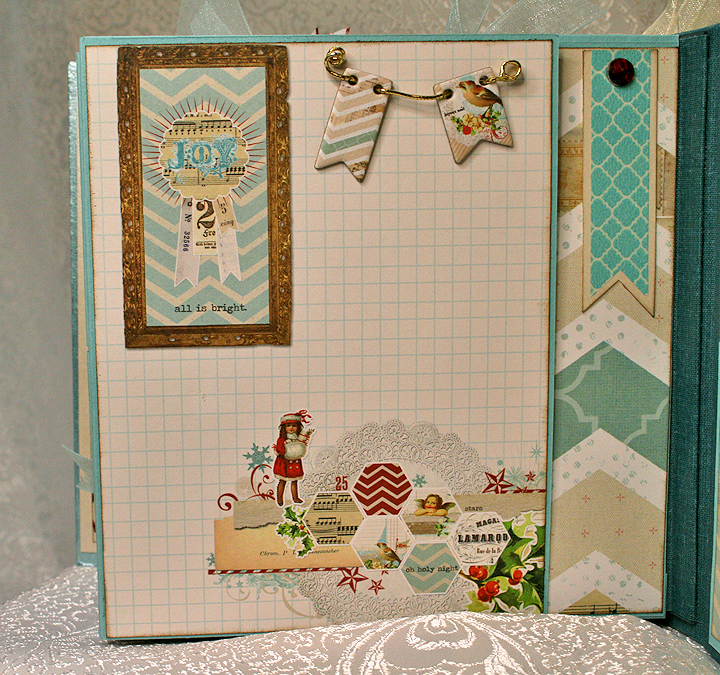
This is with the first page flipped out.  The wings are from a Cuttlebug Embossing Plus die called Vintage Collage.  The heart borders are from Martha Stewart punches.  The scalloped frame under the wings is from a Spellbinders die.  

7

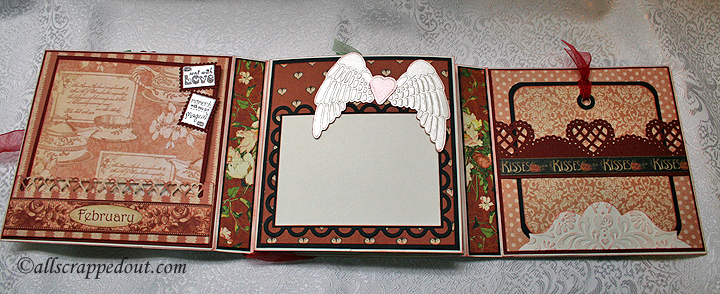
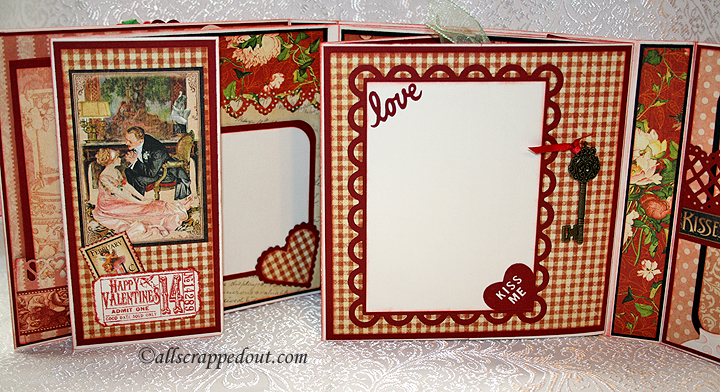
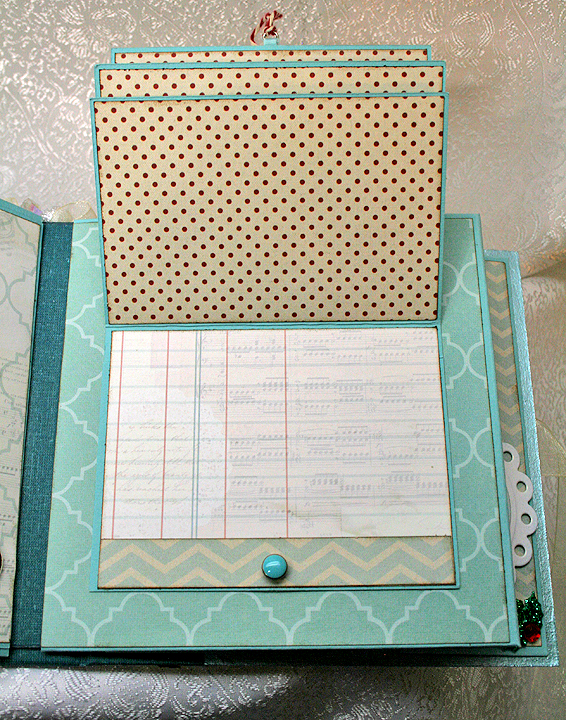
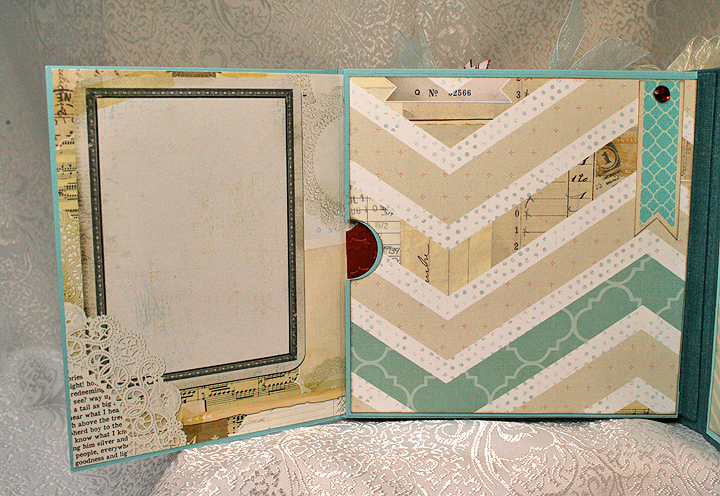
This is after you flip open the page with the wings.  Another scalloped frame from Spellbinders, the heart is from a Martha Stewart die and the key is from Graphic 45.  I think the “love” is also a Martha Stewart punch.  
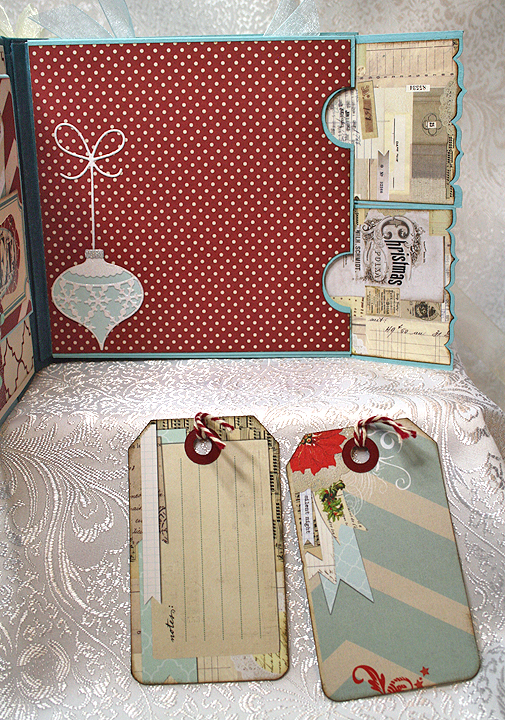
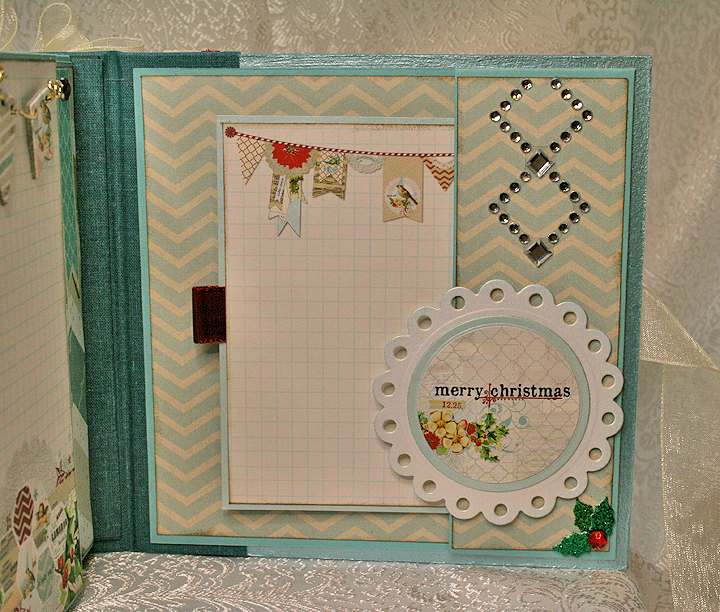
8

And another flip:

9

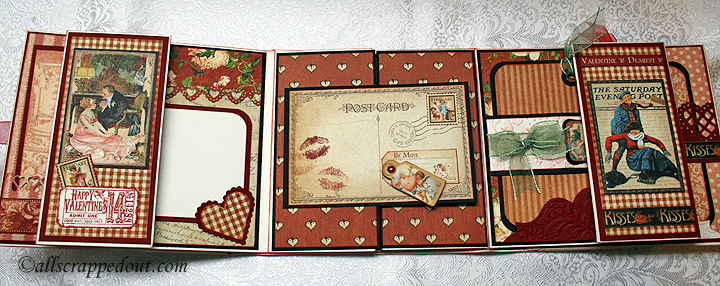
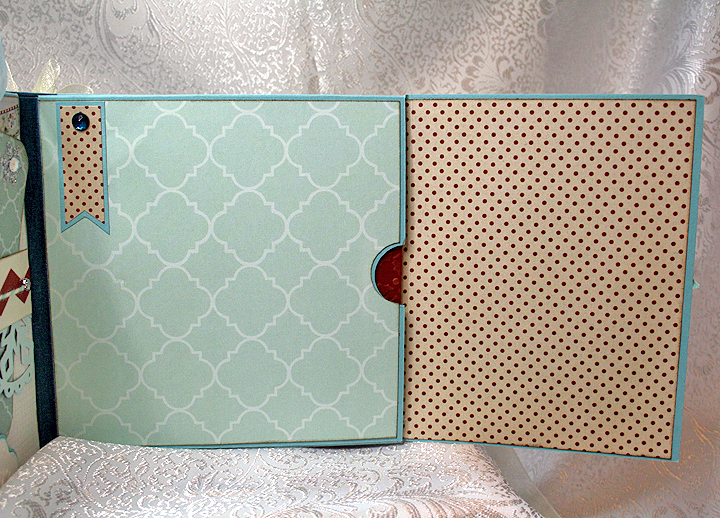
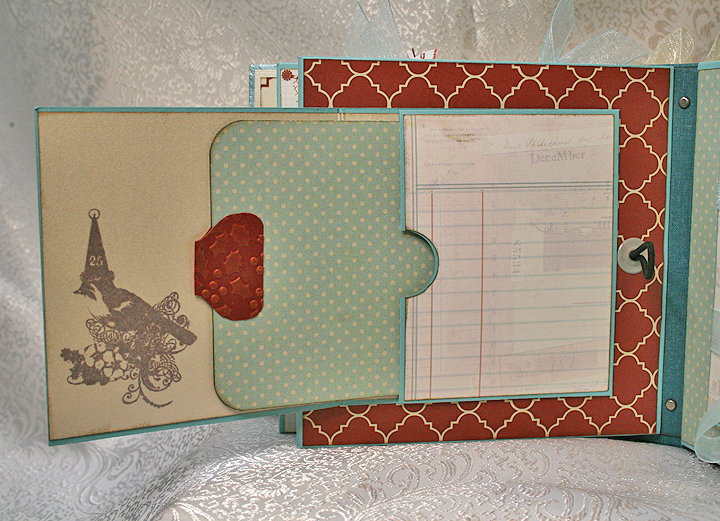
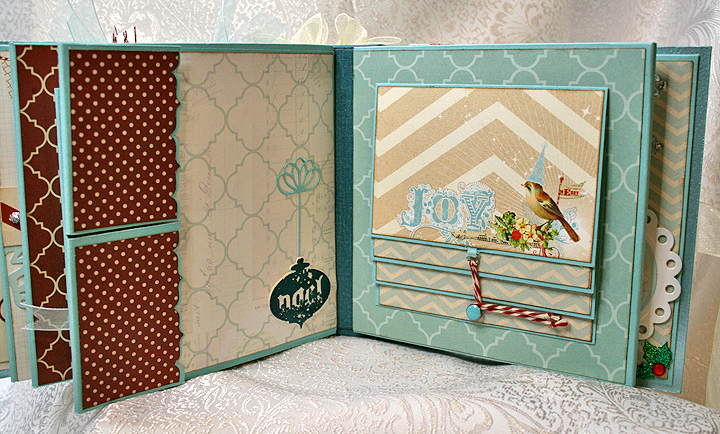
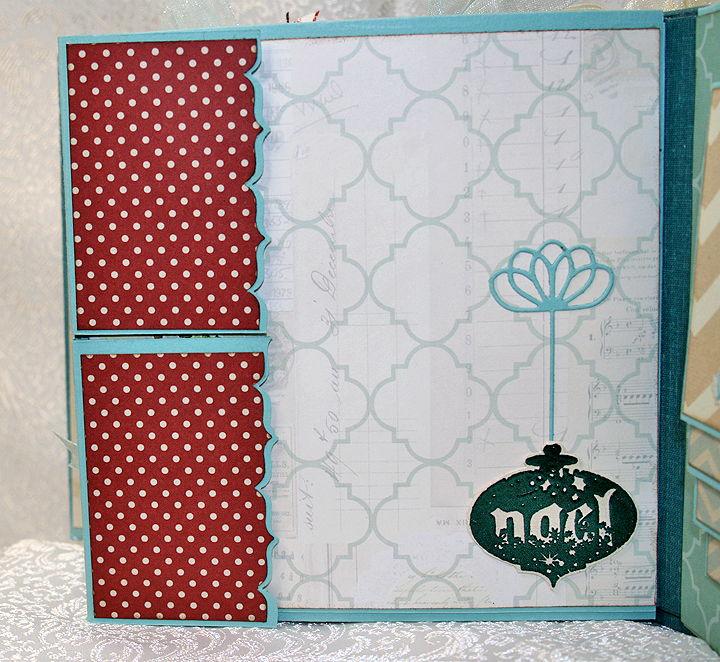
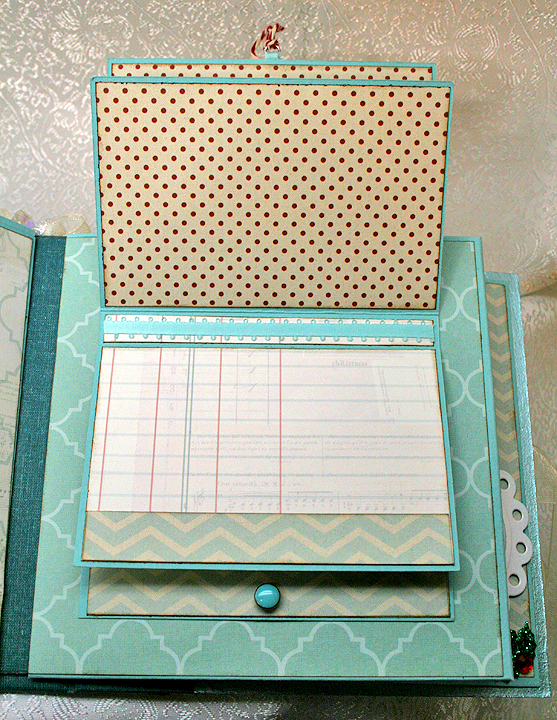
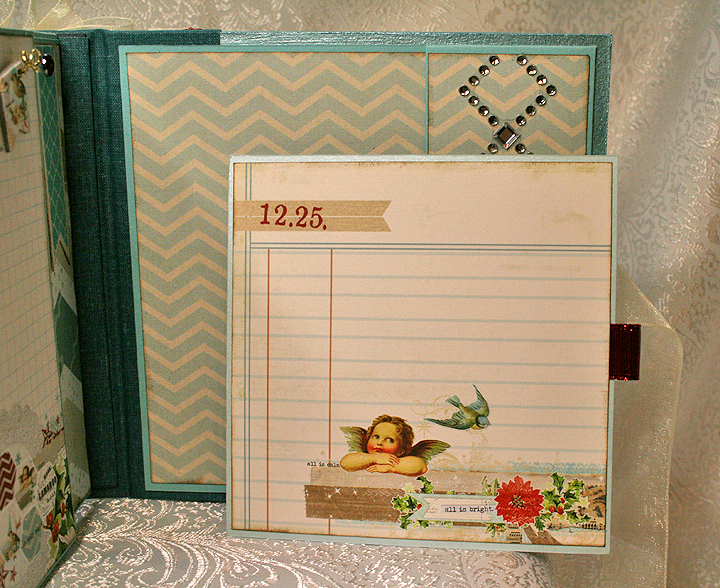
Here is a gate fold that opens to the back of the album.

10

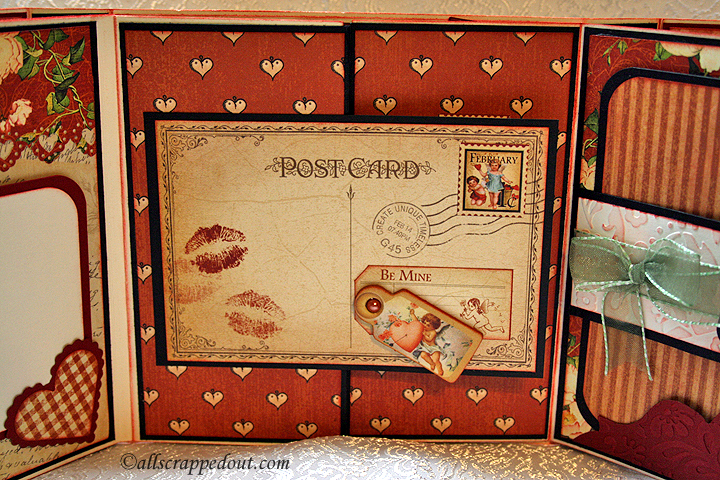
 And this what it looks like with the left gate open.

11

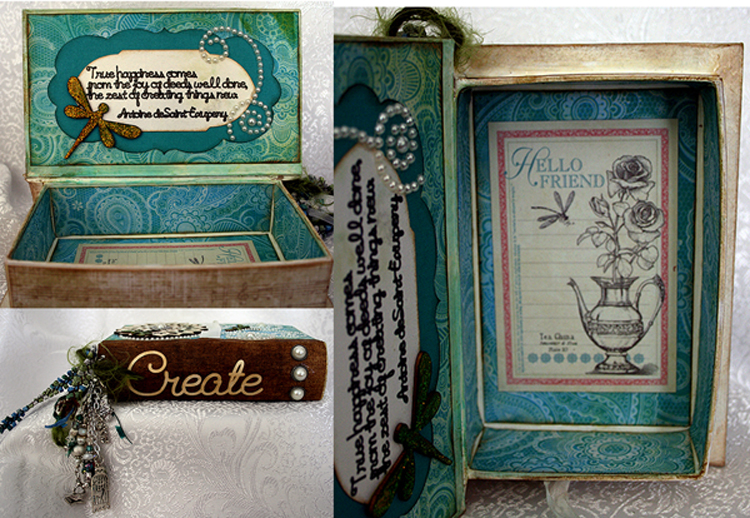
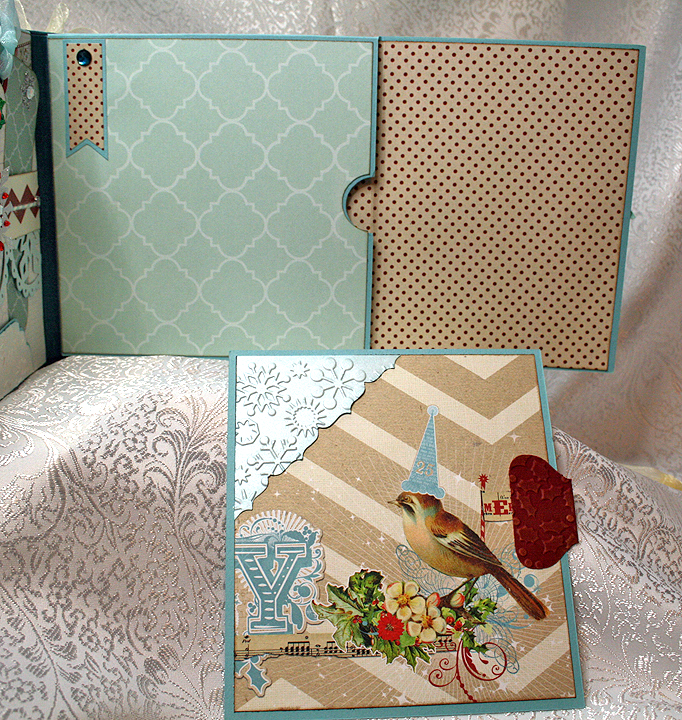
And here we are at the back of the album, with a photo mat held in place with a corner embellishment.

12

This was a fun album to assemble.


  • Graphic 45 paper and Ornate Metal Key
  • Cricut cartridge:  Elegant Edges
  • Spellbinders dies
  • Martha Stewart punches
  • Cuttlebug embossing folders and Vintage Collage die


Altered Book Box and Stick Pin Swap

I recently participated in an altered book box and stick pin swap on the Cricut Circle Message Board.  I want to share the beautiful box and pins that Maria sent me.  I love the chunky charm she made to hang on the edge of the spine of the book.  It is filled with so many cute charms and beads.

C1a

The inside of the box is as beautiful as the outside.

C2

Maria made a stick pin for each month, which I thought was very creative.   She also made a very pretty spring card.  Thank you so much, Maria — I love it all !!

C3


Christmas Mini Album for Cricut Circle Stocking Stuffer Swap

I participated in the Cricut Circle Stocking Stuffer Swap for the first time in 2013.  I figure it’s about time I posted the mini album I made to send to my partner, Sherry (Octoberbeauty).  I’ll warn you — there are lots of pictures.

This is the second mini album I’ve made and I again used a tutorial from Cathy, whose etsy shop is called So Much Scrap.   For this album I used her All Hallow’s Eve tutorial.  I really like her tutorials because they are very detailed and easy to follow.

I did something a little different on this album than what the directions call for.  I made the spine and binding system using only chipboard and book binding cloth — I didn’t use any cardstock in the construction.  I am happy with the way it turned out — the binding system is very flexible.

The patterned paper I used throughout the album is from My Mind’s Eye Merry & Bright collection.  The solid cardstock is all Basis 80#.  The edges of the chipboard are painted with Martha Stewart pearl paint.  I covered the outside of the spine in wool felt and added some ribbon, lace and metallic rick rack trim to the edges.

Front10B

Front12B

Back2

I made the charm on the spine using stardust jingle bells, crystal snowflake beads and a deer pendant I got from eBay. I made the bow using my Zutter Bow-It-All.  I’m really liking the bows I can make using this handy tool.

Charm

Here are some close-up details of the album front.  The poinsettia is made from the Layered Poinsettia die by Spellbinders, sprayed with Lindy’s Stamp Gang’s Starburst spray, and I added glass seed beads to the center.  The snowflake is from the Tim Holtz Snowflake Rosette die and is coated in coarse glitter.  The album closure is a ribbon that wraps around a brad on the front cover — another of Cathy’s wonderful ideas.

FrontPoinsettia

CoverDetail

Pages 1 and 2:

P1-2

P1B

The pocket opens up to reveal a photo mat inside.  I made all the tabs for the photo mats using my We R Memory Keepers Envelope Punch Board and embossed the tabs with my Cuttlebug.

P1TagB

The ornament is cut from a Memory Box die.  The edges on the pocket flaps were done with a punch — I think it was an EK Success Bracket border punch.  The flaps close with a magnet — there are lots of magnetic closures used in this album.

P2

I made the small tags using Tim Holtz’s Tag & Tie die.

P2Tags

Pages 3-4:

P3-4

P3Tags

P4

Page 4 opens and has a photo mat inside the pocket.

P4Open

P4Tag

Pages 5 and 6:

P5-6B

The pocket closes using an elastic hair band and a brad.

P5B

P5Open

Page 6 has an accordion fold feature that folds up and is held closed with a ribbon.  The snowflake trim is from a Martha Stewart punch.

P6

P6Open

P6OpenB

Pages 7 and 8:

P7-8B

The ornament is embossed with Lindy’s Stamp Gang embossing powder.  I can’t remember what stamp I used for the ornament — that’s what I get for waiting so long to post this on our blog.  The ribbon hanger is a Memory Box die.

P7B

P7TagsB

Page 8 has a waterfall feature.

P8B

P8OpenC

P8OpenB

P8Open

Pages 9 and 10:

P9-10B

P9

P9OpenB

P9TagC

P10

P10WTag

Thanks for checking out my Christmas album.  I have a Valentine mini to post next — I hope it doesn’t take me two months to get it written up, like it did with this album.

Front6B

  • My Mind’s Eye Merry & Bright paper collection
  • Basis 80# cardstock
  • So Much Scrap (etsy shop), All Hallow’s Eve tutorial
  • Tim Holtz dies: Snowflake Rosette and Tag & Tie
  • Memory Box ornament and bow dies
  • Spellbinders Layered Poinsettia die
  • Lindy’s Stamp Gang embossing powder
  • EK Success Bracket edger punch
  • We R Memory Keeps Envelope Punch Board
  • Zutter Bow-It-All
  • Martha Stewart pearl paint
  • Cuttlebug

Valentine Swap on the Cricut Circle Message Board


I participated in the Valentine Swap on the Cricut Message Board that was hosted by Sherry (Octoberbeauty).  My partner for this swap was Maria (MariaJ) and I want to share all the goodies she sent me.  Besides spoiling me with so many gifts, she made a really cute pin cushion and included some stick pins in it.  It will be on display in my craft room.

This is what I saw inside the box when I opened it.  Everything was so nicely wrapped — check out the gift basket.  I love the cupcakes Maria clipped on the cellophane.

InsideBox

This is the beautiful Valentine card Maria made.

Card

I got some Spellbinder dies and a pad of really cute Valentine paper 🙂

Pkgs

This shows the inside of the basket, after I removed the cellophane.  Maria really stuffed that basket full of goodies.

Basket2

Two pictures of the pin cushion and stick pins.  I pulled the flower petals up in one picture so you can see how the pin cushion is made in a tea cup — so clever!

PinCushion

PinCushionCup

The last pictures shows all the items that were inside the basket with the pin cushion.  To the left you can see the bookmark with the pretty blue beaded charm hanging from it — I love it!!  Thank you so much, Maria!

IB2

CHA Winter 2014 Conference & Trade Show, Day Two

Today we saw some really neat products — and we got to see Vanna White.  Vanna was in Lion Brands Yarn’s booth for a fashion show. It was standing room only, but we had a pretty good spot to watch.  After the show ended, several people went up to have their picture taken with Vanna.  There was a large group of men and women from Michaels (all wearing red shirts) posing for pictures.

Vanna

After the crowd started thinning out, Erin was able to take some pics of the displays around the stage.  They were very impressive — all made from yarn.   The display was titled, “The 7 Wonders of the Yarn World” and featured 7 yarn sculptures.

Lion2

Lion3

Soon after we left Lions booth, I spotted a banner for a 3D printer and we headed right there.  It was Klic-N-Kut’s booth and they were doing a demo on the printer.  We watched as it made a mini goblet.  Both Erin and I (and lots of other people) were fascinated by the printer.  The printer is $1300.  You have to have a software program that enables you to draw 3D objects, then you bring that file into the printer’s software program and from there it prints out the object.

3D

We visited Bo Bunny’s booth again because I wanted to look at the two buildings that Laura Denison (of Following the Paper Trail) created.  Erin took more pictures and this time got some pics of the back of the Winter Fairy House.  It opens up and has space to hold a mini album.

LauraFairyHouse

And here is another pictured of Laura’s Pet Shoppe.

LauraPetShoppe

There is plenty of bling on the other half of the showroom floor, too.  We found 3 more blinged out projects in glass cases along the front walkway.  They are all eye catching, but the Kitchen Aid mixer covered in rhinestones is really a knock out.

Bling

Bling2

We spent a little time in the We R Memory Keepers booth.  We watched a demonstration of the Lifestyle Crafts Letterpress.  When the man finished with the demo, he showed us a prototype of a new die cutting/embossing machine.  It reminded me a little of my Cuttlebug, but it has a lot of different features.  One is a button that you turn and it raises or lowers the bed.  You need only one set of plates — no more sandwiches.  It also has an optional motor that slips over where the handle attaches — so you can have a motorized version, when you want it.

WeR

Once again it is getting late, so I am just going to add the rest of the pictures with short captions.

7Gyp

7 Gypsies


7 Gypsies

7 Gypsies – I love how they did the banner on this layout. The banners are on small hangers that are hung on a chain.


7 Gypsies

7 Gypsies

We got to see the new Brother ScanNCut.  It was impressive to watch — the demonstrator stamped an image and cut it out.  Erin came up with a very good point.  So many stamp companies are now selling dies to coordinate with some of their stamps so you don’t have to fussy cut around the images.  Why not take the money you would invest in dies and buy this machine?  That way you don’t have to store the dies and you will be able to cut around any stamped image.  As you can see, it cuts around the fine details.

ScanNCut from Brother cutting out a stamped image.

ScanNCut from Brother cutting out a stamped image.


Removing the cut from Brother's ScanNCut.

Removing the cut from Brother’s ScanNCut.


Bro3

Decorated cell phone cases.

Decorated cell phone cases.


More cell phone cases.

More cell phone cases.


Fabscraps

Fabscraps


Crows in the Kaisercraft booth.

Crows in the Kaisercraft booth.


Lindy's Stamp Gang

Lindy’s Stamp Gang


Lindy's Stamp Gang

Lindy’s Stamp Gang


The Modge Podge mascot -- she was kind enough to pose for us.

The Modge Podge mascot — she was kind enough to pose for us.


Displays in the Plaid booth.

Displays in the Plaid booth.


Prima

Prima


Prima

Prima


Prima

Prima


Prima

Prima


SEI

SEI


Stampendous

Stampendous


Stampendous

Stampendous


Stampendous

Stampendous


Stampendous

Stampendous


Teresa Collins

Teresa Collins


Teresa Collins -- the bottom picture shows an album that doesn't look like much in the package.  But you pull the tab on the one end and it flips through the pages.

Teresa Collins — the bottom picture shows an album that doesn’t look like much in the package. But you pull the tab on the one end and it flips through the pages.


Tim Holtz demonstrating his new spritzer.

Tim Holtz demonstrating his new spritzer.


CHA Winter 2014 Conference & Trade Show, Day One


Erin and I attended the opening day of the CHA Conference & Trade Show held in Anaheim, CA.  We arrived about an hour after it opened — we were a little late because Erin had to drive up from San Diego.  We stayed until about an hour before it closed and managed to walk a little over 1/3 of the show.  We will be back tomorrow when it opens.

Erin took a lot of pictures and I am sharing quite a few.  I would post more but I am just too tired and I need to get to bed so we can get up and do it all over again tomorrow.  We plan on going all four days.  So, here are some of the highlights from today.

Some of the displays in the lobby.

Some of the displays in the lobby.


Lanterns hanging in the lobby.

Lanterns hanging in the lobby.


Brother's new Scan & Cut machine, laser die cuts, Pop-It-Up dies, and Spellbinders Tool In One (used to clean up those hard-to-get-out pieces from intricate dies).

In the New Showcase area: Brother’s new Scan & Cut machine, laser die cuts, Pop It Up dies, and Spellbinders Tool in One (to clean up those hard-to-get-out pieces from intricate dies).


New Tim Holtz products - a Spritzer to use with Distress Markers and some mini Distress Inks and Ink Blending Tool.

New Tim Holtz products – a Spritzer to use with Distress Markers and some Mini Distress Inks and Ink Blending Tool.


Crystals

Lots of bling at the show. Even Swarovski is there — we haven’t made it to the Swarovski Elements booth yet.


Die Cuts With a View always has fantastic displays.  This year their booth has walls and they have gorgeous framed paper art hanging on the sides.

Die Cuts With a View always has fantastic displays. This year their booth has walls and they have gorgeous framed paper art hanging on the outside.


More DCWV

More DCWV


Bo Bunny's booth features two beautiful projects -- a Winter Fairy House and a the Happy Tails Pet Shoppe, both created by Laura Denison of Following the Paper Trail.

Bo Bunny’s booth features two beautiful projects — a Winter Fairy House and the Happy Tails Pet Shoppe, both created by Laura Denison of Following the Paper Trail.


The kits Erin & I received at the Bo Bunny booth for giving them a business card.

The kits Erin & I received at the Bo Bunny booth for giving them a business card.


The Graphic 45 booth -- always a popular location.

The Graphic 45 booth — always a popular location.


More Graphic 45.  The Tea Shoppe is gorgeous.  It was also created by Laura Denison of Following the Paper Trail.

More Graphic 45. The Tea Shoppe is gorgeous. It was also created by Laura Denison of Following the Paper Trail.

Cute paper and stickers from Scrapbook Customs.

Cute paper and stickers from Scrapbook Customs.


Embroidered Christmas Stocking

As I said in a recent post, I joined the Stocking Stuffer Swap on the Cricut Circle Message Board last month.  My secret partner was the hostess of the swap, Sherry, and I wanted to make a special stocking for her.  She likes butterflies, so I went searching for an embroidery file with a Christmas design with butterflies.  My first stop was Embroidery Library, because I knew I would surely find something I liked on this site.  And I was not disappointed.  I chose their Feliz Flutterby Winter Rose pattern for my stocking, which I made using a Simplicity pattern (that I enlarged in both width and length).  The fabric is a brocade from JoAnn and I used three different metallic threads for some of the swirls and snowflakes.

14

I love all the baubles hanging from the stocking.  The bow is my first attempt at using my Bow-it-All from Zutter.  I really like how easy it was to make, once I figured out how to tie off the bow correctly.  I made a double bow with three loops, using organza ribbon.

Here’s a close-up of the embroidery.

Closeup2

Cricut Circle Stocking Stuffer Swap Box

For several years I have wanted to participate in the Stocking Stuffer Swap on the Cricut Circle Message Board.  Since this time of the year is usually the busiest for my embroidery business, I have never signed up.  This year I decided I was going to give it a shot and I’m so glad I did.  I had a wonderful time shopping and making gifts for my secret partner.  I will post those later.  Right now I want to show you what my wonderful partner sent me.

My partner for this swap was IrishDancer (her message board name).  It was a secret swap, so I didn’t find out her identity until it was time to open the boxes.  She was so very generous and I love everything she sent.

She sent me all kinds of goodies from Crate Paper’s All Bundled Up collection and from October Afternoon’s Silent Night collection.

1

 I love the flag/pennant paper punch.  I got some Memento ink in a pretty pink and blue, a glue pen, some Tim Holtz Distress Glitter in pink and blue (so pretty) and a box of Hero Arts tags.

3

 You could send your partner a stocking or a Santa hat.  IrishDancer sent me a Santa hat that is so sparkly and pretty.  I received a Spellbinders snowflake die, a banner paper pad, a mini notebook that is covered in beautiful fabric, a candy cane pen, some yummy Ghiradelli dark chocolate, and a Jo-Ann’s gift card.  Thank you so much, IrishDancer. You really spoiled me!

2


Ornament Christmas Card


I needed a Christmas card and had very little time to create one, so I turned to my Cuttlebug and some Memory Box dies that I had just received.  This was my first time using Memory Box dies and I am very impressed with them.  I will be buying more!

I used a color scheme of aqua and red for this card.  The polka dot paper is from My Mind’s Eye Merry & Bright collection.  The card matches a project that I will be posting soon, made from the same collection.

Card3 

The white cardstock is Stardream Metallic White Gold and I used a Cuttlebug embossing folder called Snow Flurries.  I inked the edges in Tumbled Glass Distress Ink.

Three Memory Box dies were used to create the ornament — the Classic Ornament die, the Snowflake Ornament die and the Crisp Bows die.  I used glitter cardstock for the snowflake part of the ornament and for the bow.  The background of the ornament is Stardream Aquamarine cardstock.  The die cut pieces are very intricate (and delicate), so I ran them through my Xyron to adhere them.

And that’s all I did — this was a very quick card for me.  I’m entering this card in the Cricut Circle Weekly Challenge, which is to make a Christmas project using non-traditional colors.

Card5

  • Cuttlebug Snow Flurries embossing folder
  • Memory Box dies:  Classic Ornament, Snowflake Ornament, Crisp Bows
  • Stardream metallic cardstock
  • My Mind’s Eye Merry & Bright
  • Distress Ink
  • Xyron

Pac-Man Card


Erin asked me to make a birthday card for her to give to one of her friends and she requested something with an 80’s video arcade game on it, like Pac-Man.  I found a print card showing Pac-Man eating dots and heading towards a birthday cake.  So I did my version of that card using my Cricut.

I first printed a maze from the game that I found online.  I thought it would make a neat background for the card.  I designed Pac-Man in Cricut Craft Room, using the George & Basic Shapes cartridge.  I used a circle and laid a triangle over it (not using the weld feature) to make the mouth.  His eye is a black faceted stone from my stash — I think I got them at Joann’s.

Front5

The white dots are from an EK Success punch — I think it’s called Swiss Cheese. The birthday cake is from Life’s A Party and I added orange Stickles for the flames on the candles.  Pac-Man, the white dots, and the birthday cake are all popped up with foam dots.

Front

When I was laying out the card in Cricut Craft Room, I happened upon a really neat sentiment that I thought would be great with this card.  It is from a project cartridge called Space Party.  But wouldn’t you know it, it was one of the few cartridges that I didn’t have.  I looked at other fonts, but nothing grabbed me like the Space Party sentiment.

So I went on eBay, found a Space Party cartridge that wasn’t being bid too high and placed a bid.  I ended up getting it for less than $2.50 — can you believe that?  Still, I hope I use it for more than just the sentiment on this one card!

This was a pretty quick and easy card to make — and Erin was very happy with it.  I even made an envelope for it using my We R Memory Keepers Envelope Punch Board.

I am going to enter this card in the Cricut Circle Challenge, which is to use or try something new.  Since I have never used Space Party before, I figure that will satisfy the requirements.  And I used the Swiss Cheese punch, which I have owned for some time and have never used either.

  • Cricut cartridges used:  George & Basic Shapes, Life’s A Party, Space Party
  • EK Success Swiss Cheese punch
  • Stickles
  • Faceted stone from stash