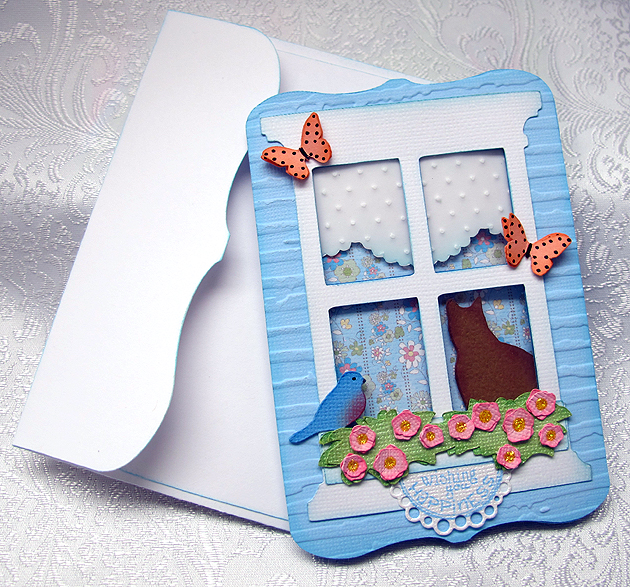
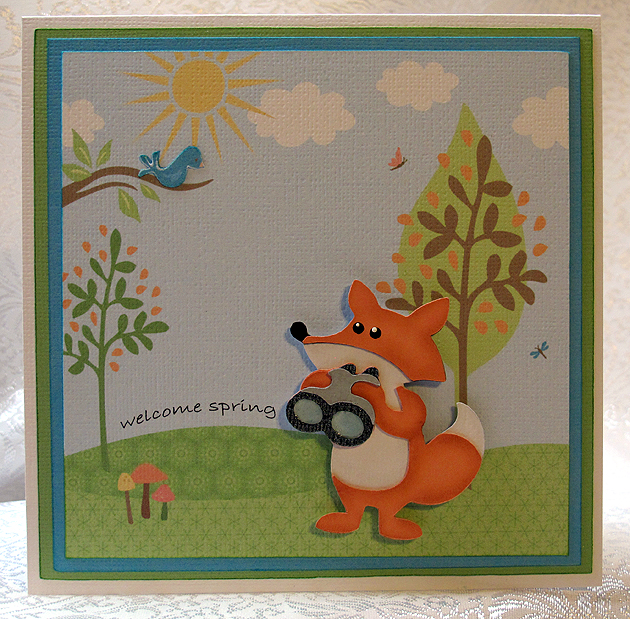
There is going to be a new Cricut cartridge available on February 21, 2013 and it is called Creative Cards. For one week only, from February 14-20, there are seven cards and envelopes from this cartridge available to use for free in Cricut Craft Room. I was happy I found time to try one of these cuts — I chose to make the window card.
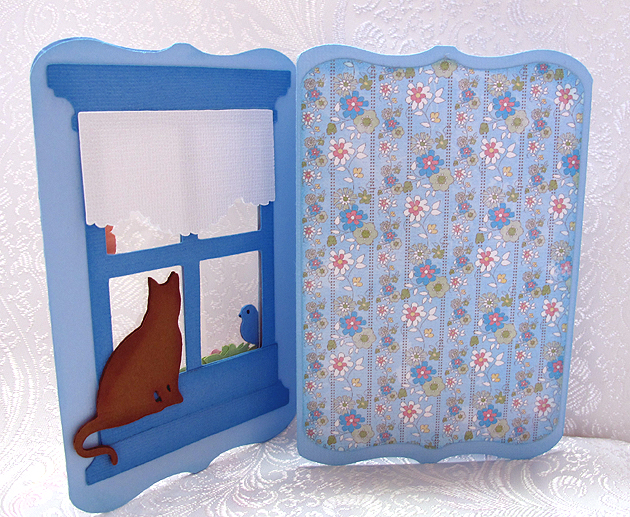
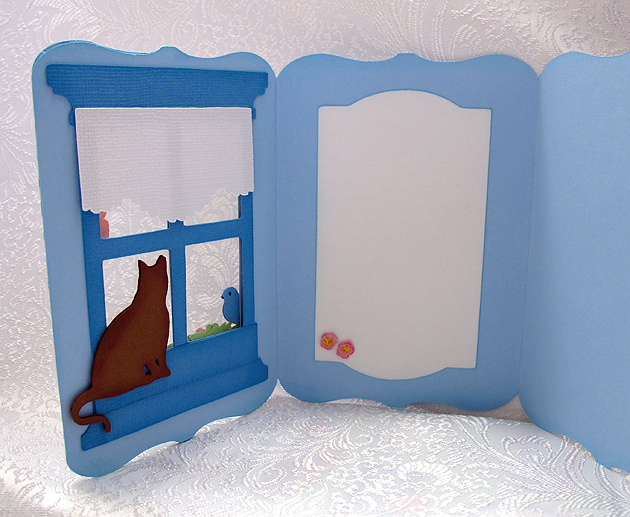
I really like this card, so much so that I will surely purchase Creative Cards. I think the window card is called a tri-fold card. I like this because the inside of the card, where I will write my greeting, is not visible through the window.
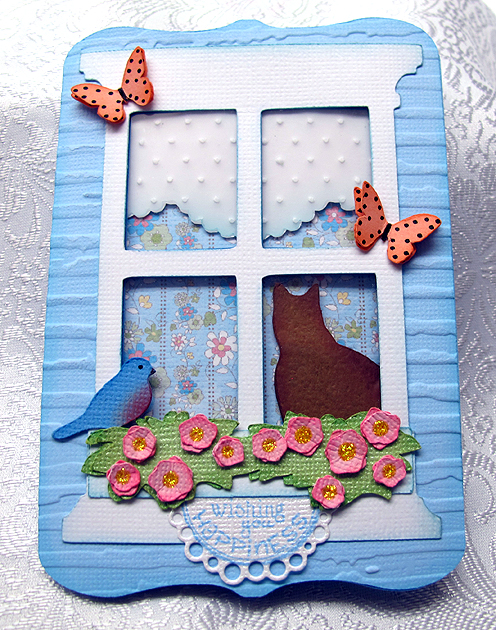
I made my card using spring colors and the first thing I did was decide what paper was going to show through the window. I wanted something that looked like wallpaper, so it would look like the inside of a house. I looked through my Imagine cartridges and found a striped print I liked on the Blossom cartridge. After picking out my wallpaper, I decided my card would be blue. All the small pieces were cut from scraps.
The card is cut at 5″ and the finished size is about 3.5″ x 5″. I cut an extra front panel and ran it through the Cuttlebug using the Distressed Stripes embossing folder so that it would look like siding on a house. I cut a piece of clear acetate and adhered it between the two front pieces to give the appearance of glass.
The curtain is a piece of vellum run through the Cuttlebug using the Swiss Dots folder, backed by a piece of white cardstock. The outside window and flower box are white. I cut an extra window in a darker blue and used it on the inside because I wanted a finished look in there too.
The bird and butterflies are from Creative Cards and both were cut at 2.5″. The only other cartridge I used was A Child’s Year to cut the silhouette of the cat, which was cut at 2″. I inked and chalked all the pieces before assembling the card. I used Stickles for the centers of the flowers.
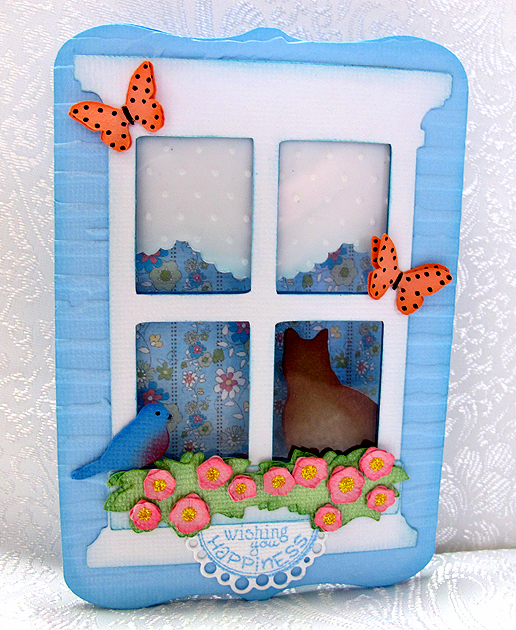
The sentiment below the flower box is from Whimsy Stamps and it is from their Celebration Circle Pennants set. I cut it out using the matching die. This was my first time using both the stamps and die, and I am very happy with how it turned out.
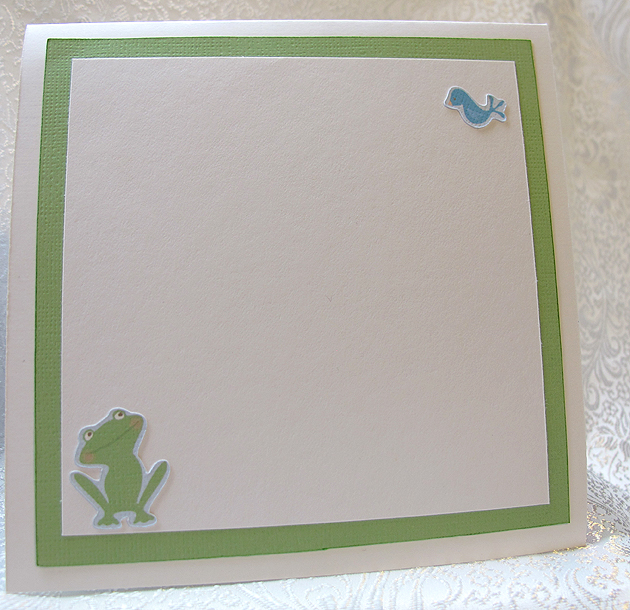
On the inside of the card, I added a white mat to write on. It is the inside of the window from the card cut — I just hid the outline for the card and cut only the window. I embellished it with a couple of the same flowers from the window box on the front.
The last step was making the envelope, and that turned out to be an easy task. I simply cut the envelope at the same size I cut the card, which was 5″. I scored along the two side flaps and then at both the top and bottom. I folded at the score marks and then inked all the edges. I glued the bottom to the side flaps and the envelope was done. I’ll seal the top flap when I send the card.
- Cricut cartridges: Creative Cards, Imagine Blossom, A Child’s Year
- Ink & Chalk
- Whimsy Stamps
- Stickles


Recent Comments